How to Use Playgrounds
From the Browser
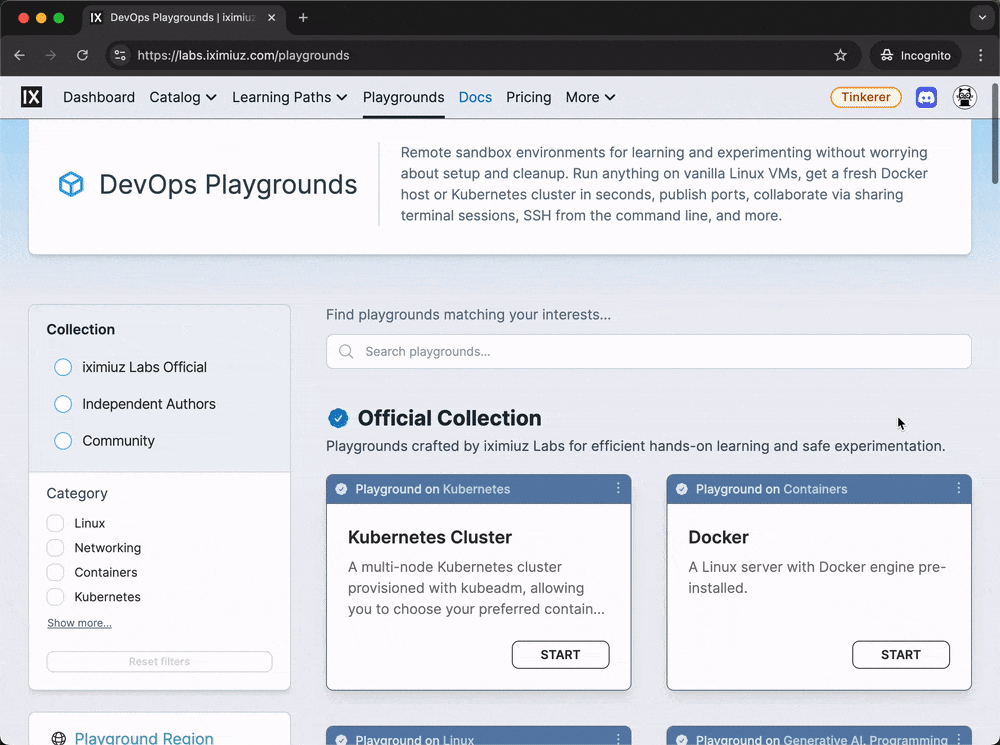
Starting a playground from the browser is the easiest way.
- Navigate to the Playgrounds page.
- Find a playground you like and click on its card.
- On the next page, click on the Start Playground button.
- Wait for the playground to warm up and boot (usually 5-60 seconds).
- Use the opened web terminal with an SSH session to the playground.
Once the playground is up and running, you can run arbitrary shell commands, install software, build containers, reboot the VMs, and do most other things you can do on a regular Linux server.
Two notable exceptions are:
- You cannot reinstall the operating system of playground VMs
- Upgrading the kernel of playground VMs is not supported yet
If you need an alternative Linux distribution, check the Linux category of the Playgrounds catalog - it has a wide range of Linux distributions to choose from. For more advanced users, brining your own rootfs image is also supported.
You can also choose between the supported kernel versions during the playground start process. The currently available kernel versions are:
- 5.10
- 6.1
- 6.12 (experimental)
- 6.18 (experimental)
From the Command Line
Starting a playground is also possible from the comfort of your local terminal.
For this, you will need a CLI tool called labctl.
It is a thin wrapper around the iximiuz Labs API with a number of UX improvements.
You can use labctl to start and access Linux, Docker, Kubernetes, networking, and other types of playgrounds.
Installation
The command below will download the latest release to ~/.iximiuz/labctl/bin, adding it to your PATH.
curl -sf https://labs.iximiuz.com/cli/install.sh | sh
Alternatively, you can install labctl via Homebrew (macOS and Linux only):
brew install labctl
Authentication
After installing labctl, you will need to authenticate the CLI session to the iximiuz Labs API.
The command below will open a browser page with a one-time use URL.
labctl auth login
Starting playgrounds
Once you have authenticated, you can start a new playground with a simple:
labctl playground start docker
You can also automatically open the playground in a browser with:
labctl playground start k3s --open
...or SSH into the playground's machine with:
labctl playground start ubuntu-24-04 --ssh
SSH into a playground
Once you have started a playground, you can access it with:
labctl ssh <playground-id>
...or run a one-off command with:
labctl ssh <playground-id> -- ls -la /
Listing, stopping, restarting, and destroying playgrounds
You can list recent playgrounds with:
labctl playground list
And stop a running playground with:
labctl playground stop <playground-id>
Stopping a playground shuts down its virtual machines, preserving the playground state and the VM disks in a remote storage. You can restart a stopped playground later on using the following command:
labctl playground restart <playground-id>
To dispose of a running or stopped playground, completely erasing its data, use the labctl destroy command:
labctl playground destroy <playground-id>
Signing out and deleting the CLI
You can sign out and delete the CLI session with:
labctl auth logout
To uninstall the CLI, just remove the ~/.iximiuz/labctl directory.
From an IDE (VS Code, Cursor, etc)
You can develop right on the playground machine using the Visual Studio Code Remote - SSH extension or its JetBrains analog.
Supported IDEs:
code(Visual Studio Code)cursor(Cursor)windsurf(Windsurf)
If the IDE fails to connect, add the following to your ~/.ssh/config file:
Host localhost 127.0.0.1 ::1
  IdentityFile ~/.ssh/iximiuz_labs_user
  AddKeysToAgent yes
  # UseKeychain yes  # <--- macOS-only option
  StrictHostKeyChecking no
  UserKnownHostsFile /dev/null
Opening a new playground in your IDE
To open a new playground in your IDE, use the following command (labctl installation is assumed):
labctl playground start docker --ide code
This mode is intentionally simple and does not support custom working directories or cloning repositories. For a more powerful experience, see the next section.
Opening an existing playground in your IDE
To open a currently running playground in your IDE, use the following command:
labctl ide <name> <playground-id>
This will start an SSH proxy, wait for the connection to be ready, and open the IDE automatically.
Using a custom working directory
By default, the IDE opens the user's home directory. Use --workdir (-w) to open a specific directory instead:
labctl ide <name> <playground-id> --workdir projects
Relative paths are resolved from the user's home directory. Absolute paths are used as-is.
Cloning a public repository
Use --repo (-r) to clone a Git repository into the playground before opening the IDE.
For example, to clone the github.com/iximiuz/kexp repository into the playground before opening the VSCode IDE, use the following command:
PLAY_ID=$(labctl playground start golang)

labctl ide code $PLAY_ID --repo https://github.com/iximiuz/kexp
When a single repo is specified without an explicit --workdir, the IDE opens the cloned repository's directory.
You can also specify a custom clone path using the <url>:<path> format:
labctl ide <name> <playground-id> --repo https://github.com/user/repo:my-project
Cloning a private repository (SSH + agent forwarding)
For private repositories that require SSH authentication, use an SSH-style URL with the --forward-agent flag:
labctl ide <name> <playground-id> \
  --repo git@github.com:user/private-repo \
  --forward-agent
WARNING: The --forward-agent flag forwards your local SSH agent to the playground VM.
This means the playground machine can use your SSH keys for the duration of the session.
Use it with caution.
Cloning multiple repositories into one working directory
Use --repo multiple times and set a shared --workdir:
labctl ide <name> <playground-id> \
  --workdir projects \
  --repo https://github.com/user/frontend \
  --repo https://github.com/user/backend
Both repositories will be cloned into the projects/ directory (as projects/frontend and projects/backend), and the IDE will open the projects/ folder.
Using the SSH Proxy mode manually
You can also use the SSH Proxy mode manually to forward a local port to the playground VM's SSHD port (22). For example, to forward the local port 2222 to the playground VM's SSHD port (22), use the following command:
labctl ssh-proxy <playground-id> --address localhost:2222
Then you can access the playground VM using a remote SSH extension for your IDE.
Example for VSCode:
cursor --folder-uri vscode-remote://ssh-remote+laborant@127.0.0.1:2222/home/laborant
Example for Cursor:
cursor --folder-uri vscode-remote://ssh-remote+laborant@127.0.0.1:2222/home/laborant
Check out this short recording on YouTube demonstrating the use case.
- Previous
- What are iximiuz Labs Playgrounds