Multimedia Content Integration
HTML5 media elements
HTML5 ships two native media elements — <video> and <audio> — that the browser renders with built-in playback controls. No plugins, no Flash, no third-party players required.
ColdFusion's role is server-side: it stores metadata, serves file paths, and handles uploads. The browser's <video> and <audio> elements do the actual playback.
<!DOCTYPE html>
<html lang="en">
<head>
  <meta charset="UTF-8">
  <title>Media Demo</title>
</head>
<body>

  <h2>Video</h2>
  <video controls width="640" preload="metadata">
    <source src="/media/sample.mp4"  type="video/mp4">
    <source src="/media/sample.webm" type="video/webm">
    Your browser does not support HTML5 video.
  </video>

  <h2>Audio</h2>
  <audio controls preload="metadata">
    <source src="/media/sample.mp3" type="audio/mpeg">
    <source src="/media/sample.ogg" type="audio/ogg">
    Your browser does not support HTML5 audio.
  </audio>

</body>
</html>
Multiple <source> tags let the browser pick the first format it supports — MP4/MP3 for broad compatibility, WebM/OGG as open-format fallbacks.
Video and audio format compatibility — which to use?
| Format | MIME type | Browser support | Notes |
|---|---|---|---|
| MP4 (H.264) | video/mp4 | All modern browsers | Best compatibility — use as primary |
| WebM (VP9) | video/webm | Chrome, Firefox, Edge | Open format, smaller file size |
| OGG Theora | video/ogg | Firefox, Chrome | Older open format, less common today |
| MP3 | audio/mpeg | All modern browsers | Best audio compatibility |
| OGG Vorbis | audio/ogg | Firefox, Chrome | Open format audio fallback |
The practical rule: always provide MP4/MP3 first. Add WebM/OGG as a second <source> for open-format coverage. The browser picks the first it can play.
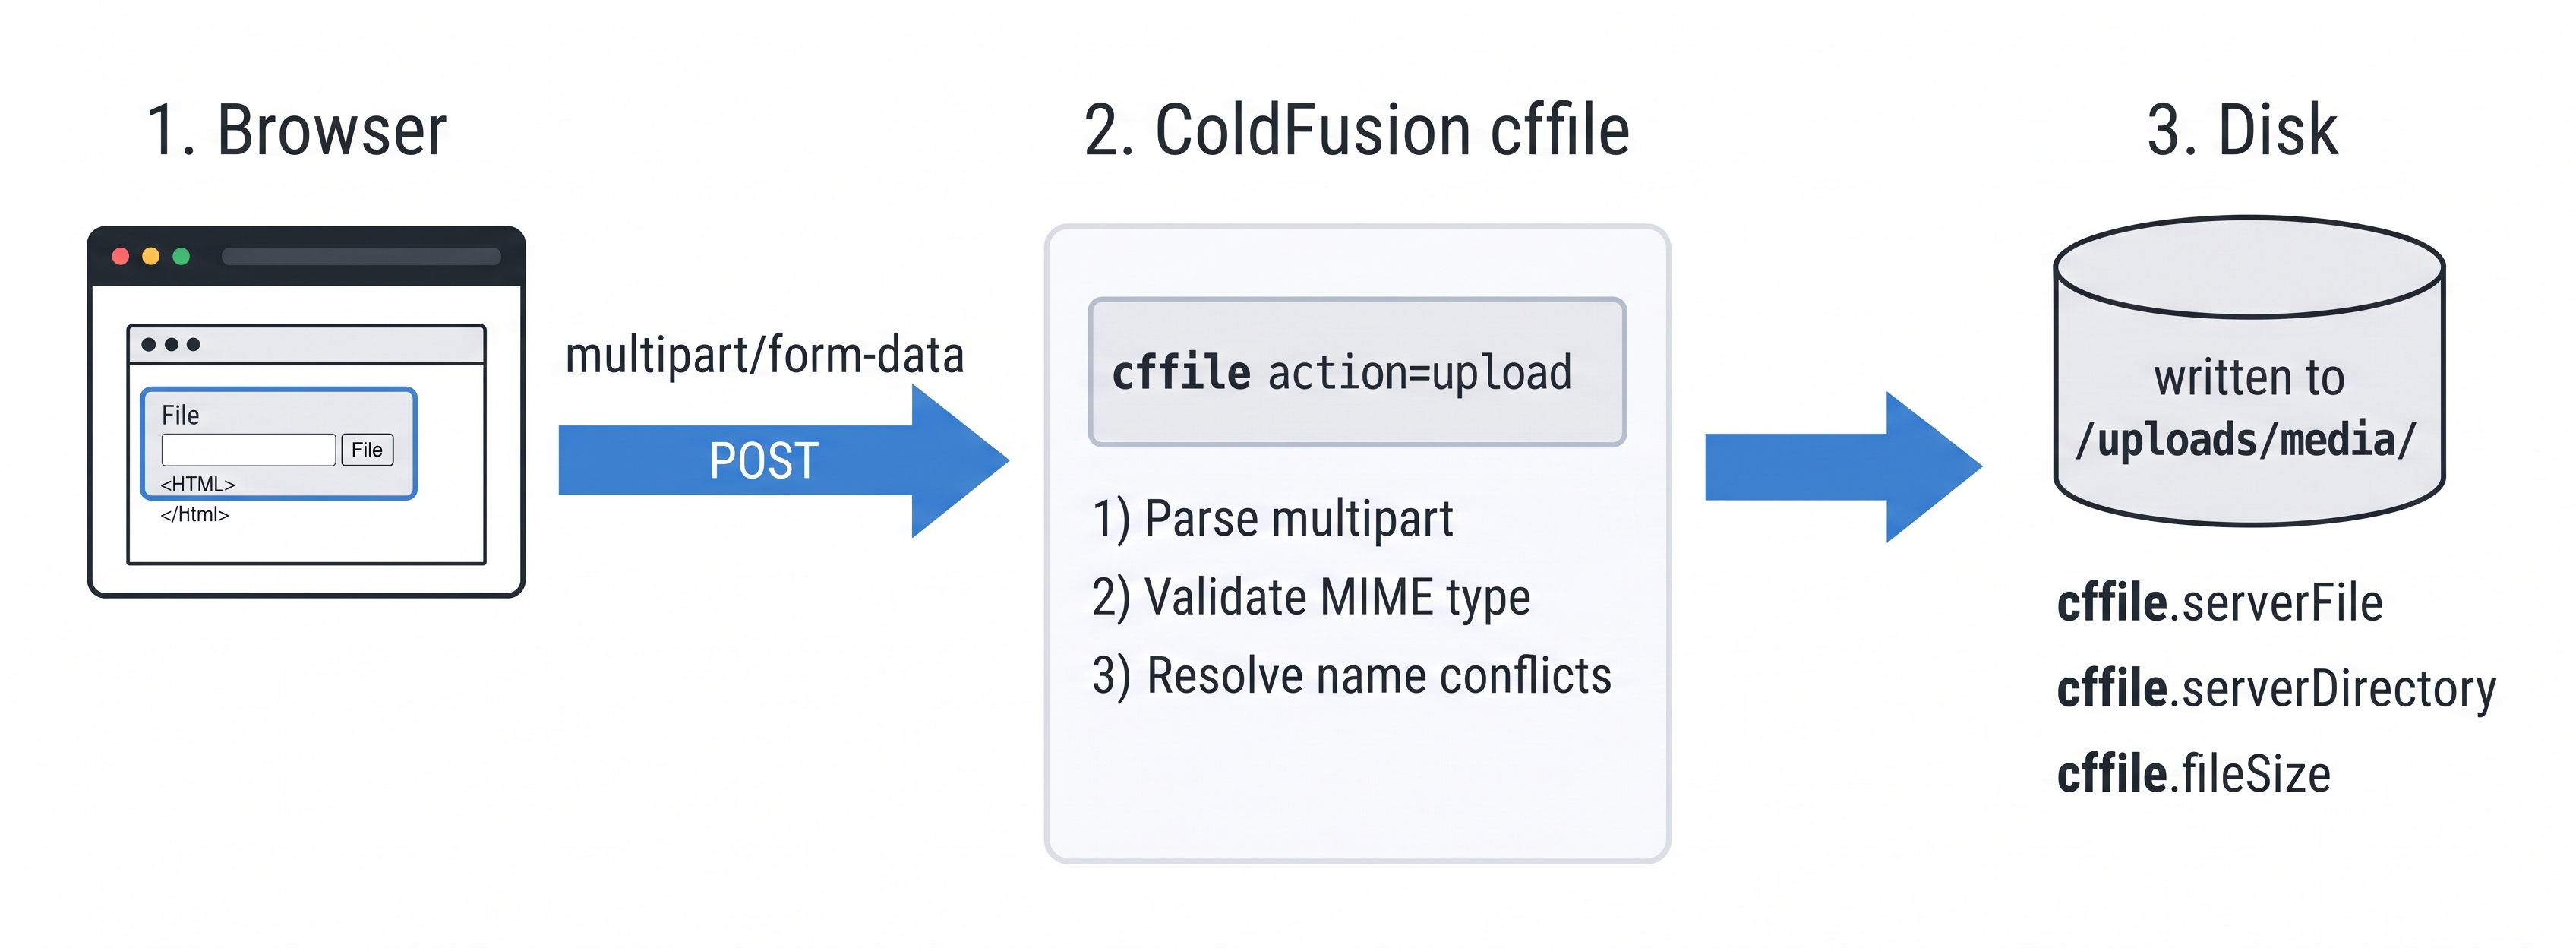
cffile action="upload" handles the entire multipart pipeline — parsing, validation, name-conflict resolution, and disk write.
Activity 1 — Create a media demo page
Activity: Create media_demo.cfm — an HTML5 page with <video> and <audio> elements and a CFML-rendered timestamp.
Terminal tab:
sudo tee /opt/coldfusion2025/cfusion/wwwroot/student/media_demo.cfm << 'EOF'
<!DOCTYPE html>
<html lang="en">
<head>
  <meta charset="UTF-8">
  <meta name="viewport" content="width=device-width, initial-scale=1.0">
  <title>ColdFusion Media Demo</title>
  <style>
    body  { font-family: sans-serif; max-width: 700px; margin: 2rem auto; }
    video, audio { display: block; margin: 1rem 0; }
  </style>
</head>
<body>
  <h1>ColdFusion Media Demo</h1>

  <cfoutput>
    <p>Page generated at: <strong>#timeFormat(now(), "HH:mm:ss")#</strong></p>
  </cfoutput>

  <h2>Video</h2>
  <video controls width="640" preload="metadata">
    <source src="/media/sample.mp4"  type="video/mp4">
    <source src="/media/sample.webm" type="video/webm">
    <p>Your browser does not support HTML5 video.</p>
  </video>

  <h2>Audio</h2>
  <audio controls preload="metadata">
    <source src="/media/sample.mp3" type="audio/mpeg">
    <source src="/media/sample.ogg" type="audio/ogg">
    <p>Your browser does not support HTML5 audio.</p>
  </audio>

</body>
</html>
EOF
✏️ Using the IDE tab instead? Create the file here
In the IDE tab, click File → Open Folder…, type /opt/coldfusion2025/cfusion/wwwroot/student and press Enter. If VS Code asks "The folder does not exist. Would you like to create it?" — click Yes. Then right-click in the Explorer panel → New File → name it media_demo.cfm, paste the content below, and save with Ctrl+S:
<!DOCTYPE html>
<html lang="en">
<head>
  <meta charset="UTF-8">
  <meta name="viewport" content="width=device-width, initial-scale=1.0">
  <title>ColdFusion Media Demo</title>
  <style>
    body  { font-family: sans-serif; max-width: 700px; margin: 2rem auto; }
    video, audio { display: block; margin: 1rem 0; }
  </style>
</head>
<body>
  <h1>ColdFusion Media Demo</h1>

  <cfoutput>
    <p>Page generated at: <strong>#timeFormat(now(), "HH:mm:ss")#</strong></p>
  </cfoutput>

  <h2>Video</h2>
  <video controls width="640" preload="metadata">
    <source src="/media/sample.mp4"  type="video/mp4">
    <source src="/media/sample.webm" type="video/webm">
    <p>Your browser does not support HTML5 video.</p>
  </video>

  <h2>Audio</h2>
  <audio controls preload="metadata">
    <source src="/media/sample.mp3" type="audio/mpeg">
    <source src="/media/sample.ogg" type="audio/ogg">
    <p>Your browser does not support HTML5 audio.</p>
  </audio>

</body>
</html>
Verify the page is served:
curl -s http://localhost:8500/student/media_demo.cfm | head -20
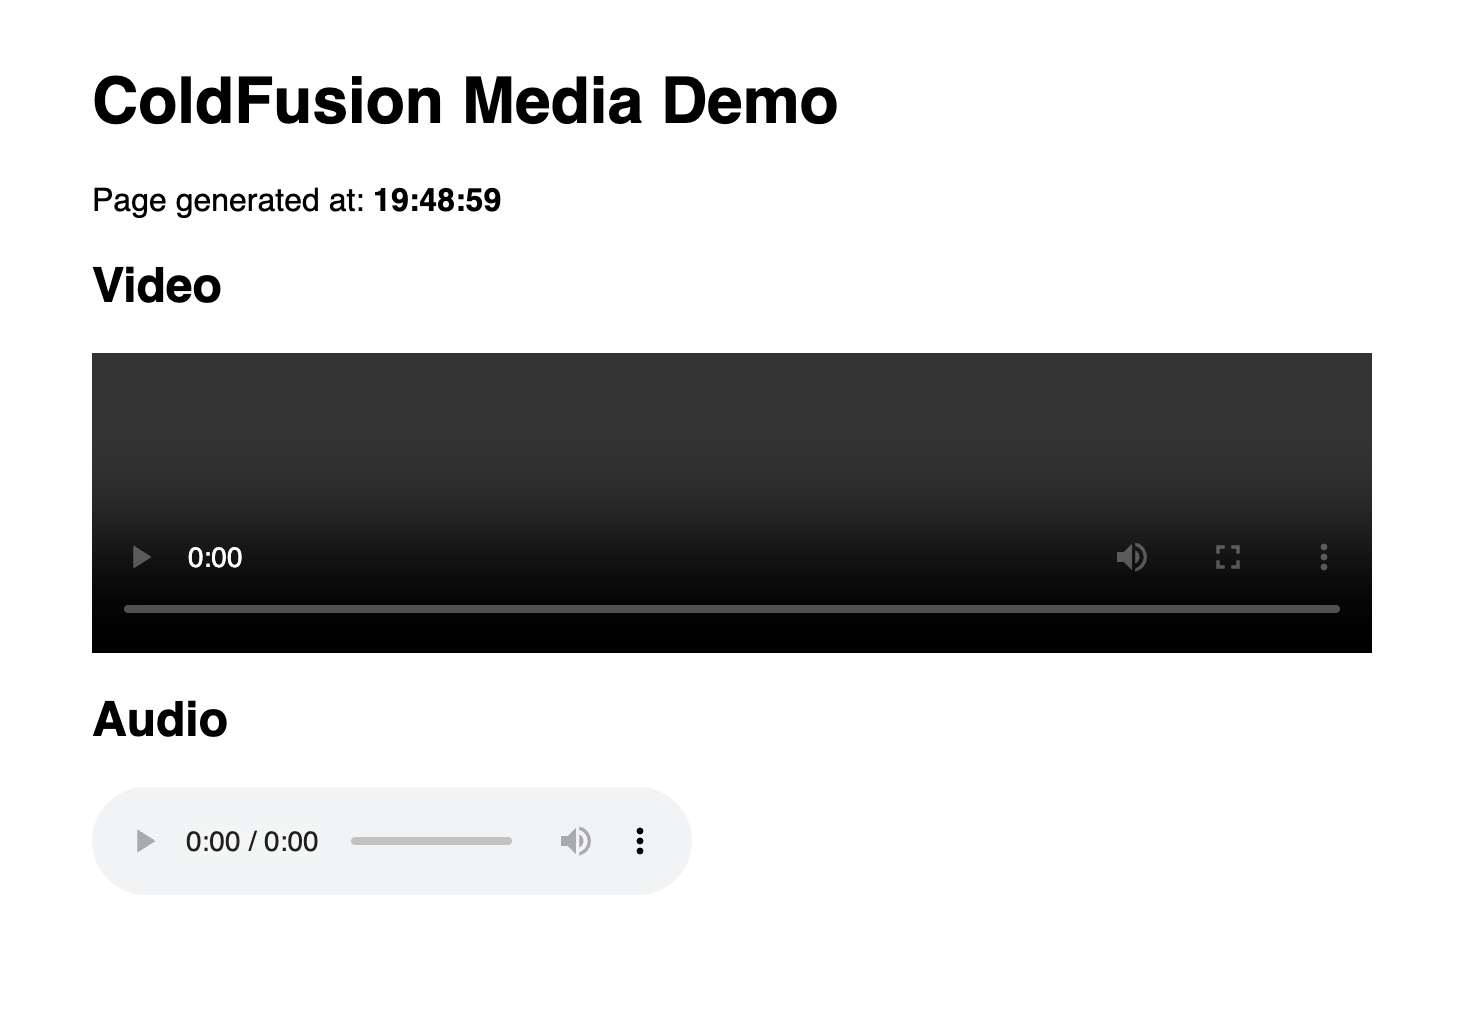
media_demo.cfm with both HTML5 <video> and <audio> elements and a CFML-rendered timestamp.
HTML5 video and audio elements in depth
The controls attribute renders the browser's native playback UI. Additional attributes let you fine-tune behaviour:
| Attribute | Effect |
|---|---|
controls | Show play/pause, volume, seek bar |
autoplay | Start playing immediately (muted required in most browsers) |
muted | Start muted — required for autoplay in Chrome/Safari |
loop | Repeat indefinitely |
preload="none" | Don't load any data until the user presses play |
preload="metadata" | Load duration and dimensions only (default) |
preload="auto" | Load the whole file on page load |
poster="/img/thumb.jpg" | Image shown before playback starts (video only) |
width / height | Video display dimensions in pixels |
File upload with cffile
cffile action="upload" handles multipart form submissions. ColdFusion validates the MIME type, resolves filename conflicts, and writes the file to disk:
<cfscript>
  if (structKeyExists(form, "mediaFile")) {
    allowedTypes = "video/mp4,video/webm,audio/mpeg,audio/ogg";
    cffile(
      action       = "upload",
      filefield    = "mediaFile",
      destination  = expandPath("/uploads/media/"),
      accept       = allowedTypes,
      nameconflict = "makeunique"
    );
    writeOutput("Uploaded: " & cffile.serverFile);
  }
</cfscript>

<form method="post" enctype="multipart/form-data">
  <input type="file" name="mediaFile" accept="video/*,audio/*">
  <button type="submit">Upload</button>
</form>
Key cffile properties after upload:
| Property | Value |
|---|---|
cffile.serverFile | Filename on disk (after conflict resolution) |
cffile.serverDirectory | Destination directory |
cffile.fileSize | Size in bytes |
cffile.contentType | MIME type reported by the browser |
Security rules for file uploads
Client-submitted data — including file names and MIME types — is untrusted. A malicious user can rename a .php file to video.mp4 and submit it. Always apply all three defences:
- Validate the MIME type server-side — the
acceptattribute oncffilechecks theContent-Typeheader, but also inspect the actual file bytes withimageIsValid()for images or a magic-bytes check for video. - Whitelist extensions explicitly:
allowedExts = ["mp4", "webm", "mp3", "ogg"];
ext = lCase(listLast(cffile.serverFile, "."));
if (!arrayFind(allowedExts, ext)) {
  fileDelete(cffile.serverDirectory & cffile.serverFile);
  throw(message="Disallowed file type.");
}
- Store uploads outside the web root when files should not be directly browsable. Serve them through a CF endpoint that checks permissions first.
Activity 2 — Create a file upload handler
Activity: Create upload_media.cfm — a page with a cffile upload handler and a form that accepts video and audio files.
Terminal tab:
sudo mkdir -p /opt/coldfusion2025/cfusion/wwwroot/uploads/media

sudo tee /opt/coldfusion2025/cfusion/wwwroot/student/upload_media.cfm << 'EOF'
<!DOCTYPE html>
<html lang="en">
<head>
  <meta charset="UTF-8">
  <meta name="viewport" content="width=device-width, initial-scale=1.0">
  <title>Upload Media</title>
  <style>
    body { font-family: sans-serif; max-width: 520px; margin: 2rem auto; }
    .result { margin-top: 1rem; padding: 1rem; background: #f0f4ff; border-left: 4px solid #3b82d4; }
    .error  { color: #c0392b; }
  </style>
</head>
<body>
  <h1>Upload Media File</h1>

<cfif cgi.REQUEST_METHOD eq "POST" and structKeyExists(form, "mediaFile") and len(form.mediaFile)>
  <cfscript>
    allowedTypes = "video/mp4,video/webm,audio/mpeg,audio/ogg";
    allowedExts  = ["mp4", "webm", "mp3", "ogg"];
    uploadDir    = expandPath("/uploads/media/");

    try {
      cffile(
        action       = "upload",
        filefield    = "mediaFile",
        destination  = uploadDir,
        accept       = allowedTypes,
        nameconflict = "makeunique"
      );
      ext = lCase(listLast(cffile.serverFile, "."));
      if (!arrayFind(allowedExts, ext)) {
        fileDelete(cffile.serverDirectory & "/" & cffile.serverFile);
        throw(message="Disallowed file extension: #ext#");
      }
    } catch (any e) {
      uploadError = e.message;
    }
  </cfscript>

  <cfif isDefined("uploadError")>
    <div class="result"><span class="error">Upload failed: <cfoutput>#encodeForHTML(uploadError)#</cfoutput></span></div>
  <cfelse>
    <div class="result">
      <strong>Upload successful!</strong><br>
      <cfoutput>
        File: <strong>#encodeForHTML(cffile.serverFile)#</strong><br>
        Size: <strong>#cffile.fileSize# bytes</strong><br>
        Type: <strong>#encodeForHTML(cffile.contentType)#</strong>
      </cfoutput>
    </div>
  </cfif>
</cfif>

  <form method="post" enctype="multipart/form-data">
    <label for="mediaFile">Choose a video or audio file:</label><br><br>
    <input type="file" id="mediaFile" name="mediaFile" accept="video/*,audio/*" required>
    <br><br>
    <button type="submit">Upload</button>
  </form>
</body>
</html>
EOF
✏️ Using the IDE tab instead? Create the file here
In the IDE tab, first create the uploads directory from the Terminal tab:
sudo mkdir -p /opt/coldfusion2025/cfusion/wwwroot/uploads/media
Then in the IDE tab, open /opt/coldfusion2025/cfusion/wwwroot/student/, right-click in the Explorer panel → New File → name it upload_media.cfm, paste the content below, and save with Ctrl+S:
<!DOCTYPE html>
<html lang="en">
<head>
  <meta charset="UTF-8">
  <meta name="viewport" content="width=device-width, initial-scale=1.0">
  <title>Upload Media</title>
  <style>
    body { font-family: sans-serif; max-width: 520px; margin: 2rem auto; }
    .result { margin-top: 1rem; padding: 1rem; background: #f0f4ff; border-left: 4px solid #3b82d4; }
    .error  { color: #c0392b; }
  </style>
</head>
<body>
  <h1>Upload Media File</h1>

<cfif cgi.REQUEST_METHOD eq "POST" and structKeyExists(form, "mediaFile") and len(form.mediaFile)>
  <cfscript>
    allowedTypes = "video/mp4,video/webm,audio/mpeg,audio/ogg";
    allowedExts  = ["mp4", "webm", "mp3", "ogg"];
    uploadDir    = expandPath("/uploads/media/");

    try {
      cffile(
        action       = "upload",
        filefield    = "mediaFile",
        destination  = uploadDir,
        accept       = allowedTypes,
        nameconflict = "makeunique"
      );
      ext = lCase(listLast(cffile.serverFile, "."));
      if (!arrayFind(allowedExts, ext)) {
        fileDelete(cffile.serverDirectory & "/" & cffile.serverFile);
        throw(message="Disallowed file extension: #ext#");
      }
    } catch (any e) {
      uploadError = e.message;
    }
  </cfscript>

  <cfif isDefined("uploadError")>
    <div class="result"><span class="error">Upload failed: <cfoutput>#encodeForHTML(uploadError)#</cfoutput></span></div>
  <cfelse>
    <div class="result">
      <strong>Upload successful!</strong><br>
      <cfoutput>
        File: <strong>#encodeForHTML(cffile.serverFile)#</strong><br>
        Size: <strong>#cffile.fileSize# bytes</strong><br>
        Type: <strong>#encodeForHTML(cffile.contentType)#</strong>
      </cfoutput>
    </div>
  </cfif>
</cfif>

  <form method="post" enctype="multipart/form-data">
    <label for="mediaFile">Choose a video or audio file:</label><br><br>
    <input type="file" id="mediaFile" name="mediaFile" accept="video/*,audio/*" required>
    <br><br>
    <button type="submit">Upload</button>
  </form>
</body>
</html>
Verify the upload handler is accessible:
curl -s -o /dev/null -w "%{http_code}" http://localhost:8500/student/upload_media.cfm
You should see 200.
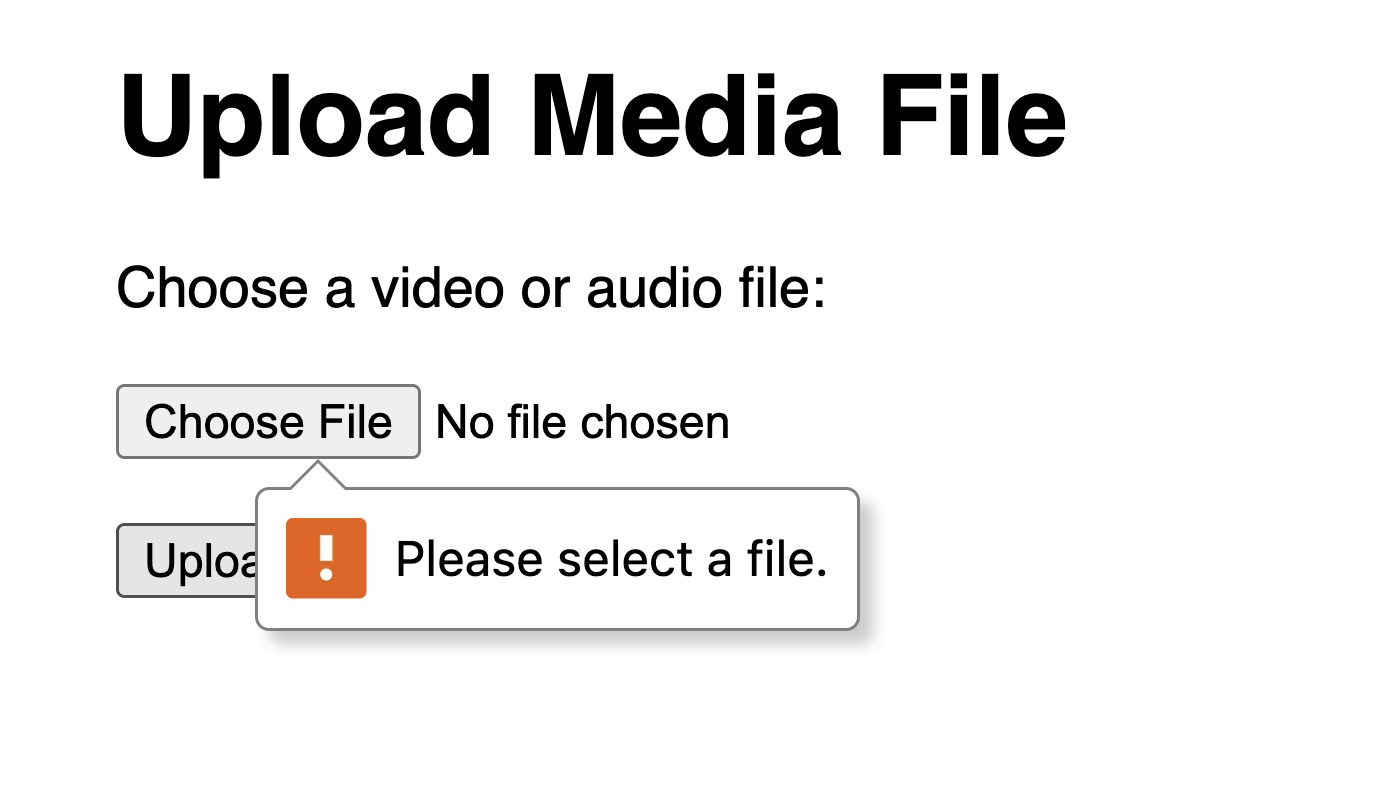
upload_media.cfm — the upload form before and after a successful file submission, with ColdFusion echoing back the server filename, size, and MIME type.
Image manipulation with cfimage
In ColdFusion 2025, image manipulation is provided by a separately installed package called image. In this lab environment it is pre-installed for you — cfimage, imageNew(), imageRead(), imageWrite(), and imageInfo() are all ready to use.
Why does the CF Admin Package Manager fail when trying to install "image"?
If you navigate to CF Admin → Package Manager and try to install the image package manually, you will see an error like:
Unable to connect to the Adobe Package Repository.
Connection timed out.
This is expected in the lab environment. The CF Package Manager tries to download packages from Adobe's servers at runtime — but the lab VM has no outbound internet access (this is a deliberate sandbox restriction).
The image package is already installed. It was downloaded and installed during the image build process, when internet access was available. You do not need to install it again.
The practical rule: in this lab, never try to install CF packages through the Admin UI. All packages needed for the curriculum are pre-installed at build time via cfpm.sh.
<cfscript>
  // Resize an uploaded image to a 200×200 thumbnail
  cfimage(
    action      = "resize",
    source      = "/uploads/original.jpg",
    destination = "/uploads/thumb.jpg",
    width       = "200",
    height      = "200",
    overwrite   = true
  );
</cfscript>
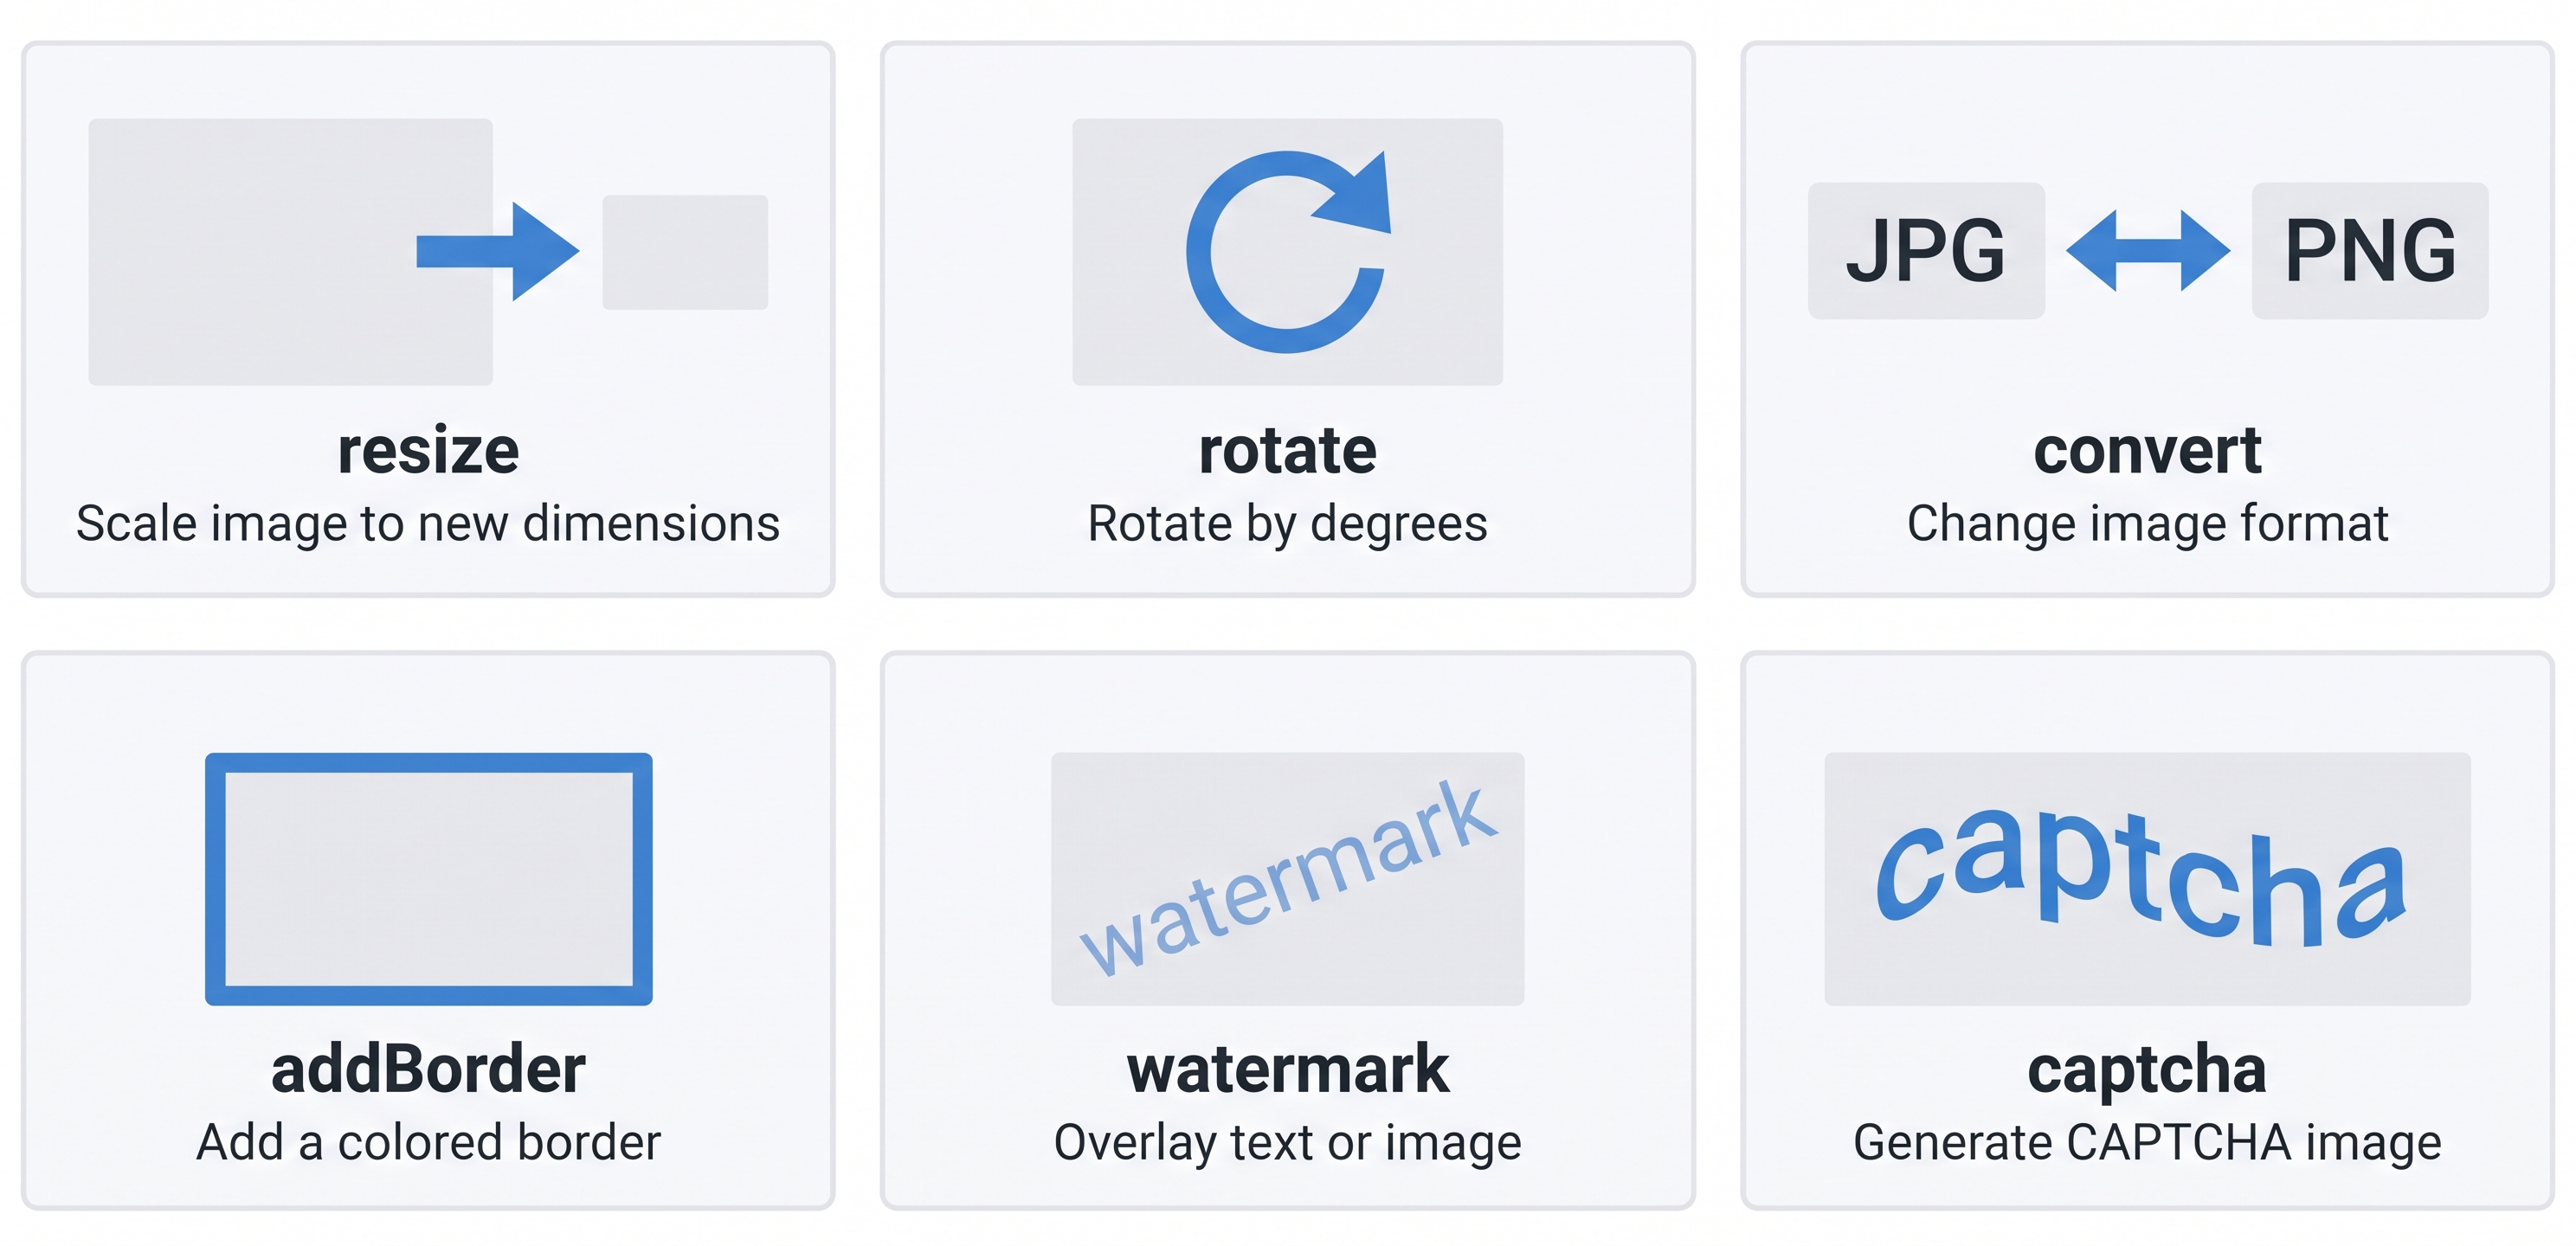
cfimage actions reference — resize, rotate, convert, addBorder, watermark, and captcha — all available via the pre-installed image package.
All cfimage actions:
| Action | What it does |
|---|---|
resize | Scale image to new dimensions |
rotate | Rotate by degrees |
convert | Change format (e.g. JPG → PNG) |
addBorder | Add a coloured border |
watermark | Overlay semi-transparent text or image |
captcha | Generate a CAPTCHA challenge image |
read | Load image into a CF image object for scripted manipulation |
write | Save a CF image object to disk |
getInfo | Return width, height, format, and EXIF metadata |
Activity 3 — Generate a thumbnail with cfimage
Activity: Create image_thumb.cfm — a page that uses cfimage to generate a thumbnail and display both original and resized result.
Terminal tab:
# Create a minimal test image using ColdFusion itself
sudo tee /opt/coldfusion2025/cfusion/wwwroot/student/image_thumb.cfm << 'EOF'
<!DOCTYPE html>
<html lang="en">
<head>
  <meta charset="UTF-8">
  <title>cfimage Thumbnail Demo</title>
  <style>
    body { font-family: sans-serif; max-width: 700px; margin: 2rem auto; }
    .images { display: flex; gap: 2rem; align-items: flex-start; margin-top: 1rem; }
    figure  { margin: 0; text-align: center; }
    figcaption { font-size: .85rem; color: #555; margin-top: .4rem; }
  </style>
</head>
<body>
  <h1>cfimage — Thumbnail Demo</h1>

  <cfscript>
    srcPath   = expandPath("/uploads/test_original.jpg");
    thumbPath = expandPath("/uploads/test_thumb.jpg");

    // Generate a solid-colour test image if it doesn't exist yet
    if (!fileExists(srcPath)) {
      img = imageNew("", 400, 300, "rgb", "##4a90d9");
      imageSetDrawingColor(img, "white");
      imageDrawText(img, "ColdFusion Test Image  400x300", 60, 145);
      imageWrite(img, srcPath);
    }

    // Resize to 200×150 thumbnail
    cfimage(
      action      = "resize",
      source      = srcPath,
      destination = thumbPath,
      width       = "200",
      height      = "150",
      overwrite   = true
    );

    origImg   = imageRead(srcPath);
    thumbImg  = imageRead(thumbPath);
    origInfo  = imageInfo(origImg);
    thumbInfo = imageInfo(thumbImg);
  </cfscript>

  <div class="images">
    <figure>
      <img src="/uploads/test_original.jpg" width="400" height="300" alt="Original">
      <figcaption>
        <cfoutput>Original — #origInfo.width#×#origInfo.height# px</cfoutput>
      </figcaption>
    </figure>
    <figure>
      <img src="/uploads/test_thumb.jpg" width="200" height="150" alt="Thumbnail">
      <figcaption>
        <cfoutput>Thumbnail — #thumbInfo.width#×#thumbInfo.height# px</cfoutput>
      </figcaption>
    </figure>
  </div>
</body>
</html>
EOF
✏️ Using the IDE tab instead? Create the file here
In the IDE tab, right-click in the Explorer panel → New File → name it image_thumb.cfm, paste the content from the Terminal command above, and save with Ctrl+S.
Open /image_thumb.cfm in the ColdFusion 2025 browser tab. ColdFusion will generate the test image programmatically and display both original and thumbnail side by side.
curl -s -o /dev/null -w "%{http_code}" http://localhost:8500/student/image_thumb.cfm

cfimage resizing a programmatically generated test image — original at 400×300 and thumbnail at 200×150, dimensions confirmed by imageInfo().
Troubleshooting — "Variable IMAGEGETINFO is undefined"
If you see this error when loading image_thumb.cfm:
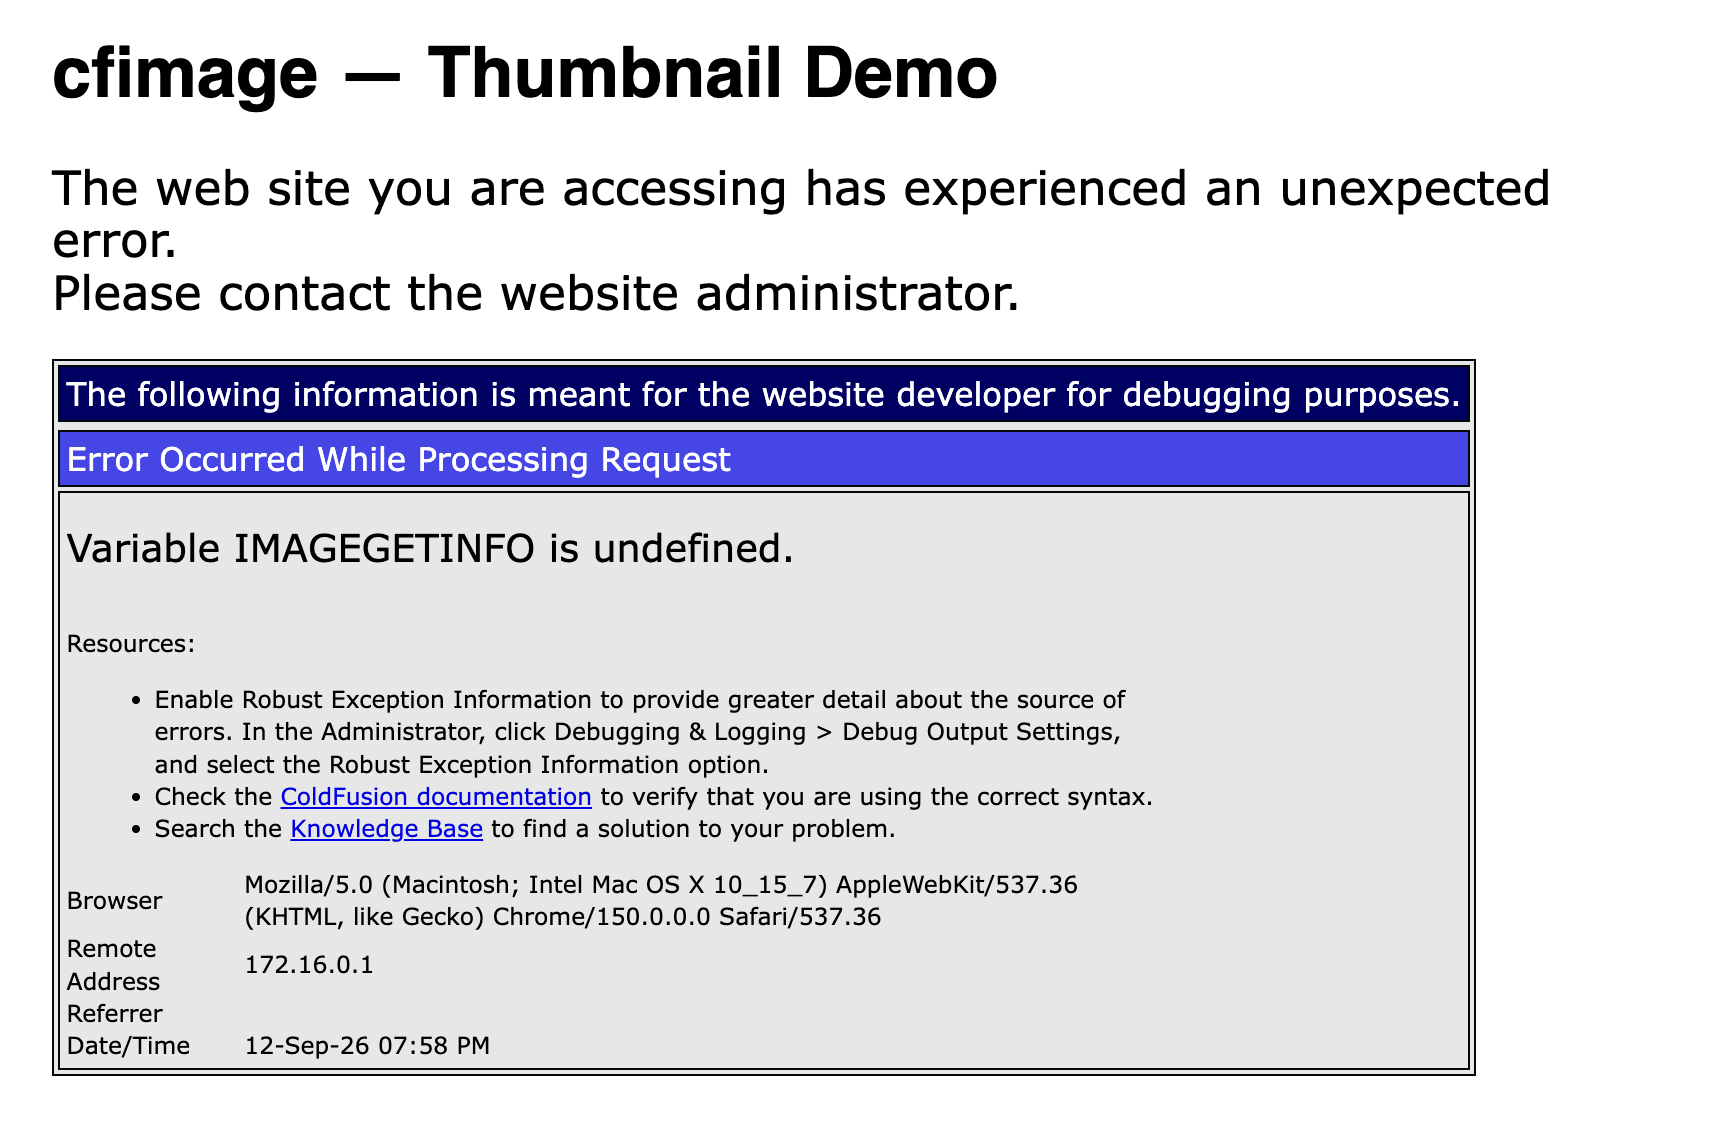
ColdFusion 2025 error — imageGetInfo() does not exist as a standalone function.
What it means: an earlier version of this lesson used imageGetInfo(), which does not exist in ColdFusion 2025. The correct function is imageInfo().
The fix — use imageInfo() on an image object returned by imageRead():
// ✗ Wrong — imageGetInfo() is not a CF2025 function
origInfo = imageGetInfo(imageRead(srcPath));

// ✓ Correct
origImg  = imageRead(srcPath);
origInfo = imageInfo(origImg);
writeOutput(origInfo.width & "×" & origInfo.height);
The current code in this lesson already uses imageInfo(). If you see this error it means you are running an older copy of image_thumb.cfm — re-run the sudo tee command above to replace it with the corrected version.
When all the checks above are green, this lesson is complete. Your progress is saved automatically.
🎉 Congratulations — you have reached the end of Unit 1!
You have covered a lot of ground: CFML syntax, variables and scopes, the application lifecycle, object-oriented programming with CFCs, HTML5 integration, and multimedia handling. That is a solid foundation.
To reinforce everything you have learned, your next step is the Unit 1 Challenge. The challenge brings together concepts from across all seven lessons into a single hands-on task. Feel free to review any lesson, re-read the hint boxes, or consult external sources — that is not cheating, that is how real developers work.
Take your time, trust the process, and keep up the hard work. You've got this. 💪
- Previous lesson
- HTML5 and Advanced ColdFusion Features
- Next lesson
- Unit 1 Challenge — Solution Review