Application.cfc & Request Lifecycle
What is Application.cfc?
Application.cfc is the framework entry point for every ColdFusion web application. Drop it in the web root and ColdFusion automatically invokes its lifecycle methods at the right moment — no configuration file, no XML, no registration step.
Application.cfc is a reserved filename — not just because it is a CFC, but because ColdFusion has a hardcoded block on this specific name. Normally you can request any .cfc file directly in the browser and CF will show an introspection page listing its public methods. Application.cfc is the exception: CF intercepts it at the request dispatcher level before it ever executes, for security reasons (it sets session timeouts, datasources, and app-wide settings — allowing direct requests could expose your configuration or let someone trigger onApplicationStart() on demand). If you try to open http://localhost:8500/Application.cfc you will always get an "Invalid request" error. Verify it indirectly instead — by making a normal request and observing that the lifecycle hooks fired.
It replaces the older Application.cfm approach and gives you a clean OO structure: one component, one place to configure your entire application.
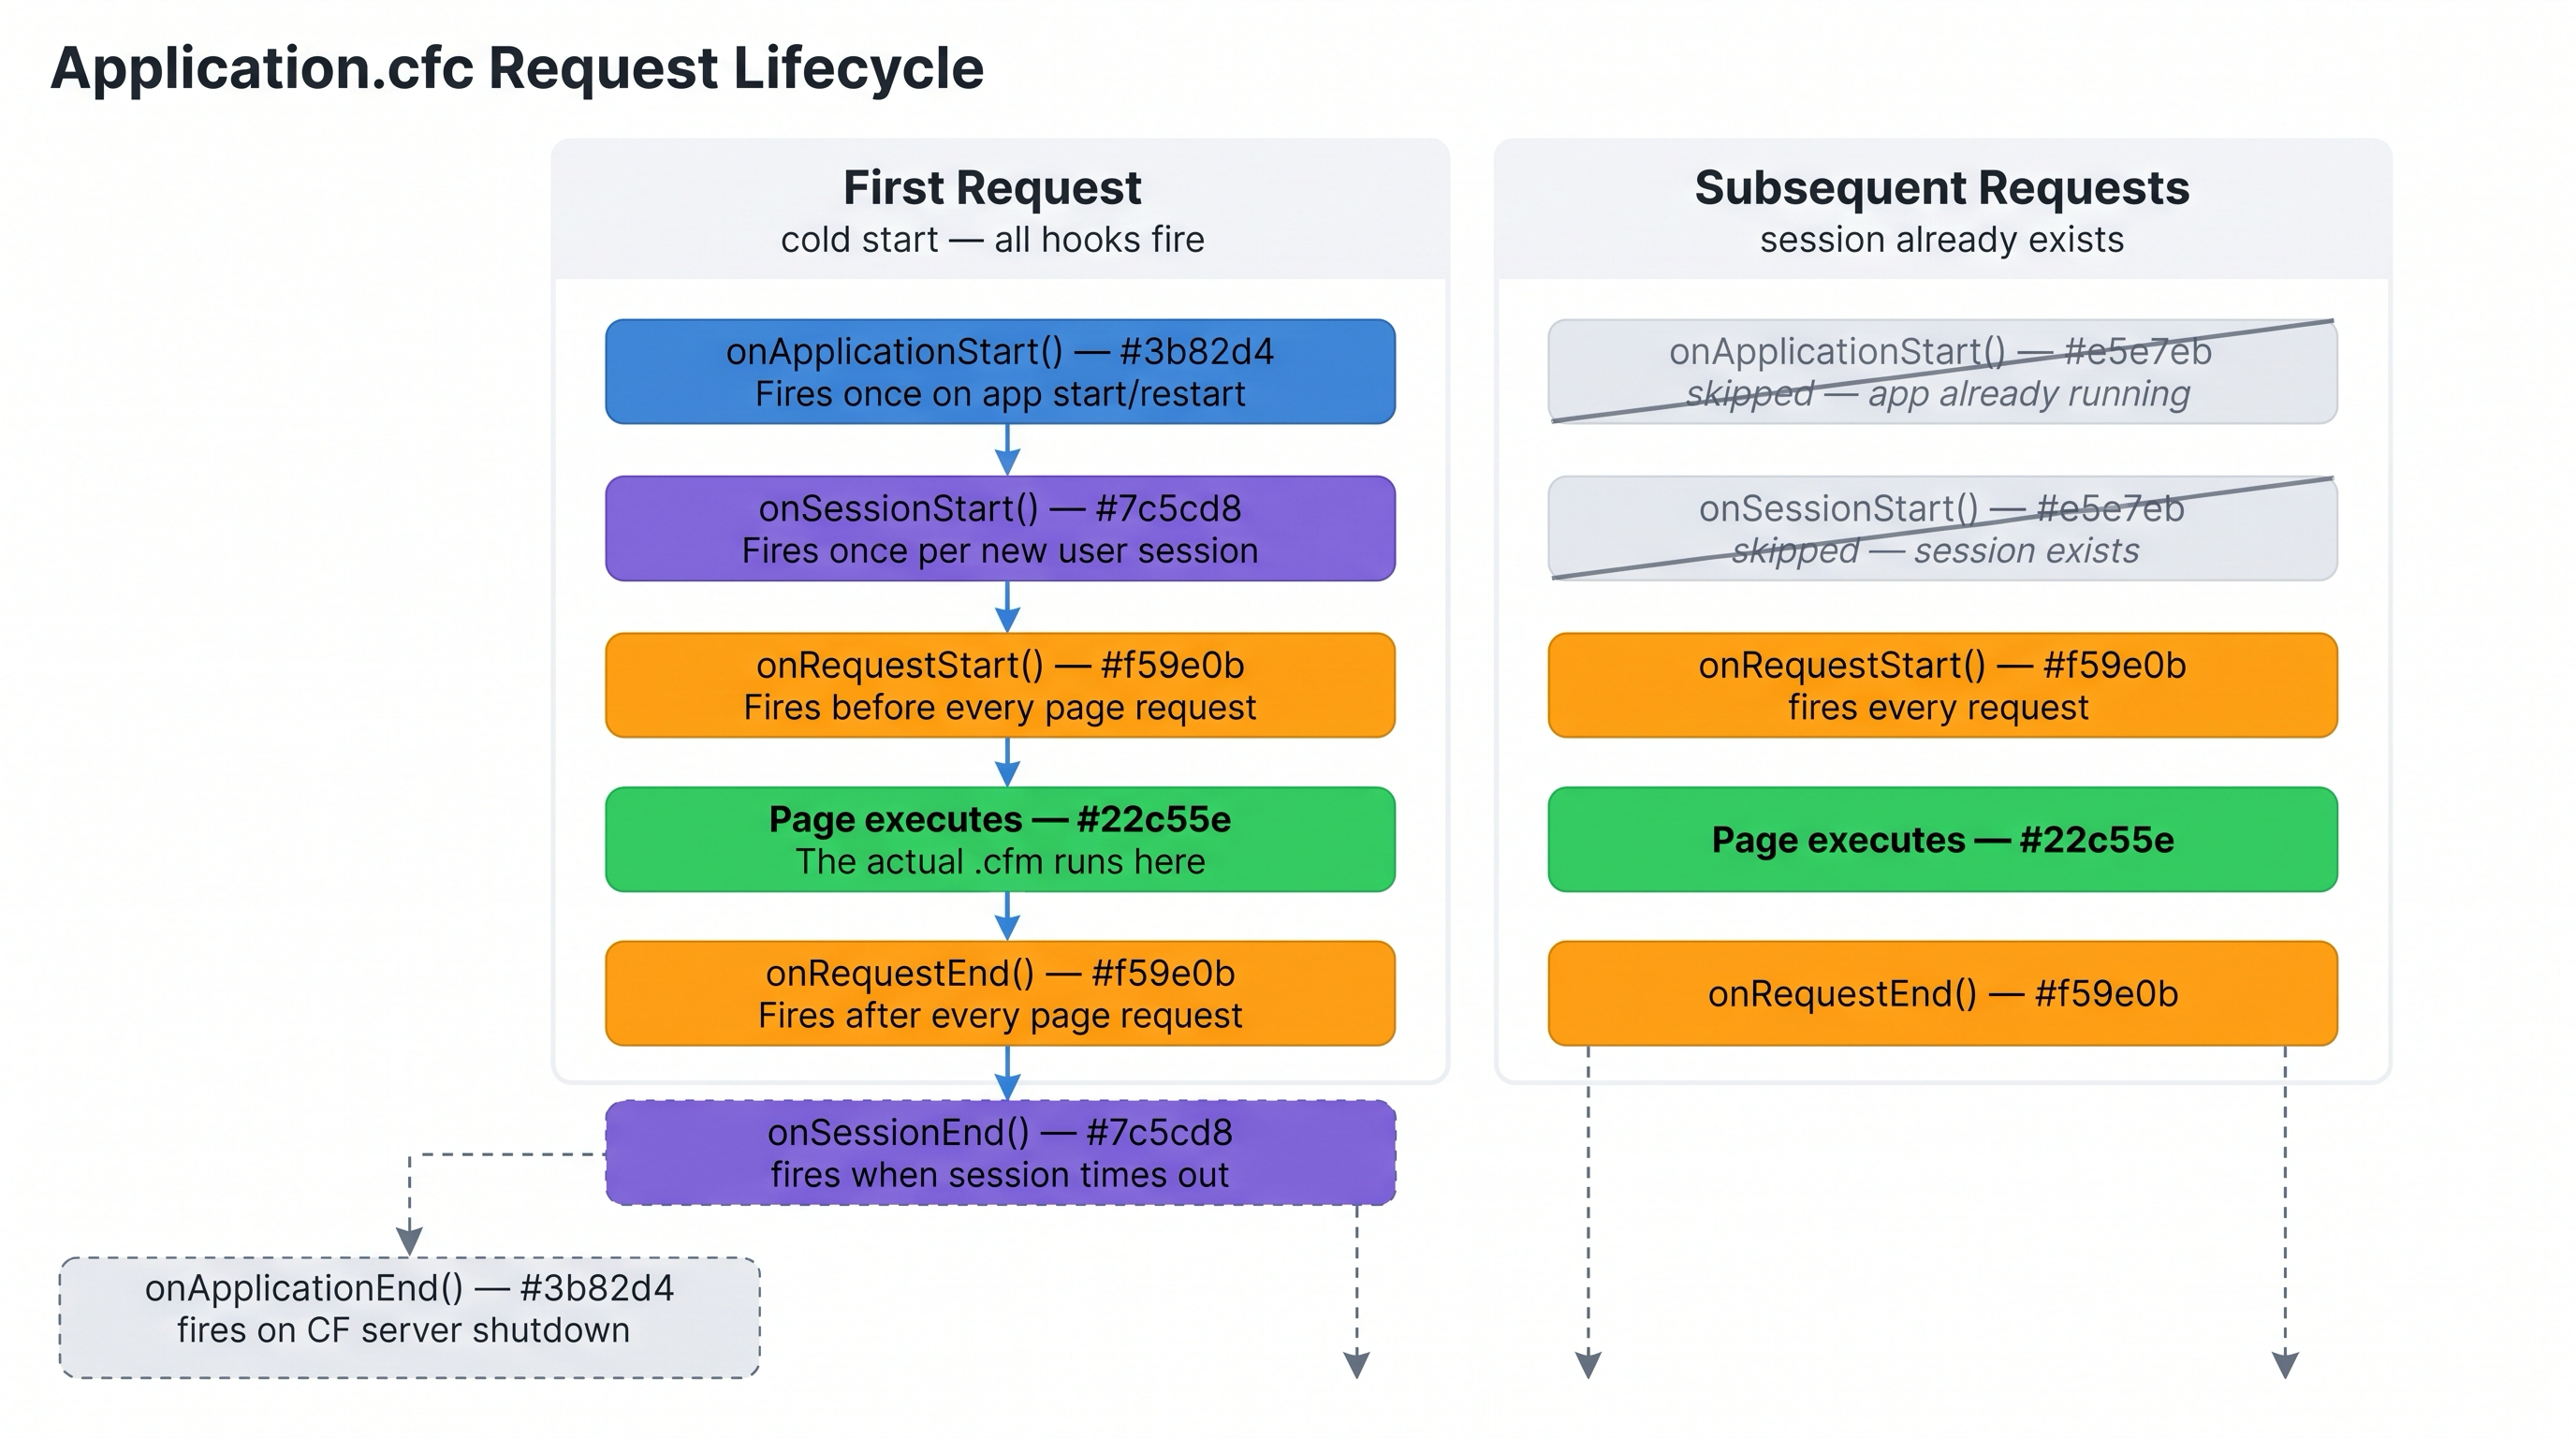
Application.cfc lifecycle: first-request path (left) triggers all startup hooks; subsequent requests skip them.
Lifecycle order
Each request triggers a predictable sequence of method calls:
| Step | Method | Fires |
|---|---|---|
| 1 | onApplicationStart | Once per application start/restart |
| 2 | onSessionStart | Once per new user session |
| 3 | onRequestStart | Before every page request |
| 4 | onRequest | The actual page (if defined; otherwise CF runs the .cfm directly) |
| 5 | onRequestEnd | After every page request |
| 6 | onSessionEnd | When a session times out |
| 7 | onApplicationEnd | When the application shuts down |
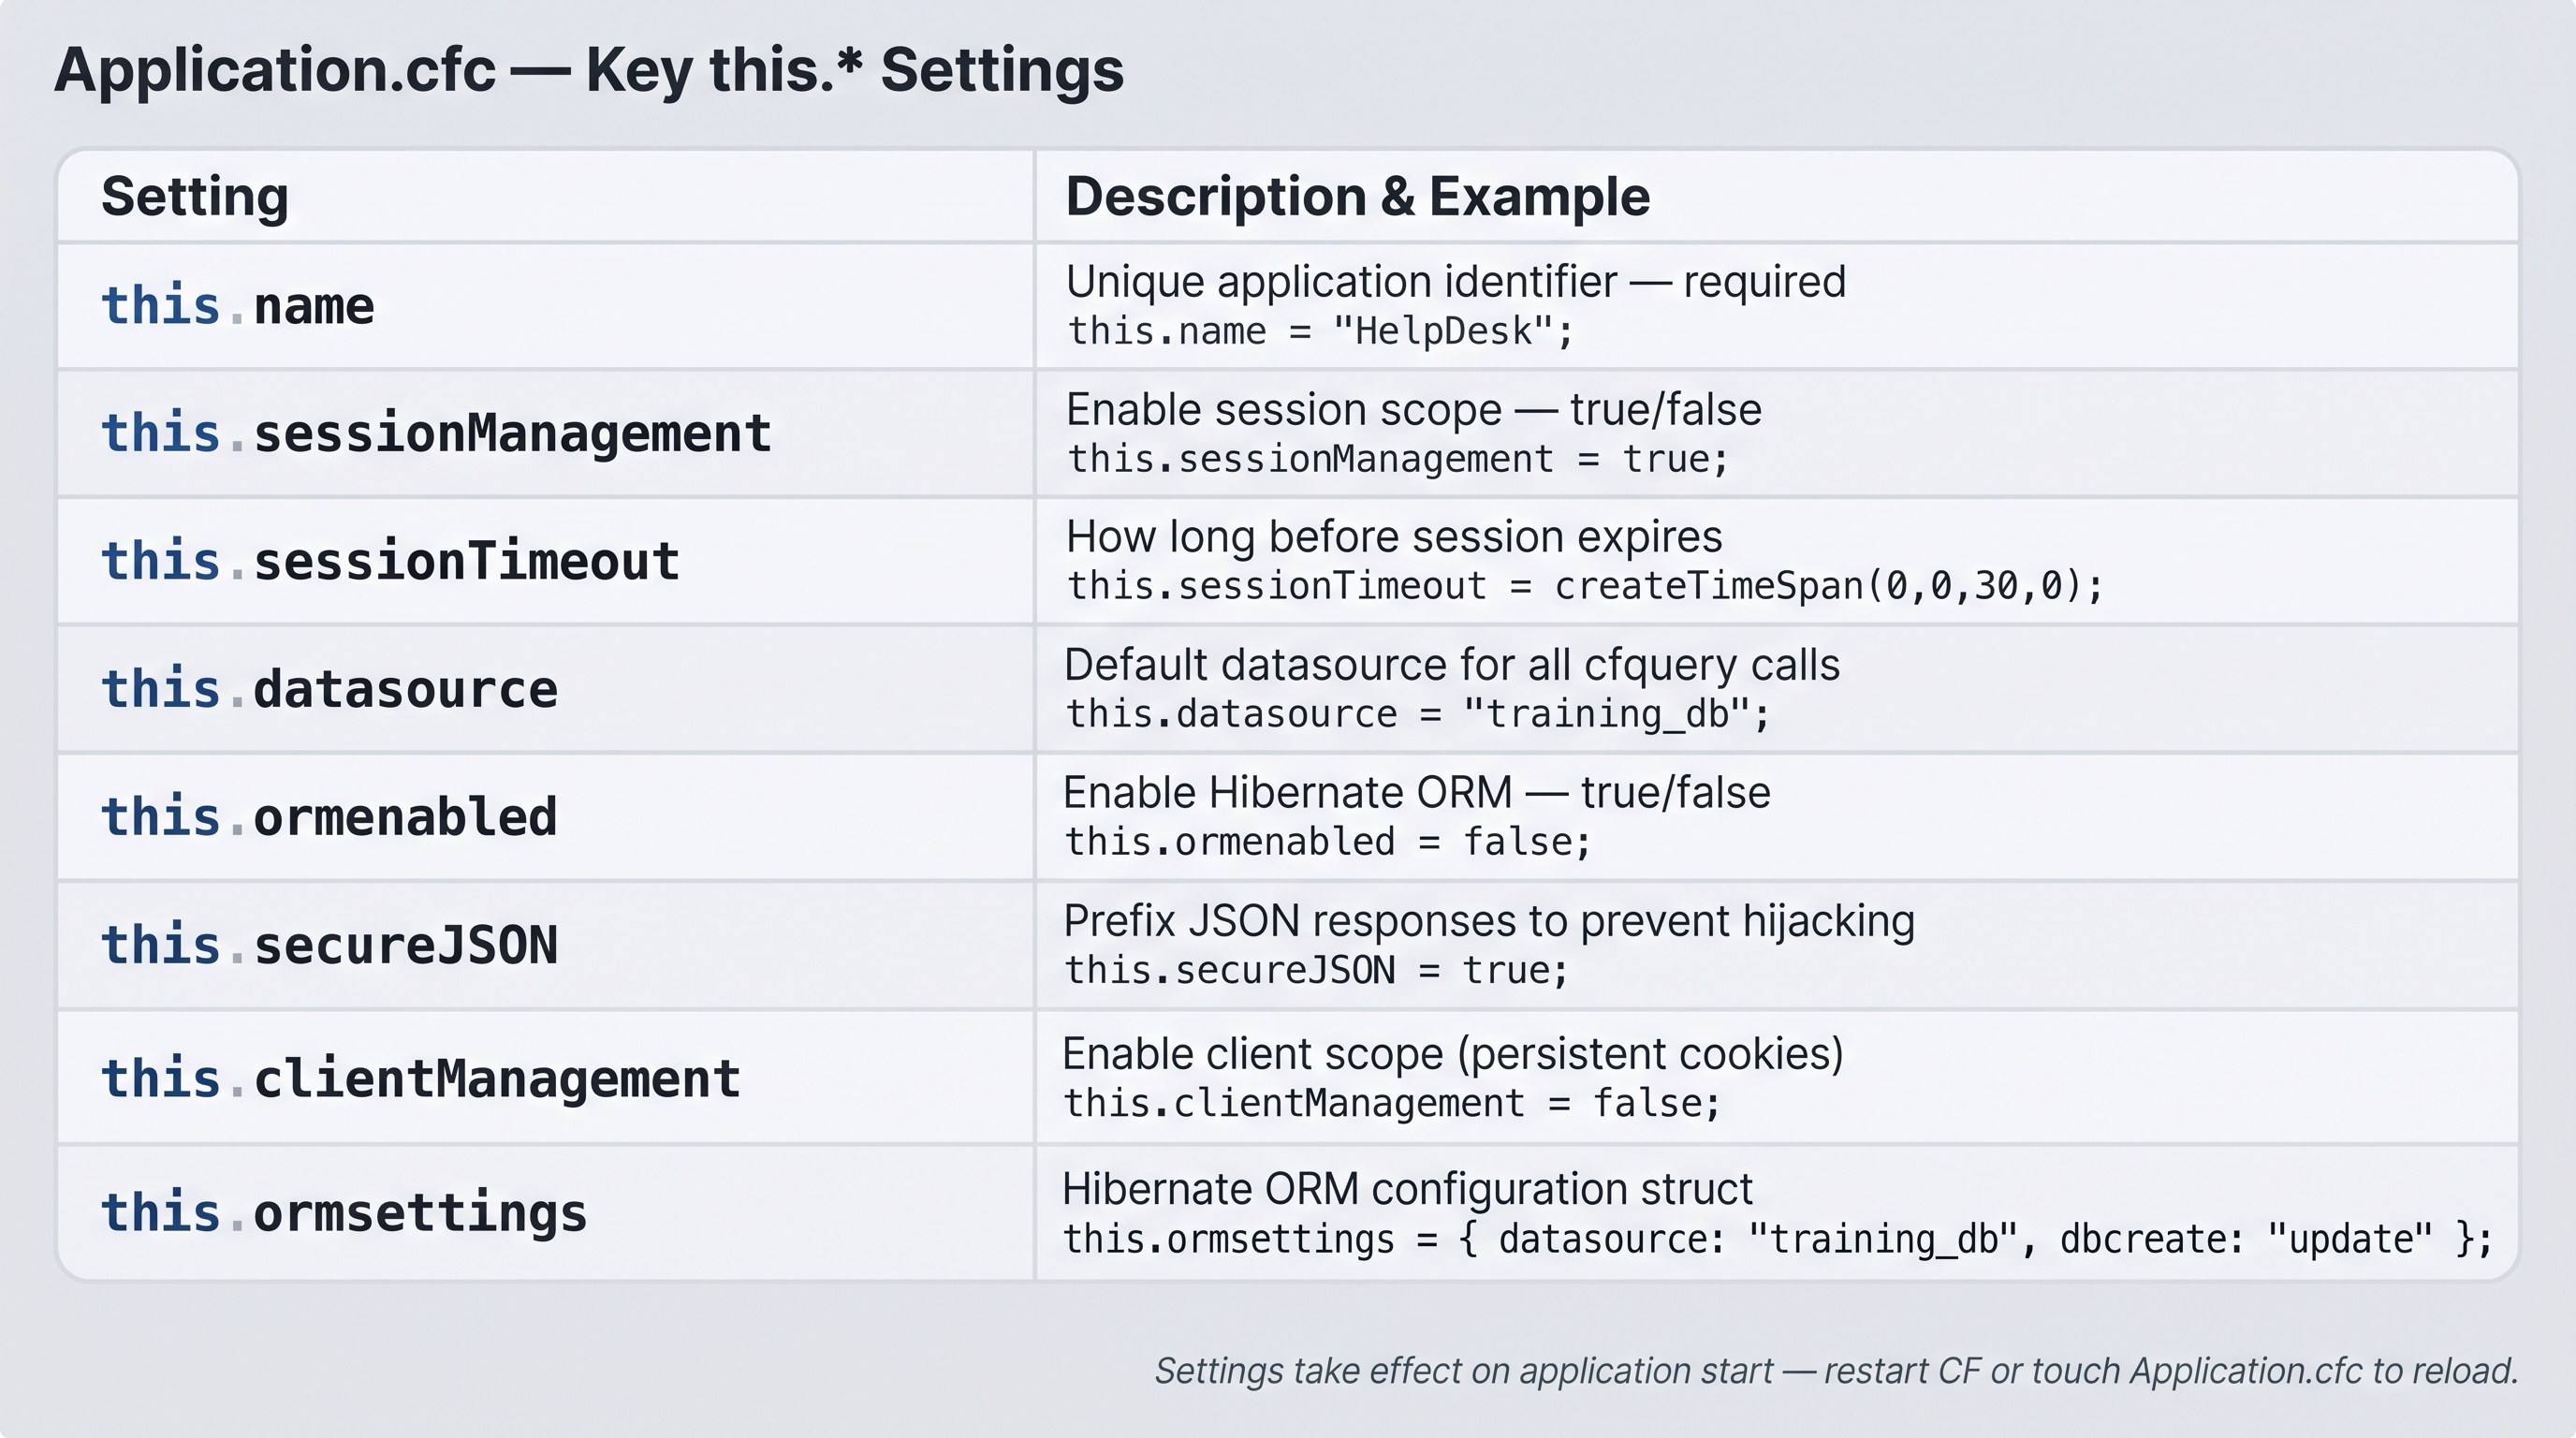
Key this.* settings in Application.cfc — configure once, effective for every request in the application.
Activity 1 — Create Application.cfc
Why
wwwroot/and notstudent/?Application.cfcmust live in the web root (/opt/coldfusion2025/cfusion/wwwroot/) — not instudent/. ColdFusion walks up the directory tree from the requested page to findApplication.cfc, so placing it inwwwroot/means it governs every request to the engine, including yourstudent/pages. If you put it insidestudent/it would only apply to files in that subfolder. This is the one file in this course that intentionally lives outsidestudent/.
Activity: Replace Application.cfc in the web root with the version below.
Terminal tab:
sudo tee /opt/coldfusion2025/cfusion/wwwroot/Application.cfc << 'EOF'
component {

  this.name              = "CFTraining";
  this.sessionManagement = true;
  this.sessionTimeout    = createTimeSpan(0, 0, 30, 0);  // 30 minutes

  // WebSocket channels — required by the WebSockets lesson (module 3)
  this.wschannels = [
    { name="chat", cfclistener="WSHandler" }
  ];

  public boolean function onApplicationStart() {
    application.startTime = now();
    writeLog(text="Application started at #now()#", file="application");
    return true;
  }

  public boolean function onSessionStart() {
    session.userId = 0;
    return true;
  }

  public boolean function onRequestStart(string targetPage) {
    return true;
  }

  public void function onError(any exception, string eventName) {
    writeOutput("An error occurred: #exception.message#");
  }

}
EOF
✏️ Using the IDE tab instead? Edit the file here
In the IDE tab, click File → Open Folder…, type /opt/coldfusion2025/cfusion/wwwroot and press Enter. Application.cfc already exists in the Explorer panel — click it to open it, select all (Ctrl+A), replace with the content below, and save with Ctrl+S:
component {

  this.name              = "CFTraining";
  this.sessionManagement = true;
  this.sessionTimeout    = createTimeSpan(0, 0, 30, 0);  // 30 minutes

  // WebSocket channels — required by the WebSockets lesson (module 3)
  this.wschannels = [
    { name="chat", cfclistener="WSHandler" }
  ];

  public boolean function onApplicationStart() {
    application.startTime = now();
    writeLog(text="Application started at #now()#", file="application");
    return true;
  }

  public boolean function onSessionStart() {
    session.userId = 0;
    return true;
  }

  public boolean function onRequestStart(string targetPage) {
    return true;
  }

  public void function onError(any exception, string eventName) {
    writeOutput("An error occurred: #exception.message#");
  }

}
Verify it was created:
ls -lh /opt/coldfusion2025/cfusion/wwwroot/Application.cfc

Terminal confirming Application.cfc was created in the web root.
Activity 2 — Verify onApplicationStart fires
The onApplicationStart method you just added writes to the application scope and logs to the CF log file. Trigger it by making any request to the engine:
curl -s -o /dev/null -w "%{http_code}\n" http://localhost:8500/index.cfm
# Expected: 200
Now confirm onApplicationStart is defined in the file:
grep "onApplicationStart" /opt/coldfusion2025/cfusion/wwwroot/Application.cfc
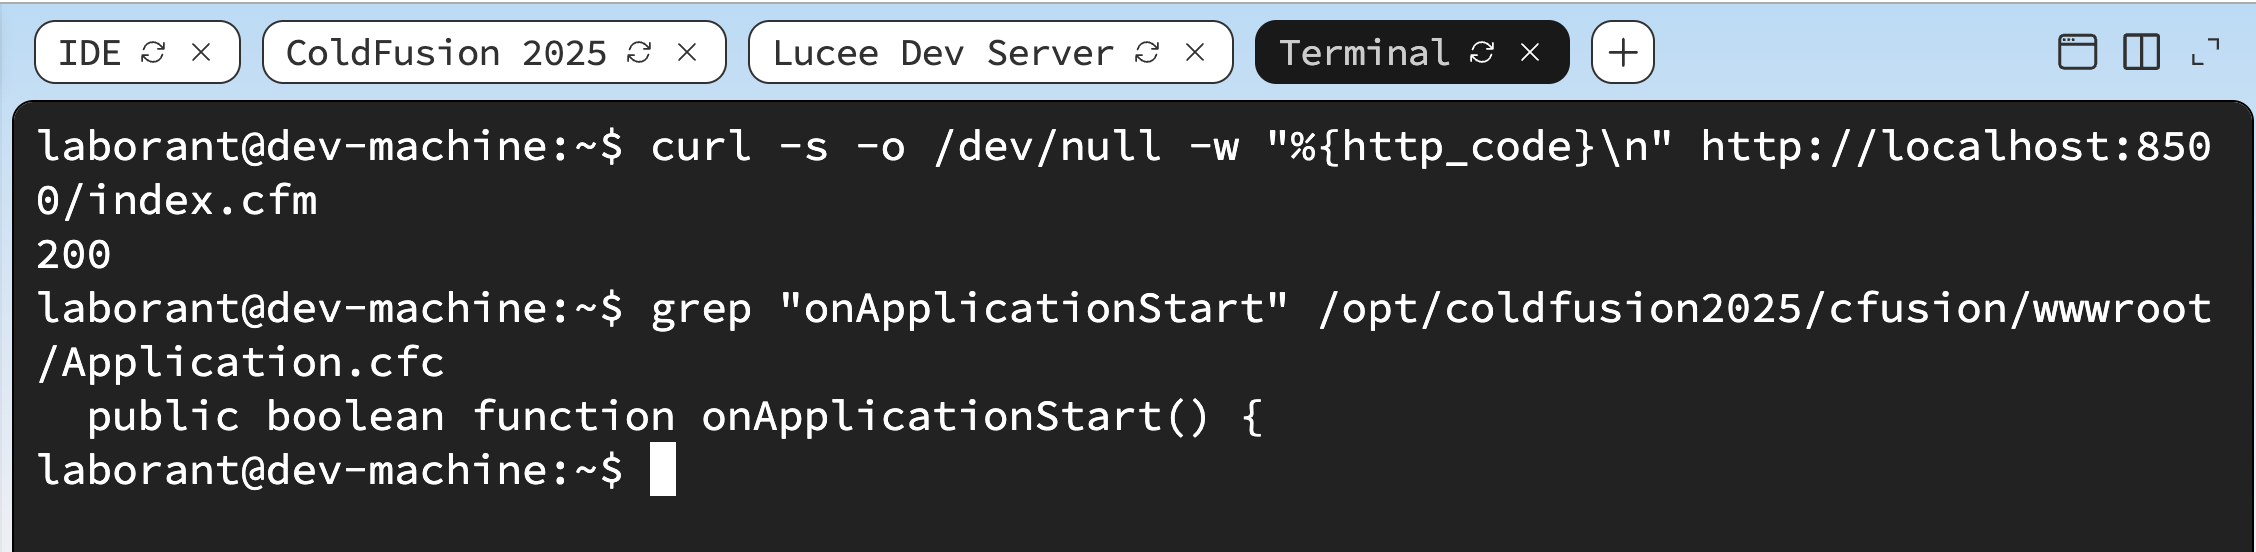
grep confirms onApplicationStart is defined in Application.cfc.
Key this.* settings
The this.* block at the top of Application.cfc configures the entire application before any request is processed:
component {
  this.name              = "HelpDesk";             // required — unique app identifier
  this.sessionManagement = true;                   // enable session scope
  this.sessionTimeout    = createTimeSpan(0,1,0,0);  // 1 hour
  this.clientManagement  = false;
  this.datasource        = "training_db";          // default datasource for cfquery

  // ORM settings (covered in the ORM lesson)
  this.ormenabled        = false;
}
| Setting | Purpose |
|---|---|
this.name | Unique app identifier — required, determines application scope boundary |
this.sessionManagement | Enables session.* scope |
this.sessionTimeout | How long before an idle session expires |
this.datasource | Default datasource — pages can omit datasource in <cfquery> |
this.ormenabled | Enables Hibernate ORM (covered later) |
Activity 3 — Verify this.* settings
Your Application.cfc already has this.name, this.sessionManagement, and this.sessionTimeout set from Activity 1. Confirm all three are present and correctly valued:
grep -E "this\.(name|sessionManagement|sessionTimeout)" \
  /opt/coldfusion2025/cfusion/wwwroot/Application.cfc
Expected output:
  this.name              = "CFTraining";
  this.sessionManagement = true;
  this.sessionTimeout    = createTimeSpan(0, 0, 30, 0);
Then confirm the engine responds without errors after loading the updated file:
curl -s -o /dev/null -w "%{http_code}\n" http://localhost:8500/index.cfm
# Expected: 200
![[object Object]](/content/files/courses/ColdFusion-2025-Foundations-5151cba6/module-1/4.lesson-application-lifecycle/__static__/terminal-application-cfc-this-v1.png?v=1791349307475)
grep confirms this.name, this.sessionManagement, and this.sessionTimeout are all set in Application.cfc.
Open the ColdFusion 2025 tab (right-click → Open in New Tab) and browse to your lab root — CF Admin login page appearing means the engine is running with your Application.cfc active.
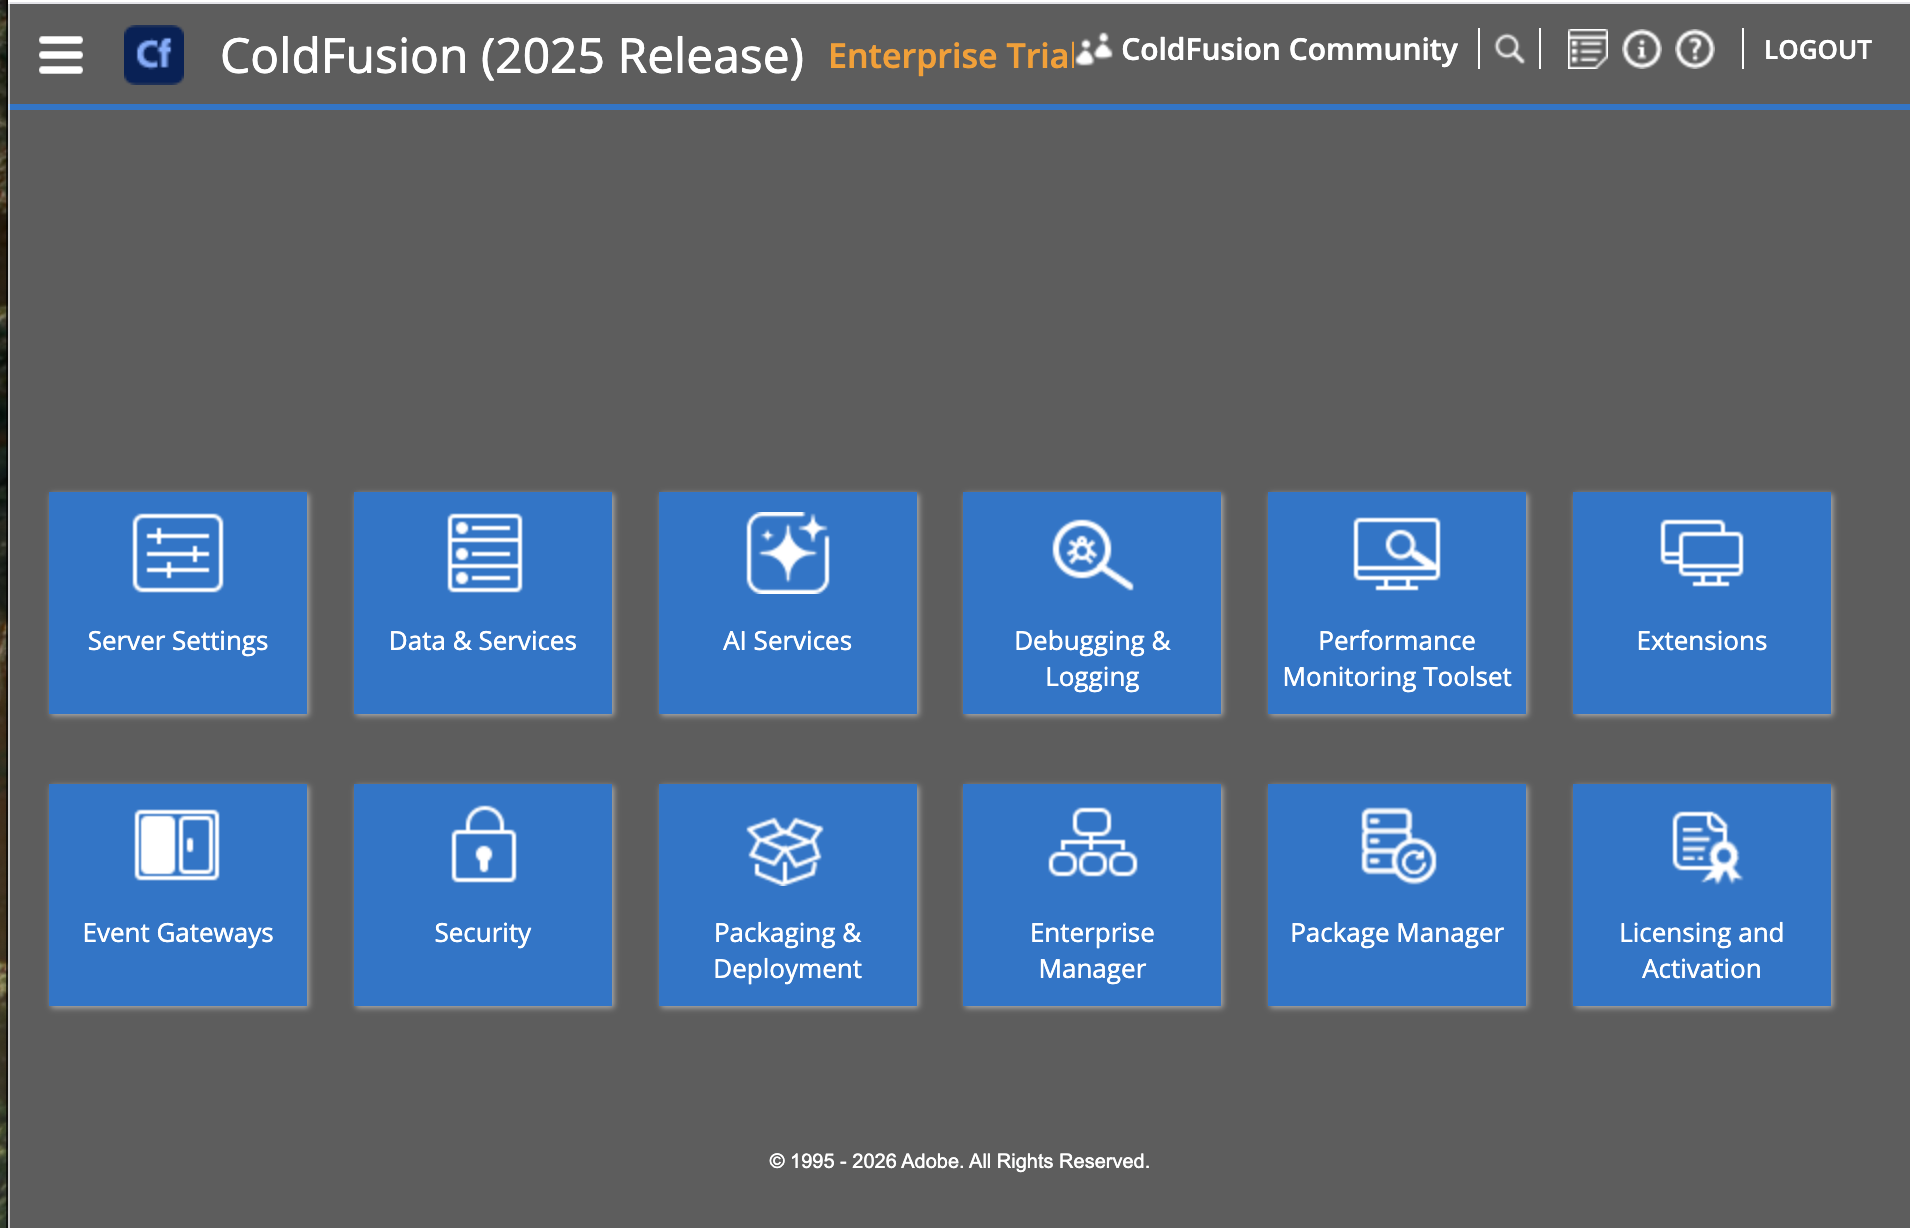
CF Admin login page — log in with password admin.
Log in with password admin. Now verify your Application.cfc is active in two ways:
1 — /status.cfm (fastest)
status.cfm is a diagnostic page pre-installed in the web root — you don't need to create it. In the ColdFusion 2025 browser tab, right-click → Open Link in New Tab, then change the path to /status.cfm. The page reads directly from the running CF engine and shows:
- this.name — confirms
Application.cfcis loaded andCFTrainingis the app name - onApplicationStart — shows
fired — <timestamp>ifonApplicationStart()ran and setapplication.startTime - JVM memory — live heap usage
- Session management — confirms sessions are enabled
2 — CF Admin → Debugging & Logging → Log Files
In CF Admin, go to Debugging & Logging → Log Files in the left navigation. Open application.log — you should see the line written by writeLog() in onApplicationStart(), timestamped to when the application first started.
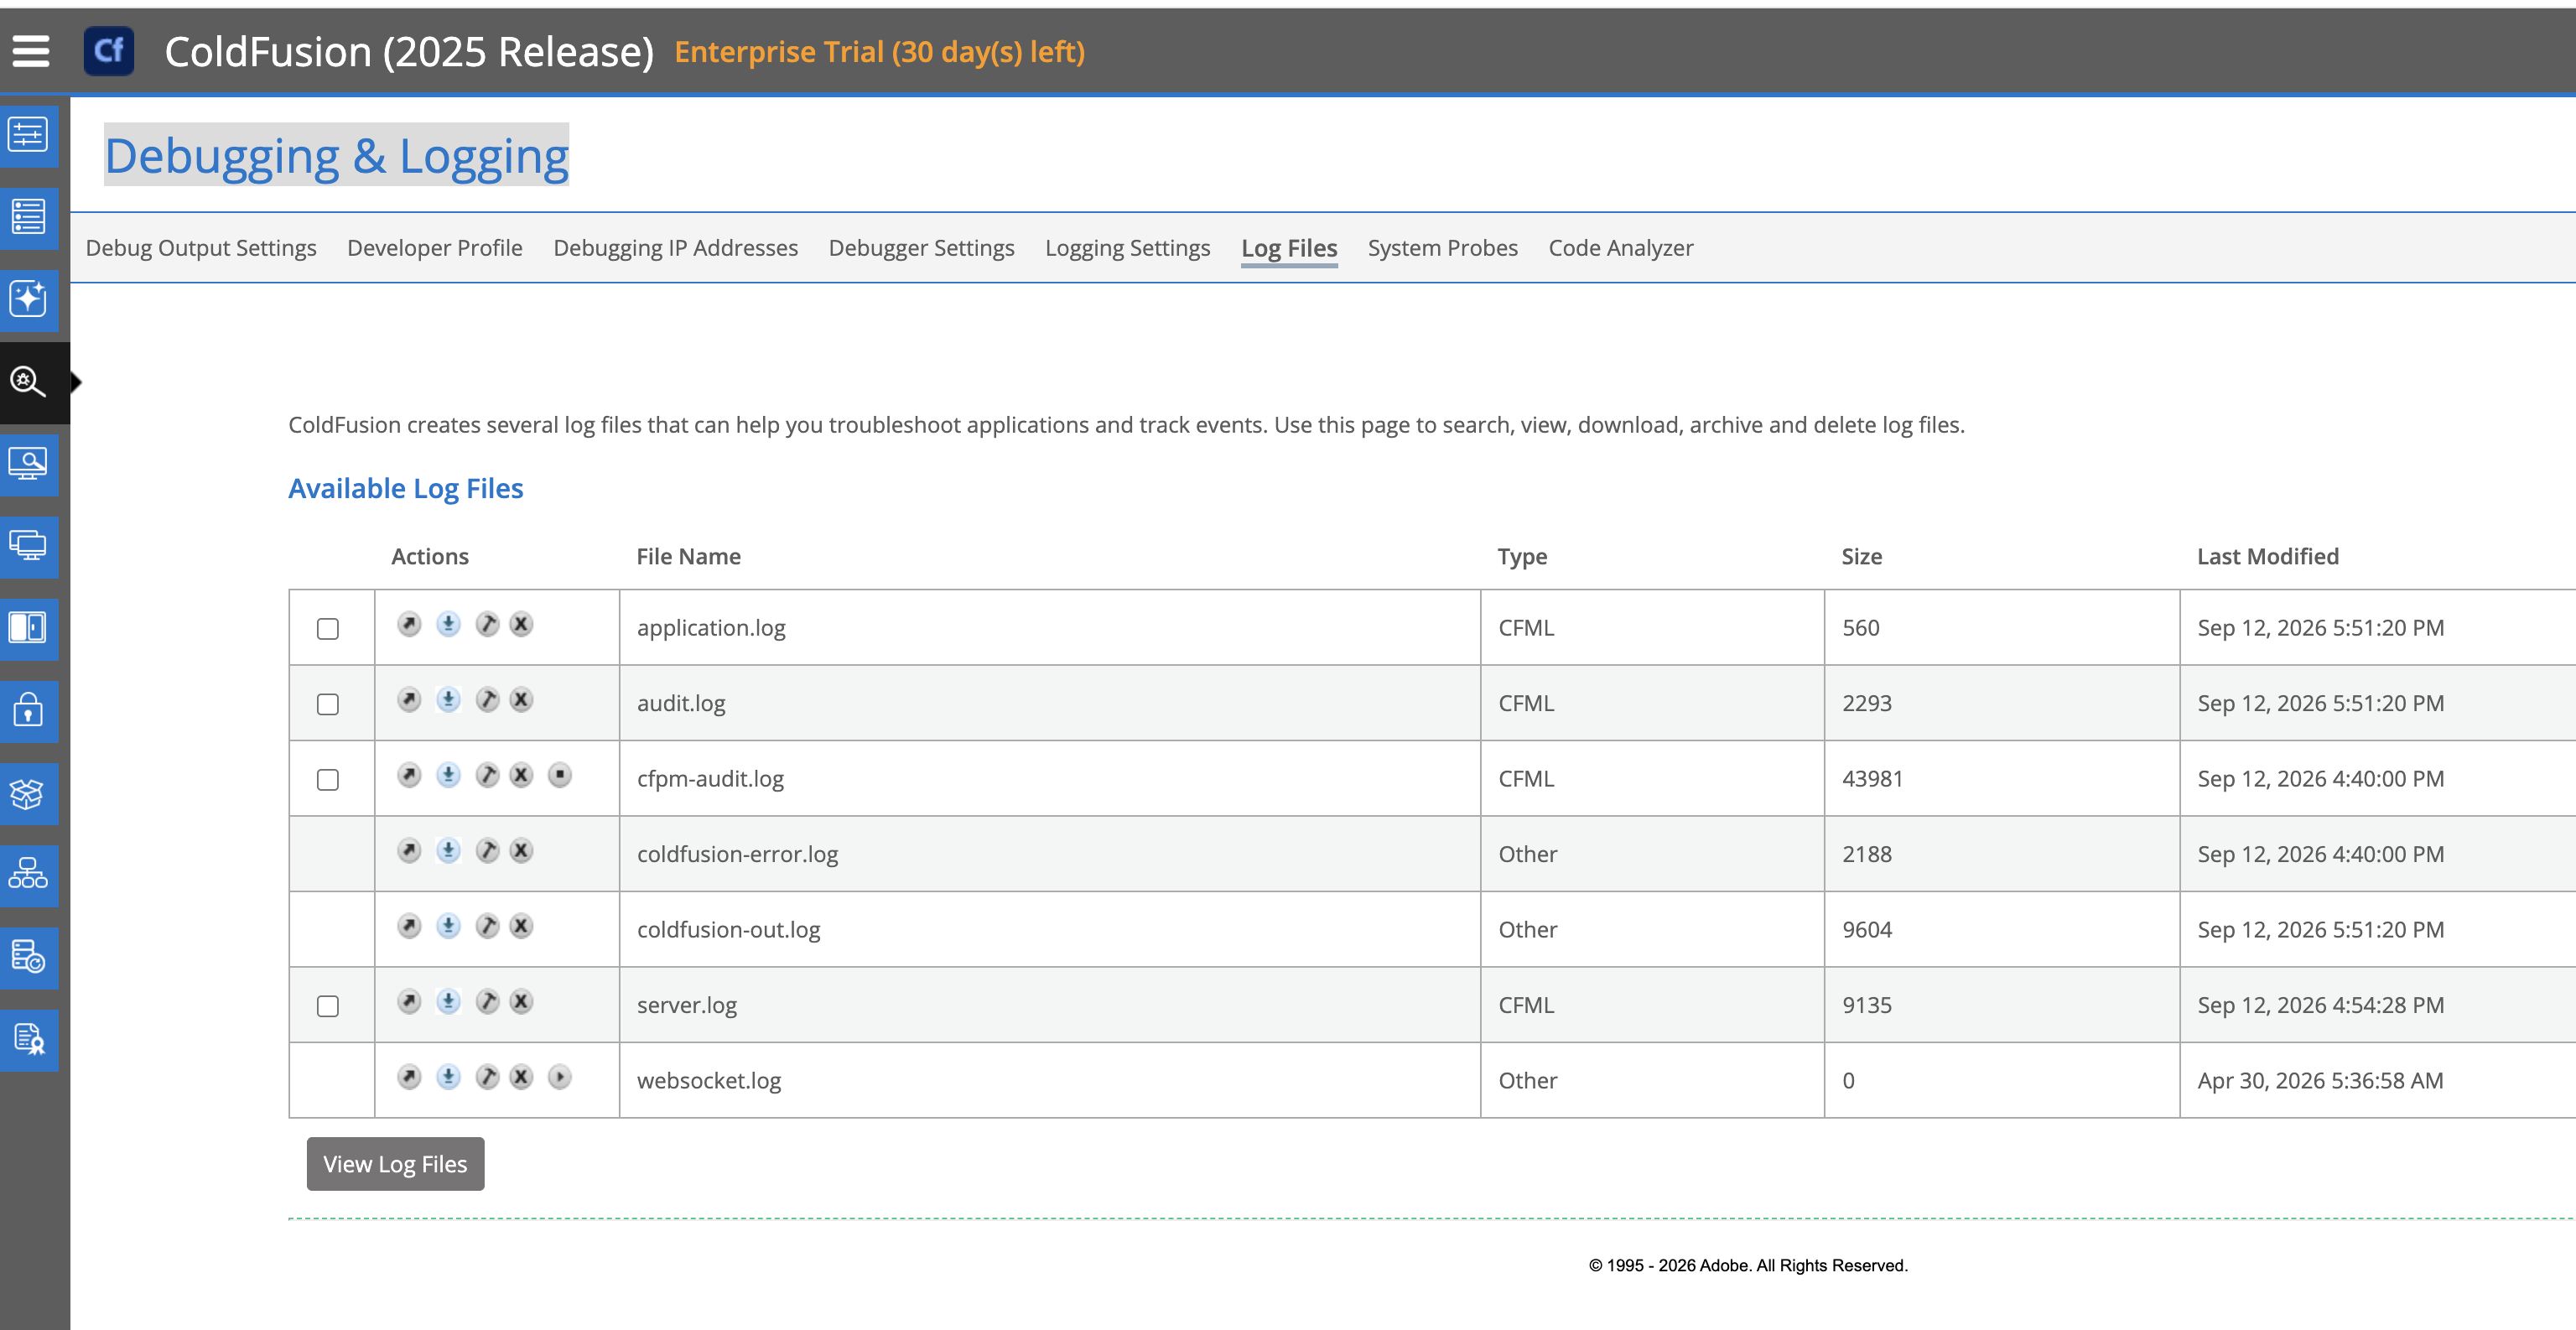
CF Admin → Debugging & Logging → Log Files — open application.log to see the entry written by onApplicationStart().
Note on Performance Monitoring Toolset: The PMT button in CF Admin requires a separate PMT Server + Elastic Stack (Elasticsearch + Kibana) that is not running in this lab. See the hint box below for the full explanation. Full PMT setup is covered in a separate ColdFusion Monitoring & Observability course.
onRequestStart as a gatekeeper
A common pattern is to enforce authentication in onRequestStart. It runs before every page — making it the ideal place to check whether the user is logged in:
public boolean function onRequestStart(string targetPage) {
  var publicPages = ["/login.cfm", "/register.cfm"];
  if (!session.userId && !arrayFind(publicPages, arguments.targetPage)) {
    location(url="/login.cfm", addtoken=false);
    return false;  // abort the request — page will not execute
  }
  return true;
}
Returning false from onRequestStart stops the request entirely — the target page never runs. This is how CF apps enforce login gates without touching every individual page.
Activity 4 — Add the gatekeeper to Application.cfc
You will update Application.cfc with the gatekeeper onRequestStart and create a simple login.cfm stub so the redirect has somewhere to land.
Step 1 — Update Application.cfc
The onRequestStart method already exists in your file — replace it with the gatekeeper version. Terminal tab:
sudo tee /opt/coldfusion2025/cfusion/wwwroot/Application.cfc << 'EOF'
component {

  this.name              = "CFTraining";
  this.sessionManagement = true;
  this.sessionTimeout    = createTimeSpan(0, 0, 30, 0);  // 30 minutes

  // WebSocket channels — required by the WebSockets lesson (module 3)
  this.wschannels = [
    { name="chat", cfclistener="WSHandler" }
  ];

  public boolean function onApplicationStart() {
    application.startTime = now();
    writeLog(text="Application started at #now()#", file="application");
    return true;
  }

  public boolean function onSessionStart() {
    session.userId = 0;
    return true;
  }

  public boolean function onRequestStart(string targetPage) {
    var publicPages = ["/login.cfm", "/register.cfm"];
    if (!session.userId && !arrayFind(publicPages, arguments.targetPage)) {
      location(url="/login.cfm", addtoken=false);
      return false;  // abort the request — page will not execute
    }
    return true;
  }

  public void function onError(any exception, string eventName) {
    writeOutput("An error occurred: #exception.message#");
  }

}
EOF
✏️ Using the IDE tab instead? Edit the file here
In the IDE tab, click File → Open Folder…, type /opt/coldfusion2025/cfusion/wwwroot and press Enter. Click Application.cfc, select all (Ctrl+A), replace with the content below, and save with Ctrl+S.
  component {

  this.name              = "CFTraining";
  this.sessionManagement = true;
  this.sessionTimeout    = createTimeSpan(0, 0, 30, 0);  // 30 minutes

  // WebSocket channels — required by the WebSockets lesson (module 3)
  this.wschannels = [
    { name="chat", cfclistener="WSHandler" }
  ];

  public boolean function onApplicationStart() {
    application.startTime = now();
    writeLog(text="Application started at #now()#", file="application");
    return true;
  }

  public boolean function onSessionStart() {
    session.userId = 0;
    return true;
  }

  public boolean function onRequestStart(string targetPage) {
    var publicPages = ["/login.cfm", "/register.cfm"];
    if (!session.userId && !arrayFind(publicPages, arguments.targetPage)) {
      location(url="/login.cfm", addtoken=false);
      return false;  // abort the request — page will not execute
    }
    return true;
  }

  public void function onError(any exception, string eventName) {
    writeOutput("An error occurred: #exception.message#");
  }
}
Step 2 — Create login.cfm
The gatekeeper redirects unauthenticated users to /login.cfm. Create a stub so CF has a page to land on:
sudo tee /opt/coldfusion2025/cfusion/wwwroot/student/login.cfm << 'EOF'
<cfoutput>
<h2>Login page</h2>
<p>You have been redirected here because you are not logged in.</p>
<p>session.userId = #session.userId#</p>
</cfoutput>
EOF
✏️ Using the IDE tab instead? Create the file here
In the IDE tab, right-click in the Explorer panel → New File → name it login.cfm, paste the content below, and save with Ctrl+S.
  <cfoutput>
  <h2>Login page</h2>
  <p>You have been redirected here because you are not logged in.</p>
  <p>session.userId = #session.userId#</p>
  </cfoutput>
Step 3 — Test the gatekeeper
First confirm hello.cfm (a protected page) now redirects to login:
curl -s -o /dev/null -w "%{http_code}\n" http://localhost:8500/student/hello.cfm
# Expected: 302  (redirect to /login.cfm)
Then follow the redirect and confirm you land on the login page:
curl -sL http://localhost:8500/student/hello.cfm
# Expected: output contains "Login page" or "not logged in"
And confirm the login page itself is accessible (a public page — no redirect):
curl -s -o /dev/null -w "%{http_code}\n" http://localhost:8500/student/login.cfm
# Expected: 200
session.userId is set to 0 by onSessionStart(). The gatekeeper checks !session.userId — since 0 is falsy in CFML, any page that is not in publicPages will redirect to /login.cfm. This simulates a real app where a logged-in user would have a non-zero userId.
How do I restart the application to re-trigger onApplicationStart?
onApplicationStart only fires once — on the very first request after the engine starts or after the application is explicitly restarted. To force it to re-run during development:
Option 1 — From CF Admin:
- Open CF Admin (right-click the ColdFusion 2025 tab → Open in New Tab)
- Log in with password
admin - Go to Server Settings → Memory Variables
- Click Clear Application Scope next to your app name
Option 2 — From the Terminal:
sudo systemctl restart coldfusion
# Wait ~15 seconds, then:
curl -s -o /dev/null -w "%{http_code}\n" http://localhost:8500/index.cfm
What is the Performance Monitoring Toolset really, and why can't I use it fully here?
The CF Admin button labelled Performance Monitoring Toolset is more complex than it looks. It is not a simple built-in dashboard — it is a connection point to a separate, external infrastructure stack.
The full PMT architecture:
ColdFusion 2025
   │  pmtagent (CF package) — ships metrics out via REST
   ▼
PMT Server  ← separate Adobe download, runs as its own Java process
   │  stores and indexes data in ▼
   ▼
Elastic Stack
   ├── Elasticsearch  ← stores all metrics and log data
   ├── Logstash       ← ingests and transforms the data stream
   └── Kibana         ← the actual dashboards you interact with
What cfpm.sh install pmtagent does: it installs only the CF-side agent — the part that collects metrics and sends them out. Without a running PMT Server + Elasticsearch + Kibana on the receiving end, clicking the button in CF Admin will either show a connection error or an empty screen.
Why this lab cannot run full PMT: Elasticsearch alone requires 4–8 GB of heap. This lab VM has 2 GB total RAM — running Elasticsearch here would leave no memory for ColdFusion itself.
What you can explore in this lab: navigate to /status.cfm to see live engine and application scope data, or use CF Admin → Debugging & Logging → Log Files to read what onApplicationStart logged. These give you a real window into lifecycle behaviour without the Elastic Stack.
Full PMT setup — PMT Server installation, Elasticsearch + Logstash + Kibana configuration, CF Admin connection (hostname, port, shared secret), and Kibana dashboard import — is a dedicated operations topic covered in a separate ColdFusion Monitoring & Observability course, not this Foundations course or the Advanced Course.
💡 Need to edit Application.cfc? The IDE is the easiest option
The simplest way is to open the IDE tab — click File → Open Folder…, type /opt/coldfusion2025/cfusion/wwwroot and press Enter. Application.cfc will appear in the Explorer panel; click it, make your changes, and save with Ctrl+S.
If you prefer to stay in the Terminal, you can also use vi — but be aware it has a steep learning curve if you haven't used it before. It is completely optional:
vi /opt/coldfusion2025/cfusion/wwwroot/Application.cfc
| Key | What it does |
|---|---|
i | Enter insert mode |
Esc | Back to normal mode |
:wq + Enter | Save and quit |
:q! + Enter | Quit without saving |
If vi feels unfamiliar, stick with the IDE tab — it is always the safer choice.
Going further — ColdFusion as a backend for React, Vue, or Angular
Once you are comfortable with Application.cfc you may wonder how it fits into a modern frontend stack. The short answer: React owns the UI, ColdFusion owns the data and business logic, and they meet at a JSON API boundary.
Browser (React)                    Server (ColdFusion)
───────────────────                ──────────────────────────────
Components / State                 Application.cfc (session, auth, CORS)
     │                                      │
     │  fetch("/api/tickets")  ────────────►│  TicketService.cfc → cfquery → DB
     │◄────────────────────────  JSON       │  serializeJSON(result)
     │
  renders UI
Application.cfc becomes your API gateway — handling CORS headers, JWT token validation, and authentication before any endpoint runs. React never touches the database; ColdFusion never touches the DOM.
| Concern | Owner |
|---|---|
| Routes / UI components | React |
| Business rules & validation | ColdFusion CFC |
| Database access | ColdFusion (cfquery / ORM) |
| Auth / sessions / CORS | ColdFusion Application.cfc |
This topic is outside the scope of this Foundations course. It is covered in depth — including JWT auth, CORS configuration, REST endpoint design, and ColdBox MVC — in the ColdFusion Advanced Course.
Does ColdFusion have a dedicated API gateway or load balancer?
No — Adobe does not sell a dedicated API gateway or load balancer. ColdFusion is a CFML application server, not an infrastructure product. Here is how the pieces fit together and who provides what:
| Layer | What it does | Who provides it |
|---|---|---|
| Load balancer | Distributes traffic across multiple CF instances | Nginx, HAProxy, AWS ALB, Cloudflare — not Adobe |
| API Gateway | Rate limiting, routing rules, analytics, API keys | Kong, AWS API Gateway, Azure APIM — not Adobe |
| SSL termination | HTTPS → HTTP handoff before CF sees the request | Nginx, Cloudflare, load balancer — not Adobe |
| Application.cfc | Auth, CORS, session setup, error handling | ColdFusion — this is the CF-native layer |
| CF API Manager | Lightweight API publish/throttle layer | Adobe — bundled with CF Enterprise edition only |
What is CF API Manager? Adobe ColdFusion Enterprise ships with a built-in API Manager — a basic gateway that lets you publish, version, throttle, and secure CF REST endpoints from a UI. It is not a full Kong or AWS API Gateway replacement, but it covers the most common needs for teams that want governance over their CF APIs without adding external infrastructure.
- Available only in ColdFusion Enterprise (not Standard or Developer Edition)
- Provides: endpoint registration, API keys, throttling, subscriber management, analytics
- Does not provide: load balancing, SSL termination, or cross-service routing
What about load balancing? ColdFusion itself has no load balancer. If you run multiple CF instances you put Nginx or a cloud load balancer in front. A load balancer and an API gateway are two different tools — you can have one without the other:
- Load balancer only — splits traffic across CF nodes, no API key or rate-limit awareness
- API gateway only — manages API contracts and throttling, forwards to a single CF instance
- Both — typical for high-traffic production: load balancer handles scale, API gateway handles governance
The typical production stack:
Internet
   │
   ▼
Nginx  ←── SSL termination + static files + load balance across CF nodes
   │
   ▼
ColdFusion cluster (2–N nodes)
   │  Application.cfc handles auth, CORS, session
   │
   ▼
Database (MySQL / PostgreSQL / MSSQL)
For larger teams, Kong or AWS API Gateway sits between Nginx and CF to add rate limiting and API key management. For most ColdFusion applications, Nginx + Application.cfc is all you need.
This topic is outside the scope of this Foundations course. Infrastructure architecture, CF clustering, and API Manager configuration are covered in the ColdFusion Advanced Course.
When all the checks above are green, this lesson is complete. Your progress is saved automatically — move straight on to the next lesson.
- Previous lesson
- Variables, Data Types & Scopes
- Next lesson
- Object-Oriented Programming with CFCs