In the last lesson you brought a second cluster under Rancher. This lesson introduces the other half of managing clusters at scale: keeping what runs on them in sync with Git. Rancher's built-in GitOps engine, Fleet, watches a Git repository and applies whatever it finds there to your clusters, then keeps them matching the repository over time.

Fleet is Rancher's built-in GitOps engine - it ships with Rancher, nothing to install.
Fleet ships with Rancher, so there is nothing to install. It already runs on the upstream cluster, and you drive it the same way you drive everything else: with kubectl from the dev-machine workstation, and through the Rancher tab in the UI.
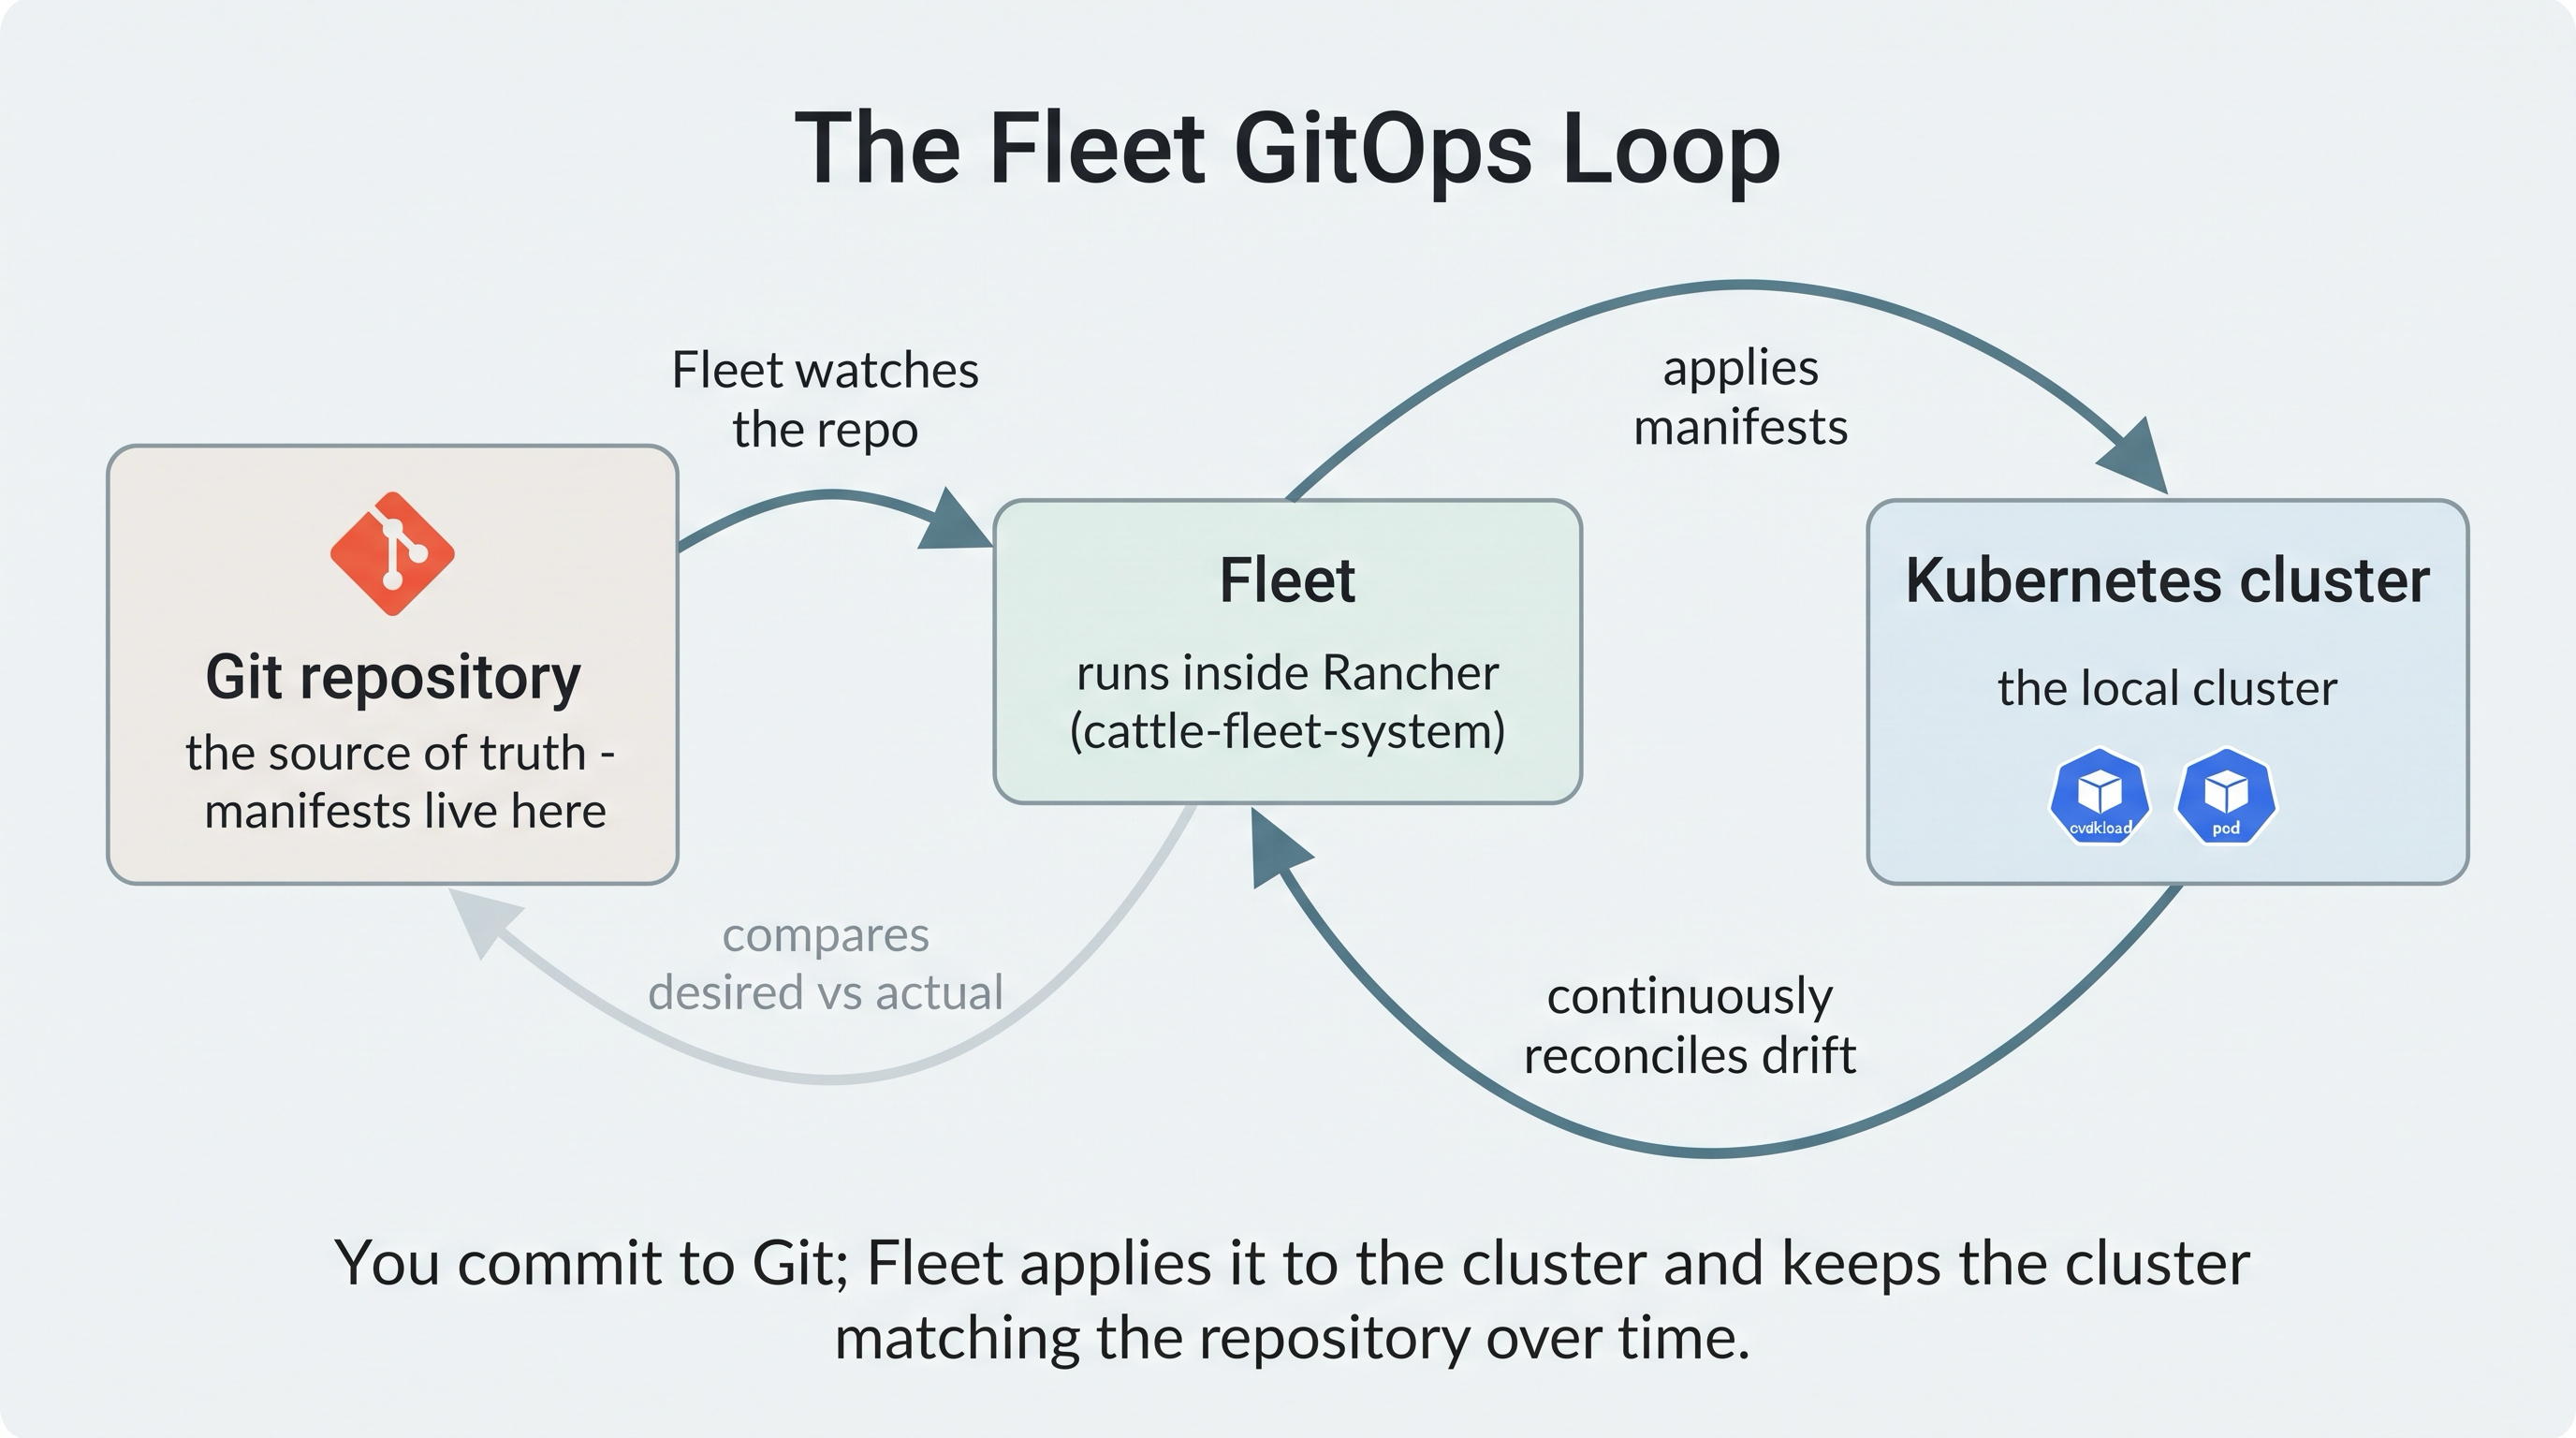
The GitOps loop: Fleet watches Git and keeps the cluster matching the repository.
What GitOps Means Here
GitOps is a simple idea with useful consequences: the Git repository is the source of truth for what should run, and an agent in the cluster makes reality match it. You do not run kubectl apply by hand; you commit to Git, and Fleet applies the change. If someone edits a resource on the cluster directly, Fleet notices the drift and reconciles it back to what Git says.
Why GitOps instead of running kubectl by hand?
Applying manifests by hand works for one cluster and one person, but it does not scale. There is no record of who changed what, no easy rollback, and no guarantee two clusters are actually configured the same way. GitOps moves the desired state into Git, so every change is a reviewed, versioned commit, rollbacks are just reverts, and the same repository can drive many clusters into an identical state. Fleet is Rancher's implementation of this pattern, and because it is built in, you get it without adding another tool.
The Core Fleet Objects
Fleet has a small set of objects, and understanding how they relate is most of the battle:
- GitRepo - points Fleet at a Git repository: the URL, a branch, and one or more paths inside it that contain manifests. You create this; it is your entry point.
- Bundle - Fleet reads each path in the GitRepo and turns it into a Bundle, a packaged unit of Kubernetes resources ready to deploy.
- BundleDeployment - for each cluster a Bundle targets, Fleet creates a BundleDeployment, the record of that bundle being applied to that specific cluster.
- Cluster and ClusterGroup - Fleet's view of the clusters it can deploy to, which you target with selectors.
The flow is always the same direction: a GitRepo produces Bundles, and each Bundle produces a BundleDeployment per targeted cluster, which is what actually applies the manifests.
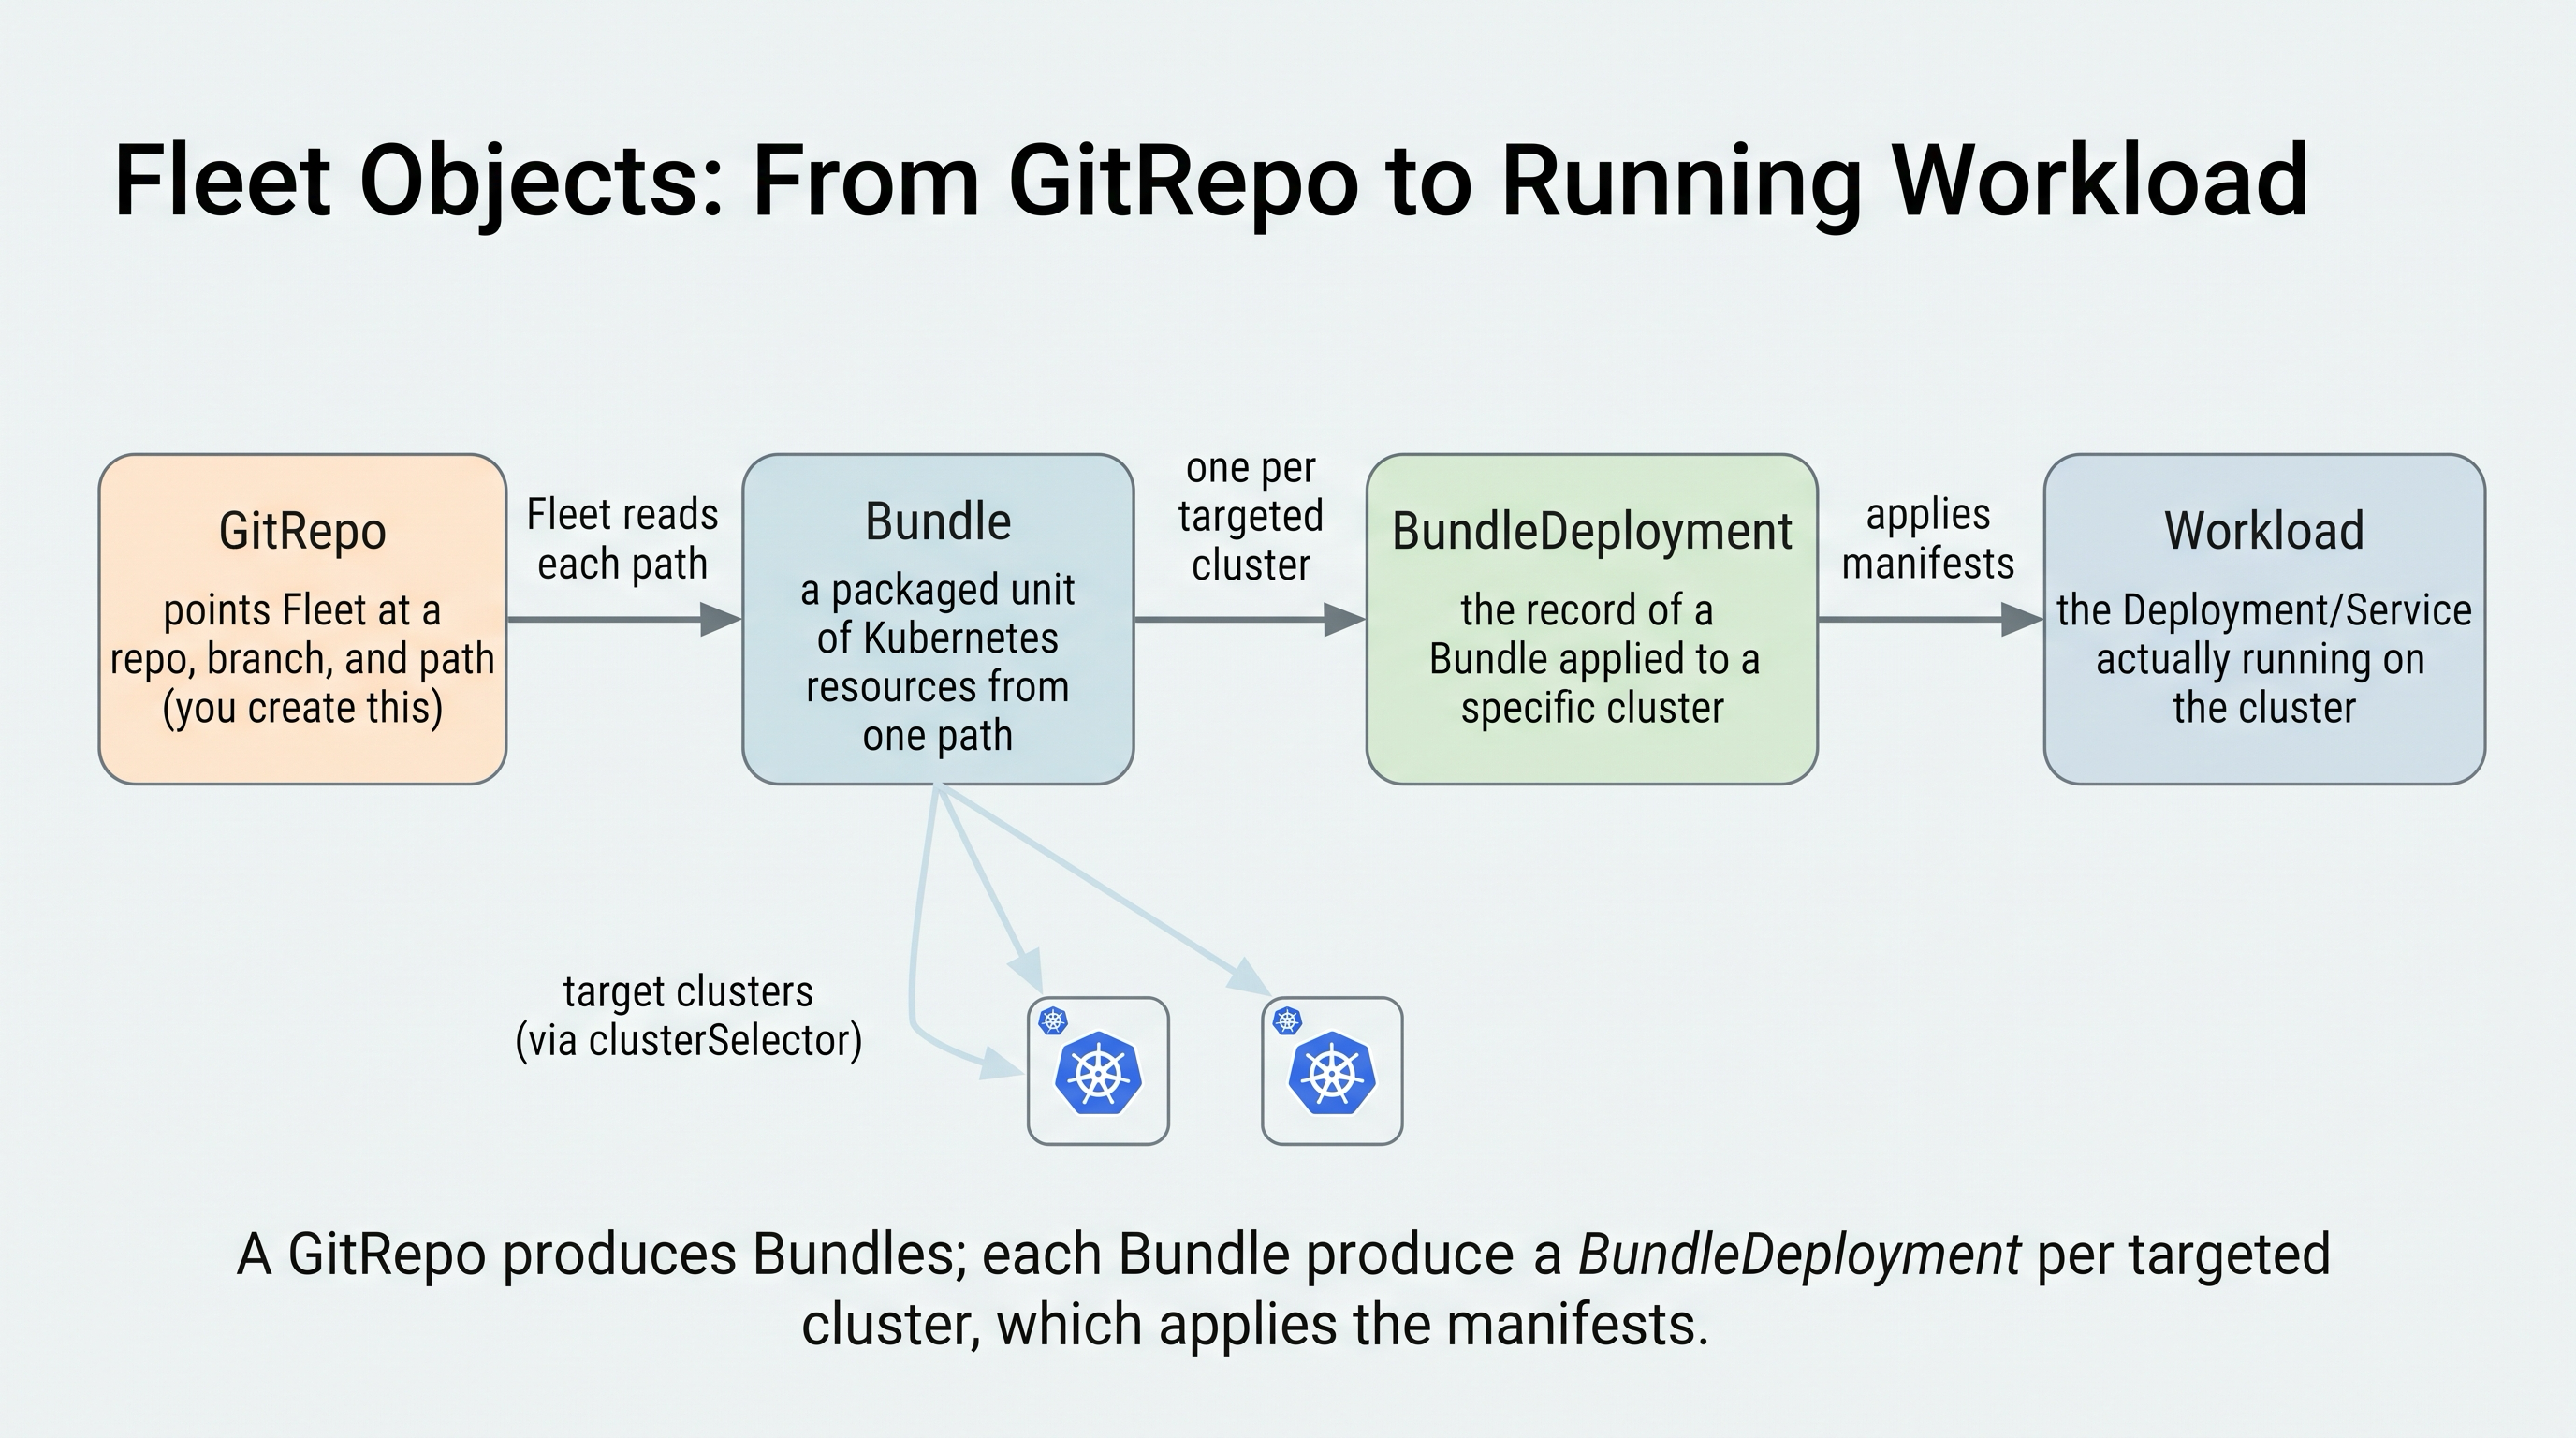
A GitRepo becomes Bundles, and each Bundle becomes a BundleDeployment per targeted cluster.
Where a GitRepo Lives Decides What It Targets
Fleet objects are namespaced, and the namespace a GitRepo lives in decides which clusters it can reach. When Rancher installs Fleet it sets up two workspaces for you:
fleet-local- contains only thelocalcluster, the one Rancher itself runs on. A GitRepo here deploys to the local cluster.fleet-default- contains the downstream clusters you have imported into Rancher. A GitRepo here can target those.
In this lesson you deploy to the local cluster, so you work in fleet-local. That keeps the focus on the GitOps mechanics, which are identical no matter which cluster is on the receiving end.
Targeting downstream clusters with fleet-default
The real payoff of Fleet is deploying the same repository to many clusters at once. That is what fleet-default is for: any cluster you imported in the previous lesson shows up there as a Fleet Cluster, and a GitRepo created in fleet-default can target one, some, or all of them using a clusterSelector (label match) or a ClusterGroup. An empty selector matches every cluster in the namespace, so one commit can roll out to your whole fleet.
The mechanics you learn here in fleet-local transfer directly: the only thing that changes for multi-cluster delivery is the namespace you create the GitRepo in and the targets you set. We keep this lesson on the local cluster so it works whether or not a downstream cluster is currently imported.
Step 1: Confirm Fleet Is Running
From the dev-machine terminal, check that Fleet's controller is up and the local cluster is registered with it:
kubectl -n cattle-fleet-system get pods
kubectl -n fleet-local get clusters.fleet.cattle.io
You should see the Fleet controller running, and a single Fleet Cluster object representing the local cluster.
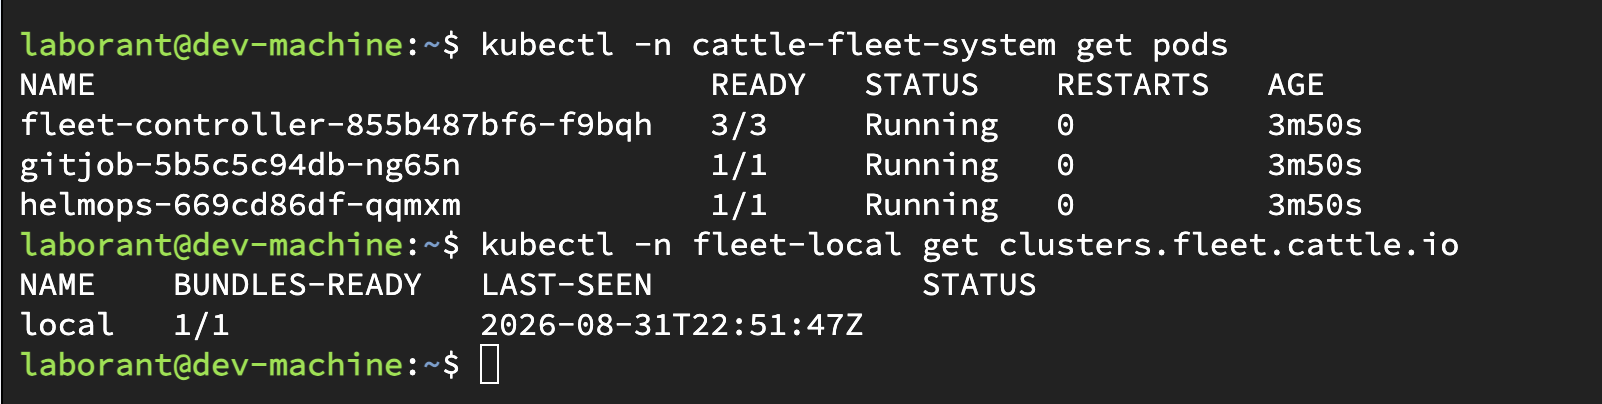
Fleet's controller is running and the local cluster is registered with it.
Step 2: Create a GitRepo
Create a GitRepo in the fleet-local namespace that points at a public repository and a path containing deployable manifests. Rancher's own fleet-examples repository is the canonical source for learning.
A minimal GitRepo looks like this. Apply it directly from the dev-machine terminal - the here-document pipes the manifest straight into kubectl, so there is no file to create:
kubectl apply -f - <<'EOF'
apiVersion: fleet.cattle.io/v1alpha1
kind: GitRepo
metadata:
  name: sample
  namespace: fleet-local
spec:
  repo: https://github.com/rancher/fleet-examples
  branch: master
  paths:
    - simple
EOF
If you prefer working with a file, save the manifest between the EOF markers to sample-gitrepo.yaml and run kubectl apply -f sample-gitrepo.yaml instead - the result is identical. You can also create the same GitRepo from the Rancher UI under Continuous Delivery, which is just a form in front of this object.
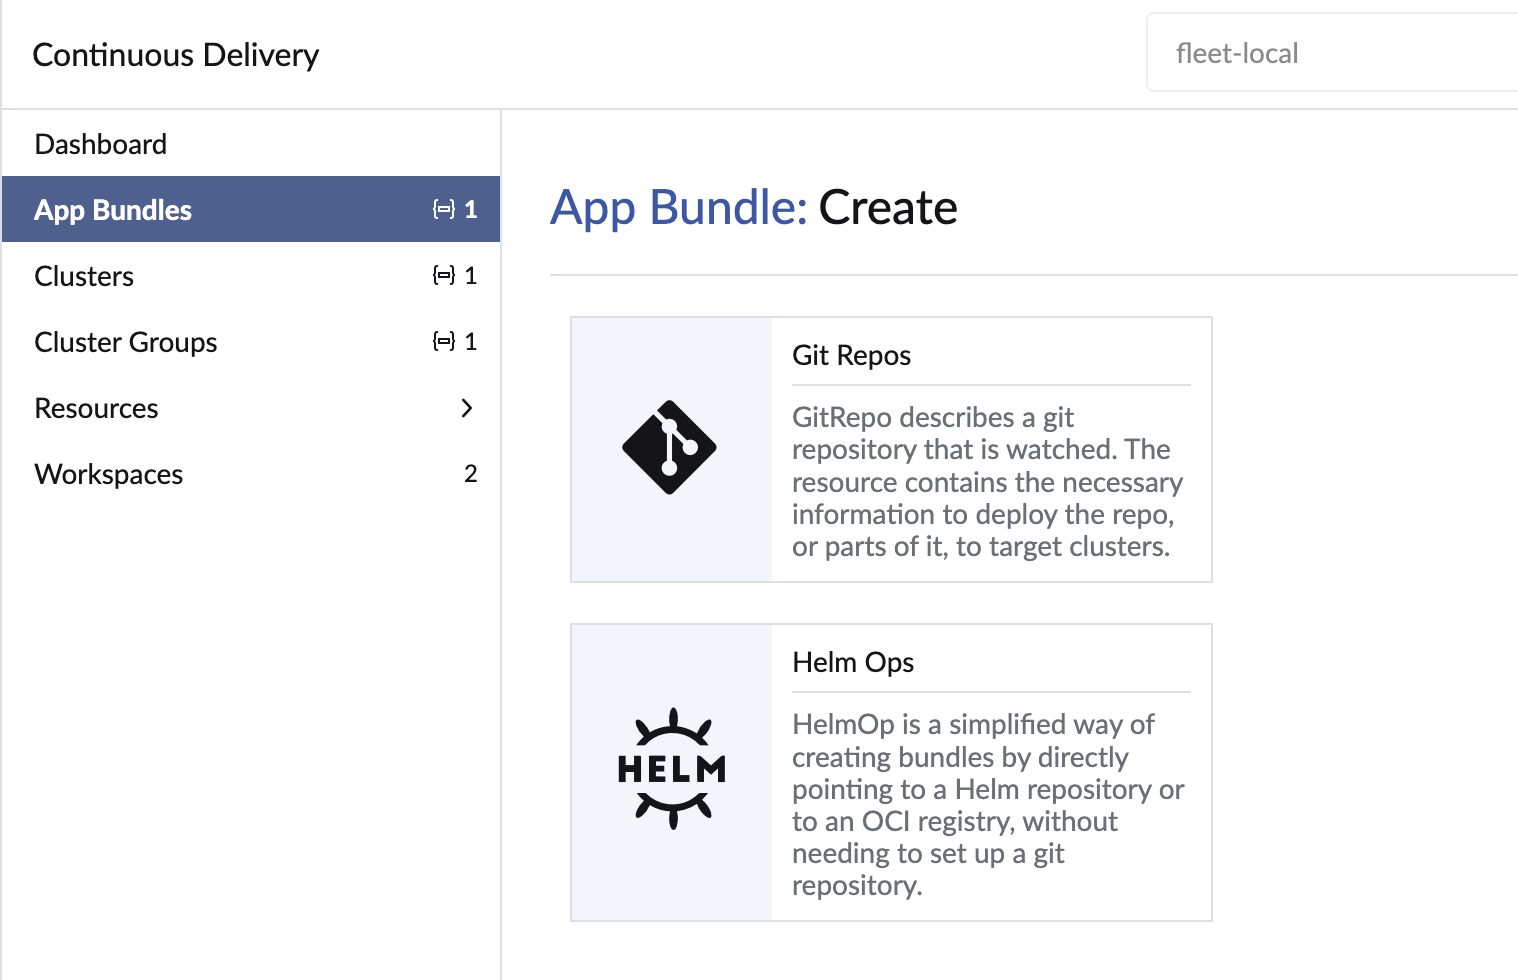
Creating the GitRepo from the Rancher UI - each field maps to a line in the manifest above.
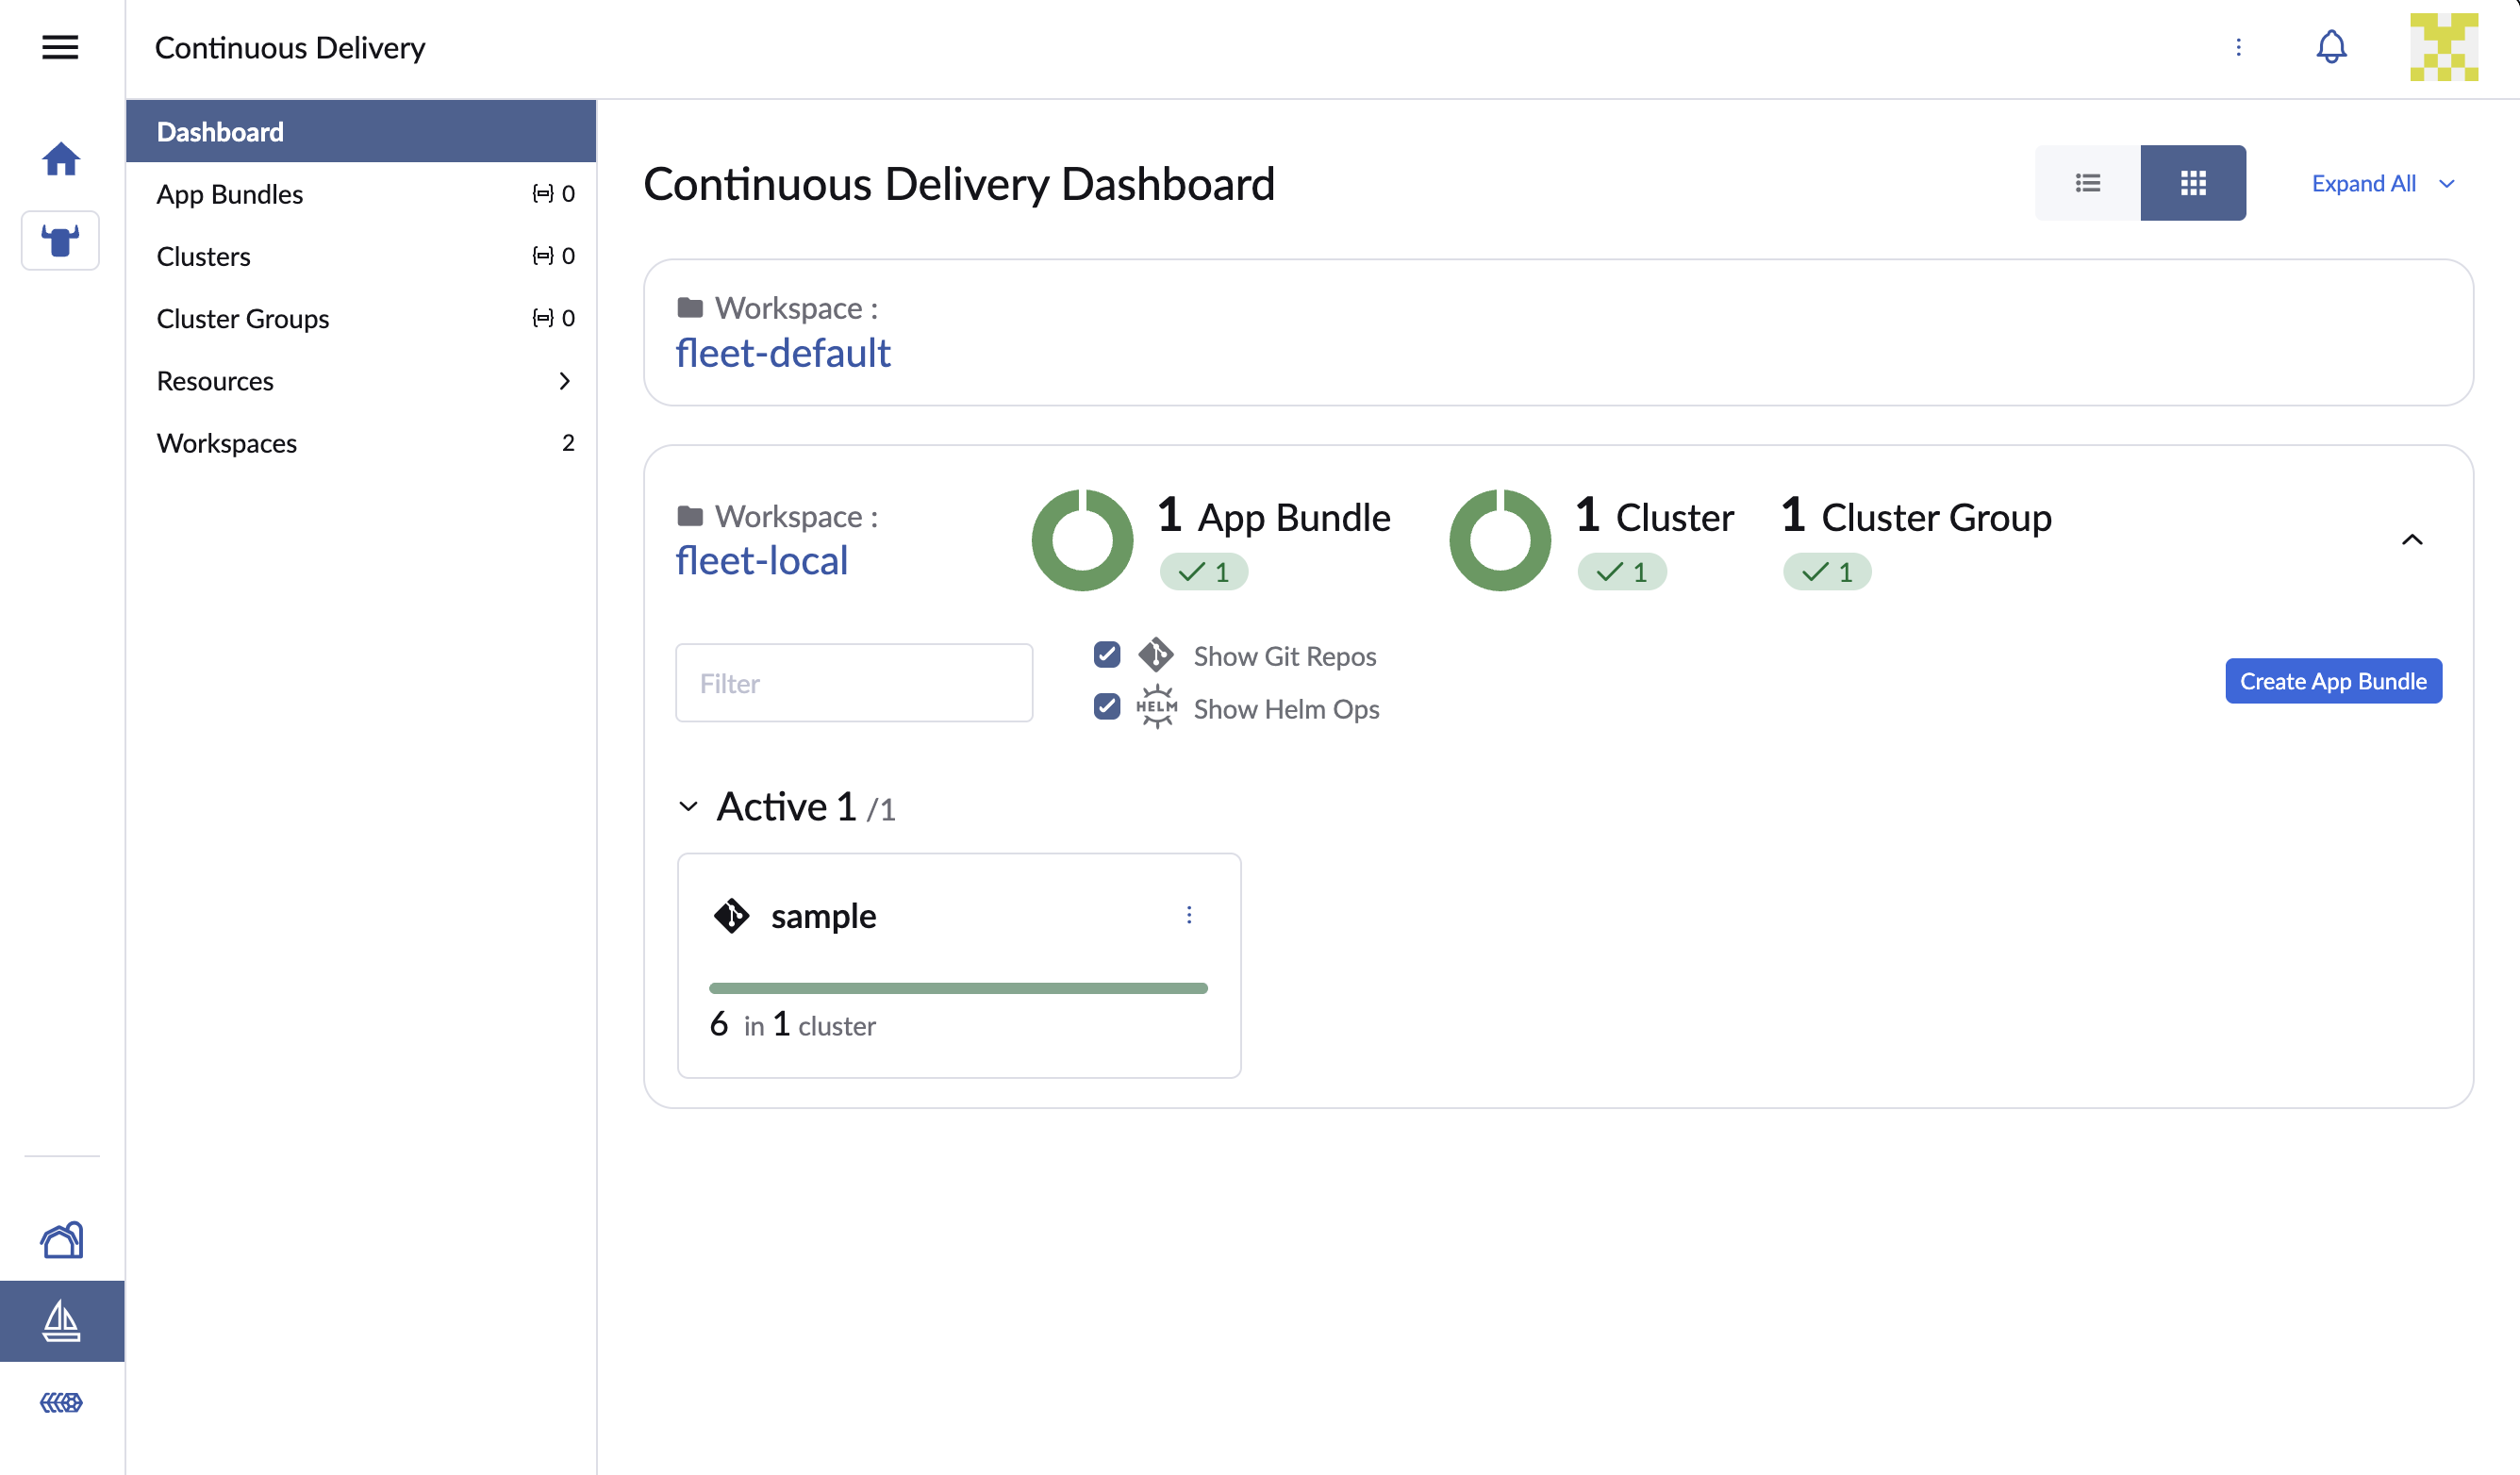
The Continuous Delivery dashboard after the GitRepo is created - it lists the same object you applied with kubectl.
What is the "simple" path in fleet-examples?
The rancher/fleet-examples repository contains several ready-to-deploy examples, each in its own path. The simple path holds a plain set of Kubernetes manifests (a Deployment and a Service) with no customization - exactly what you want when the goal is to see the GitOps loop work rather than to learn a specific application. Fleet reads that path, packages it into a Bundle, and applies it. Other paths in the same repository show more advanced patterns like Helm charts and per-cluster customization, which build on the same GitRepo object you are using here.
Step 3: Watch Fleet Build a Bundle and Deploy
Once the GitRepo exists, Fleet clones the repository, turns the simple path into a Bundle, and applies it to the local cluster. Watch it happen:
kubectl -n fleet-local get gitrepo
kubectl -n fleet-local get bundles

The GitRepo produced a Bundle, and the Bundle has reached Ready - its resources are applied.
The GitRepo reports how many resources it found and applied; the Bundle moves from NotReady to Ready as its resources land. When the Bundle is Ready, the workload it carries is running on the cluster. The simple path deploys an app called frontend into the default namespace, so confirm it there:
kubectl -n default get deployments
You will see a frontend deployment with its replicas ready - the application Fleet pulled from Git and applied, with no manual kubectl apply of the app itself.
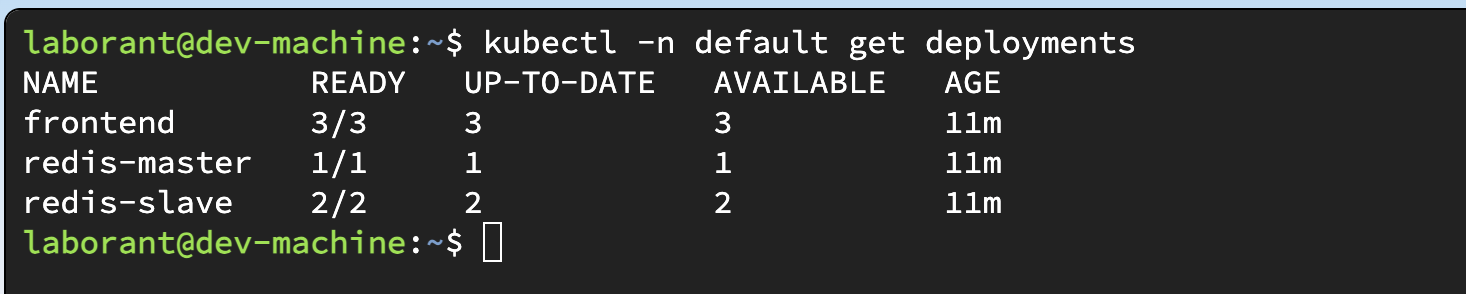
The frontend app is running in default - deployed by Fleet from Git, no manual apply.
You're Done
You pointed Fleet at a Git repository and watched it package that repository into a Bundle and apply it to the cluster, with no manual kubectl apply of the application itself. That is the GitOps loop, and it is the same whether you are deploying to one cluster or, using fleet-default and targets, to a whole fleet at once.
The challenge below asks you to run this loop yourself and confirm the workload lands. Solving it records your progress.
- Previous lesson
- Multi-Cluster Management
- Next lesson
- CI/CD with Rancher Fleet and a Git Server