Deploying Workloads with Rancher
Now that you can navigate Rancher, it is time to put real workloads on the cluster. In this lesson you will deploy an application through the Rancher UI, confirm it from the command line, expose it with a Service, and scale it - seeing throughout how Rancher's visual actions map to plain Kubernetes objects.
Rancher is already installed on this playground. Open the UI with the Rancher tab, and use the dev-machine terminal when you need kubectl (it is already pointed at the cluster).
Step 1: Create a Namespace
Keep this lesson's work tidy in its own namespace. You can create it in the UI (as you did in the last challenge) or from the terminal - here we use the terminal for speed. In the dev-machine terminal:
kubectl create namespace demo
Step 2: Deploy an Application Through the Rancher UI
Enter the local cluster in the Rancher UI, then in the Cluster Explorer go to Workload > Deployments and click Create.
Fill in the form:
- Namespace:
demo - Name:
web - Container Image:
nginx:1.27 - Leave the replica count at
1for now.
Click Create. Rancher builds a standard Kubernetes Deployment from the form and applies it - no YAML required.
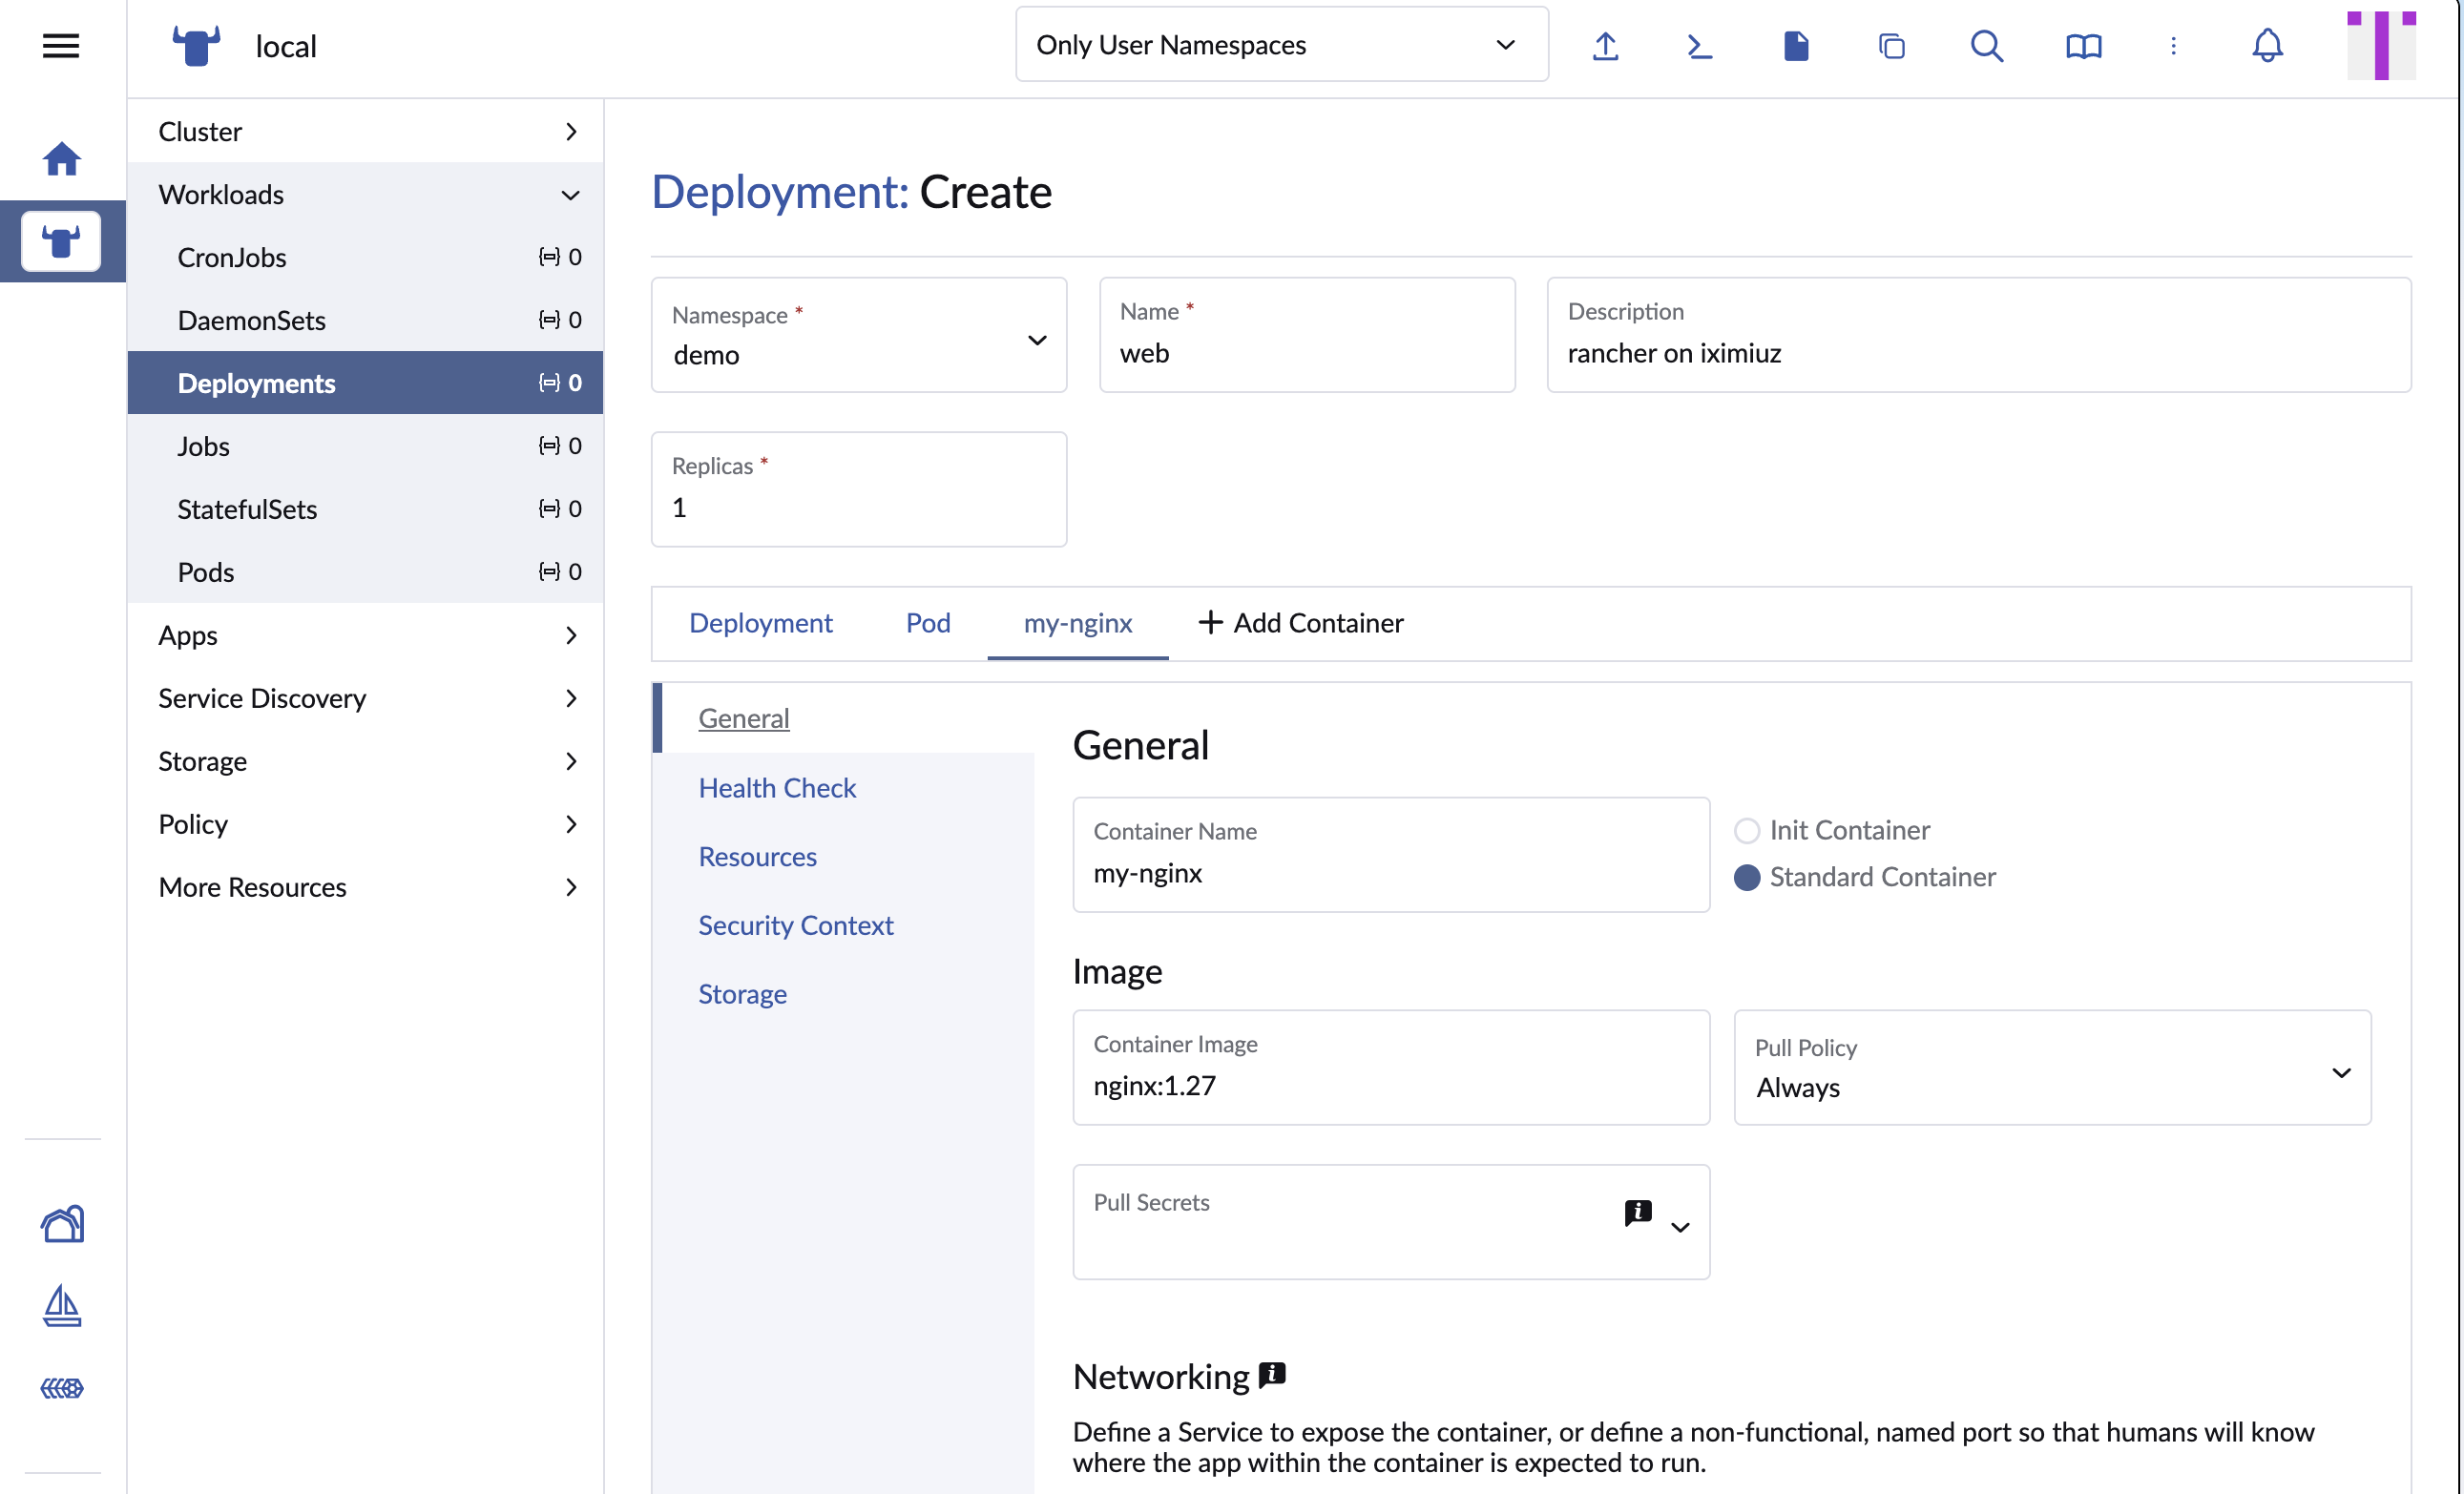
The Rancher Create Deployment form - namespace demo, name web, image nginx:1.27.
What did the form actually do?
The form is a friendly front end over a Kubernetes Deployment object. When you clicked Create, Rancher generated a manifest equivalent to kubectl create deployment web --image=nginx:1.27 and applied it to the demo namespace through the Kubernetes API. Every field in the form maps to a field in the Deployment spec - image, replicas, environment variables, ports, resource limits, and so on. Nothing Rancher-specific is created; it is a plain Deployment you could also manage with kubectl.
Confirm the deployment is running:
Step 3: See It From the Command Line
The deployment you just made in the UI is a normal Kubernetes object. Verify it from the dev-machine terminal:
kubectl -n demo get deployments
kubectl -n demo get pods
You will see the web deployment and its pod - the same object the UI is showing you, viewed from the other side. This is the theme of the whole course: the UI and the CLI are two windows onto one cluster.
Step 4: Expose the Deployment with a Service
A Deployment runs your pods, but a Service gives them a stable address other things can reach. Create one from the terminal:
kubectl -n demo expose deployment web --port=80 --name=web
Refresh Service Discovery > Services in the Rancher UI and the new web service appears there immediately - again, same object, both views.
Deployment, Service - what's the difference?
- A Deployment manages a set of identical pods and keeps the desired number running, replacing any that fail.
- A Service provides a single, stable network endpoint (a virtual IP and DNS name) that load-balances across those pods, so callers do not need to track individual pod IPs (which change as pods come and go).
You almost always pair them: the Deployment runs the app, the Service makes it reachable. Exposing the app to outside the cluster adds a third piece, an Ingress - which you will work with in the challenge for this lesson.
Step 5: Scale the Application
Real workloads rarely run a single replica. Scale web up - and you can do this from either side.
From the terminal:
kubectl -n demo scale deployment web --replicas=3
Or in the Rancher UI: open the web deployment, use the + control (or edit the deployment) to set replicas to 3. Both do the same thing - they patch the Deployment's spec.replicas, and Kubernetes schedules the extra pods across the cluster's nodes.
Watch the pods come up:
kubectl -n demo get pods -w
Press Ctrl+C to stop watching once you see three web-* pods running.

After scaling, kubectl get pods shows three running web-* pods.
You're Done
You deployed an application through the Rancher UI, confirmed it as a plain Kubernetes object from the CLI, exposed it with a Service, and scaled it out - driving the cluster from both the dashboard and the terminal.
The challenge below takes this one step further: deploy an app and make it reachable from outside the cluster with an Ingress. Solving it records your progress and proves you can run the full workload workflow on your own.
- Previous lesson
- Exploring the Rancher UI
- Next lesson
- Managing Cluster Resources