In the previous lesson you installed Rancher from the command line. This lesson takes you into the web UI - where most day-to-day cluster management actually happens. You will log in for the first time, get your bearings on the home page, tour the cluster dashboard, and see how everything in the UI maps back to plain Kubernetes objects.
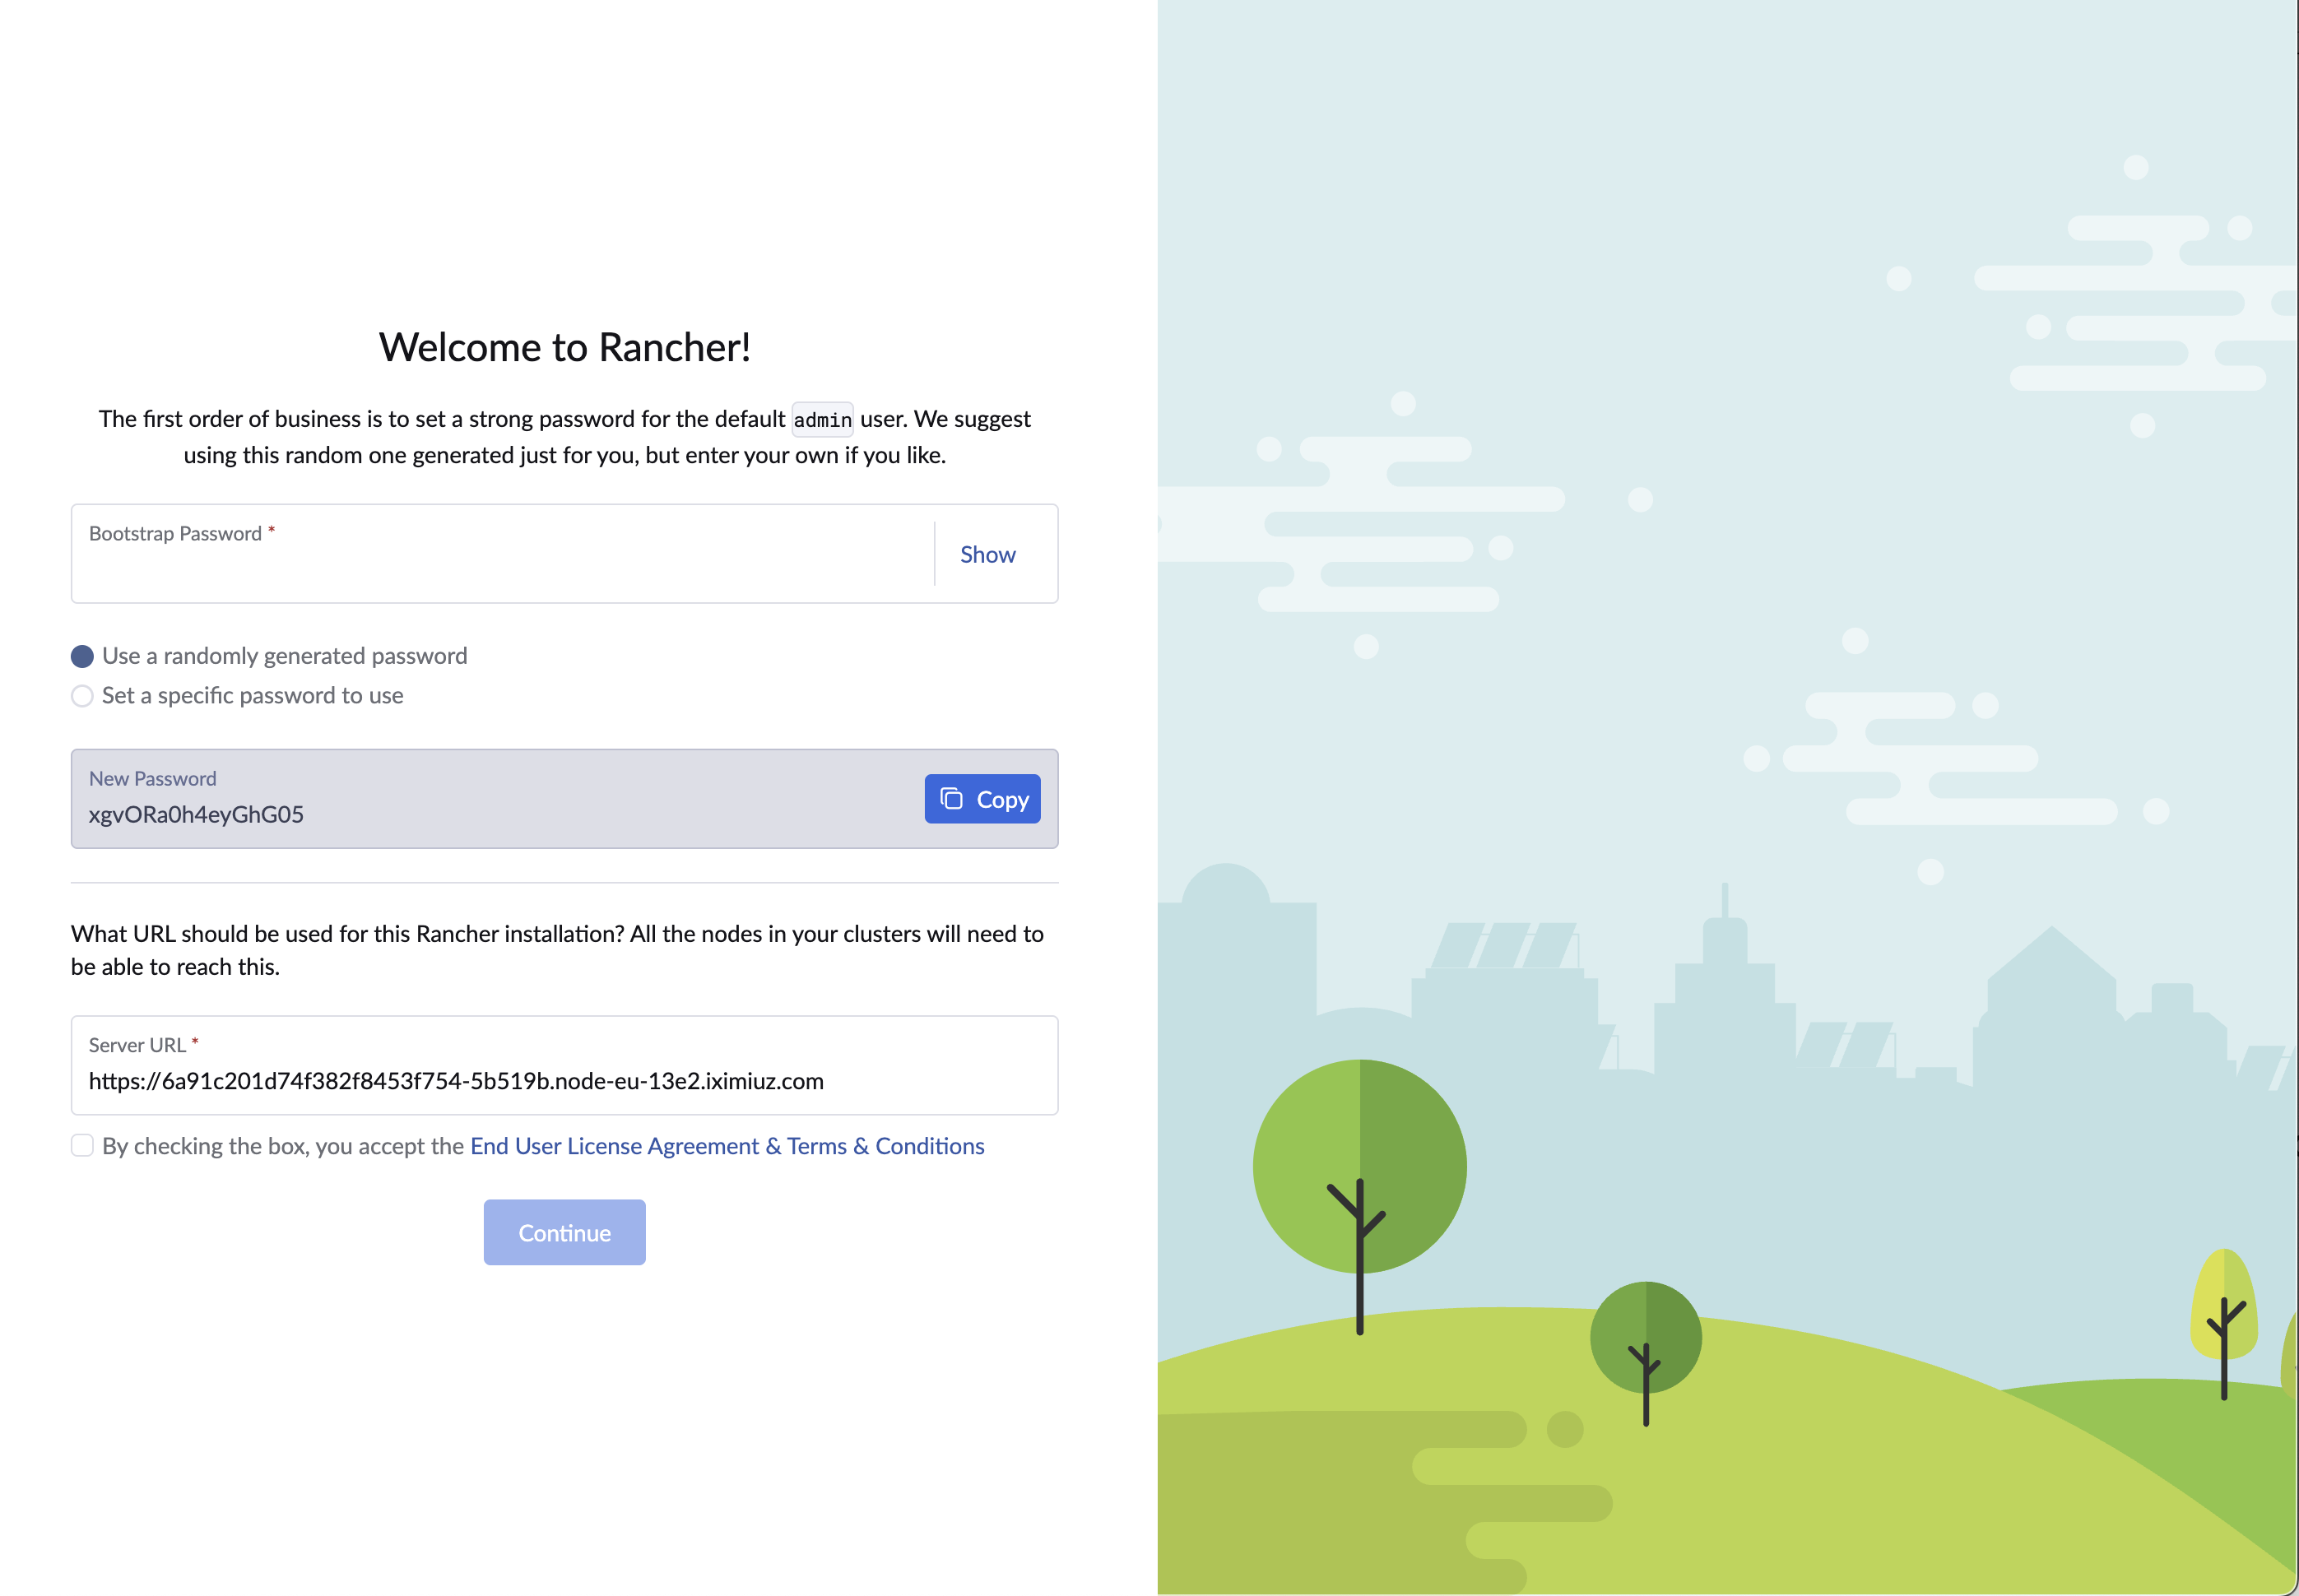
Welcome to Rancher - the dashboard you will explore in this lesson.
Rancher is already installed and running on this playground, so you can go straight to using it. When you need a terminal, use the dev-machine tab - your workstation, with kubectl already pointed at the cluster.
Step 1: Open the Rancher UI
Open the Rancher web interface by clicking the Rancher tab. It opens in a new browser tab, and you land on the login screen.
Lab-only setup - not for production. Due to the ephemeral, browser-based nature of these playground VMs, we serve the Rancher UI over plain HTTP through a NodePort so you can reach the dashboard in your browser with no extra tools or tunnels.
To be clear: Traefik is still installed and running on this cluster - it is K3s's default ingress controller and it still handles normal application traffic (you will use it in this lesson's challenge). We simply route Rancher's own dashboard around it via a NodePort for convenience; Traefik itself is untouched.
In a real environment you would never expose Rancher this way. Rancher should always sit behind an ingress controller (Traefik, NGINX, or a cloud load balancer) with proper TLS from a trusted Certificate Authority, so all traffic to the UI and API is encrypted. The plain-HTTP NodePort shortcut here is purely a convenience for the lab and must not be copied into production.
Why not HTTPS with a certificate, like in the install lesson?
For this course the Rancher UI is served over plain HTTP (see the warning above), so your browser opens it directly with no certificate prompt. That is a deliberate lab convenience, not the norm.
In production, Rancher is always fronted by TLS - typically a certificate from a trusted Certificate Authority (via Let's Encrypt or your company's PKI) terminated at the ingress or load balancer - so the UI and API are encrypted end to end. The lesson focuses on using Rancher; securing its front door with proper TLS is an install-time concern covered by Rancher's production deployment guides.
Step 2: First Login
On first access, Rancher walks you through a short bootstrap:
- Bootstrap password - enter the password set during install:
admin. - Set a new admin password - Rancher offers two options: set your own password, or use a randomly generated one. For simplicity, choose Use a randomly generated password and copy it somewhere handy - you will need it to log in for the rest of the course.
- Server URL - Rancher shows the address it will use for this installation. Accept the pre-filled value and continue.
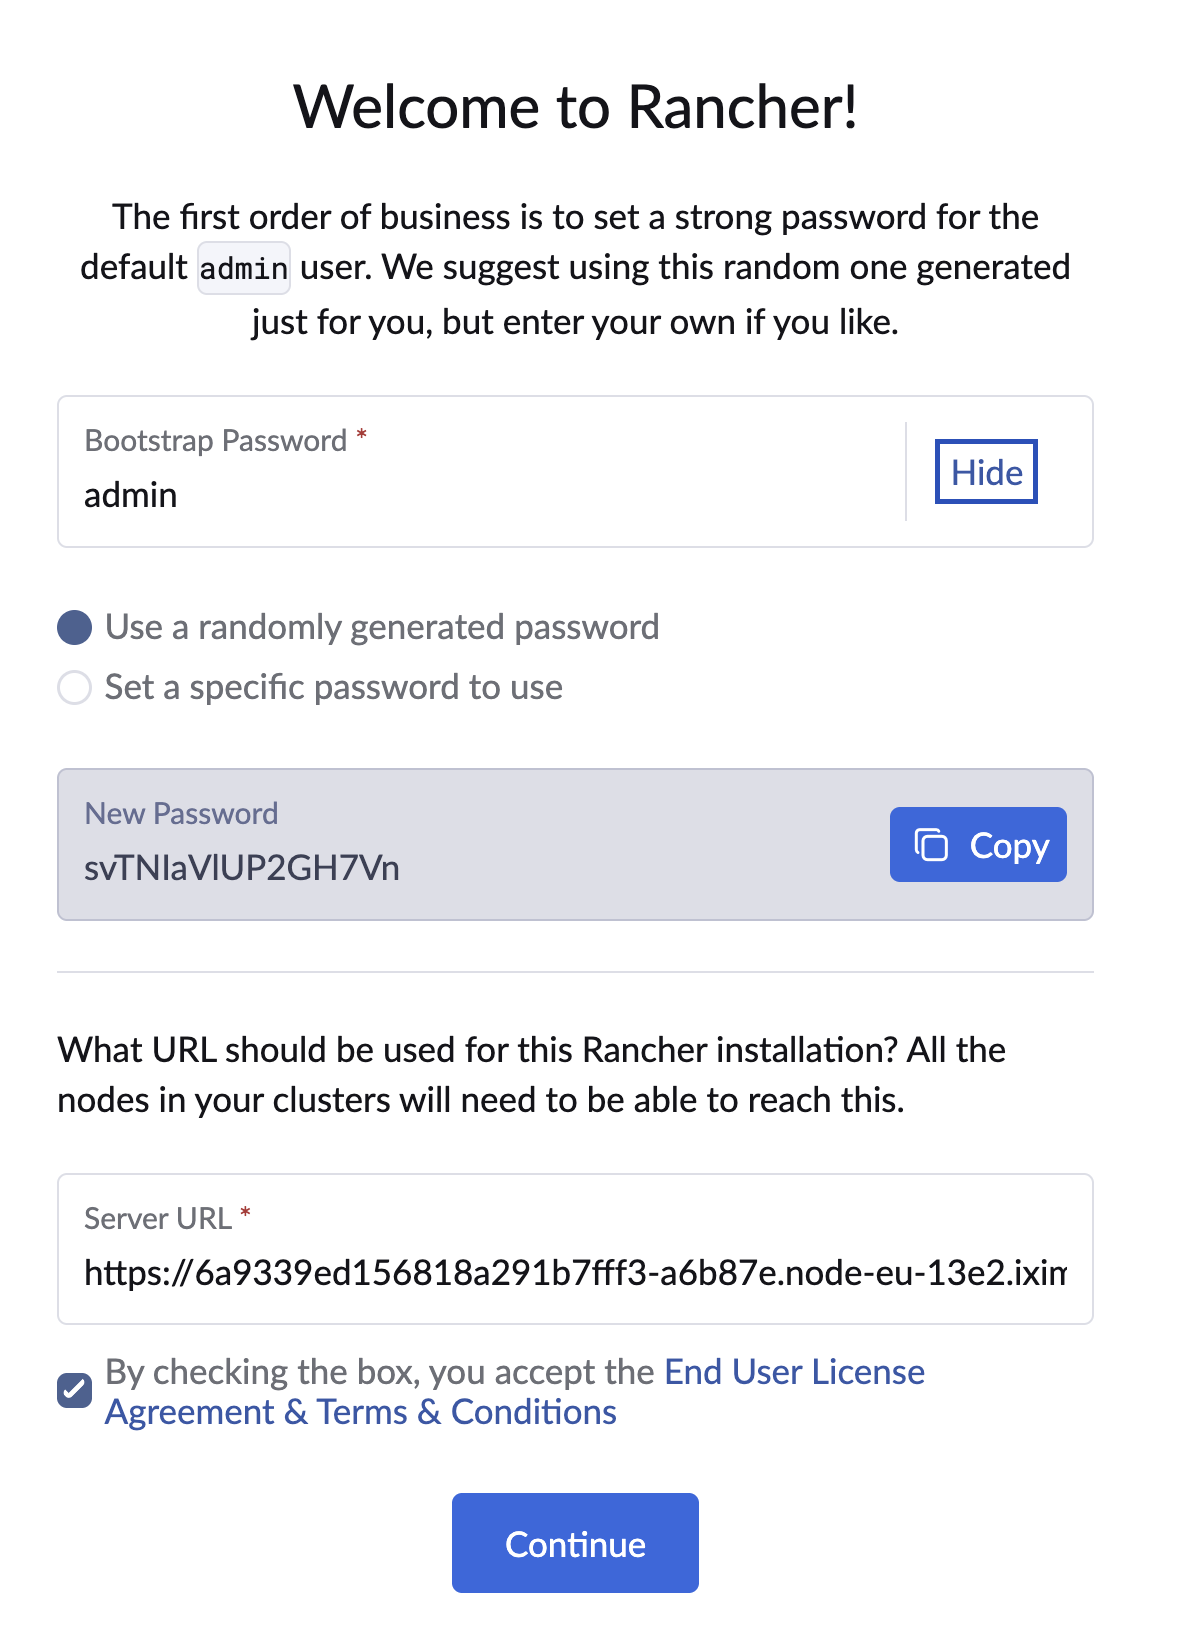
The first-login bootstrap: enter the bootstrap password, then set or generate a new admin password.
Copy that generated password before you continue - Rancher only shows it once. If you lose it, you can reset the admin password from the terminal (see below), but it is far easier to just save it now.
Lost the password? Reset it from the CLI
Rancher stores the admin credentials in the cluster, and it ships a reset-password helper inside the rancher pod. Switch to the dev-machine terminal (your workstation, where kubectl is configured) and run the following. It finds a running rancher pod and executes reset-password inside it:
kubectl -n cattle-system exec \
  $(kubectl -n cattle-system get pods -l app=rancher --no-headers | grep '1/1' | head -1 | awk '{print $1}') \
  -c rancher -- reset-password
It prints a brand-new admin password (for the user-xxxxx default administrator). Copy that value and use it to log in.
A few notes:
- This is the standard, supported way to recover the Rancher admin password on a Helm/Kubernetes install - a genuinely useful skill when you inherit a cluster whose credentials nobody wrote down.
- It requires cluster-level access (your kubeconfig), which is exactly why protecting that kubeconfig matters.
- Rancher requires the new password to be reasonably long (12+ characters), which the generator handles for you.
Why does Rancher ask for a "server URL"?
The message reads: "What URL should be used for this Rancher installation? All the nodes in your clusters will need to be able to reach this."
The server URL is the address Rancher hands to downstream cluster agents - the small agents that run on any other clusters you register, so they can phone home to the Rancher server. That is why it must be an address every managed node can reach.
In this course you only manage the local cluster (the one Rancher runs on), so nothing external depends on this value - just accept the default and move on. In a real multi-cluster deployment, though, this must be a stable, externally reachable address (a proper DNS name or load-balancer address), never something like localhost. Getting it wrong there is a classic reason downstream clusters fail to connect.
After the bootstrap, Rancher drops you on the home page.
A Map of the Rancher UI
Before we explore, it helps to have a mental model of how the UI is laid out. Rancher's interface has three structural pieces, and keeping them straight avoids a lot of confusion:
- The global navigation - the far-left rail, present everywhere. It is Rancher's top level: the cluster list (Home), each managed cluster by name (like local), and global sections for Cluster Management, Continuous Delivery (Fleet), Users & Authentication, and Global Settings. Think of it as "everything across all clusters."
- A cluster's Cluster Explorer - when you click a specific cluster (like local), the left sidebar changes to show the resources inside that one cluster: Nodes, Workloads, Service Discovery, Storage, Apps, and so on. Think of it as "everything inside this cluster."
- The content pane - the large area on the right that shows whatever you selected: a list of pods, a cluster's dashboard, a settings form, and so on.
The single most common point of confusion is mixing up (1) and (2): the global rail manages which clusters exist and platform-wide settings, while the Cluster Explorer manages what runs inside one cluster. As you follow the tour, notice when the sidebar switches between these two modes - it changes the moment you enter or leave a cluster.
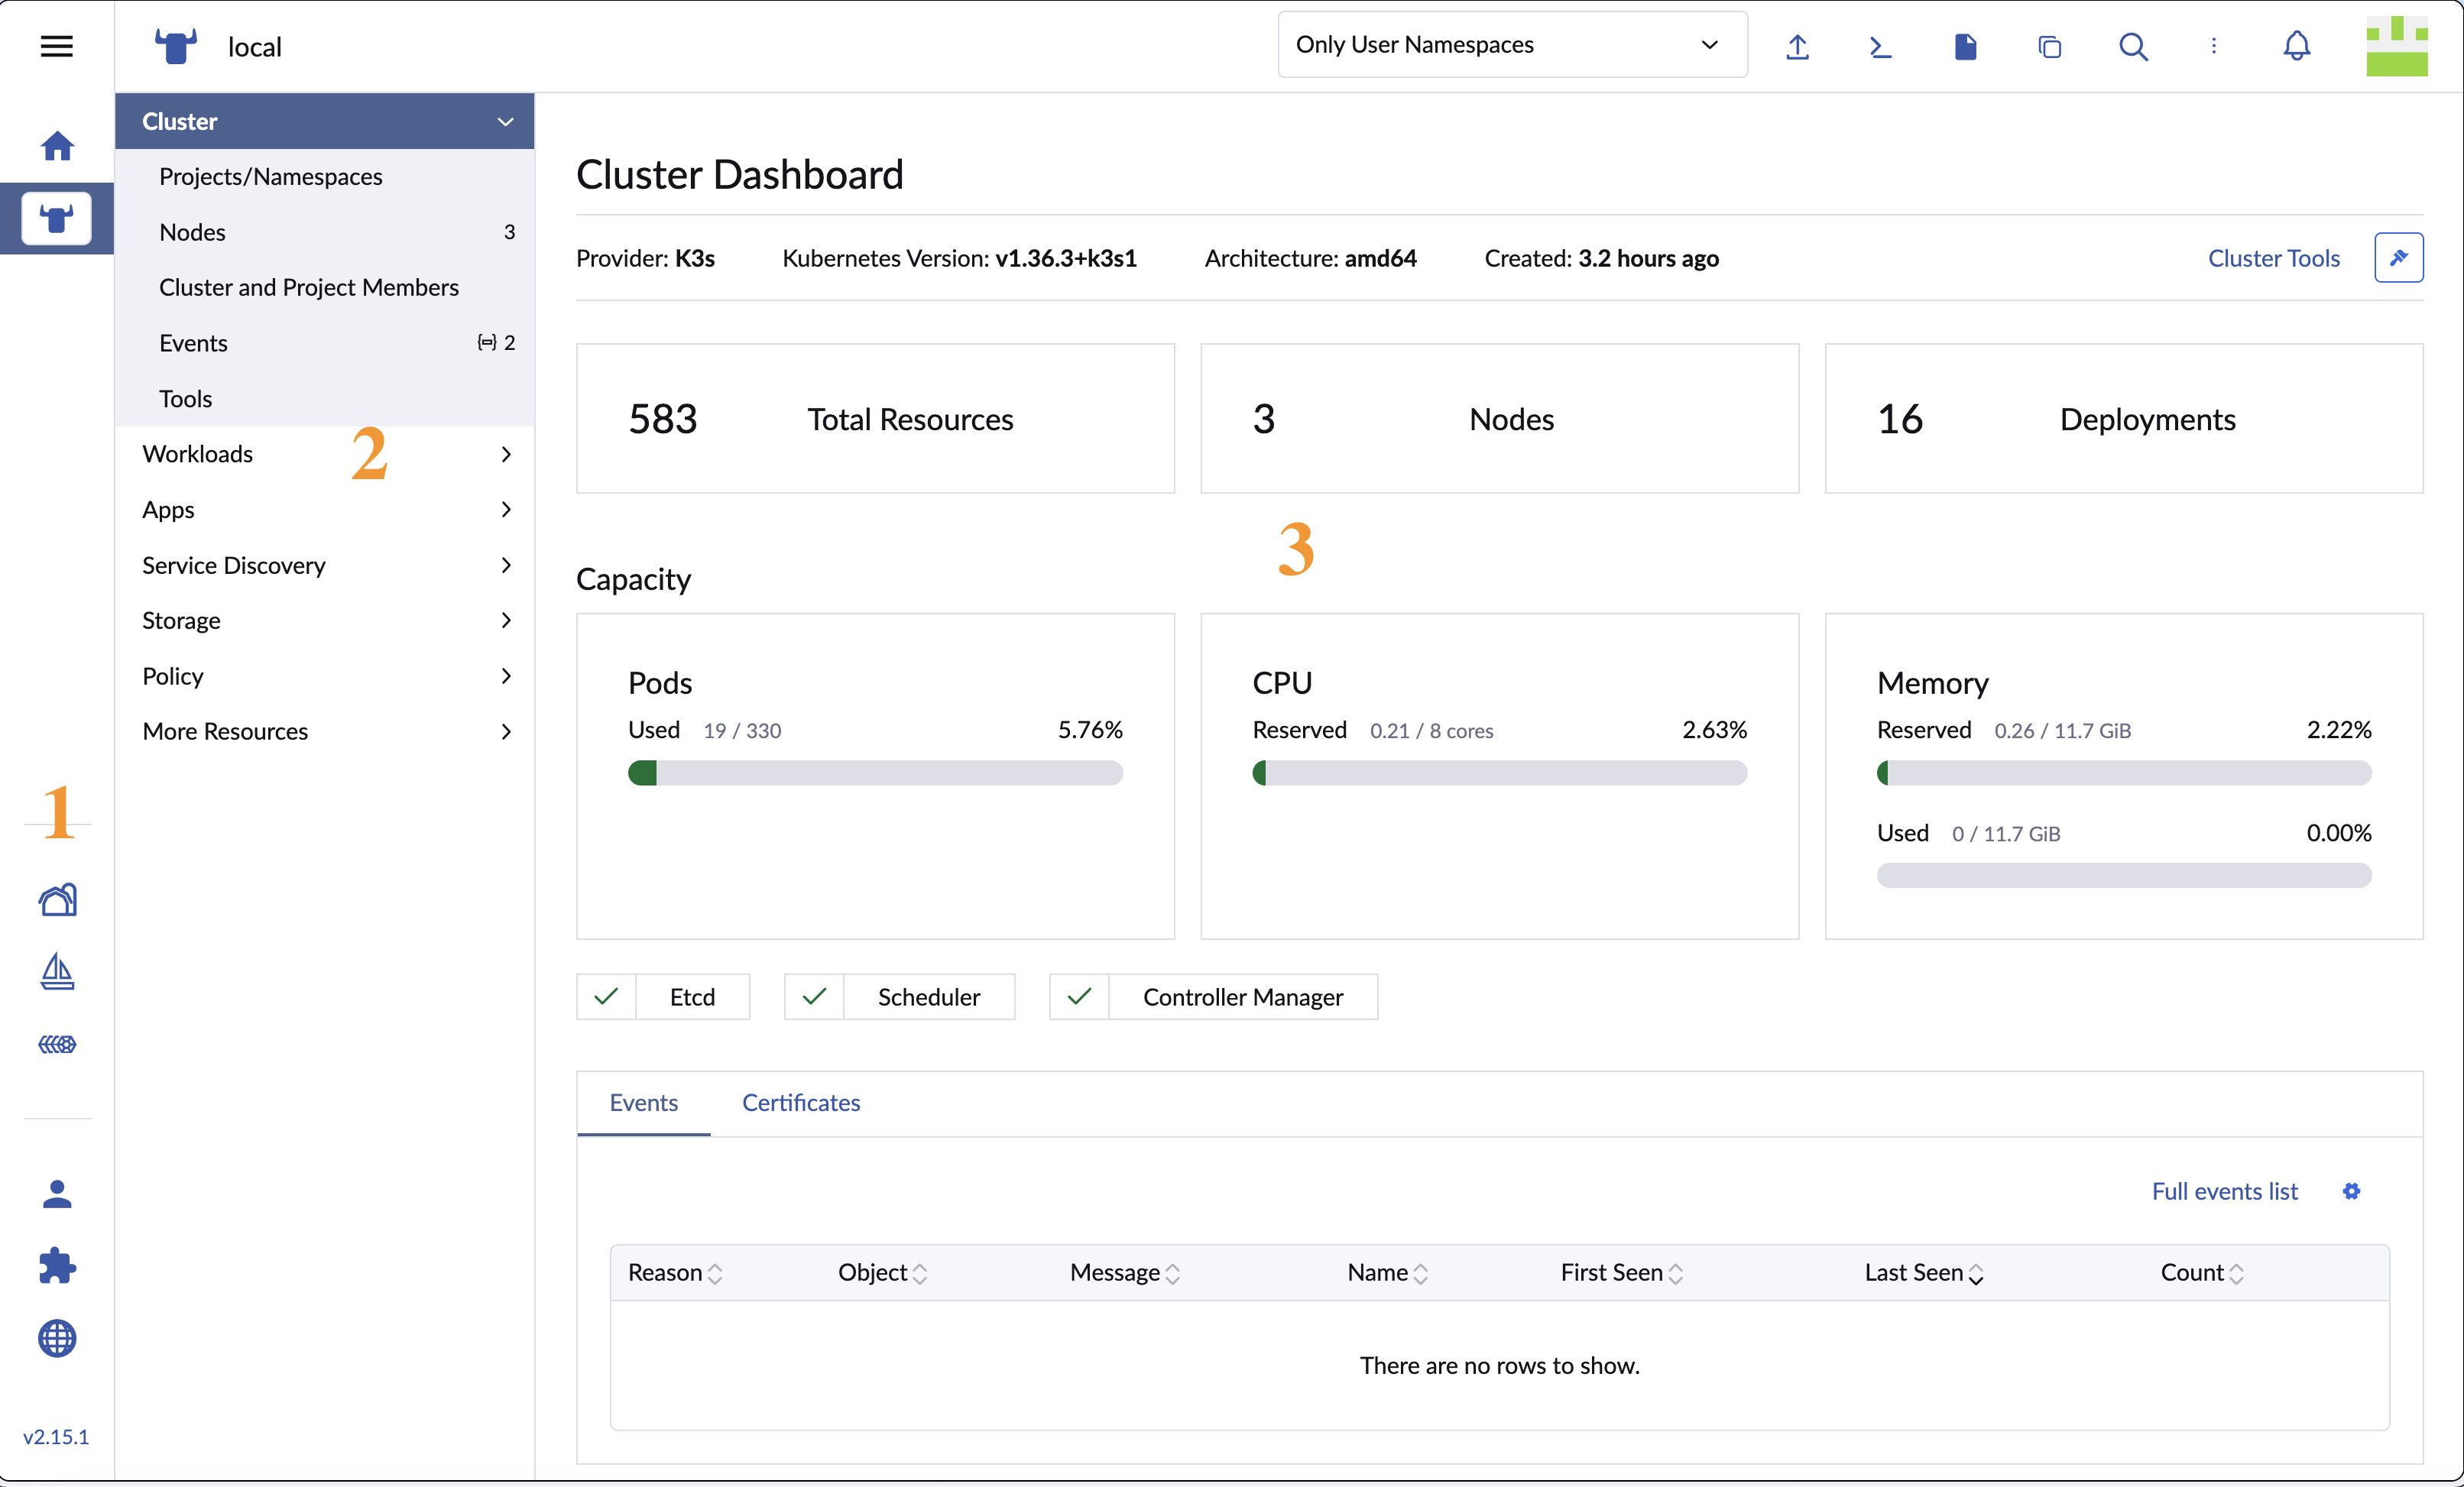
The three parts of the Rancher UI: global navigation, the Cluster Explorer, and the content pane.
Step 3: The Home Page
The home page lists every cluster this Rancher instance manages. On a fresh install there is exactly one: the local cluster - the cluster where Rancher itself is running.
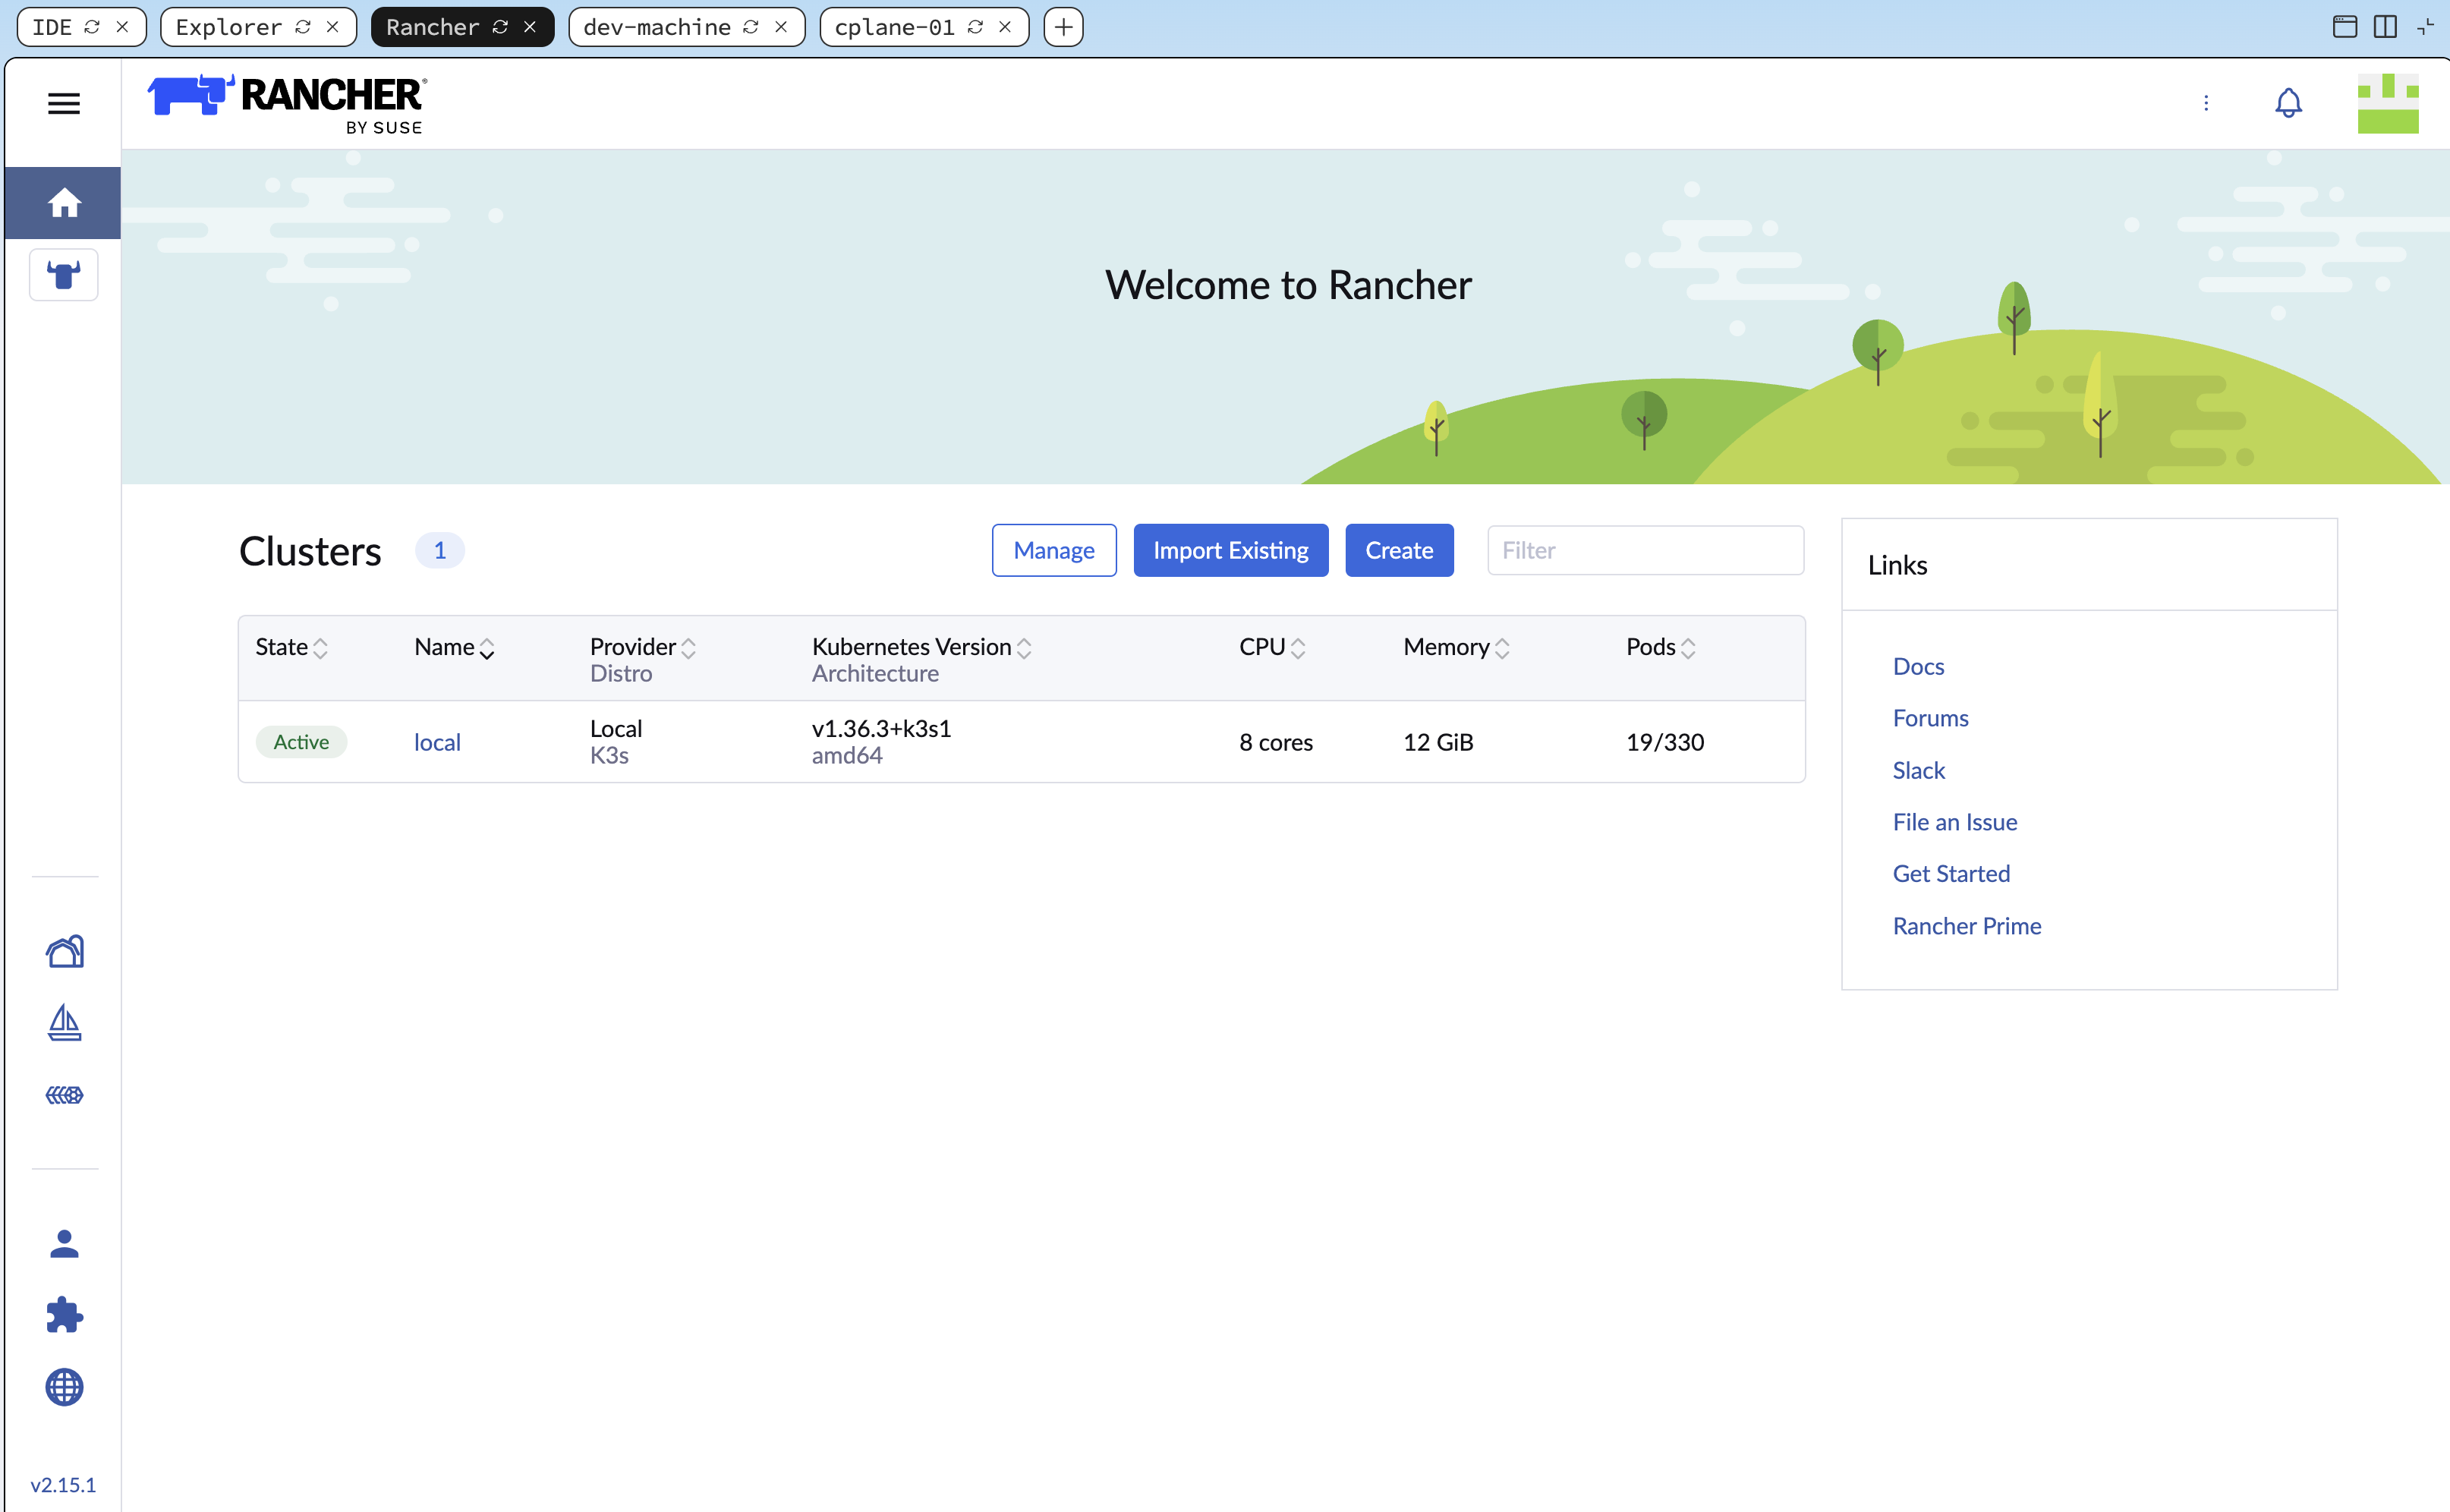
The Rancher home page: the local cluster card and the Import Existing / Create options.
The local cluster card shows its key facts at a glance:
- Provider: K3s - the Kubernetes distribution powering this cluster.
- Kubernetes Version: v1.36.3+k3s1 - the exact version running.
- Its state and node count (three nodes: one control plane, two workers).
Alongside the cluster list you will also see:
- Import Existing - registers an already-running cluster with Rancher.
- Create - provisions a brand-new downstream cluster through Rancher.
You can confirm from your workstation that "local" is the same three-node K3s cluster you have been working with. In the dev-machine terminal:
kubectl get nodes
The Kubernetes version reported here (v1.36.3+k3s1) and the three nodes match exactly what the cluster card shows in the UI - because they are the same cluster, viewed two ways.
Step 4: The Cluster Dashboard
Click the local cluster to enter its dashboard - the main workspace for managing a single cluster. At the top you get an at-a-glance summary of the cluster's contents. On this fresh cluster it reads roughly:
- 3 Nodes - the control plane and two workers.
- 16 Deployments - almost all of them system components (K3s, cert-manager, Rancher, Fleet) rather than anything you deployed.
- 780 Resources - the total count of Kubernetes objects Rancher is tracking across the cluster.
Do not worry about the exact numbers - they drift as the cluster settles - but notice how much is already running just to make Rancher and K3s work.
Entering a cluster switches the left sidebar to the Cluster Explorer - the sidebar now shows the resources inside this cluster, grouped into sections such as:
- Cluster - Nodes, Projects/Namespaces, and Events.
- Workload - Deployments, Pods, StatefulSets, Jobs, and CronJobs (your running applications).
- Service Discovery - Services and Ingresses (how traffic reaches workloads).
- Storage - PersistentVolumes, PersistentVolumeClaims, ConfigMaps, and Secrets.
- Apps - the Helm chart catalog and installed releases.
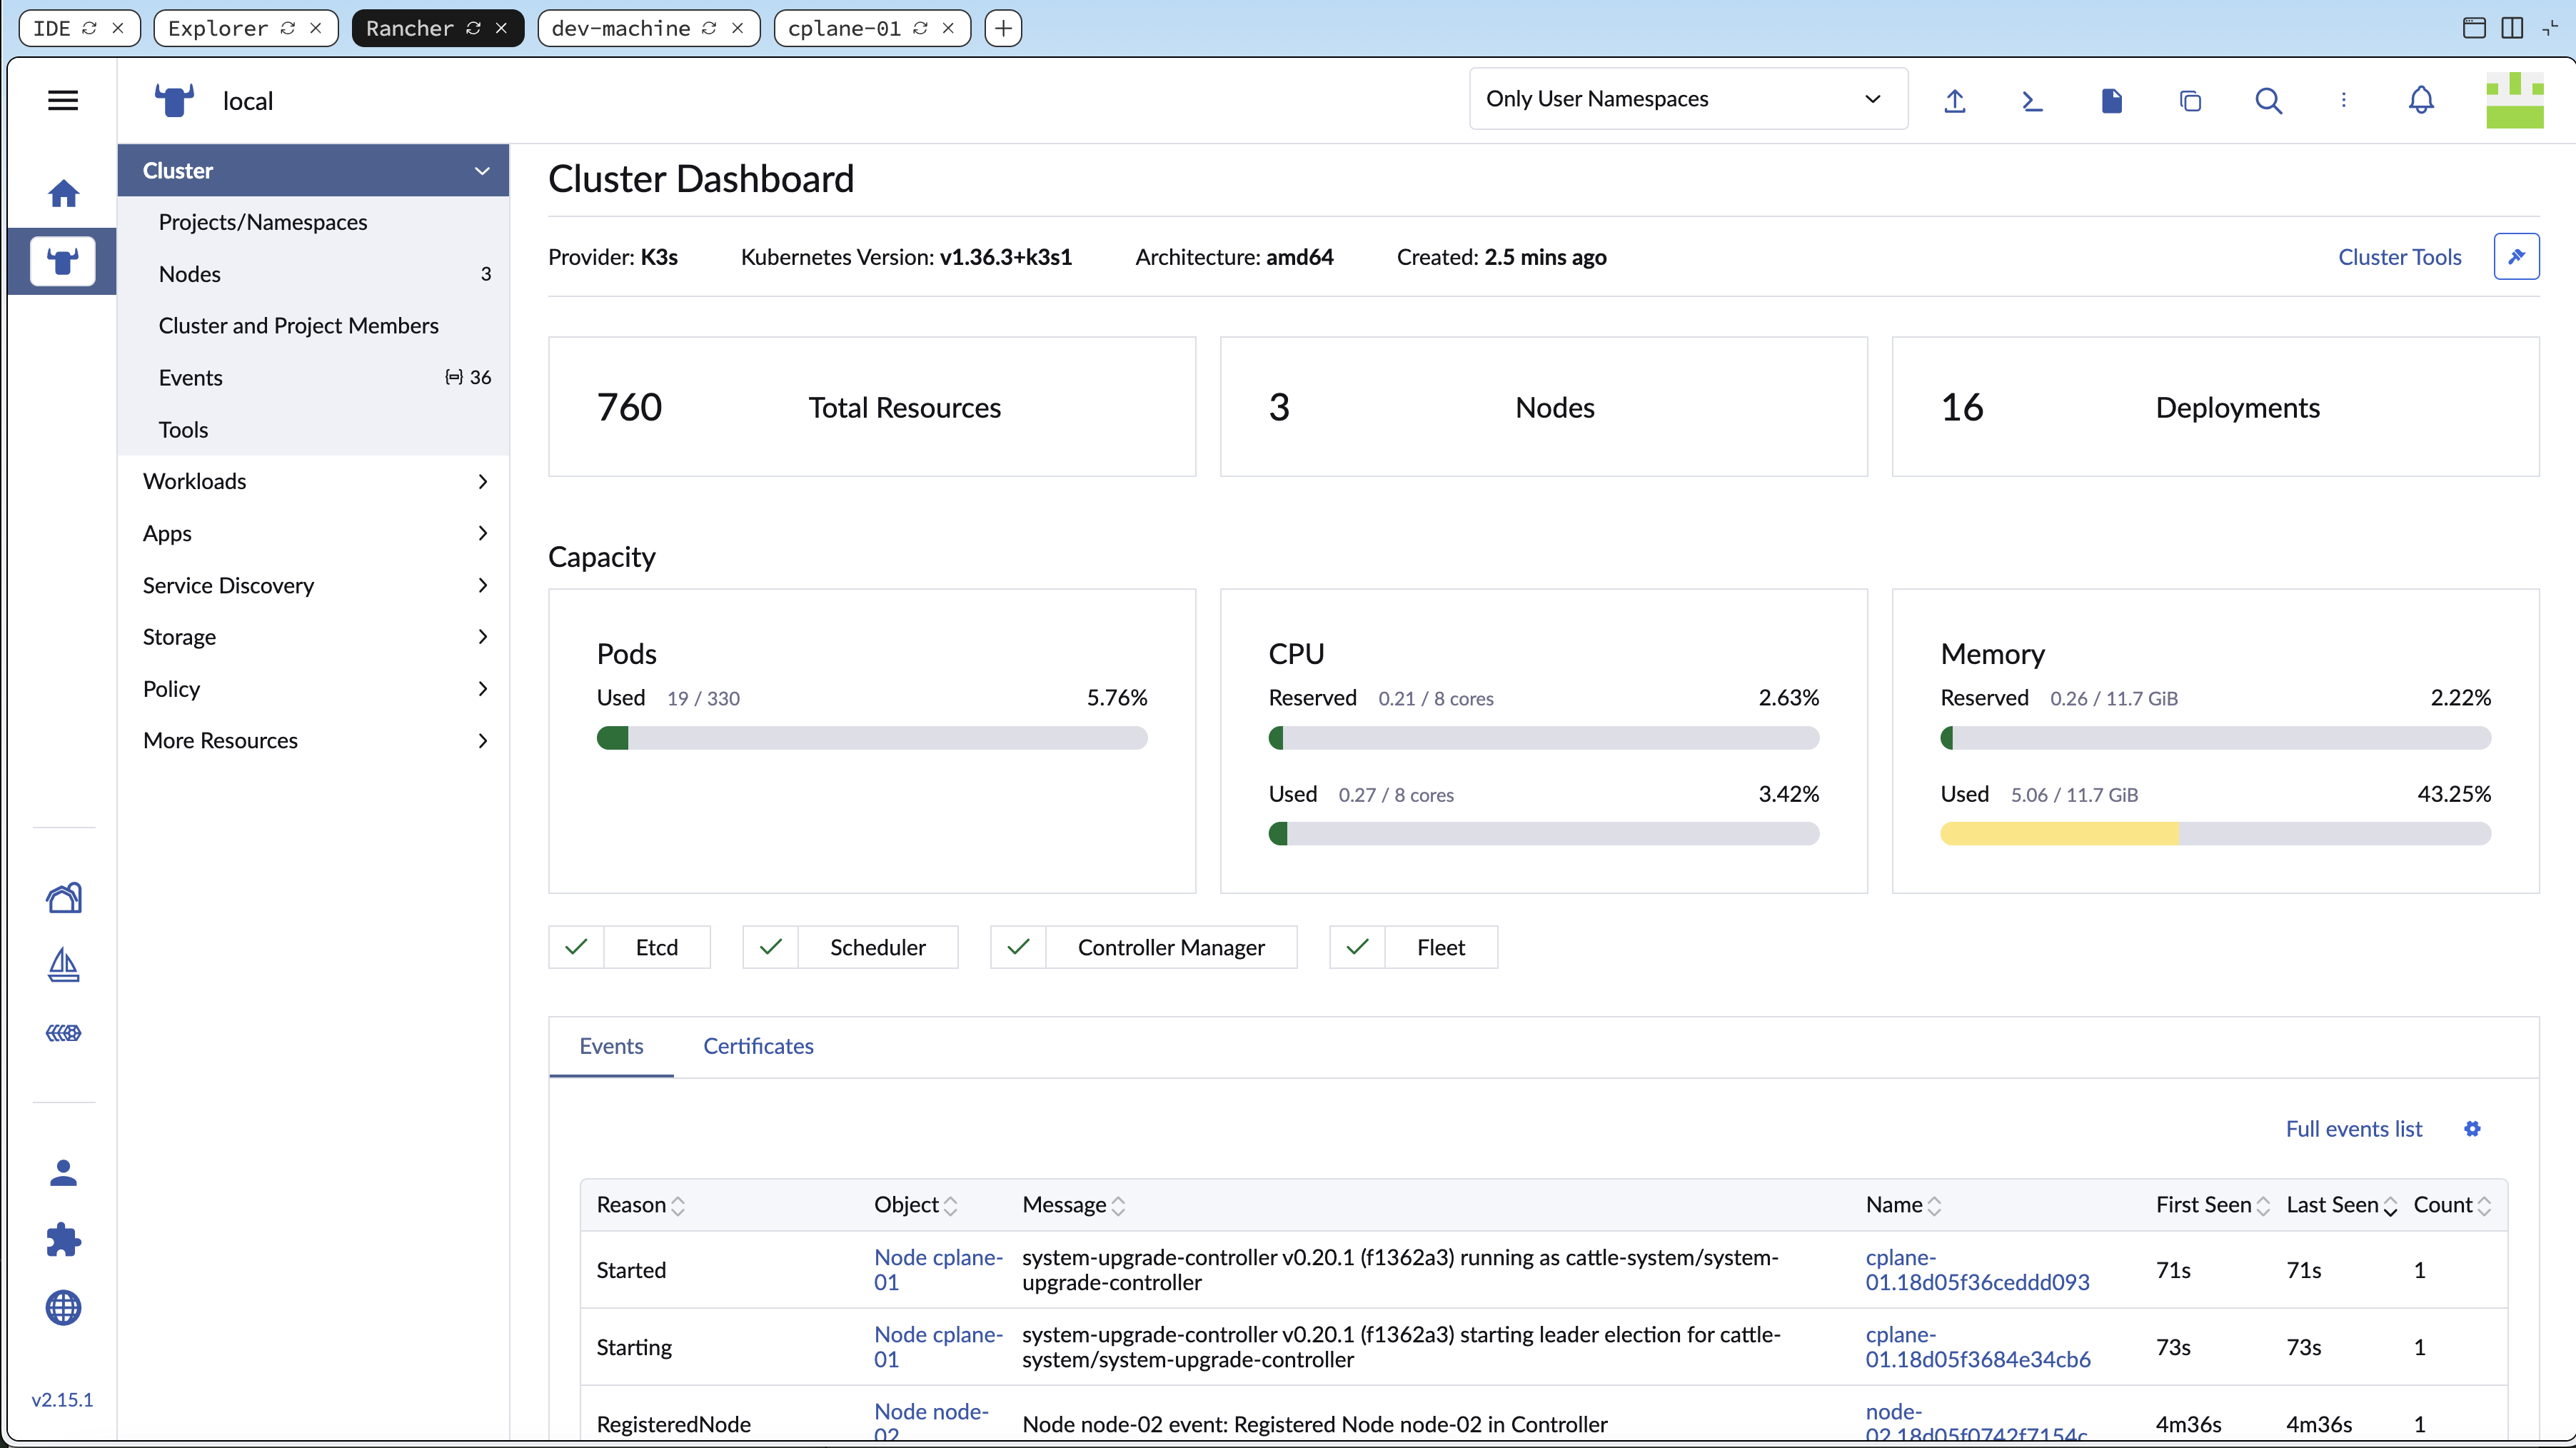
The Cluster Explorer sidebar, showing the resources inside the local cluster.
Spend a moment clicking through these. Everything you see is a live view of the cluster - open Cluster > Nodes and you will find the same cplane-01, node-01, and node-02 that kubectl get nodes just listed.
Step 5: The UI Is Just the Kubernetes API
A useful thing to internalize early: Rancher's UI is not a separate source of truth. Every screen is a view over the Kubernetes API, and every action you take is an API call. What you see in the UI, you can see from the CLI, and vice versa.
Compare the two. List deployments across the cluster from your workstation:
kubectl get deployments -A
Then, in the Rancher UI, open Workloads > Deployments and switch the namespace filter to "All Namespaces." The same deployments appear in both places - Rancher is simply rendering the objects the API returns.
Rancher extends the Kubernetes API, it does not replace it
Rancher runs on top of Kubernetes. It adds its own API (for multi-cluster management, users, projects, and so on) alongside the standard Kubernetes API, but it never hides Kubernetes from you.
That means the skills transfer both ways: anything you learn to do in the Rancher UI, you can script with kubectl or the Rancher API; and any standard Kubernetes object you create with kubectl immediately shows up in the Rancher UI. You are never locked into one or the other.
Step 6: The Global Navigation
The far-left rail is Rancher's global navigation - the entry point to everything, sitting outside any single cluster. From top to bottom you will see:
- Home - the cluster list you started on.
- local - your cluster; clicking it opens the Cluster Explorer you just toured.
- Global Apps:
- Cluster Management - the top-level view of every cluster Rancher manages, plus the drivers and credentials for provisioning new ones.
- Continuous Delivery - Rancher Fleet, the built-in GitOps engine (covered in a later module).
- Virtualization Management - managing VMs on the cluster (Harvester/KubeVirt), out of scope for this course.
- Configuration:
- Users & Authentication - local users, roles, and external identity providers (LDAP, SAML, GitHub, and others). In a real setup this is where you let teammates log in with their own accounts instead of sharing one admin login.
- Extensions - optional Rancher UI extensions.
- Global Settings - server-wide configuration, including the
server-urlyou confirmed at first login.
At the very bottom, Rancher shows its version (for example, v2.15.1) - handy to know when checking documentation or compatibility.
You do not need to change anything here yet - later lessons return to Cluster Management and Users & Authentication when we manage multiple clusters and set up access control.
You're Done
You logged into Rancher, completed the first-login bootstrap, toured the home page and the cluster dashboard, and saw first-hand that the UI is just a window onto the Kubernetes API. You now know your way around well enough to start managing real workloads.
When the check below is green, your cluster is connected and ready.
Now Prove It
Reading about the UI is not the same as driving it. The challenge below asks you to create a namespace in the local cluster entirely through the Rancher dashboard. Solving it confirms you can navigate Rancher on your own and records your progress for the course.
Wait - why are there several "Create Namespace" buttons?
On the Projects/Namespaces page you will notice the namespaces are grouped, and each group has its own Create Namespace button - under Project: Default, Not in a Project, and Project: System.
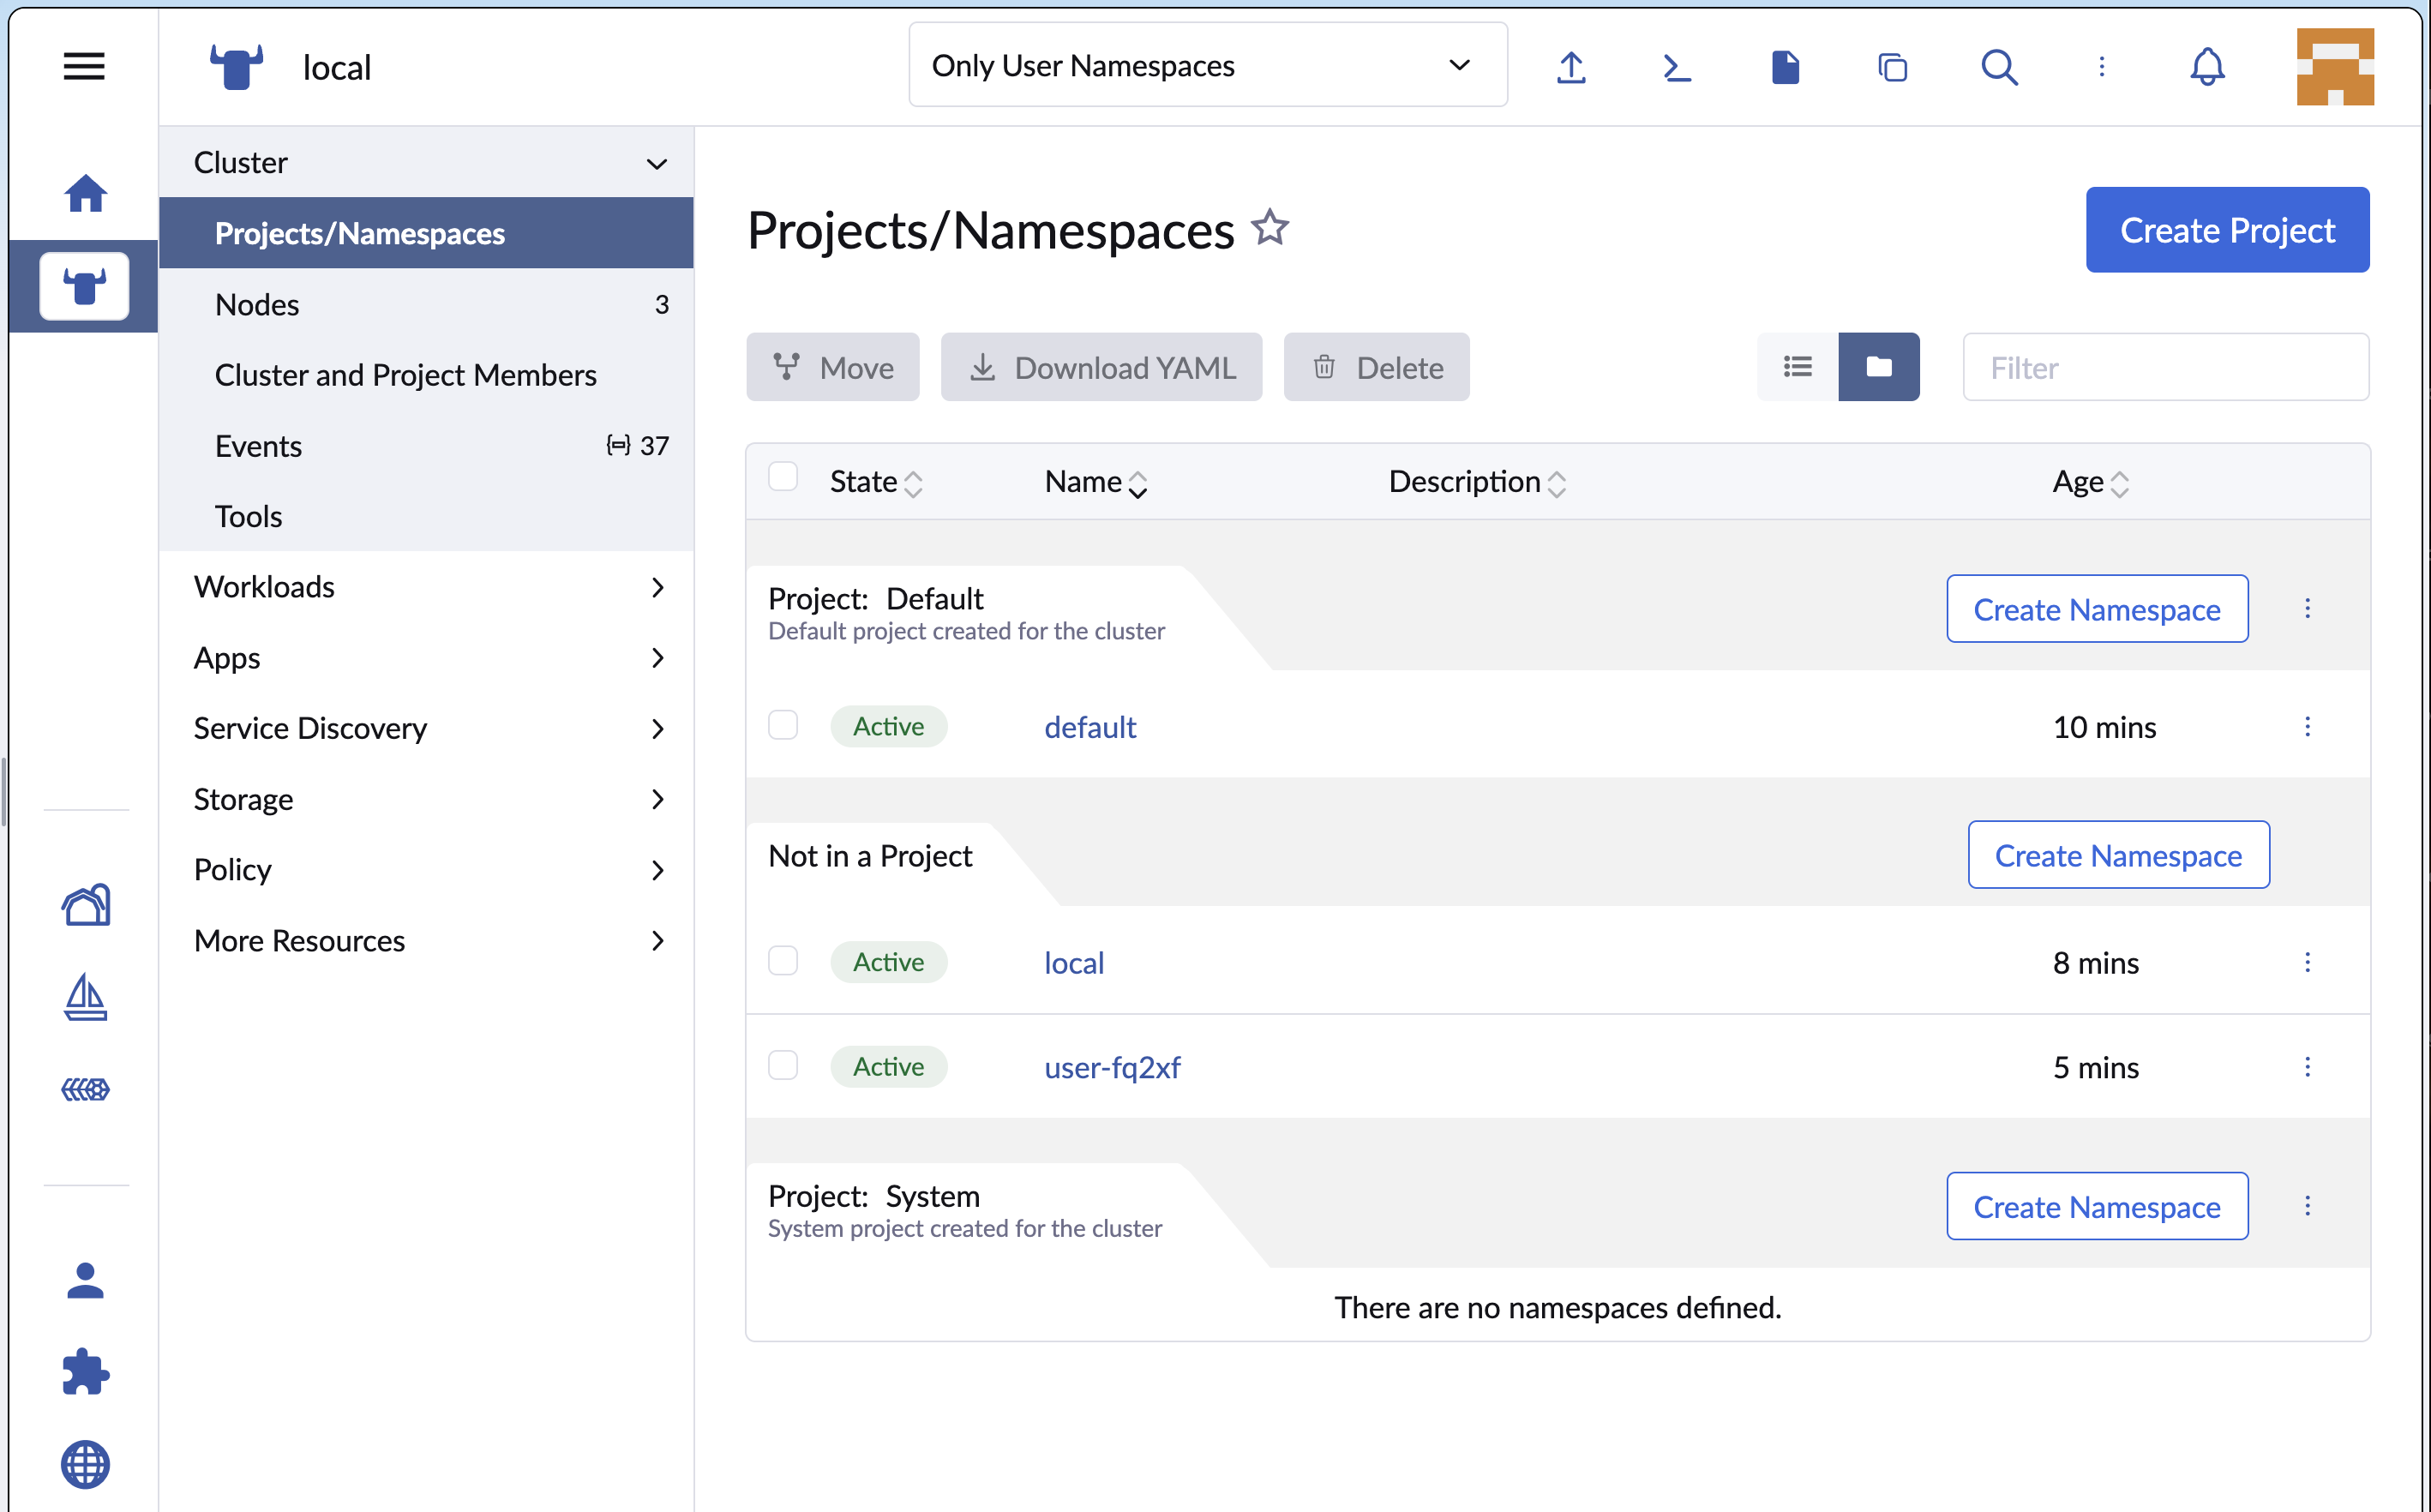
Namespaces are grouped by Project, each with its own Create button.
A Project is a Rancher-only concept - a grouping layer on top of Kubernetes namespaces that lets you apply shared RBAC and resource quotas to several namespaces at once. Plain Kubernetes has no notion of projects; they exist only inside Rancher.
For this challenge, use the Create Namespace button under Project: Default - the general-purpose project for your own workloads. (Avoid Project: System, which is meant for cluster infrastructure namespaces.) Whichever you pick, the result is still an ordinary Kubernetes namespace; the project only affects Rancher-level grouping.
We cover Projects, RBAC, and resource quotas properly in Module 2. For now, just knowing "Project = a Rancher group of namespaces, use Default" is enough.
- Previous lesson
- Installing Rancher on K3s
- Next lesson
- Deploying Workloads with Rancher