Build and Test an MCP App with Pomerium
Two Services, Two Tunnels
A Model Context Protocol (MCP) application is an MCP server whose tools come with a user interface (UI), per the MCP Apps specification: an interactive widget the host (Claude.ai, ChatGPT.com, Goose, etc.) renders inline in the chat, alongside the tool's usual structured data.
The widget is just a web page, any frontend framework works, since the host only ever loads it into a sandboxed iframe and talks to it over postMessage. This lesson uses React for the widget's UI because that's what Pomerium's mcp-app-typescript-template ships; the widget mechanism itself, and everything else in this lesson, works the same regardless of frontend framework.
The MCP Apps specification's secure default is a fully self-contained widget: CSS and JavaScript inlined, no external origin, no Content Security Policy (CSP) exceptions to declare. The template ships that path too (unit 4 shows it in action); declaring external resourceDomains/connectDomains and pulling assets from a separate origin is opt-in, not required.
This lesson opts in anyway, because splitting widget assets into their own service is how a lot of real deployments end up shaped: it decouples the frontend from the tool server, so it can be self-hosted separately or handed to a Platform as a Service (PaaS) like Netlify or Vercel. Lesson 7 carries that shape into production. The cost: once the widget's HTML references external <script>/<link> tags, your browser has to fetch them from a real origin, from inside an iframe the host sandboxes with a strict CSP. If that origin isn't reachable from wherever your browser actually is, the widget loads a blank rectangle, and nothing in the tool call says why.
That's why this lesson opens two reverse SSH tunnels instead of one. The Native SSH Reverse Tunneling with Pomerium tutorial and this course's own first lesson tunnel only the MCP server, since that's a plain server's only service. Pomerium's own local dev guide for MCP apps also uses a single tunnel, but because it assumes the same laptop runs the dev server and the browser, so assets never leave localhost. Not the case here: the dev server's on a VM, your browser's elsewhere, exactly what happens the moment more than one person, or a CI runner, or a remote review er, needs to see the app running. The second tunnel is what makes the widget assets reachable from wherever that browser is.
By the end of this lesson, you'll have:
- An MCP app, tools and widgets, running on a machine with no public address, reachable from the internet through two authenticated routes
- Both routes secured by the same policy pattern from lesson 1: OAuth 2.1 at the gateway, your email as the allow list
- A dev loop proven end to end: a tool and its widget, changed together mid-session, callable and renderable through both secured routes without touching the gateway
What you should already know
- This course's first lesson, which covers the reverse tunnel mechanics (
ssh -R, Pomerium'supstream_tunnel.ssh_policy) this lesson builds on directly. For a deeper dive into those mechanics, see the Native SSH Reverse Tunneling with Pomerium tutorial - Basic comfort with TypeScript and React: unit 4 edits a tool's input schema and a React component together
- What CSP is at a high level: a browser mechanism that restricts which origins a page (here, the widget's iframe) may load resources from
Everything else (Node.js, the MCP app template, Pomerium) is preinstalled in the playground; the only local step is the npm install below, to pull in the template's own dependencies.
The setup
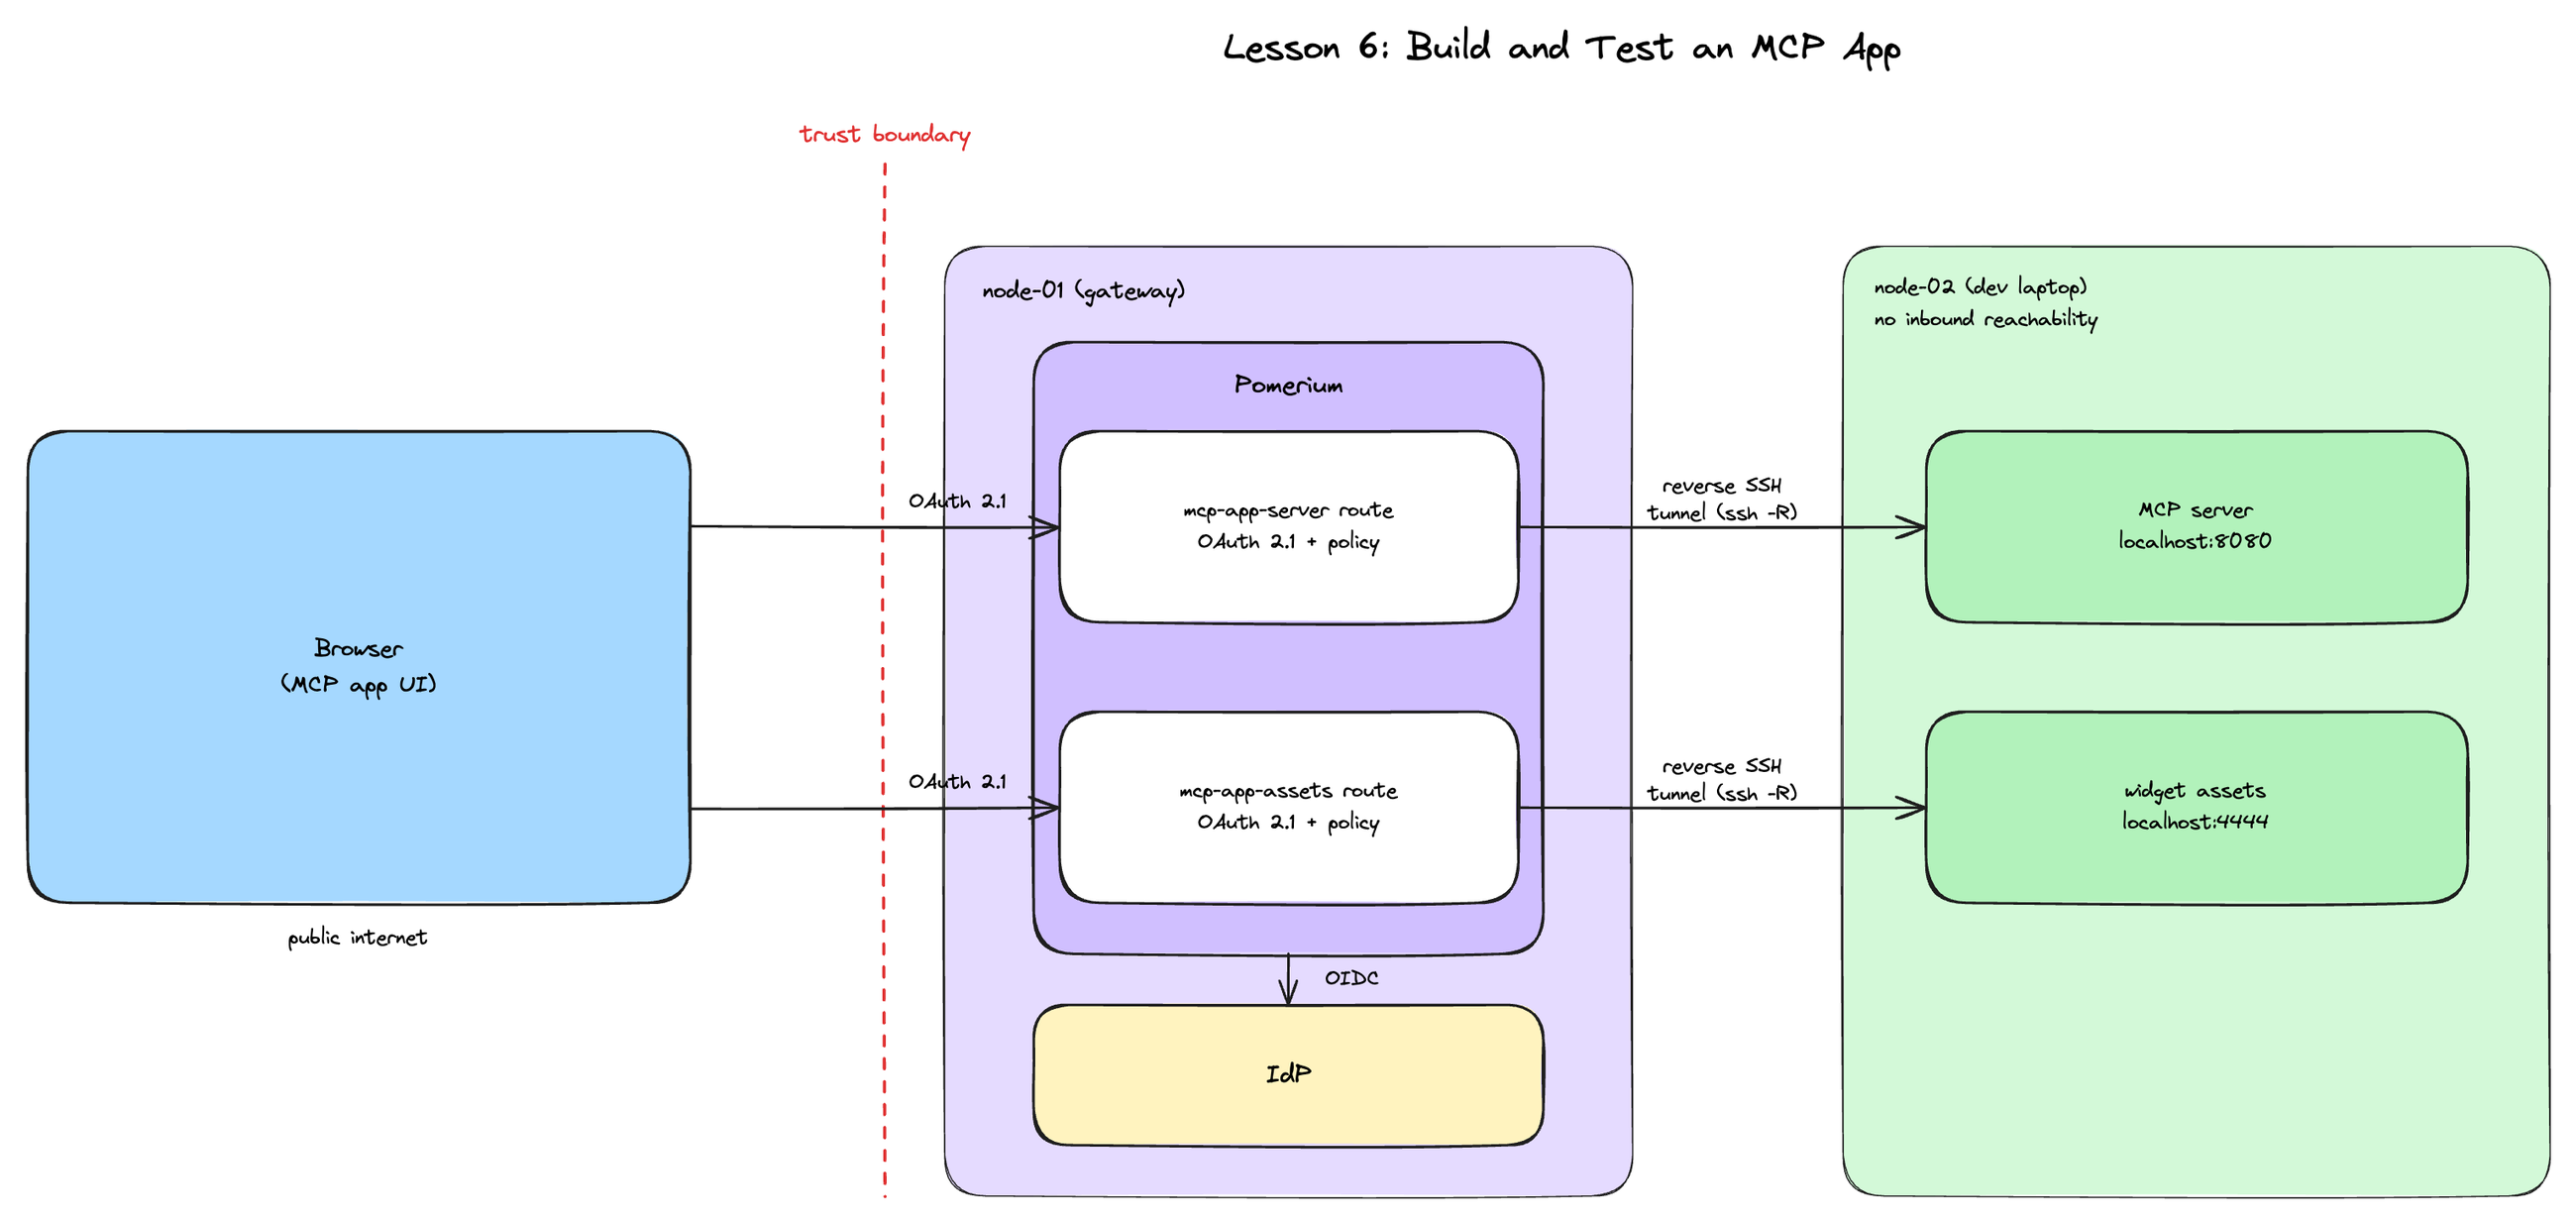
The playground has two machines, the same shape as lesson 1:
- node-02 (your "dev laptop"): runs both halves of the MCP app, no inbound reachability from the internet. Tabs: app (the dev loop), tunnel (both reverse tunnels, opened together in one SSH session), client (hosted MCPJam and anything you run as a caller), and IDE for editing files here.
- node-01 (the gateway): runs Pomerium, fully preconfigured, on the gateway tab. Sign-in is delegated to Pomerium's hosted authenticate service for quick setup and testing, same as every lesson in this course; in production, configure Pomerium to use your production identity provider instead.
Read the app before you run it
Start its dependencies installing now so they're ready by the time you need them: in the app terminal on node-02,
cd ~/mcp-app && npm install
Leave that running and switch to the IDE on node-02 to look at ~/mcp-app while it works, a clone of Pomerium's mcp-app-typescript-template. It is an npm workspace with two packages:
server/src/server.ts: an Express app on port 8080. Look for theregisterAppToolcall: it registers the one tool,echo, and one widget resource,ui://echo. Two details matter:- The resource is registered with the exact MIME type
text/html;profile=mcp-app. The MCP Apps specification requires this literal string for a host to treat the resource as renderable UI at all. - The tool's metadata carries
_meta: { ui: { resourceUri: 'ui://echo' } }, binding theechotool to theechowidget. Without it, the tool would just return text, like any ordinary MCP tool.
- The resource is registered with the exact MIME type
widgets/src/echo/Echo.tsx: an ordinary React component. It callsnew App({ name: 'Echo', version: '1.0.0' })from@modelcontextprotocol/ext-apps, the library that gives a widget its host APIs (callServerTool,openLink,sendMessage, and more), and reads the tool's result throughapp.ontoolresult. Nothing about it, JSX, hooks, event handlers, differs from any other React app.
The two files never talk directly. The server hands the host a URI (ui://echo) and, when asked, that widget's built HTML; the host loads it in a sandboxed iframe, and the React code inside talks back only through the App API, over the same MCP connection carrying tool calls. That indirection is why the assets server exists as its own thing: the HTML has to pull its JavaScript from somewhere, and "somewhere" has to be a real origin, not a description of one.
These are the two services that will be running:
| Service | Port | What it serves |
|---|---|---|
| MCP server | 8080 | Tool calls, and the widget resource's HTML |
| Widget assets | 4444 | The widget's built JavaScript and CSS |
Both will require Pomerium routes along with policy to access them and policy for who can start the reverse SSH tunnels. The next section shows how to configure those routes and policies, then the lesson opens both tunnels and tests the app end to end.
Configure Two Routes
The gateway machine (node-01) already has everything generated for you in ~/pomerium-gateway: Pomerium's config, SSH host keys, a user Certificate Authority (CA) key, and a Docker Compose file. Take a look in the gateway terminal:
cat ~/pomerium-gateway/pomerium-config/config.yaml
This config builds directly on lesson 1's, with one structural change: two routes instead of one.
runtime_flags: the same three flags as lesson 1:mcp: truefor MCP support,ssh_upstream_tunnel: trueto accept reverse tunnels, andmcp_dynamic_client_registration: trueas a bridge for clients that only support Dynamic Client Registration (DCR) rather than the newer Client ID Metadata Document (CIMD) mechanism.mcp-app-server: the MCP route.mcp: server: {}marks it as MCP-aware, so Pomerium handles the OAuth 2.1 dance with connecting clients.upstream_tunnelmeans its upstream is whatever reverse tunnel binds to this route's hostname, rather than a fixed address.mcp-app-assets: the widget assets route. Nomcp:block, this is a plain HTTP route: it exists to serve static JavaScript and CSS, not MCP traffic. It has its ownupstream_tunnel, because it needs its own reverse tunnel bind, distinct from the app server's.- Two policies on each route: same pattern as lesson 1, doubled. Each route's
policycontrols who can fetch through it; each route'supstream_tunnel.ssh_policycontrols who can open the tunnel that backs it. All four are set to a single email, the one you provide below. idp_provider: hosted: sign-in is delegated to Pomerium's hosted authenticate service, a GitHub account, a Google account, or an email and password, no OAuth client registration required.mcp_allowed_client_id_domains: the trusted MCP client domains. Only relevant to the app route (the assets route carries no MCP traffic), preconfigured to cover Claude, ChatGPT, VS Code, Goose, and hosted MCPJam, the client this lesson actually connects with in unit 3.
Three REPLACE_WITH_... placeholders are left: two routes' from: and one email, shared across all four policy blocks.
Expose the ports
First, the authenticate service URL, where OAuth callbacks land:
copy the auth URLNext, the app route, the address the MCP client will connect to:
copy the app route URLThen the assets route, where the widget's JavaScript and CSS will be served from:
copy the assets route URLThree exposures, same port (443) on the same machine, three distinct URLs: Pomerium is one process serving three different hostnames.
Secure both routes with your email
Enter the email you'll sign in with. All four policy blocks check it: only you can call the app server, only you can fetch widget assets, and only you can open either tunnel.
If you're curious, cat the config again to see all five substitutions in place (two from: values, one authenticate_service_url, and your email in four is: lines):
cat ~/pomerium-gateway/pomerium-config/config.yaml
The checks below can only verify that no placeholder is left, not that each URL landed in the right field. If a value went into the wrong slot (say the app and assets routes got swapped), the placeholders are already consumed, so re-submitting an input above does nothing: fix it by editing ~/pomerium-gateway/pomerium-config/config.yaml directly before starting the stack.
Start the stack
With the placeholders filled in, bring up Pomerium, still in the gateway terminal:
cd ~/pomerium-gateway
docker compose up -d
docker compose logs -f
Wait until Pomerium logs starting SSH listener, then press Ctrl+C to stop following the logs.
If up -d fails with a name conflict from a previous attempt, run docker compose down -v first.
Both routes exist, but neither has an upstream yet. That arrives next, from the dev machine, over one SSH connection carrying two tunnels.
Start the App, Open Both Tunnels, Render the Widget
Both routes exist on the gateway; neither has an upstream yet. Time to fix that.
Start the app
In the app terminal on node-02, npm install from unit 1 should already be done. If it's still running, wait for it to finish; if you skipped it, run cd ~/mcp-app && npm install now. Either way, once it's done, start the dev loop:
~/mcp-app-dev.sh
This runs three processes in one terminal, labeled server, widgets, and build in the output, exactly the three npm run dev starts on its own:
server: the MCP server (tsx watch), hot-reloading on save, same as every server in this course. It also decides, per request, which widget HTML to hand back: a client whose declared name doesn't matchWIDGET_INLINE_CLIENTS(default: justclaude) gets live dev-server modules; Claude.ai, and any client that declares no name at all, gets a fully inlined, self-contained snapshot instead.widgets: Vite's own dev server on port 4444, serving live source modules with hot module replacement (HMR) over a WebSocket.BASE_URL, the widget assets URL you pasted in the previous unit, drives itsallowedHostsand HMR socket config too, so HMR genuinely works through the tunnel: save a widget file, and a connected client updates in place, no rebuild-and-reload round trip.build: avite build --watchrunning in the background, rebuilding the static bundle inassets/on every save. Its only job is keeping the inlined snapshot fresh for hosts that need self-contained HTML; the HMR path never touches its output.
Wait for all three to settle (the server line ending Server started successfully, a widgets line reporting VITE ... ready, and a build line reporting the widget built).
Open both tunnels
One SSH session, two reverse binds, one for each route. In the tunnel terminal, read both route hostnames (no pasting, the values you entered in the previous unit are readable from any machine):
APP_HOST=$(cat /tmp/mcp-lesson.app-route | tr -d '[:space:]' | sed 's|/$||')
APP_HOST=${APP_HOST#https://}
ASSETS_HOST=$(cat /tmp/mcp-lesson.assets-route | tr -d '[:space:]' | sed 's|/$||')
ASSETS_HOST=${ASSETS_HOST#https://}
echo $APP_HOST
echo $ASSETS_HOST
Both echoes should print bare hostnames, no https://, no slash. Now open the tunnel:
ssh \
  -R "$APP_HOST:443:localhost:8080" \
  -R "$ASSETS_HOST:443:localhost:4444" \
  node-01 -p 2222
Two -R flags on one ssh invocation, same as any other multi-forward SSH session; nothing MCP-specific about the syntax. On the first connection you'll see the standard SSH host-key prompt (Pomerium's host key being added to your known_hosts), same as lesson 1:
laborant@node-02:~$ ssh \
> -R "$APP_HOST:443:localhost:8080" \
> -R "$ASSETS_HOST:443:localhost:4444" \
> node-01 -p 2222
The authenticity of host '[node-01]:2222 ([172.16.0.2]:2222)' can't be established.
ED25519 key fingerprint is SHA256:FewE0CR8sY2czFIdS8EvOiYU7N+6N+Hllno5xlCdUik.
This key is not known by any other names.
Are you sure you want to continue connecting (yes/no/[fingerprint])?
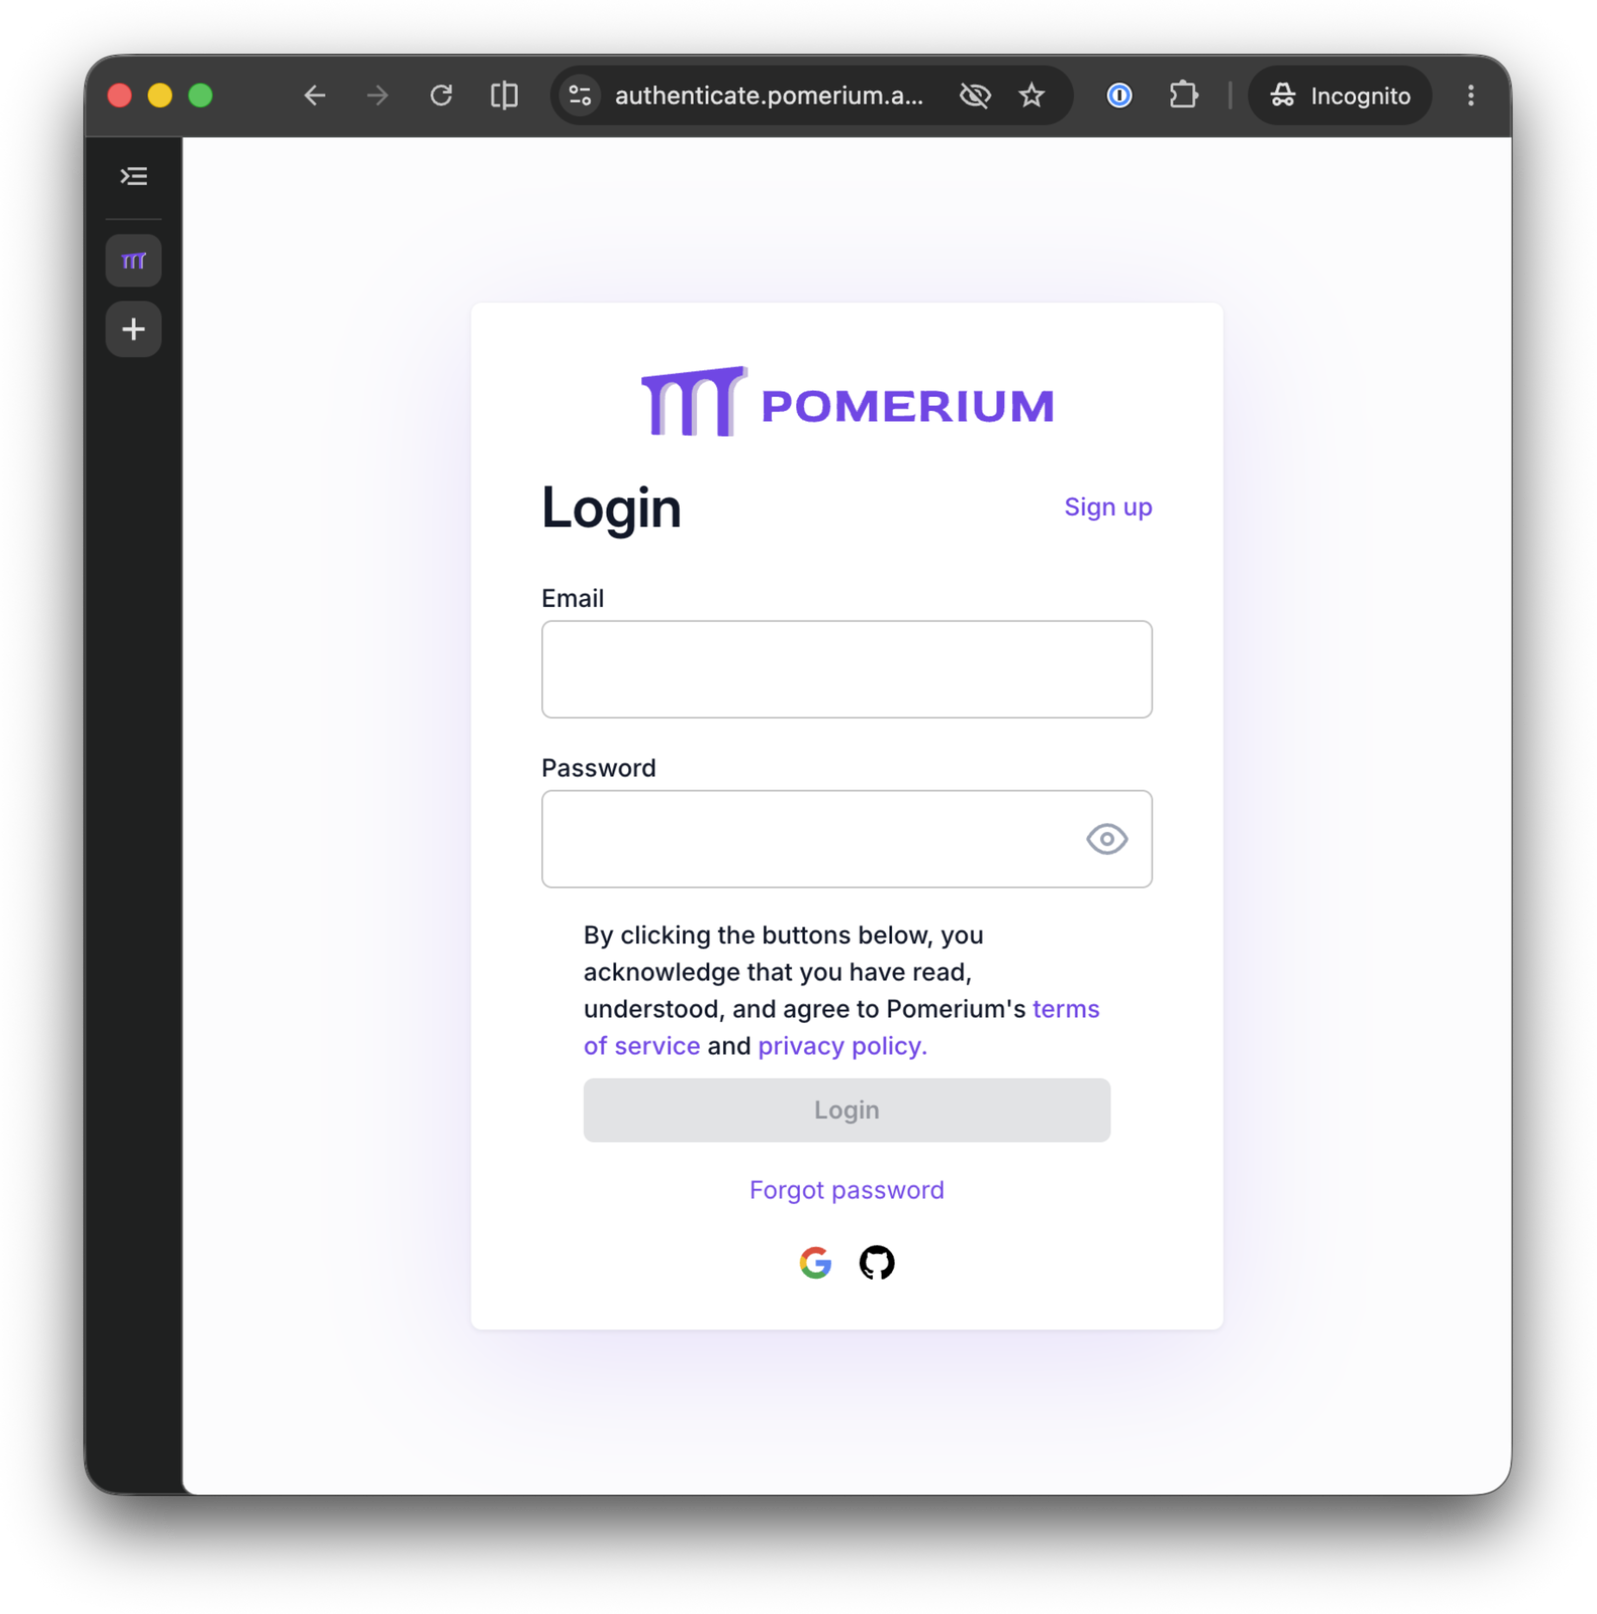
Answer yes, then open the printed sign-in URL: it lands on Pomerium's hosted authenticate sign-in page. Sign in as the account whose email you entered in the previous unit (GitHub, Google, or email and password):
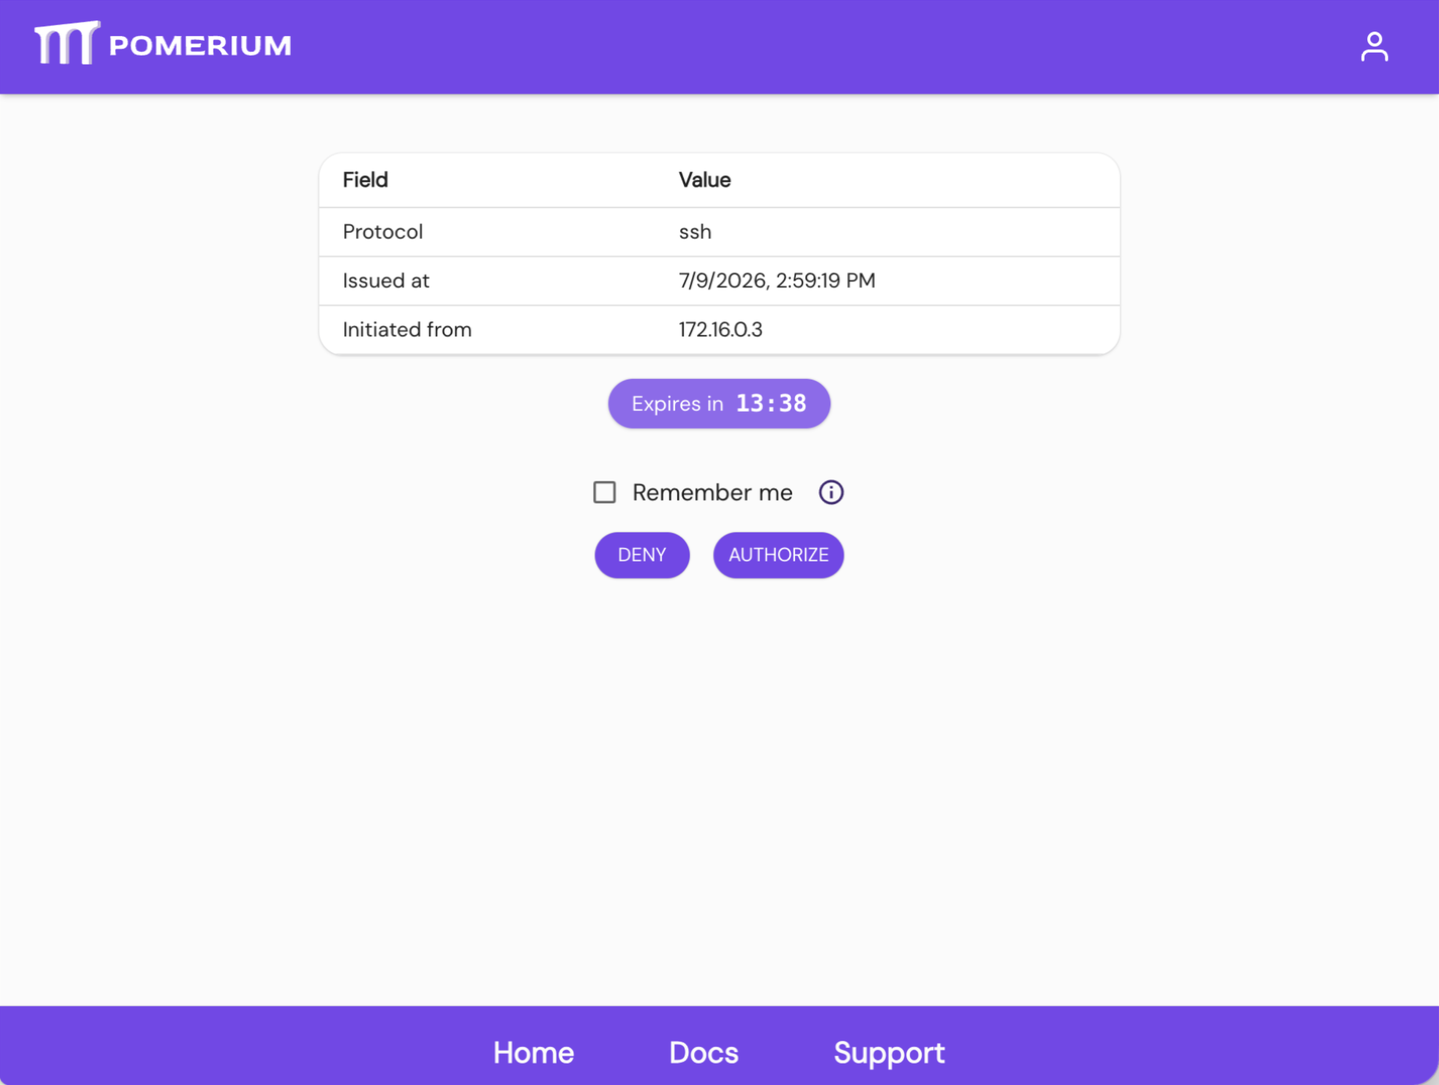
Pomerium then shows the connection it's about to authorize: the protocol (ssh), when the request was issued, and the machine it came from, same single prompt regardless of how many routes the connection backs. Click AUTHORIZE, and both binds go live under one SSH connection: this single sign-in satisfies upstream_tunnel.ssh_policy on both routes, because both are checked against the identity of the one SSH connection that just authenticated, not against each bind separately.
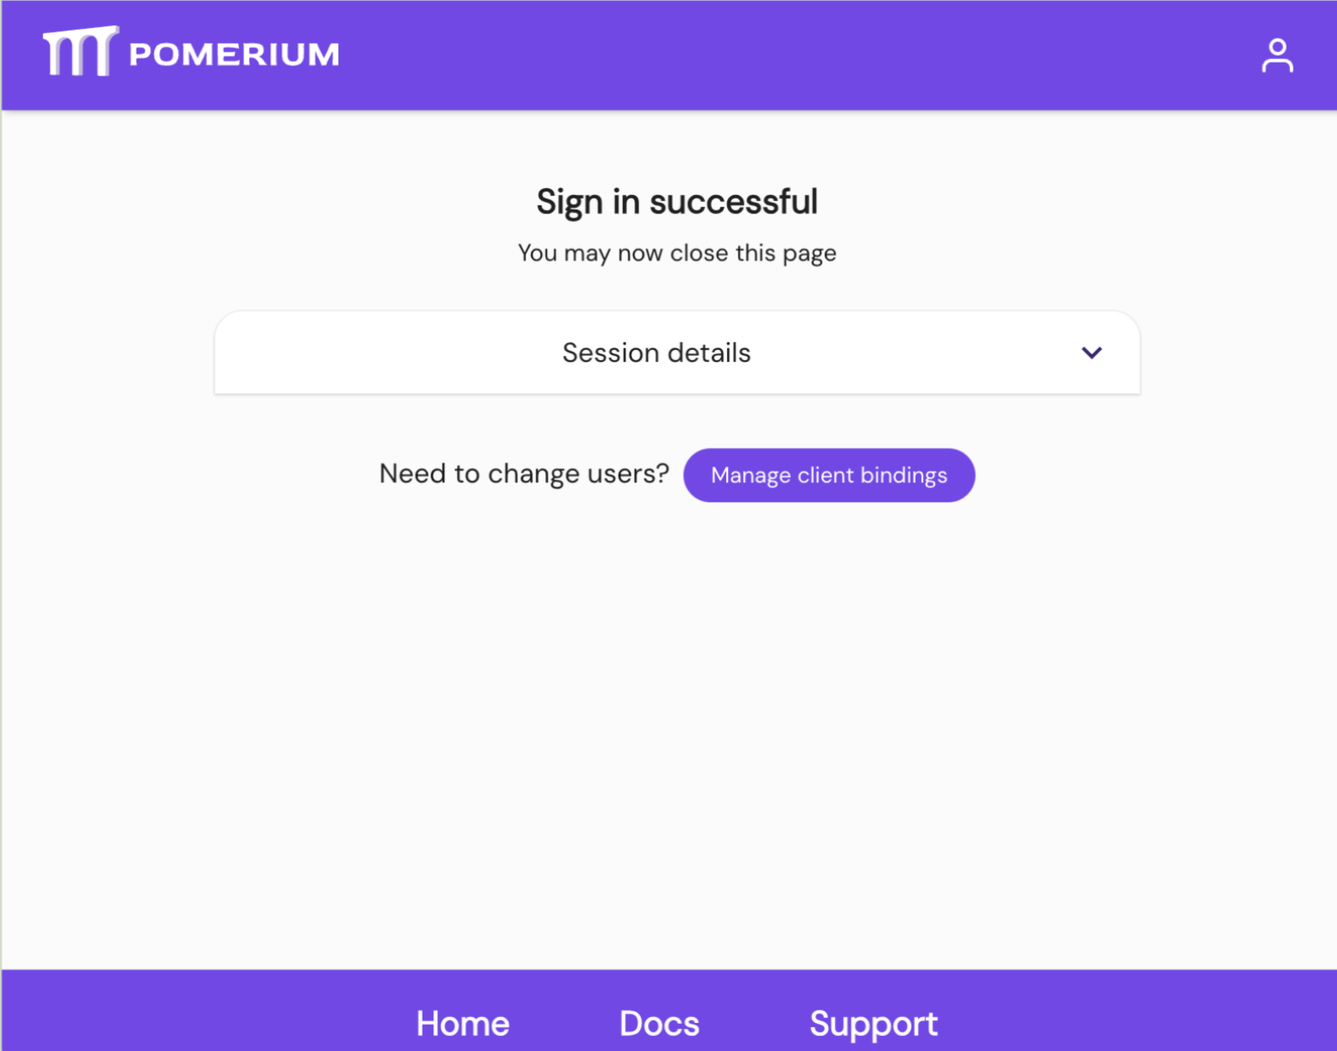
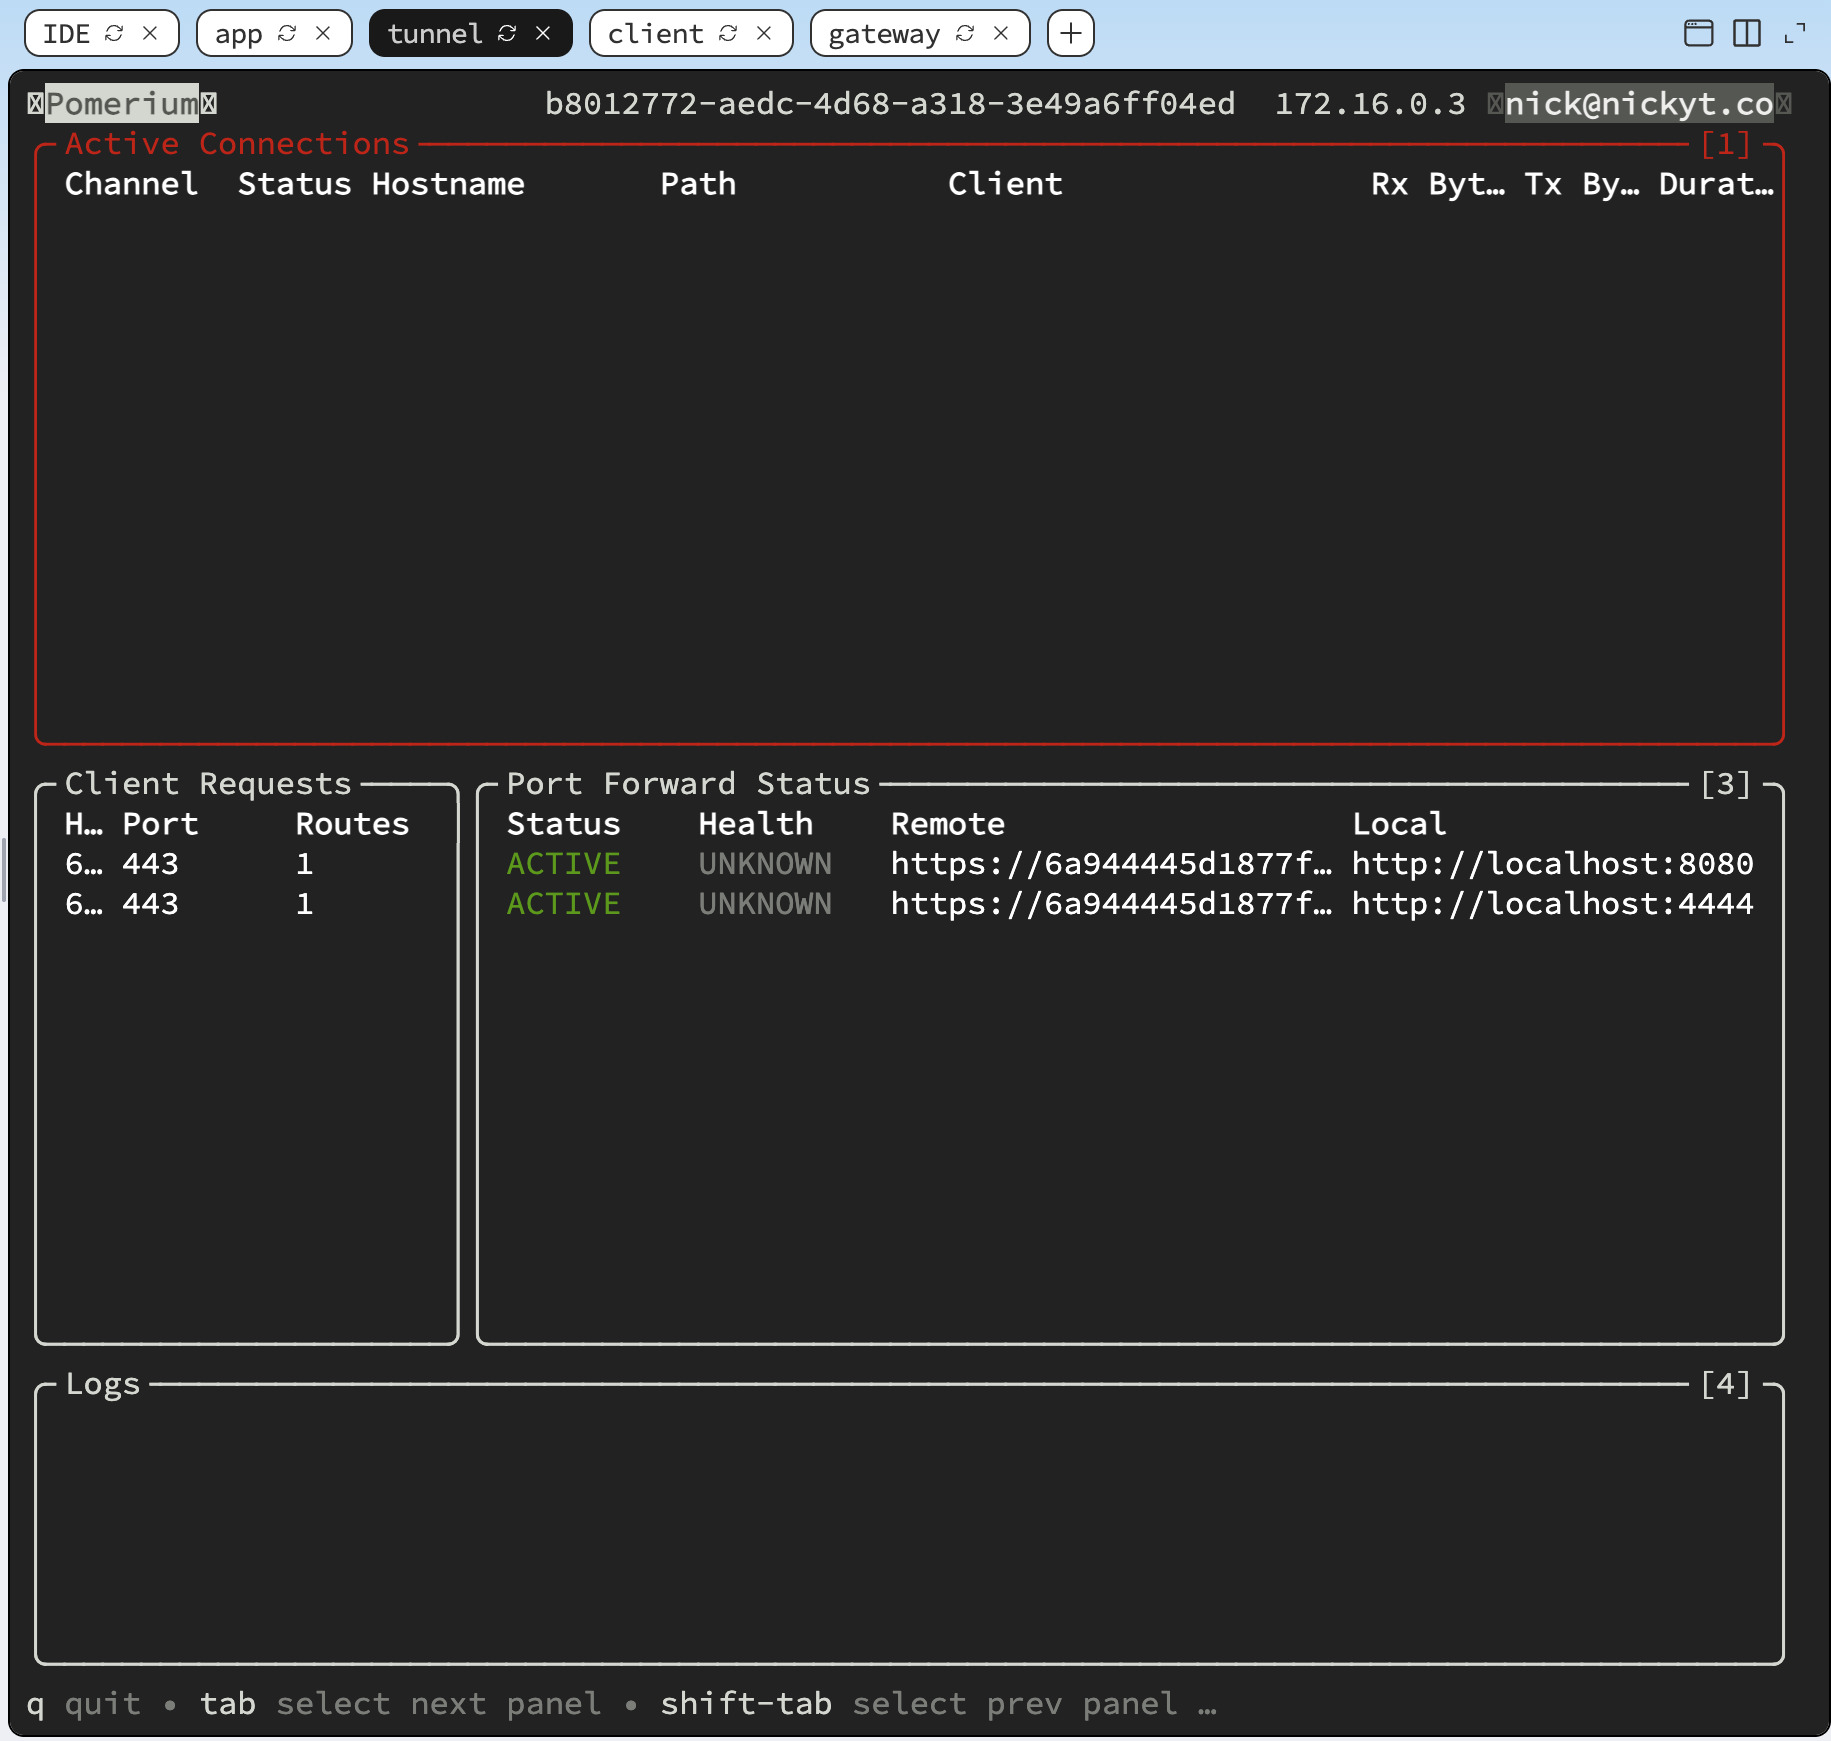
Back in the tunnel terminal, sign-in flips it into Pomerium's tunnel terminal UI (TUI), same as lesson 1. Port Forward Status now lists two entries, one per route, both ACTIVE. Leave this terminal running for the rest of the lesson; closing it (or pressing q) drops both tunnels at once.
Sign in to the assets route too
The app route's OAuth 2.1 flow is about to get all the attention in this unit, because that is the flow an MCP client drives. But the assets route has the exact same policy on it, and nothing drives its sign-in for you: your browser only visits that origin as a side effect of loading a widget's JavaScript, a background resource fetch, not a page you navigate to on purpose. So visit it on purpose, once, right now, in a plain browser tab.
The tunnel terminal is occupied by the tunnel TUI now, so switch to the client terminal instead. Shell variables don't carry over between tabs, so read the assets route URL again:
ASSETS_HOST=$(cat /tmp/mcp-lesson.assets-route \
  | tr -d '[:space:]' | sed 's|https://||; s|/$||')
echo "https://$ASSETS_HOST/echo"
Open that URL. You'll land on the same hosted authenticate sign-in you saw for the tunnel; once you're through, Vite's dev server hands back the Echo widget's own dev shell, the same kind of <script src> a host's iframe is about to load, and the widget renders in its default "No message yet" state. Nothing here calls the tool for you, so the buttons won't do anything useful yet, but seeing it render at all, styled, with no console errors, confirms the assets route is answering and the widget's JavaScript and CSS load through it. (The bare origin with no path now 404s: Vite's dev server has no index page of its own.) If it loads blank the first time, give it a moment or reload once: this is Vite compiling the widget's module graph on its very first request, made more noticeable by the tunnel's extra hop, not a sign anything is broken.
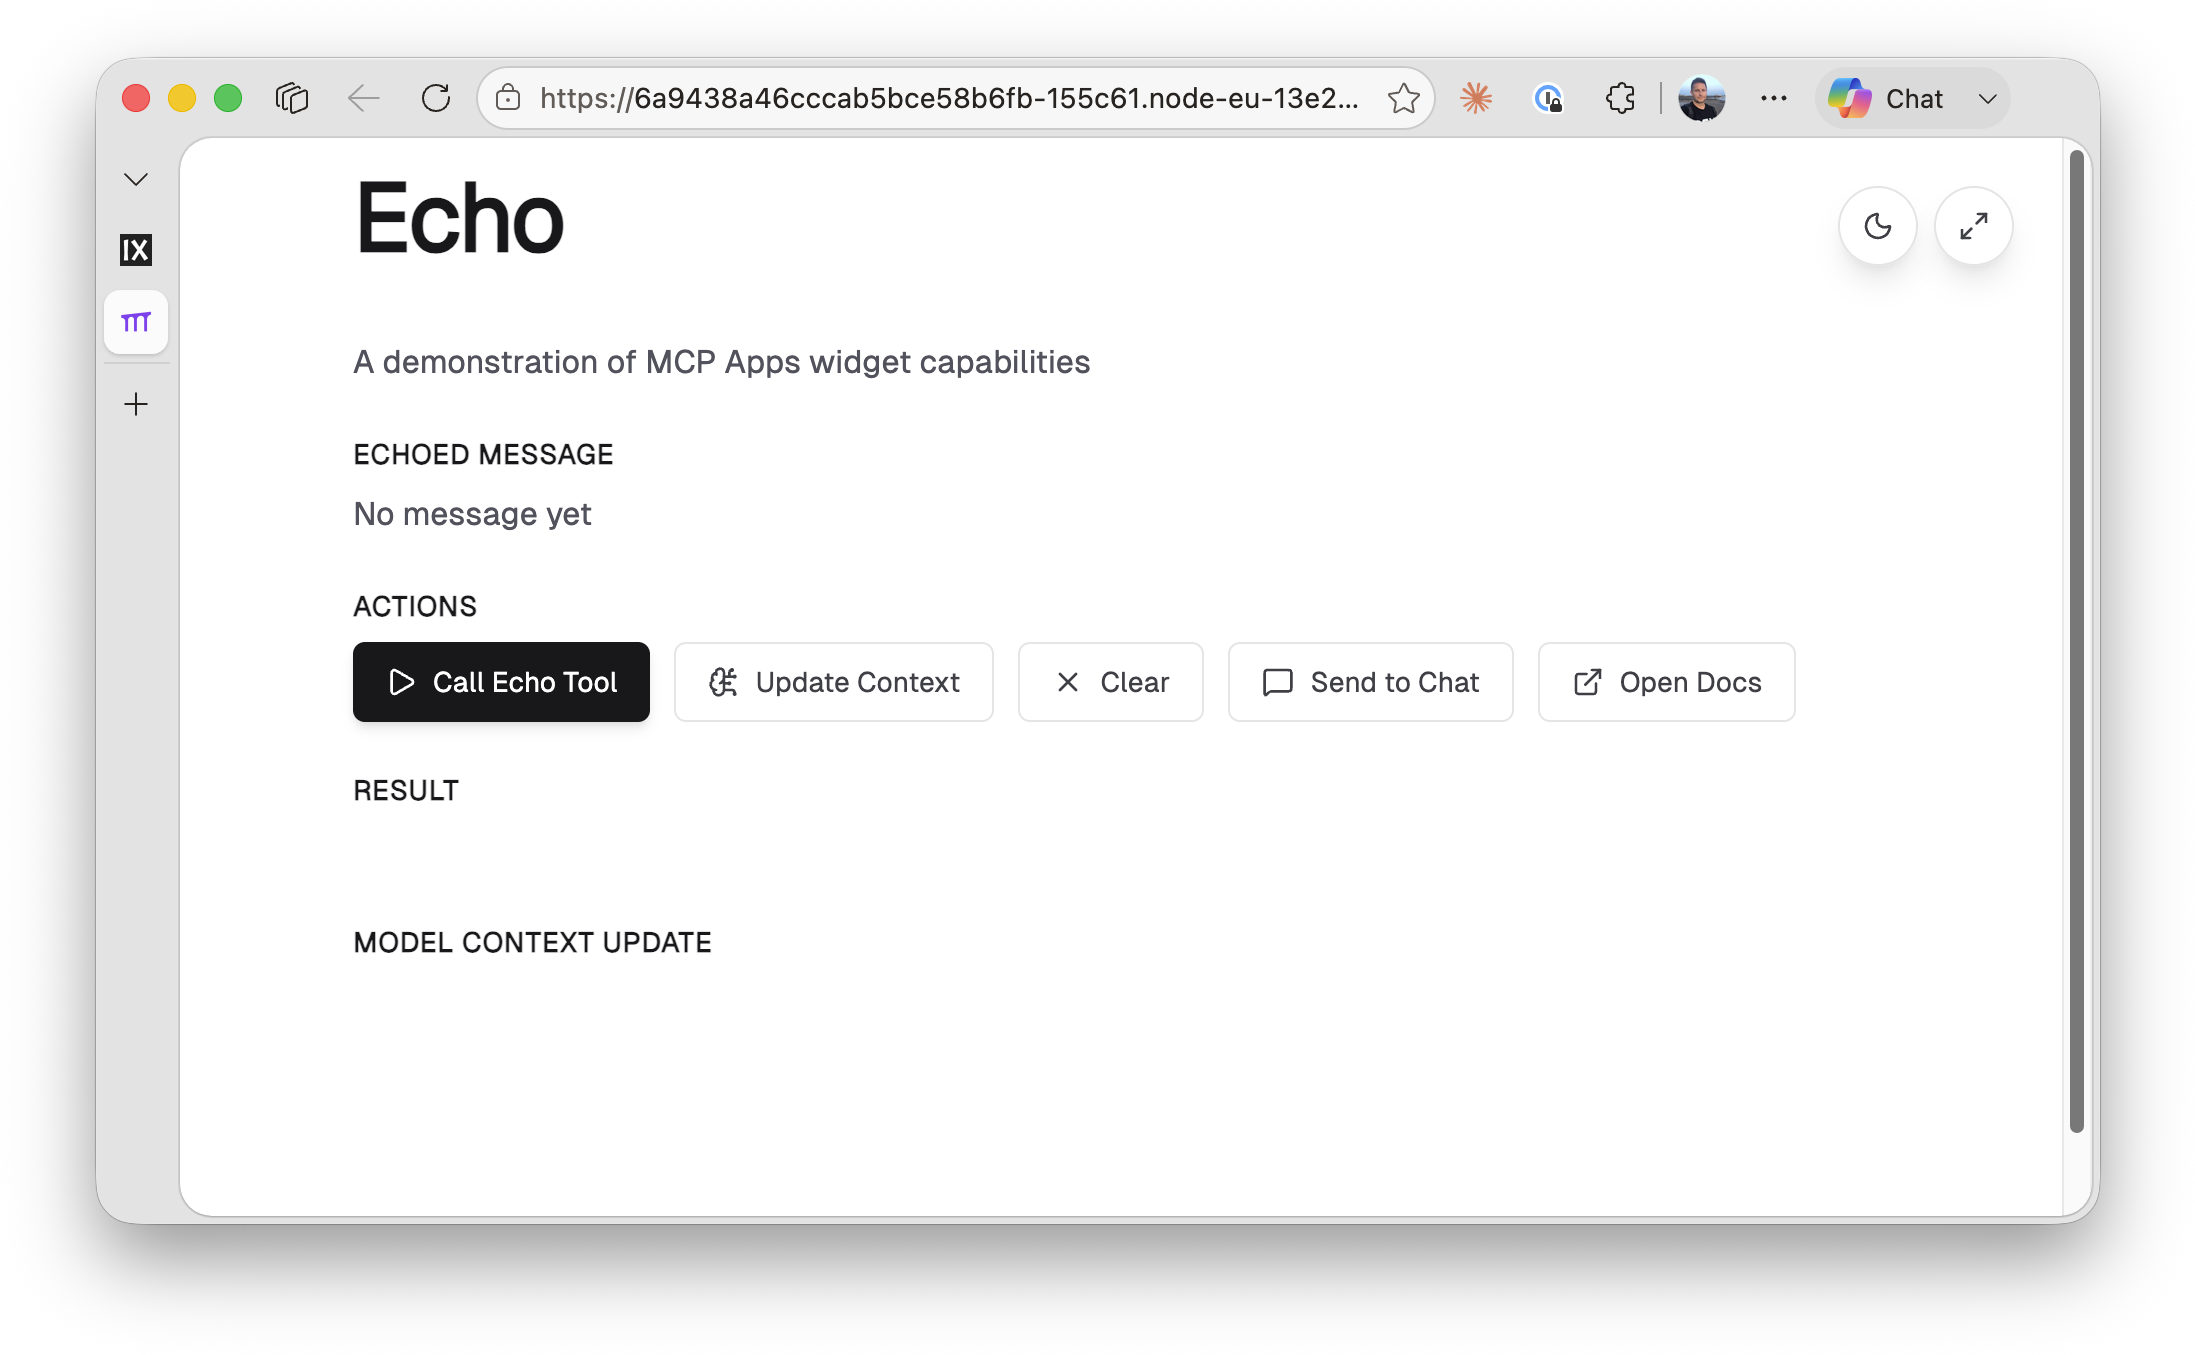
If you skip this and the widget renders as a blank rectangle after you call echo below, this is almost certainly why: the browser fetching the widget's script tag hit the same policy this route has always had, just from an iframe instead of an address bar. Come back to this step, then call the tool again.
Prove the app route's front door is locked
Still in the client terminal, read the app route URL the same way, then knock on the app route without credentials:
APP_HOST=$(cat /tmp/mcp-lesson.app-route | tr -d '[:space:]' | sed 's|https://||; s|/$||')
curl -si "https://$APP_HOST/mcp" | head -n 5
HTTP/1.1 401 Unauthorized
strict-transport-security: max-age=31536000; includeSubDomains; preload
x-frame-options: SAMEORIGIN
x-xss-protection: 1; mode=block
access-control-allow-headers: Authorization, Content-Type, Accept, MCP-Protocol-Version, MCP-Session-Id, Last-Event-ID
Same shape as lesson 1: a 401, and access-control-allow-headers naming MCP's own headers. Your app never saw this request.
Connect MCPJam and render the widget
Now connect as a real MCP client, one that actually renders MCP Apps widgets: MCPJam, hosted. It's a tool in the same space as MCP Inspector, with strong support for MCP Apps widgets specifically. Nothing to self-host or expose here, on purpose: MCPJam's hosted web app runs entirely on their own infrastructure, and just needs your app route's public URL, the same way any external HTTPS client would reach it. Read the MCP endpoint, still in the client terminal:
echo "$(cat /tmp/mcp-lesson.app-route | tr -d '[:space:]' | sed 's|/$||')/mcp"
Open app.mcpjam.com in a regular browser tab. Nothing is connected yet:
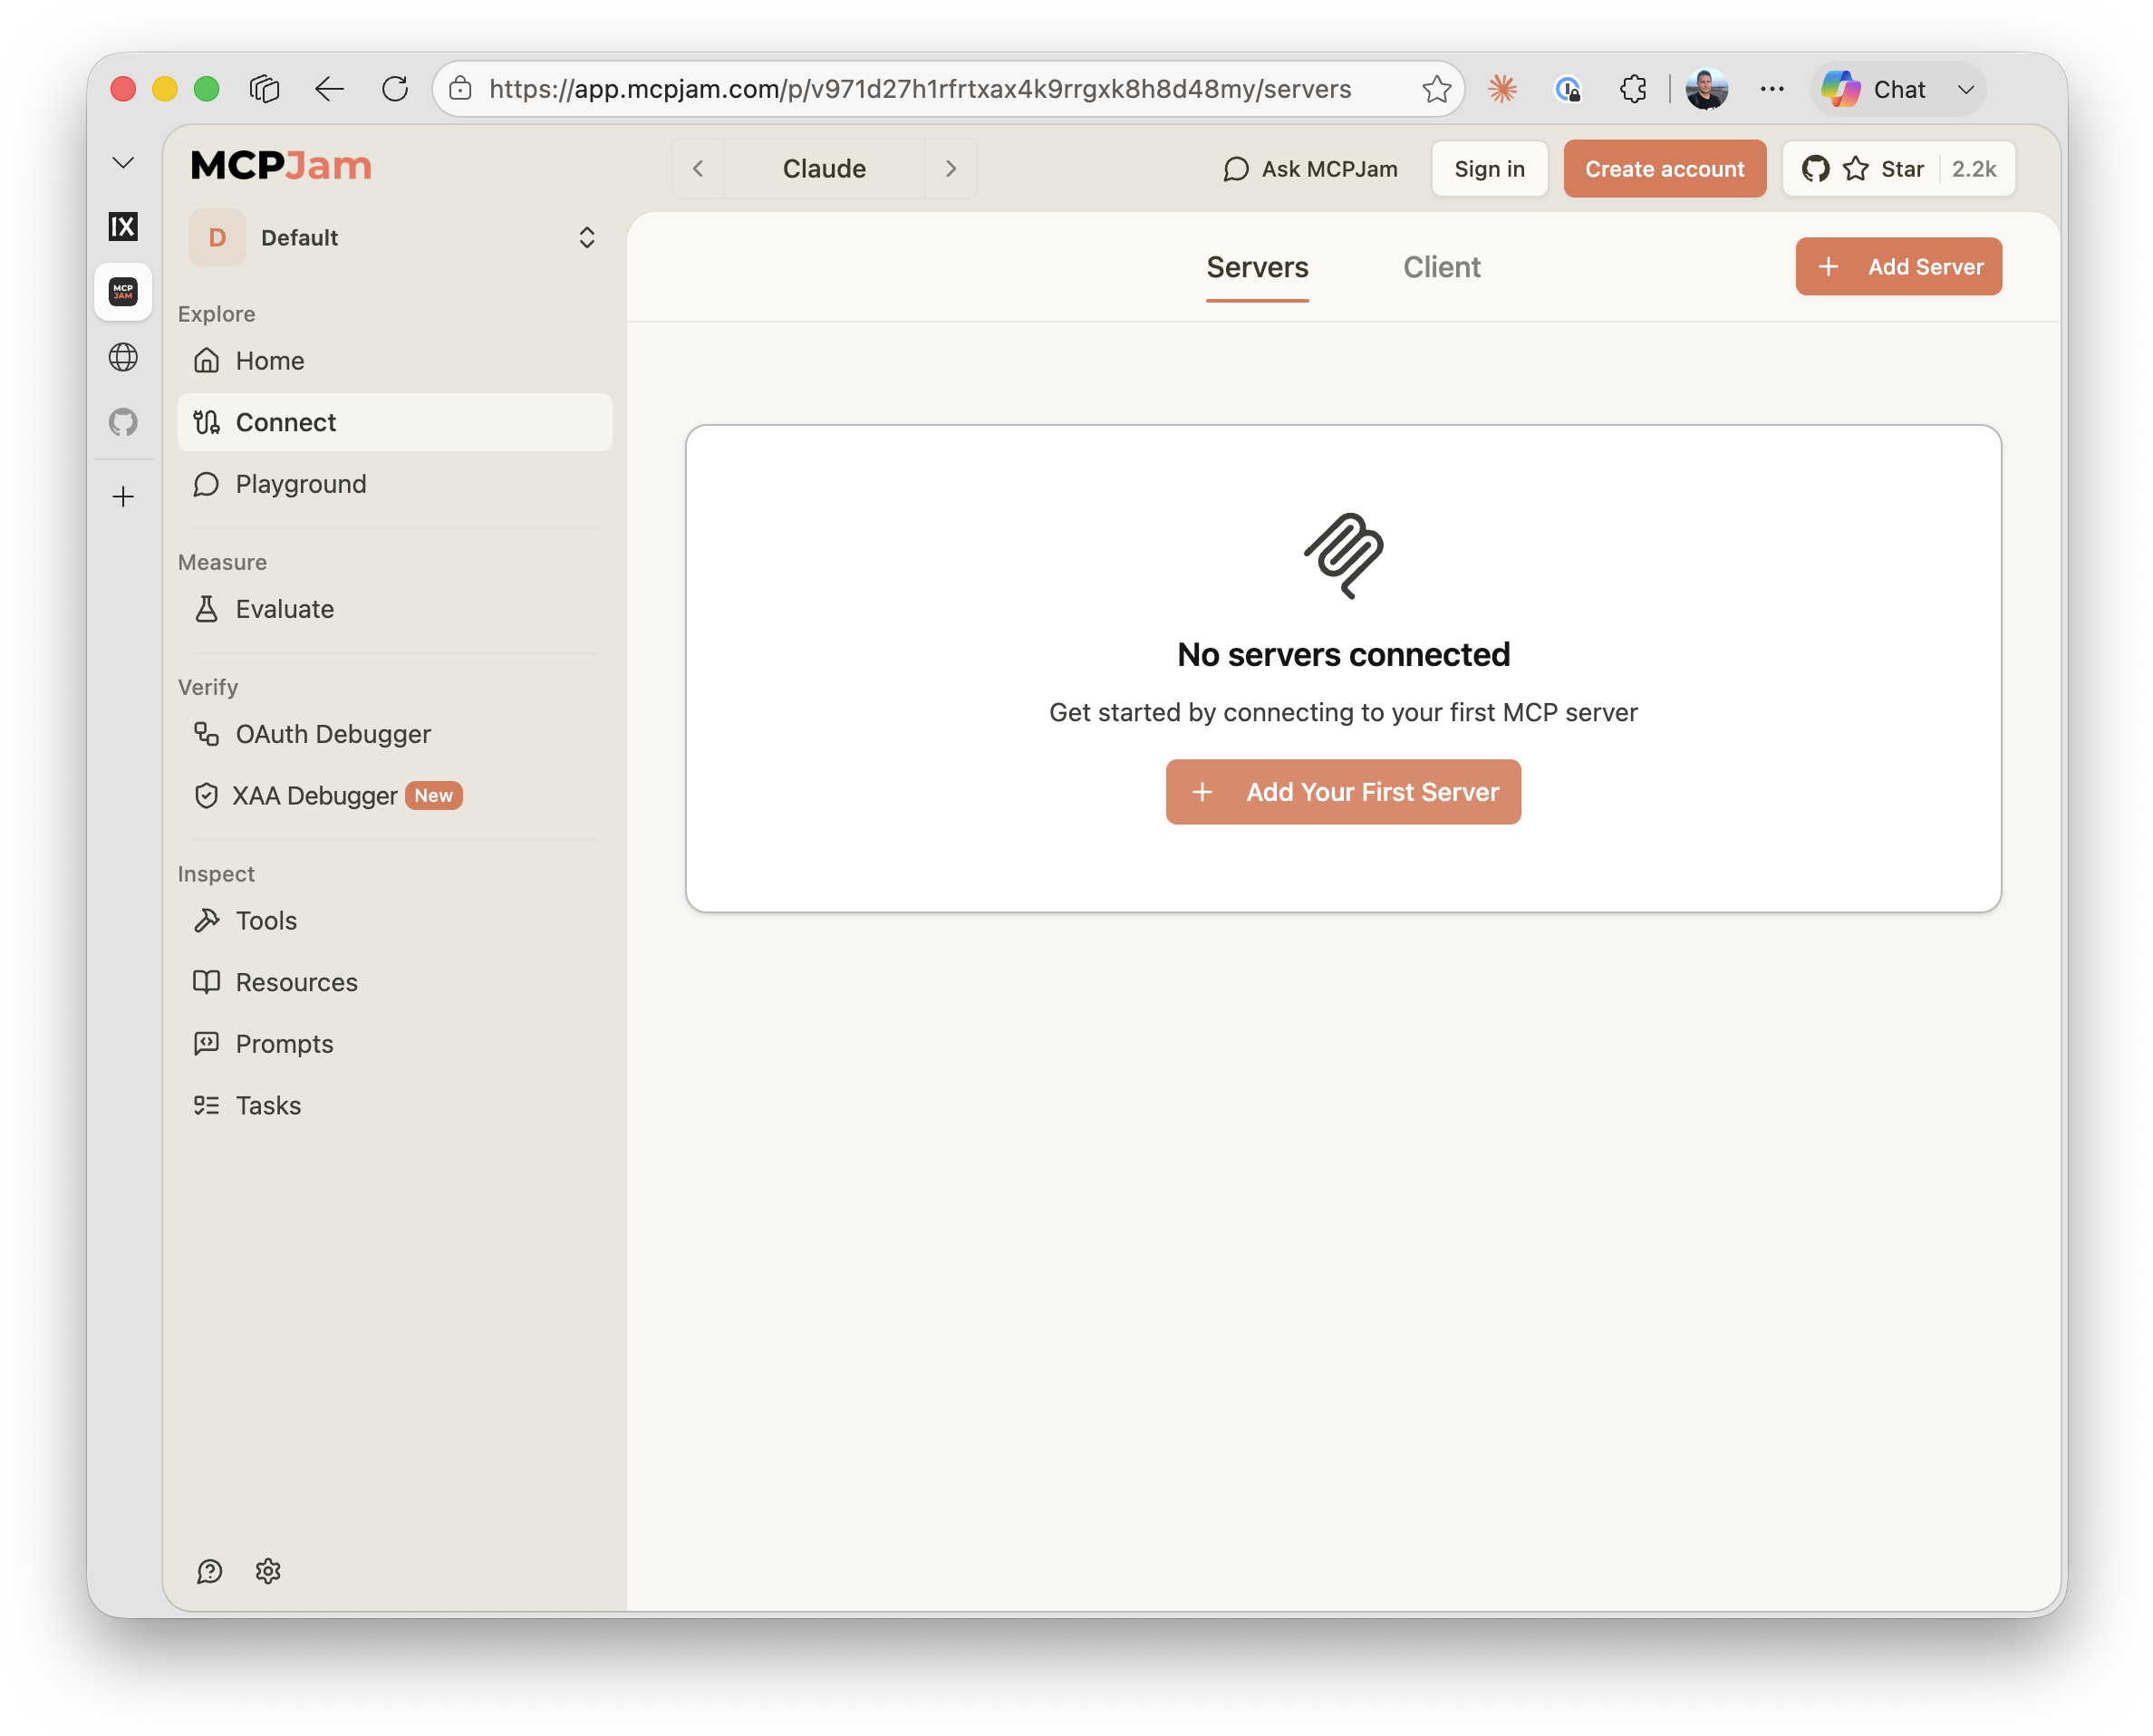
Click + Add Server (or Add Your First Server). In the dialog, give it a name (say, mcp-app-server), paste the endpoint into the URL field, and leave Connection Type (HTTPS) and Authentication (Auto: anonymous first, then OAuth if required) at their defaults:
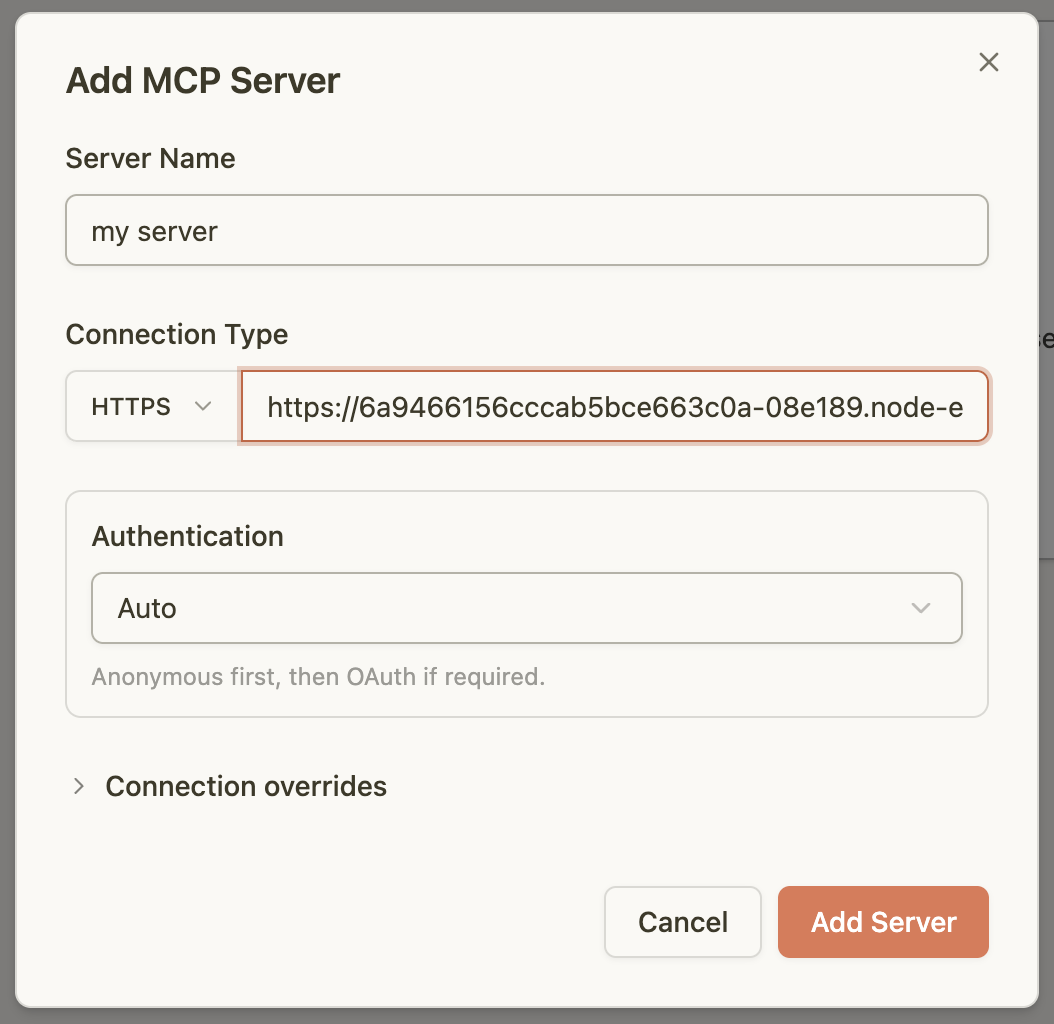
Click Add Server.
- That "anonymous first" is the same 401 you just curled: MCPJam tries the request without credentials, gets rejected, discovers Pomerium's OAuth metadata from the challenge, and registers as a client. While it's finishing setup, MCPJam asks you to confirm the connection itself, its own consent step, separate from Pomerium's:
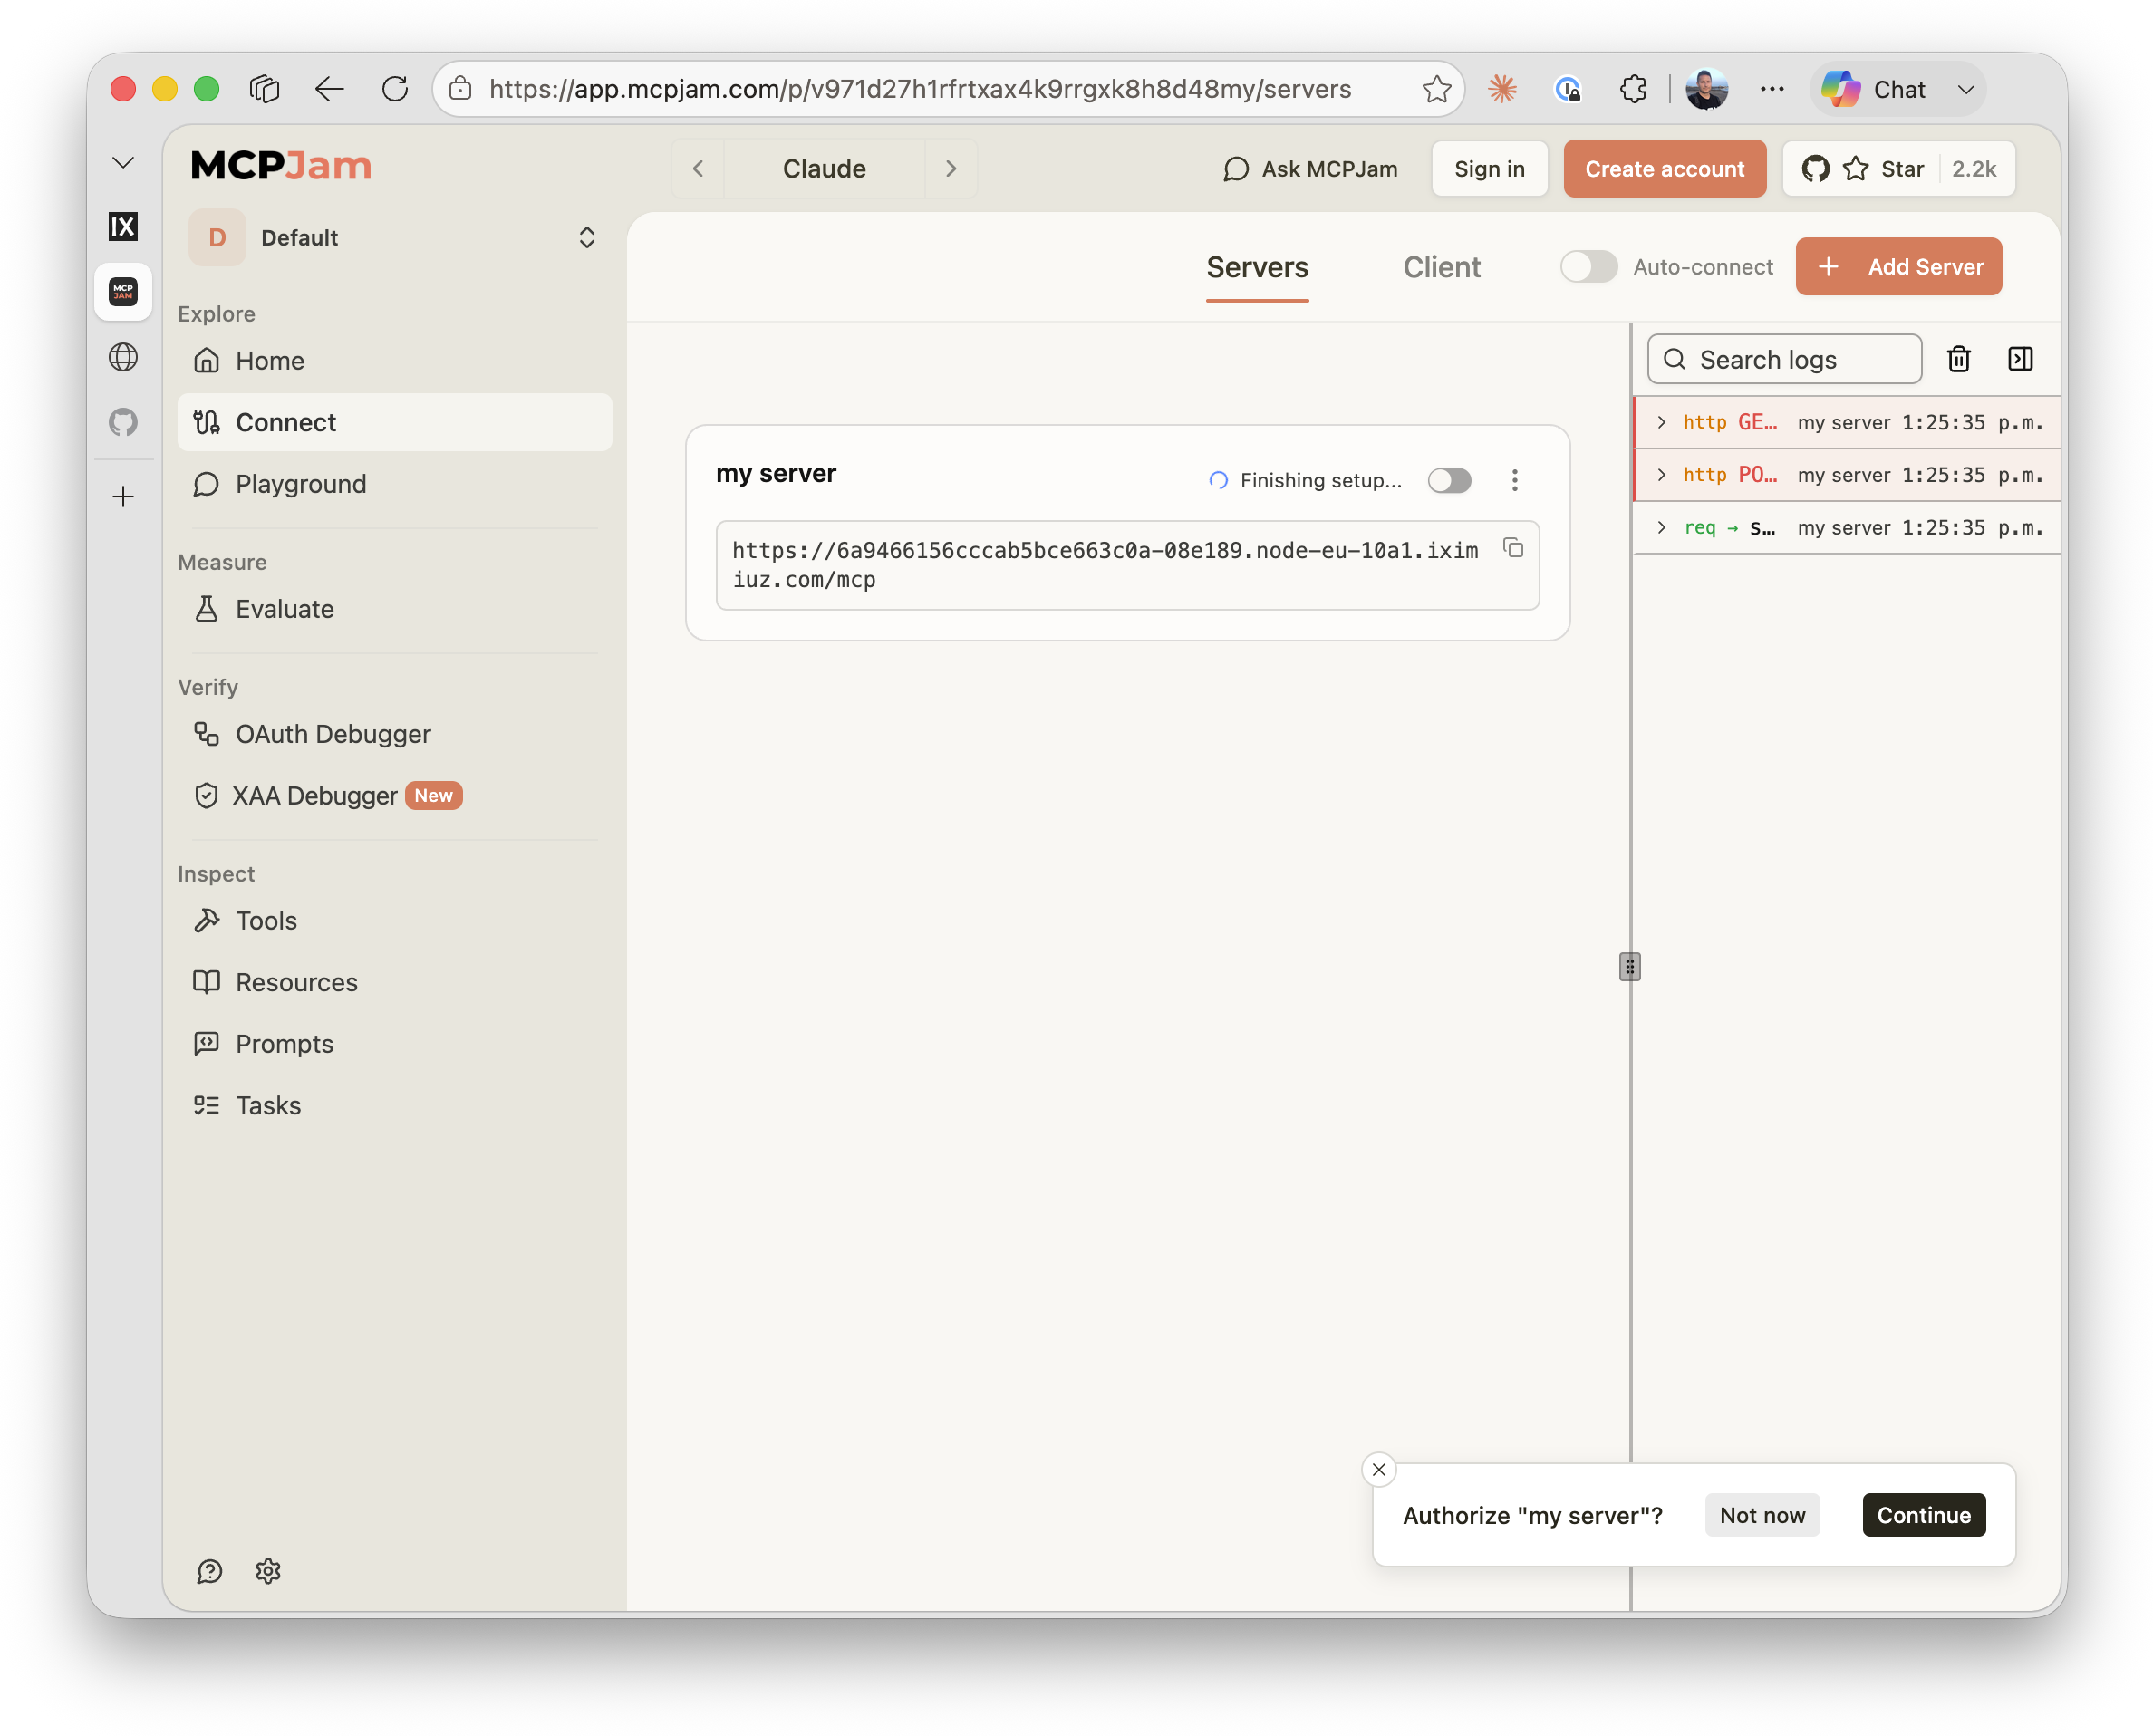
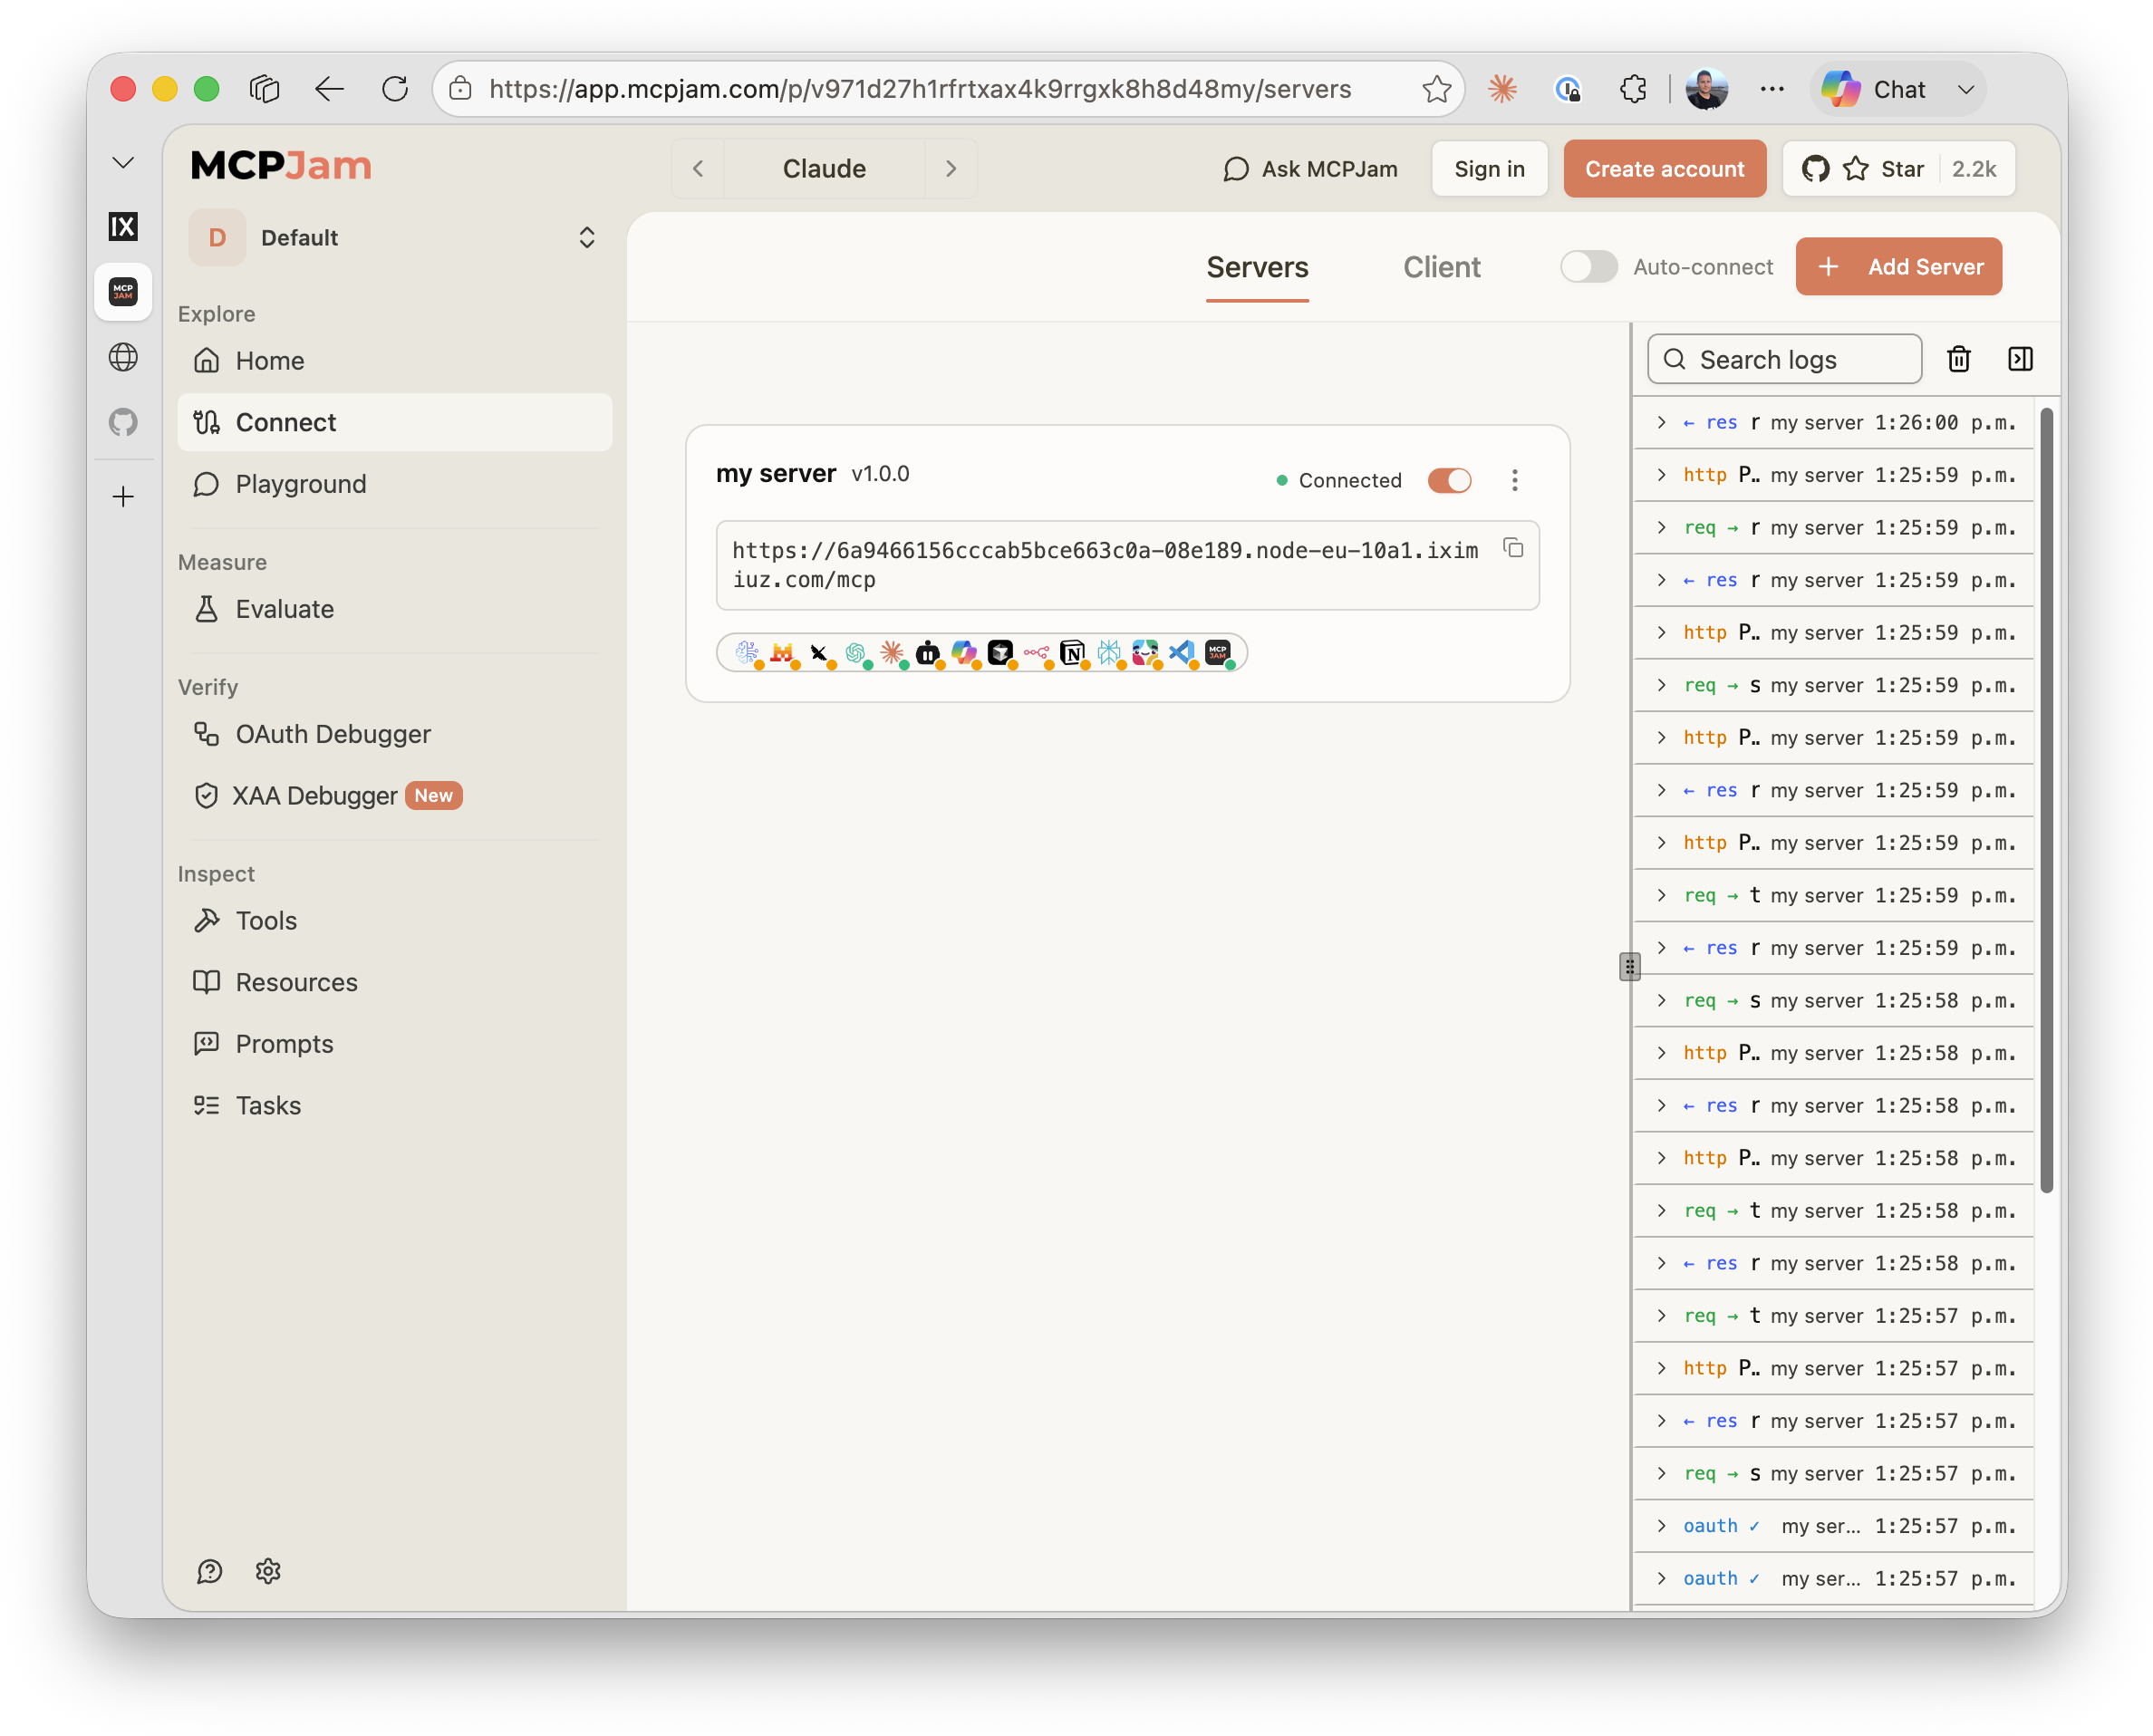
Click Continue. You most likely won't see a Pomerium login screen after that: you already have the session you created signing into the tunnel (and again when you visited the assets route directly), so that part of the flow completes silently, and the card flips to connected:
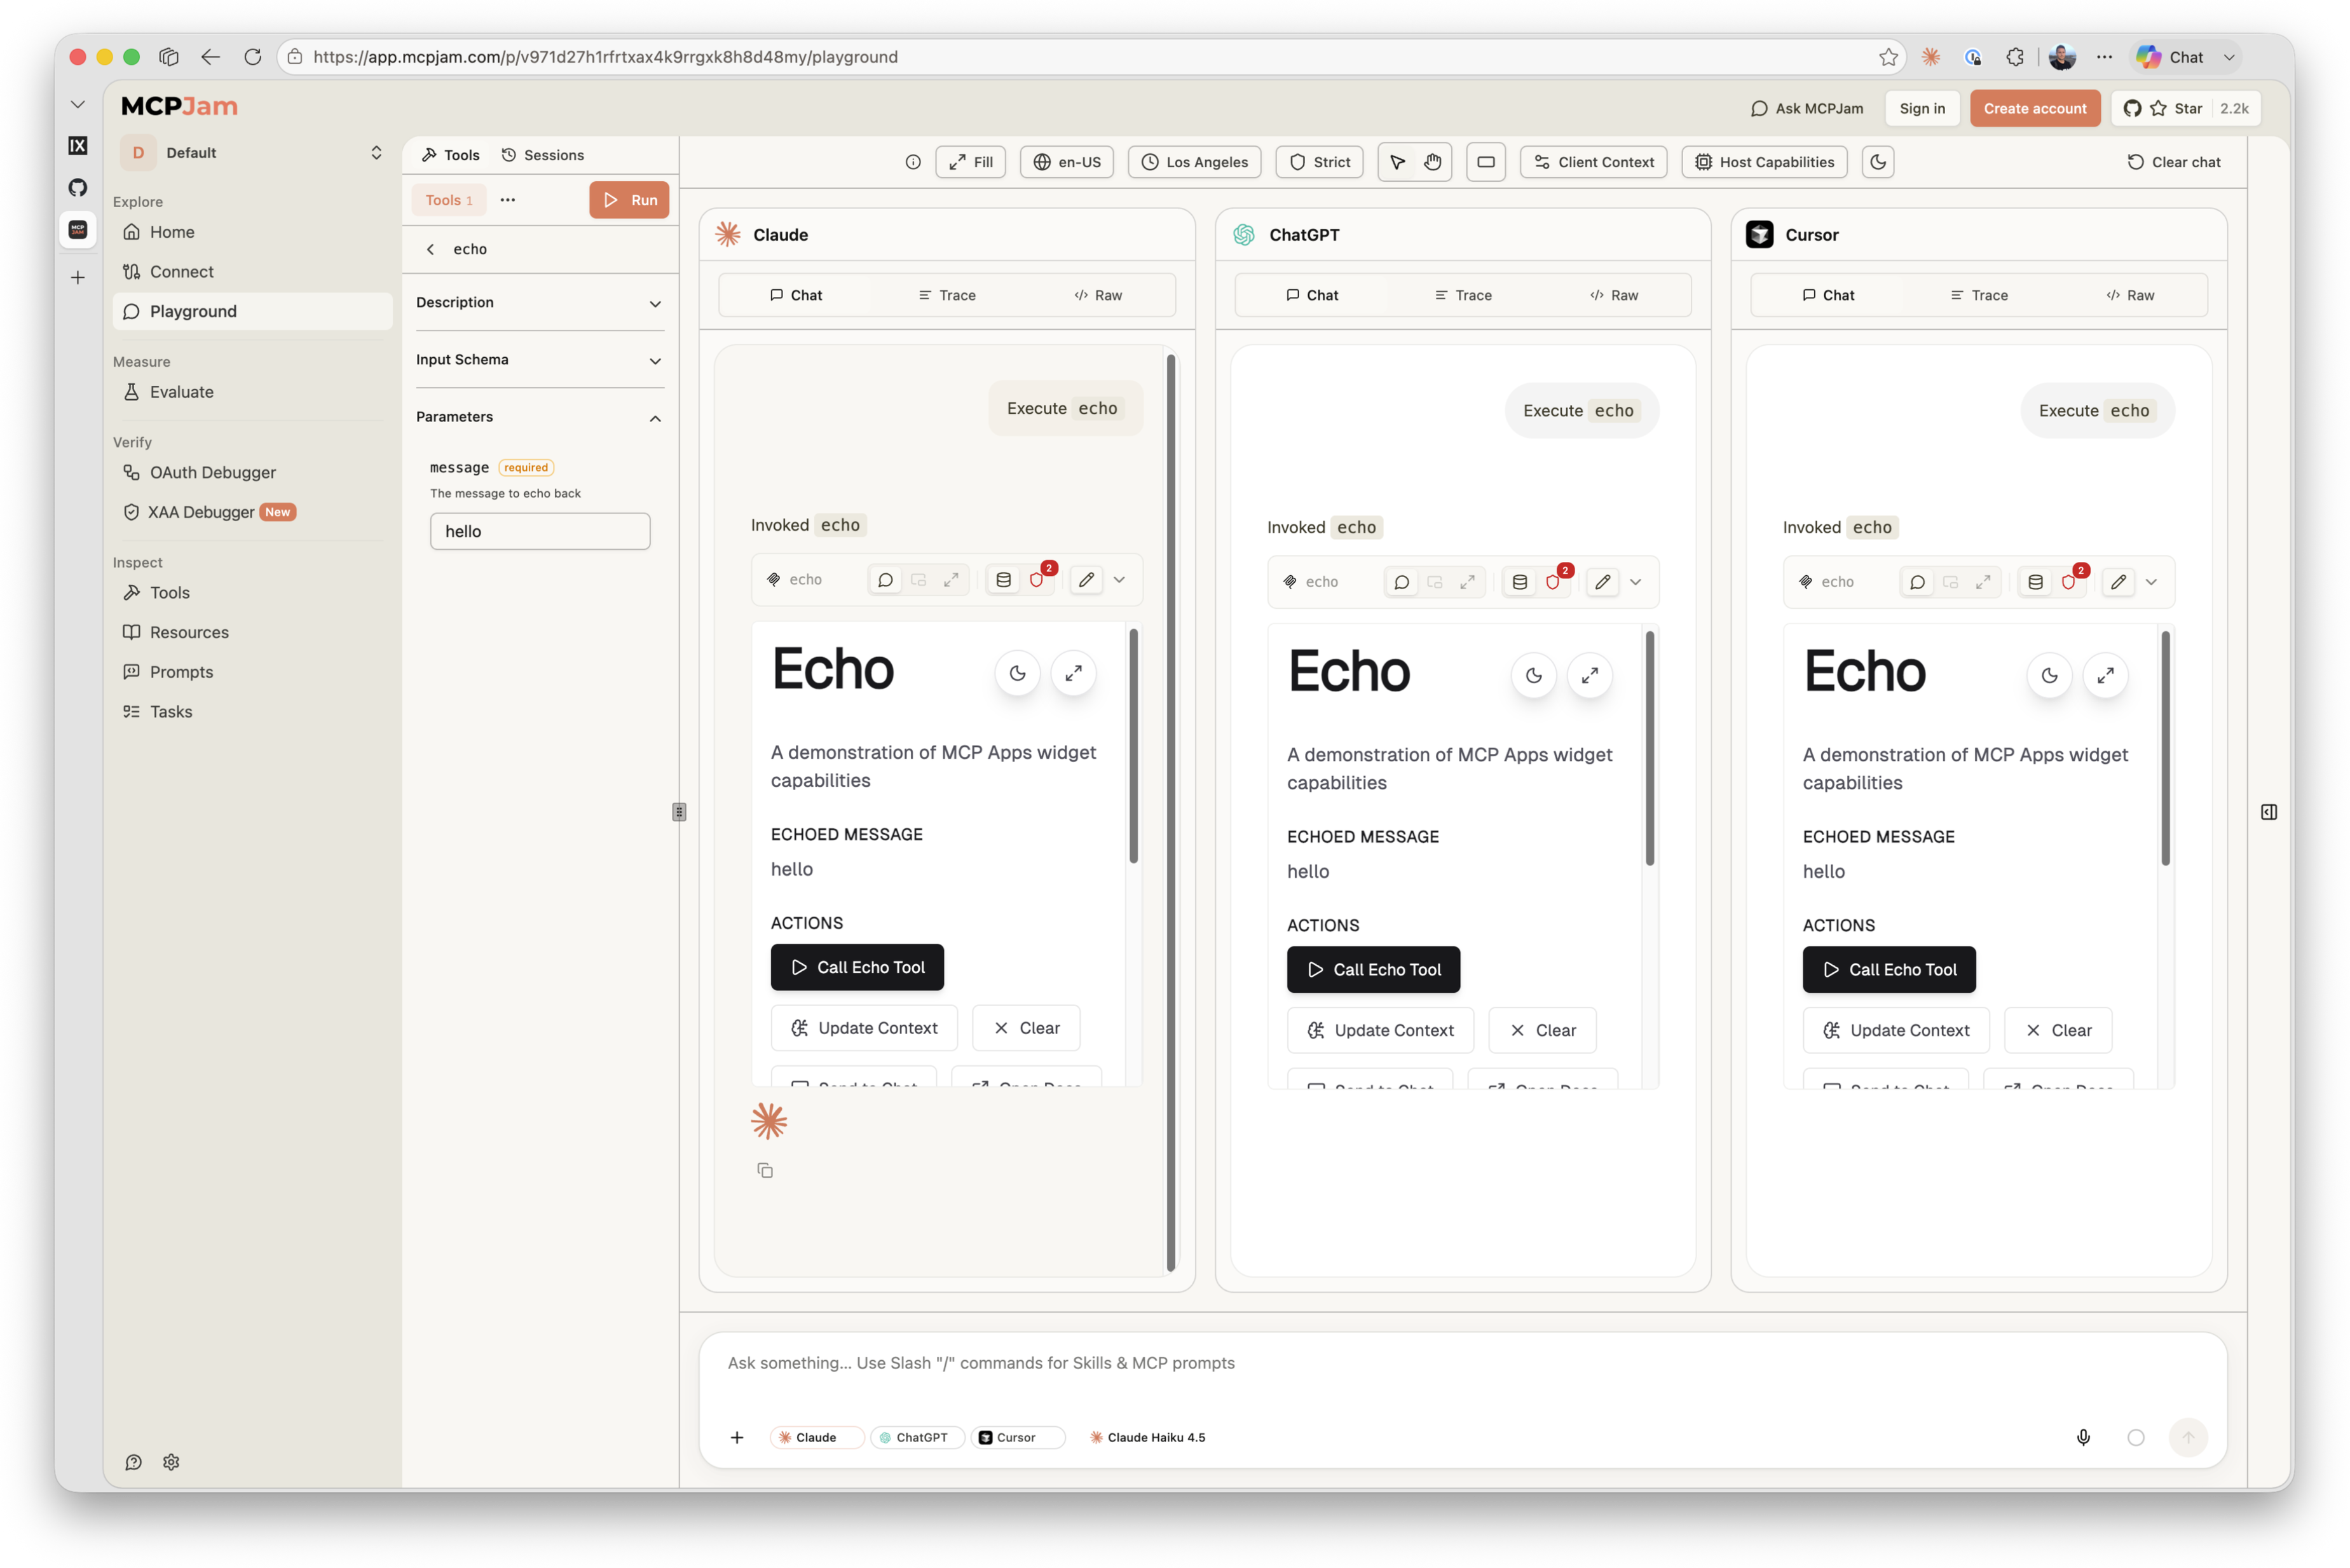
- Open Playground in the left sidebar (not the Connect screen you just came from). The Tools panel on the right already lists echo, the one tool the server exposes:
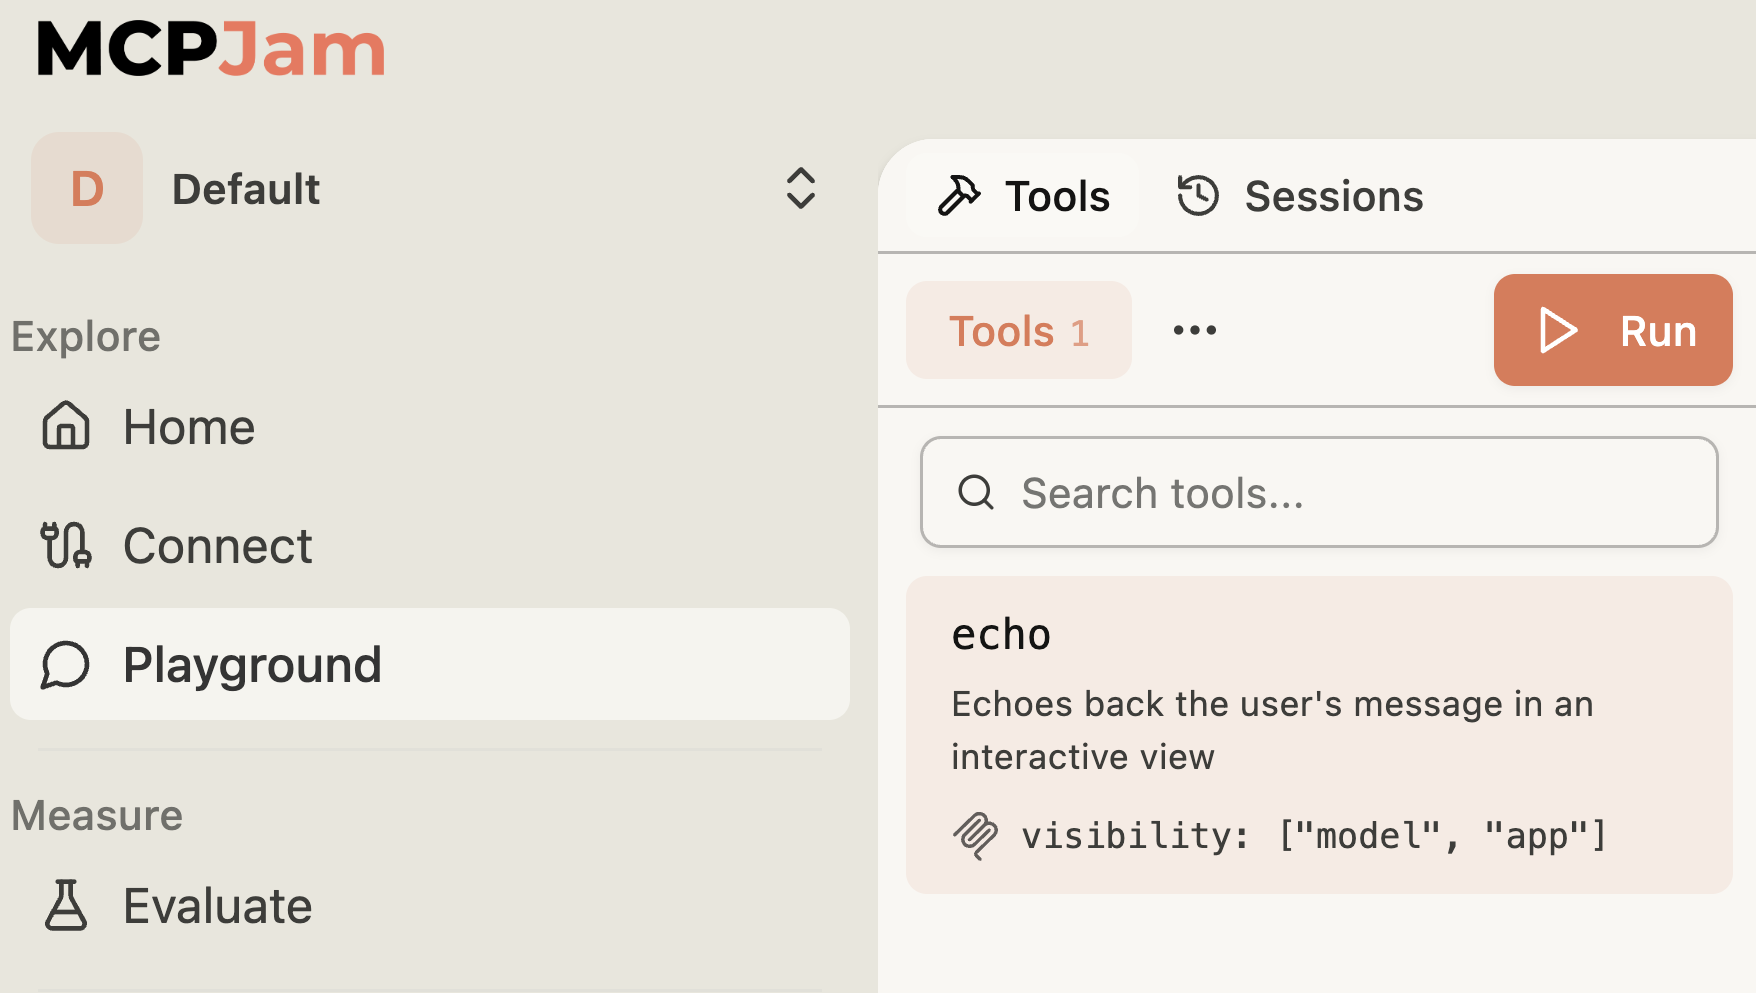
Click it, and fill in its message parameter, say hello.
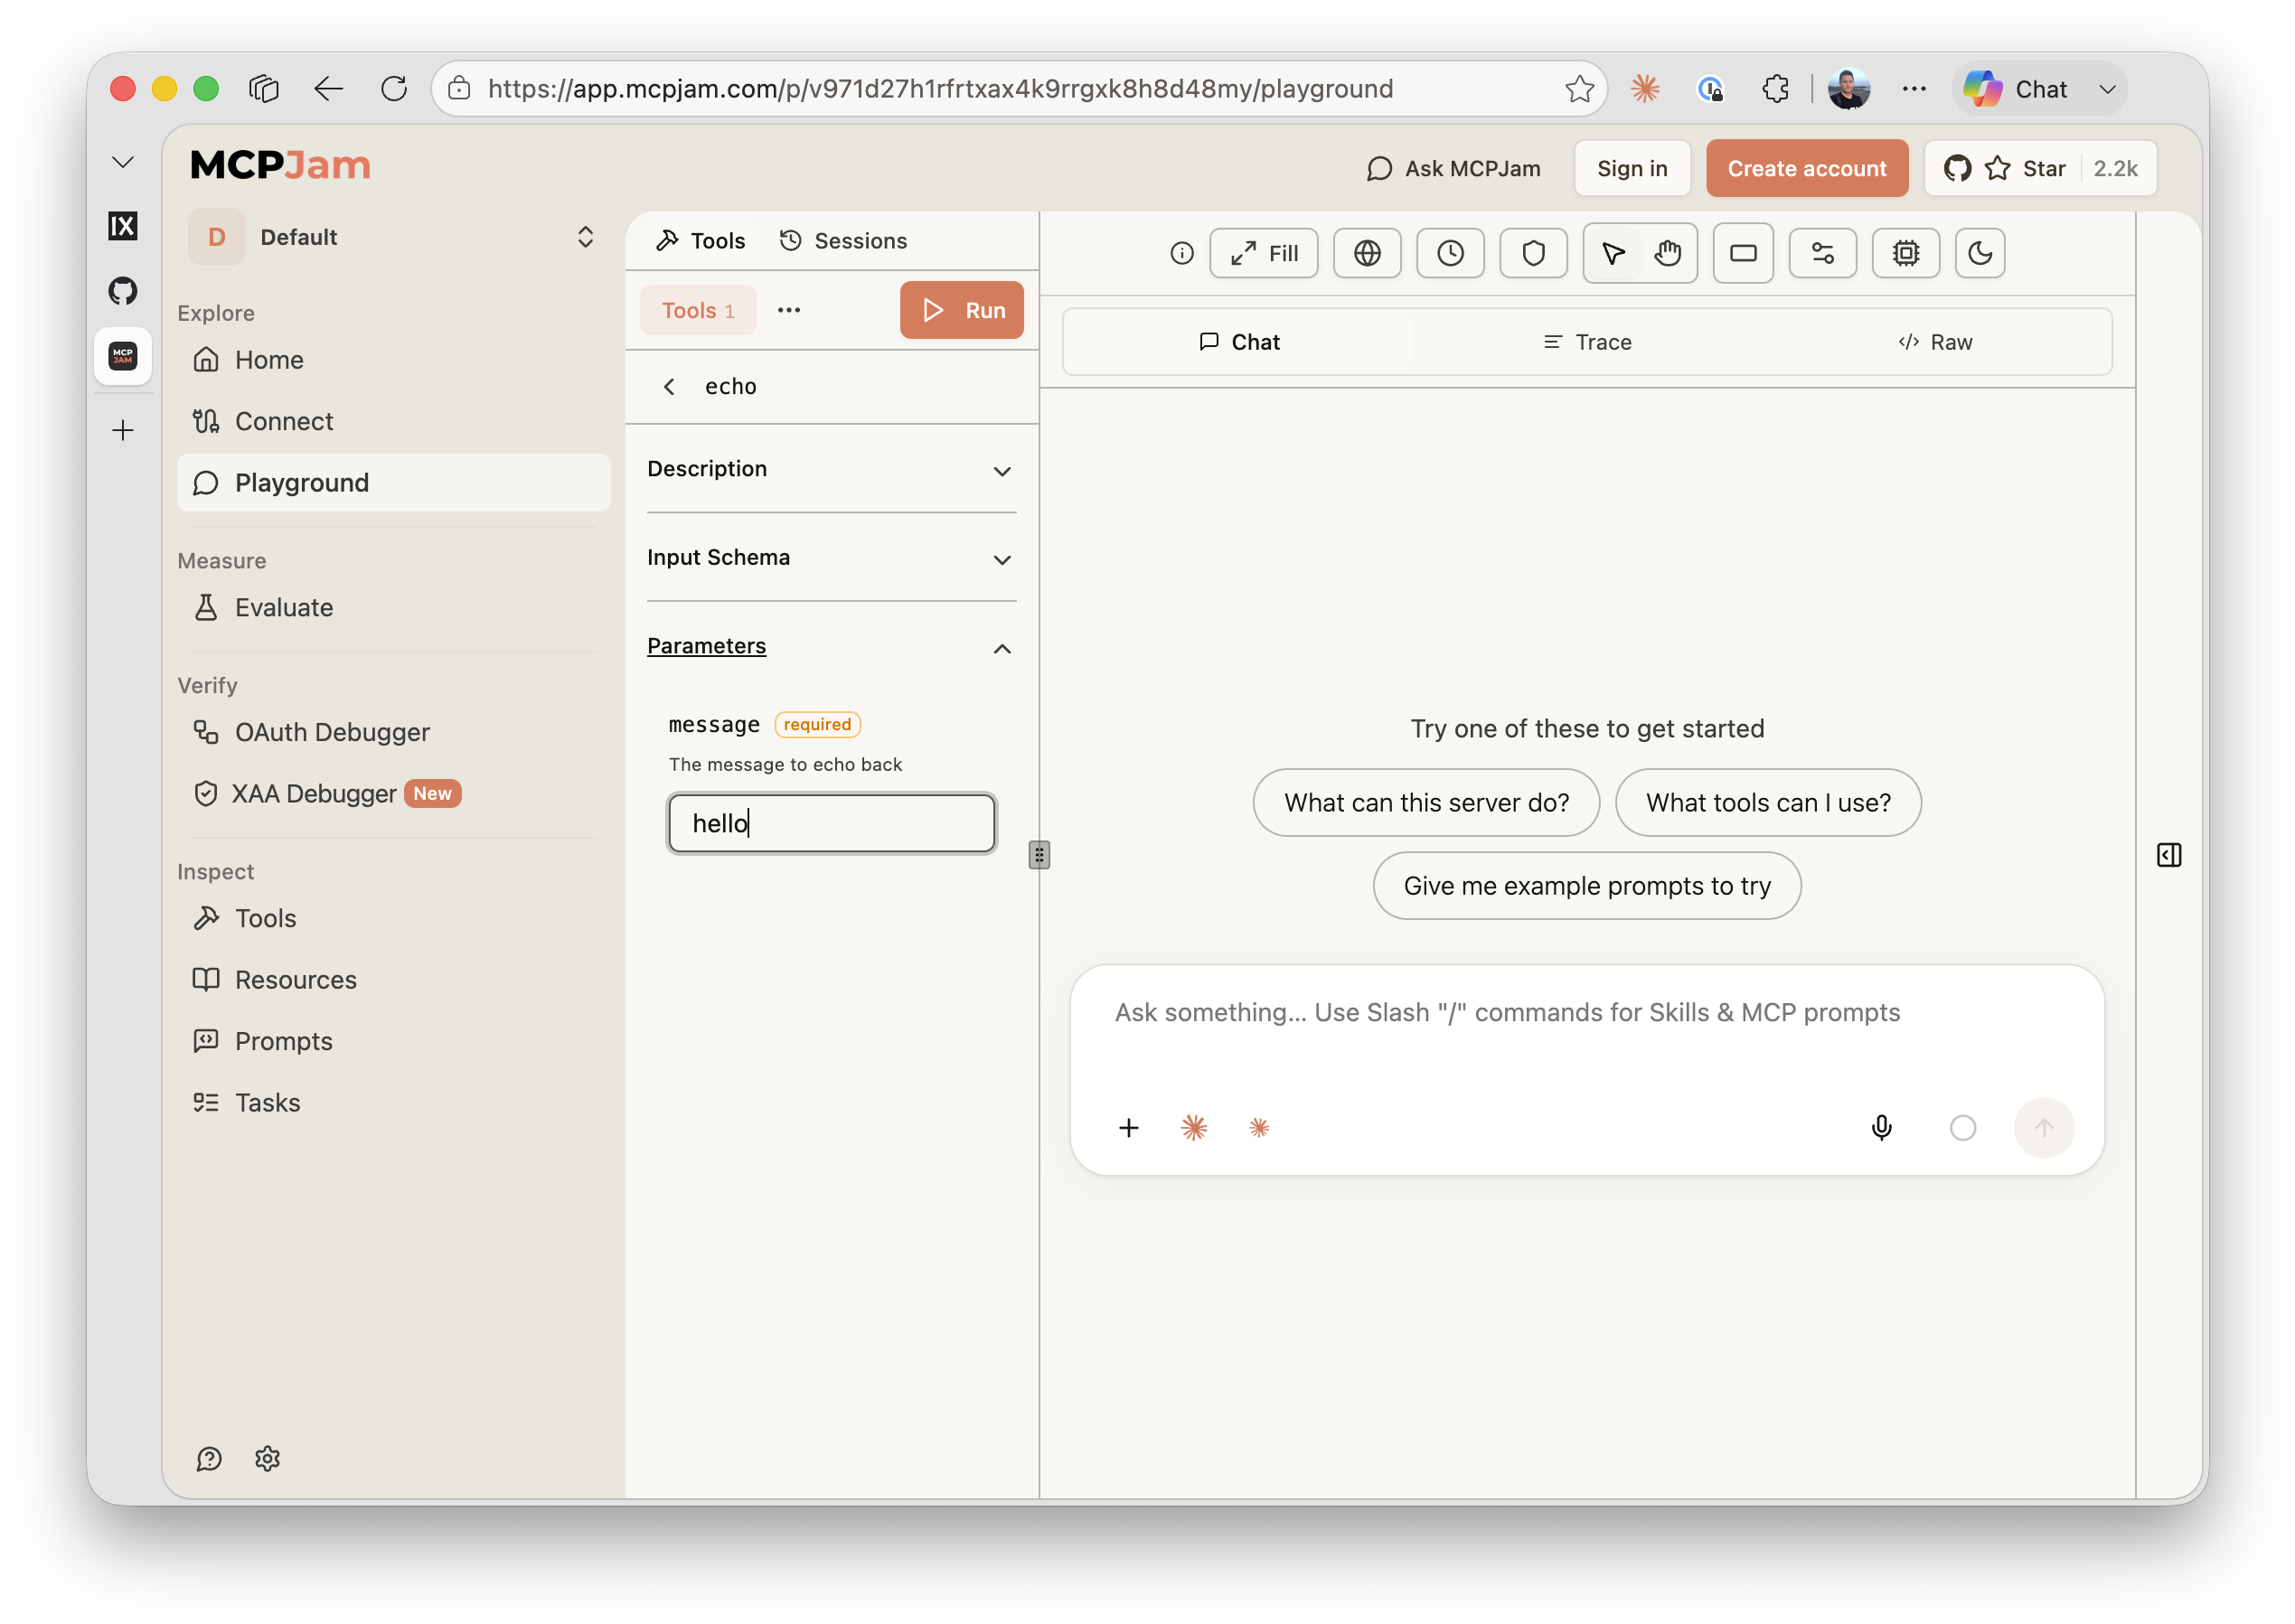
- Click Run. Playground calls
echoand renders the result side by side across each simulated host: the same MCP response, rendered independently in each. Every pane shows the same thing: the structured content (echoedMessage,timestamp) any MCP client would see, but alsoui://echo's widget rendered inline, the same React component fromEcho.tsx, showing your echoed message and buttons that call back into the server through theAppAPI.
- Click the widget's own Call Echo Tool button (inside the rendered widget, not the sidebar's Run). This calls back into the server through the
AppAPI'scallServerTool, the same way a button in a real host's widget would: a secondechoinvocation, this time with the message hardcoded inEcho.tsx("Hello from the echo widget!"), and its own result rendered inline below the widget. The widget isn't just a static render of the first response; it's a live view that can keep talking to the server.
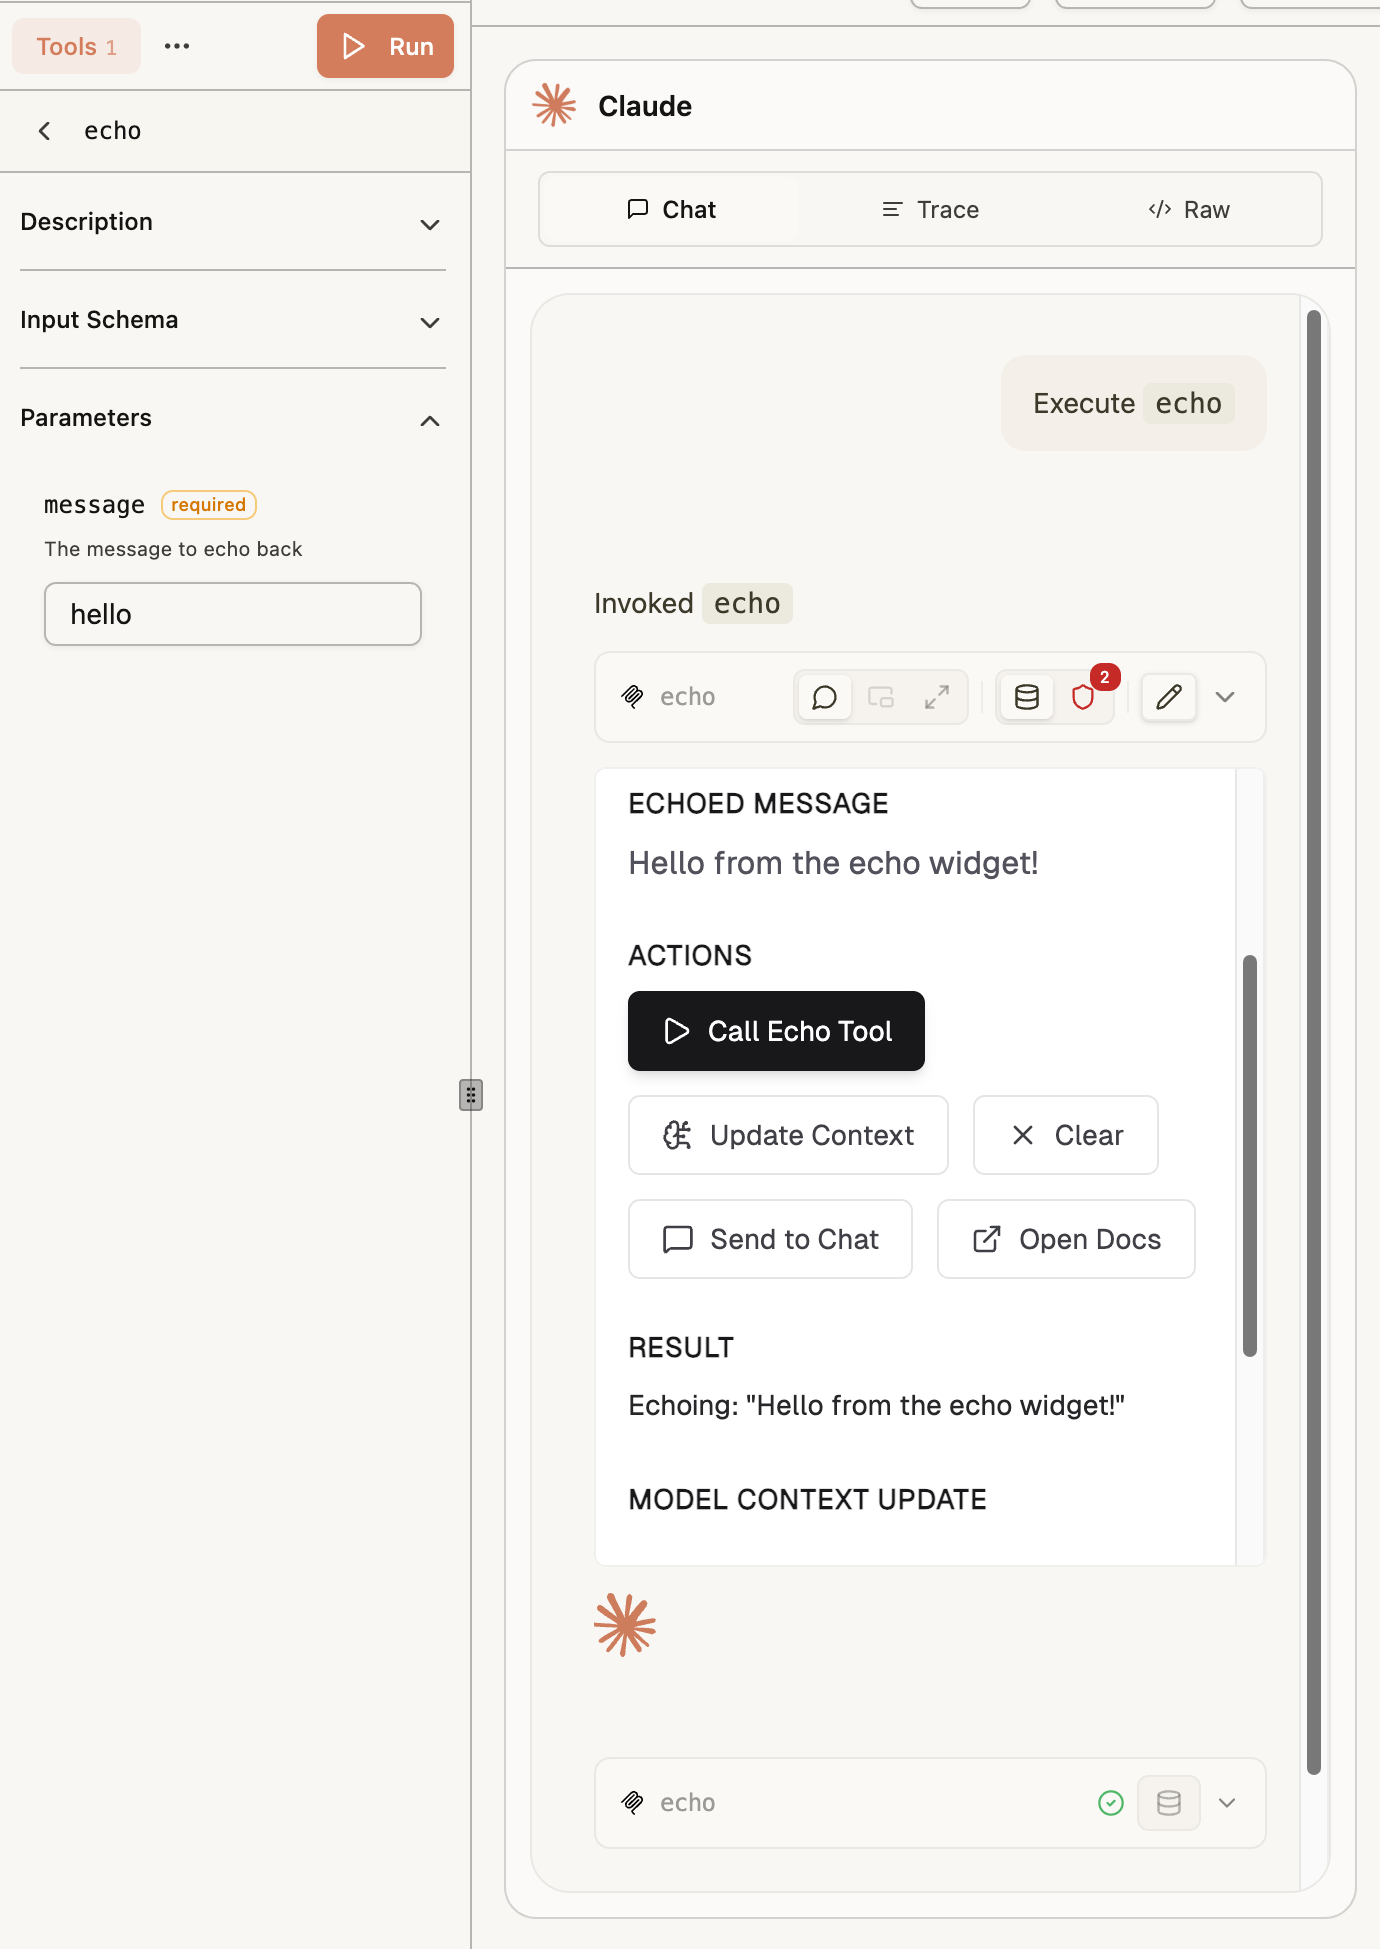
That render is the payoff of the second tunnel, three times over: the widget's HTML came back over the app route, but its JavaScript and CSS loaded from the assets route, a completely different hostname, over a completely different tunnel bind, and your browser (wherever it actually is) reached both, regardless of which host is simulating the call.
What the gateway logged
Two routes, two independent trails. On the gateway terminal (press Ctrl+C first if you still have the logs running from unit 2):
cd ~/pomerium-gateway
docker compose logs pomerium --no-log-prefix | grep mcp-tool | tail -n 1 | jq
The output should look similar to this:
{
  "level": "info",
  "server-name": "all",
  "service": "authorize",
  "request-id": "3f9e7c2a-1b6d-4a8e-9c31-0a5f6e2d8b41",
  "path": "/mcp",
  "host": "XXXX.node-eu-XXXX.iximiuz.com",
  "email": "you@example.com",
  "mcp-method": "tools/call",
  "mcp-tool": "echo",
  "mcp-tool-parameters": {
    "message": "hello"
  },
  "allow": true,
  "allow-why-true": ["email-ok"],
  "deny": false,
  "deny-why-false": [],
  "time": "2026-08-07T15:25:50Z",
  "message": "authorize check"
}
That entry is the app route's record of your tool call, identical in shape to lesson 1's. Now check the assets route's own trail, filtering on its hostname instead of mcp-tool (plain HTTP routes carry no MCP fields to grep for):
ASSETS_HOST=$(cat /tmp/mcp-lesson.assets-route \
  | tr -d '[:space:]' | sed 's|https://||; s|/$||')
docker compose logs pomerium --no-log-prefix \
  | grep "$ASSETS_HOST" \
  | grep '"allow":true' \
  | tail -n 3 | jq
The output should look similar to this:
{
  "level": "info",
  "server-name": "all",
  "service": "authorize",
  "request-id": "978718ff-4c40-4d5c-8b9c-06ba2361e8f5",
  "path": "/node_modules/.vite/deps/lucide-react.js",
  "host": "XXXX.node-eu-XXXX.iximiuz.com",
  "email": "you@example.com",
  "allow": true,
  "allow-why-true": ["email-ok"],
  "deny": false,
  "deny-why-false": [],
  "time": "2026-08-30T18:40:01Z",
  "message": "authorize check"
}
{
  "level": "info",
  "server-name": "all",
  "service": "authorize",
  "request-id": "862f04c2-8252-4a4e-a014-96b51ff91e89",
  "path": "/src/components/ui/button.tsx",
  "host": "XXXX.node-eu-XXXX.iximiuz.com",
  "email": "you@example.com",
  "allow": true,
  "allow-why-true": ["email-ok"],
  "deny": false,
  "deny-why-false": [],
  "time": "2026-08-30T18:40:19Z",
  "message": "authorize check"
}
{
  "level": "info",
  "server-name": "all",
  "service": "authorize",
  "request-id": "c45107fe-81df-489e-88c8-bc42c680303d",
  "path": "/src/utils/cn.ts",
  "host": "XXXX.node-eu-XXXX.iximiuz.com",
  "email": "you@example.com",
  "allow": true,
  "allow-why-true": ["email-ok"],
  "deny": false,
  "deny-why-false": [],
  "time": "2026-08-30T18:40:25Z",
  "message": "authorize check"
}
You should see a handful of entries like these, each with allow: true and your email: not a single echo.html and its bundle (this lesson's dev server serves the widget's live module graph, not a built bundle), but the individual source files and dependencies Vite serves on demand, .tsx/.ts/.js paths under /src and /node_modules/.vite/deps. Two routes, two policies, one gateway, and the whole widget round trip is accounted for in both logs.
Change a Tool and Its Widget Together
The dev loop this lesson set up (edit, save, rebuild, call) exists to be used mid-session, on both halves of the app at once. Prove it: give echo a shout option, backed by an input schema change, a server change, and a widget change, all live while the tunnels stay up.
Change the schema and the tool
Open the IDE and edit ~/mcp-app/server/src/types.ts. You're adding two fields: a shout input on the schema, and a shouted output on the result type. Here's the shape of that change against the file as it stands:
 export const EchoToolInputSchema = z.object({
   message: z
     .string()
     .min(1, 'Message cannot be empty')
     .describe('The message to echo back'),
+  shout: z
+    .boolean()
+    .optional()
+    .describe('Uppercase the message and add emphasis'),
 });

 export interface EchoToolOutput {
   echoedMessage: string;
   timestamp: string;
+  shouted: boolean;
   [key: string]: unknown;
 }
That's the whole file's two declarations, before and after; replace both blocks with this:
export const EchoToolInputSchema = z.object({
  message: z
    .string()
    .min(1, 'Message cannot be empty')
    .describe('The message to echo back'),
  shout: z
    .boolean()
    .optional()
    .describe('Uppercase the message and add emphasis'),
});

export interface EchoToolOutput {
  echoedMessage: string;
  timestamp: string;
  shouted: boolean;
  [key: string]: unknown;
}
Then in ~/mcp-app/server/src/server.ts, find the echo tool's handler. Two spots change: the destructure right after input validation, and the output object built from it further down.
-        const { message } = result.data;
+        const { message, shout } = result.data;
+
+        const echoedMessage = shout ? `${message.toUpperCase()}!!!` : message;

         if (!canRenderUiByCapability) {
         const output = {
-          echoedMessage: message,
+          echoedMessage,
           timestamp: new Date().toISOString(),
+          shouted: Boolean(shout),
         } satisfies EchoToolOutput;
Paste these two replacements in:
const { message, shout } = result.data;

const echoedMessage = shout ? `${message.toUpperCase()}!!!` : message;
const output = {
  echoedMessage,
  timestamp: new Date().toISOString(),
  shouted: Boolean(shout),
} satisfies EchoToolOutput;
Save both files. The server process in your app terminal restarts on its own; watch for a fresh startup line.
If the widget edit below reports shouted as unknown instead of boolean, server/src/types.ts didn't actually save the way you expect, or your editor's TypeScript check is holding a stale copy of it: mcp-app/widgets imports EchoToolOutput straight from that file (mcp-app-server/types in server/package.json's exports resolves to the raw source, not a build), so a real edit there should be visible immediately. Reopen types.ts to confirm shouted: boolean is actually there and saved before troubleshooting the widget side.
Change the widget
Open ~/mcp-app/widgets/src/echo/Echo.tsx. Four small edits, each shown as a diff against the file's actual current lines so you can see exactly where it lands, followed by the lines to paste in.
1. State. Add it next to the component's other useState calls, right before message is derived from toolOutput:
   const [localTheme, setLocalTheme] = useState<'light' | 'dark' | null>(null);
   const [contextUpdate, setContextUpdate] = useState<string | null>(null);
+  const [shout, setShout] = useState(false);

   const message = toolOutput?.echoedMessage || 'No message yet';
const [shout, setShout] = useState(false);
2. The tool call. handleCallEcho already calls echo with a hardcoded message; add shout to the same arguments object:
       const result = await activeApp.callServerTool({
         name: 'echo',
-        arguments: { message: 'Hello from the echo widget!' },
+        arguments: { message: 'Hello from the echo widget!', shout },
       });
arguments: { message: 'Hello from the echo widget!', shout },
3. The checkbox. In the Actions section, right after the Call Echo Tool button closes and before Update Context opens:
               <Play className="h-4 w-4" />
               Call Echo Tool
             </Button>
+            <label className="flex items-center gap-2 text-sm dark:text-zinc-300 text-zinc-700">
+              <input
+                type="checkbox"
+                checked={shout}
+                onChange={(e) => setShout(e.target.checked)}
+              />
+              Shout
+            </label>
             <Button
               onClick={handleUpdateContext}
<label className="flex items-center gap-2 text-sm dark:text-zinc-300 text-zinc-700">
  <input
    type="checkbox"
    checked={shout}
    onChange={(e) => setShout(e.target.checked)}
  />
  Shout
</label>
4. The badge. In the Echoed Message section, inside the paragraph that renders {message} today:
           <p className="text-base dark:text-zinc-400 text-zinc-600">
             {message}
+            {toolOutput?.shouted && (
+              <span className="ml-2 text-xs font-semibold uppercase text-purple-500">
+                shouted
+              </span>
+            )}
           </p>
{toolOutput?.shouted && (
  <span className="ml-2 text-xs font-semibold uppercase text-purple-500">
    shouted
  </span>
)}
Save. The widgets process rebuilds automatically; give it a couple of seconds.
Call it through both tunnels
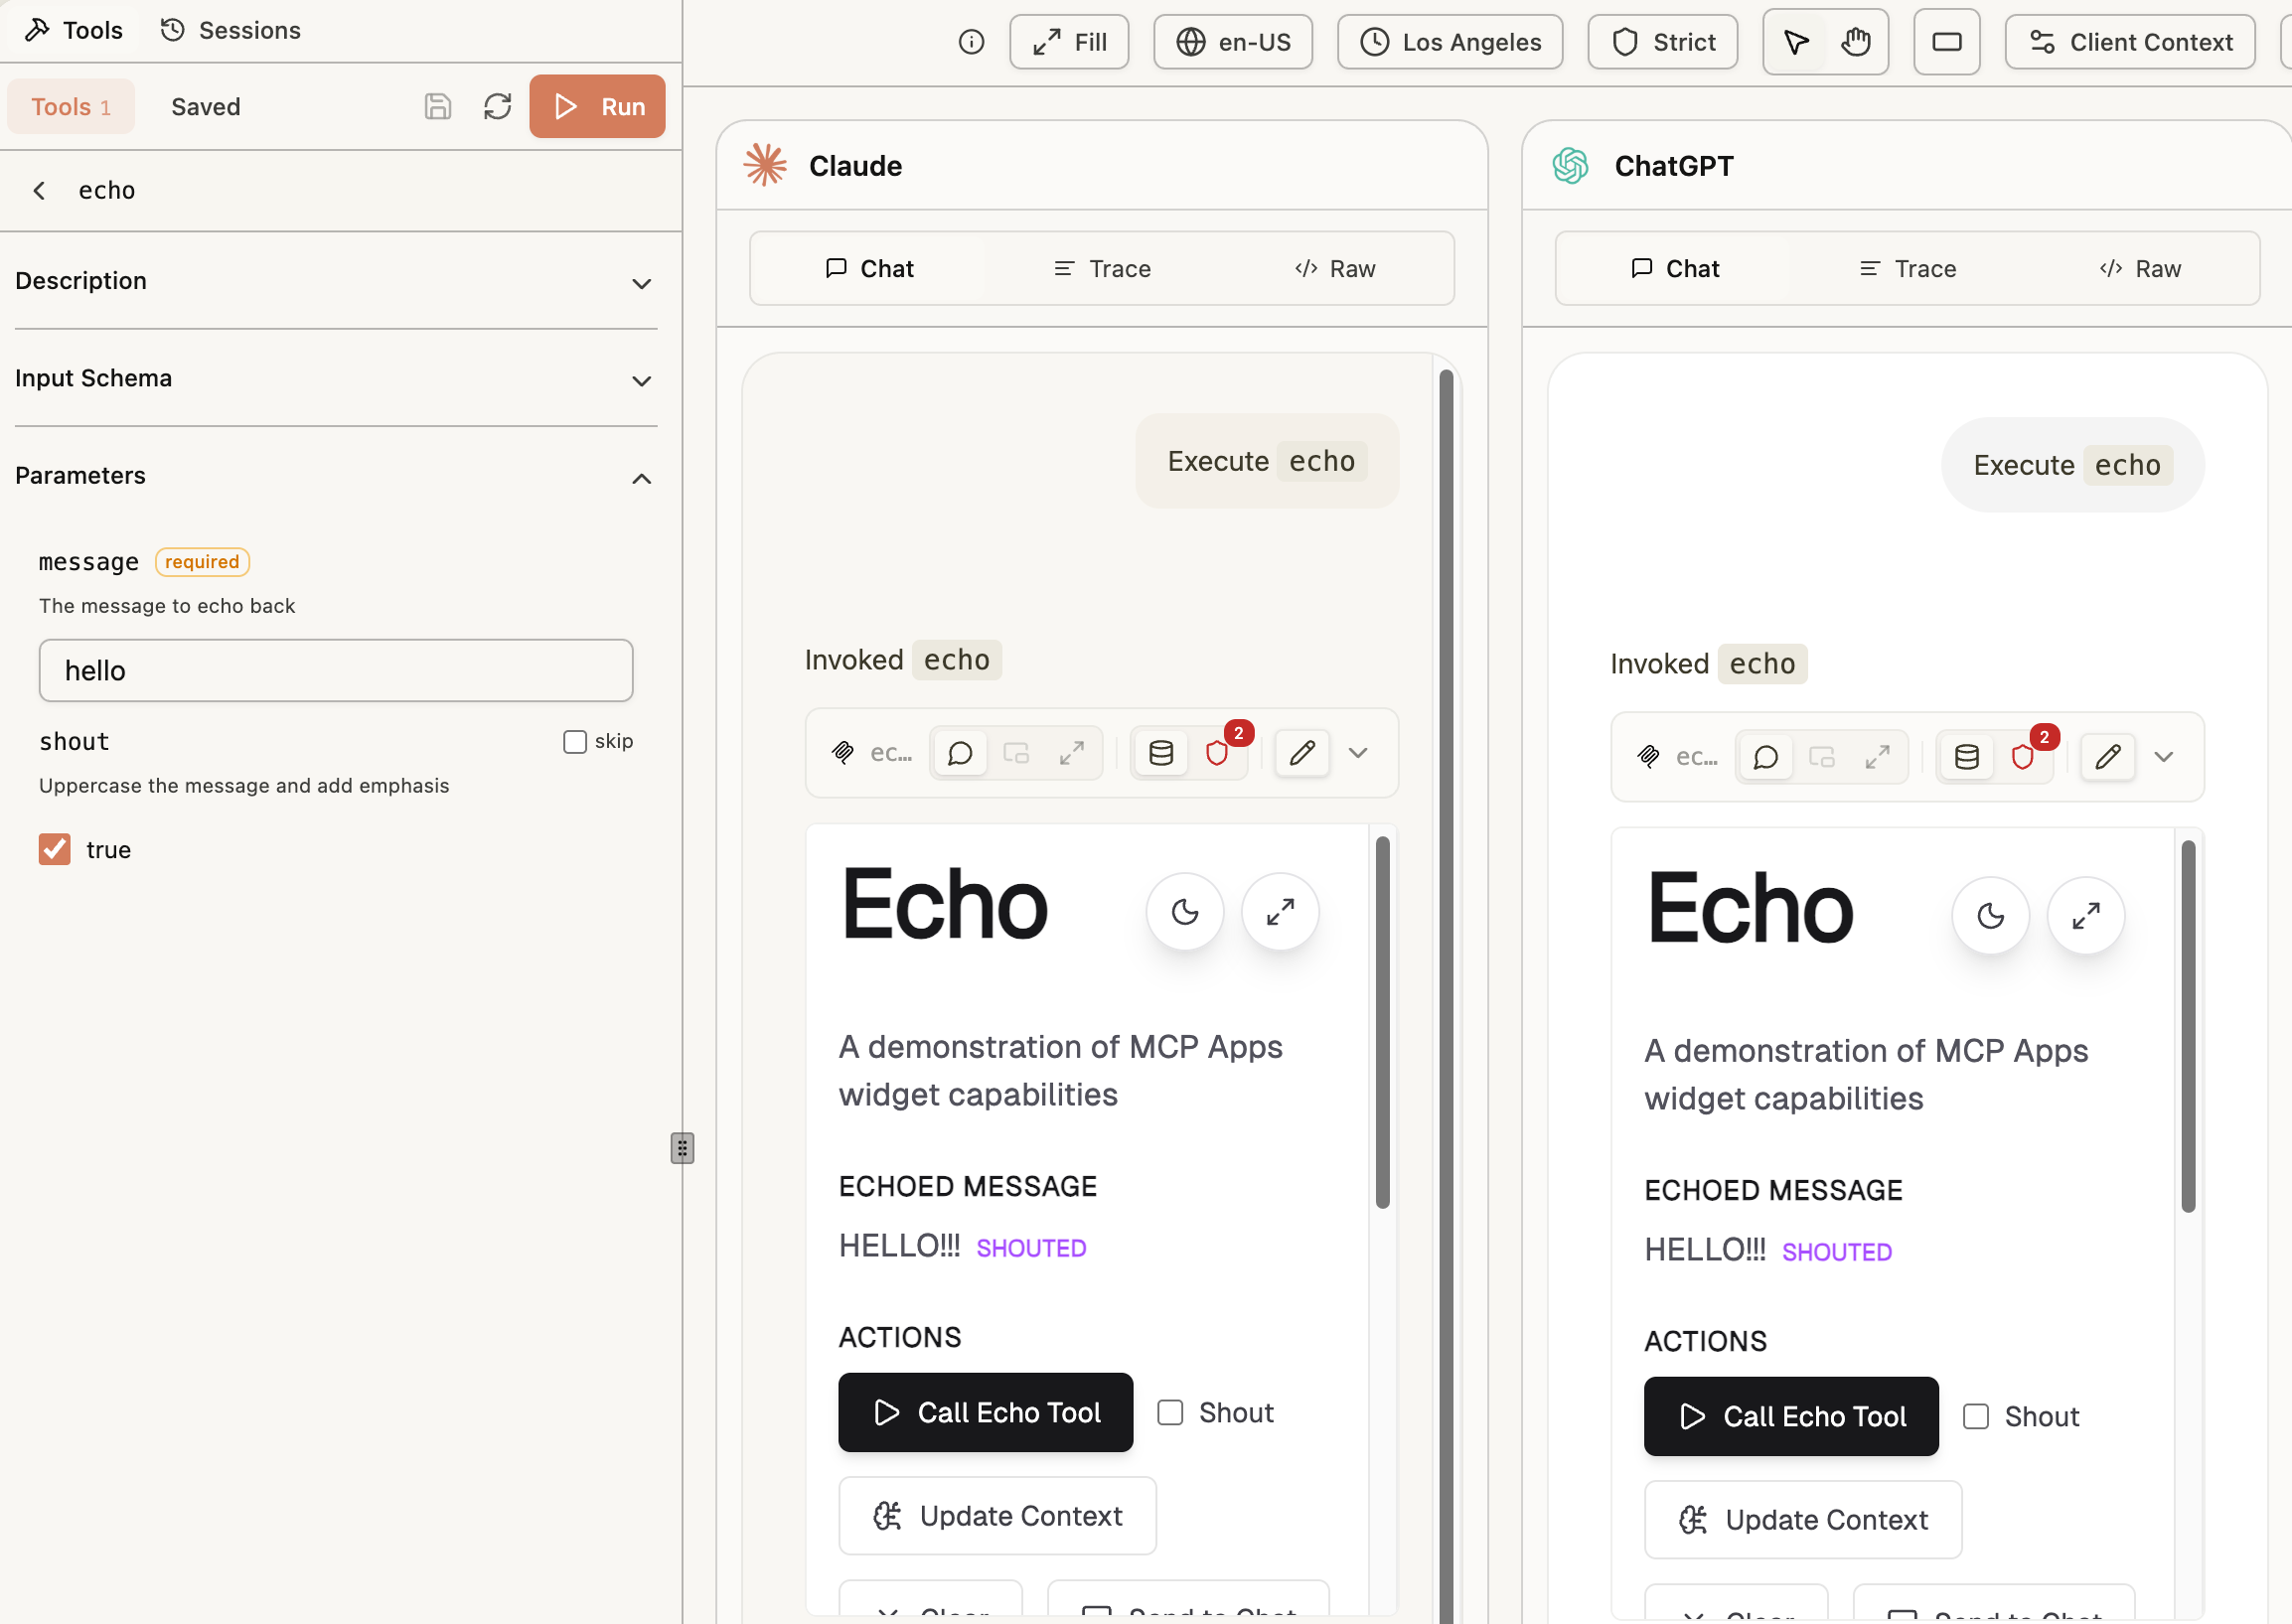
Back in MCPJam, reconnect (the schema change is enough for most clients to want a fresh tool list) and clear, then list tools again. echo's input now shows the shout field. Call it with the checkbox on, or pass shout: true directly if you're calling the raw tool form: the widget shows your message in capitals with the shouted badge, and the JavaScript that renders that badge just got rebuilt and re-served through the assets tunnel without you touching the gateway.
Optional: try it in a real host
Everything so far only needed MCPJam, so nothing here costs you a paid account. If you do have access to ChatGPT's or Claude's developer/MCP app modes, you can point them at the same app route: same OAuth flow, same policy, same audit log, but from a host that renders the widget the way an end user actually would.
Claude's iframe sandbox is stricter than MCPJam's, though: it will not load externally-hosted <script>/<link> tags at all, regardless of origin or CSP. ~/mcp-app-dev.sh already handles this, nothing to stop or restart: the server inspects each request's declared client name and automatically hands Claude.ai a fully self-contained HTML snapshot, JavaScript and CSS inlined as base64, rebuilt from the build process's output on every save, while MCPJam and ChatGPT keep getting the live dev-server HTML with HMR. Point Claude at the app route and it just works.
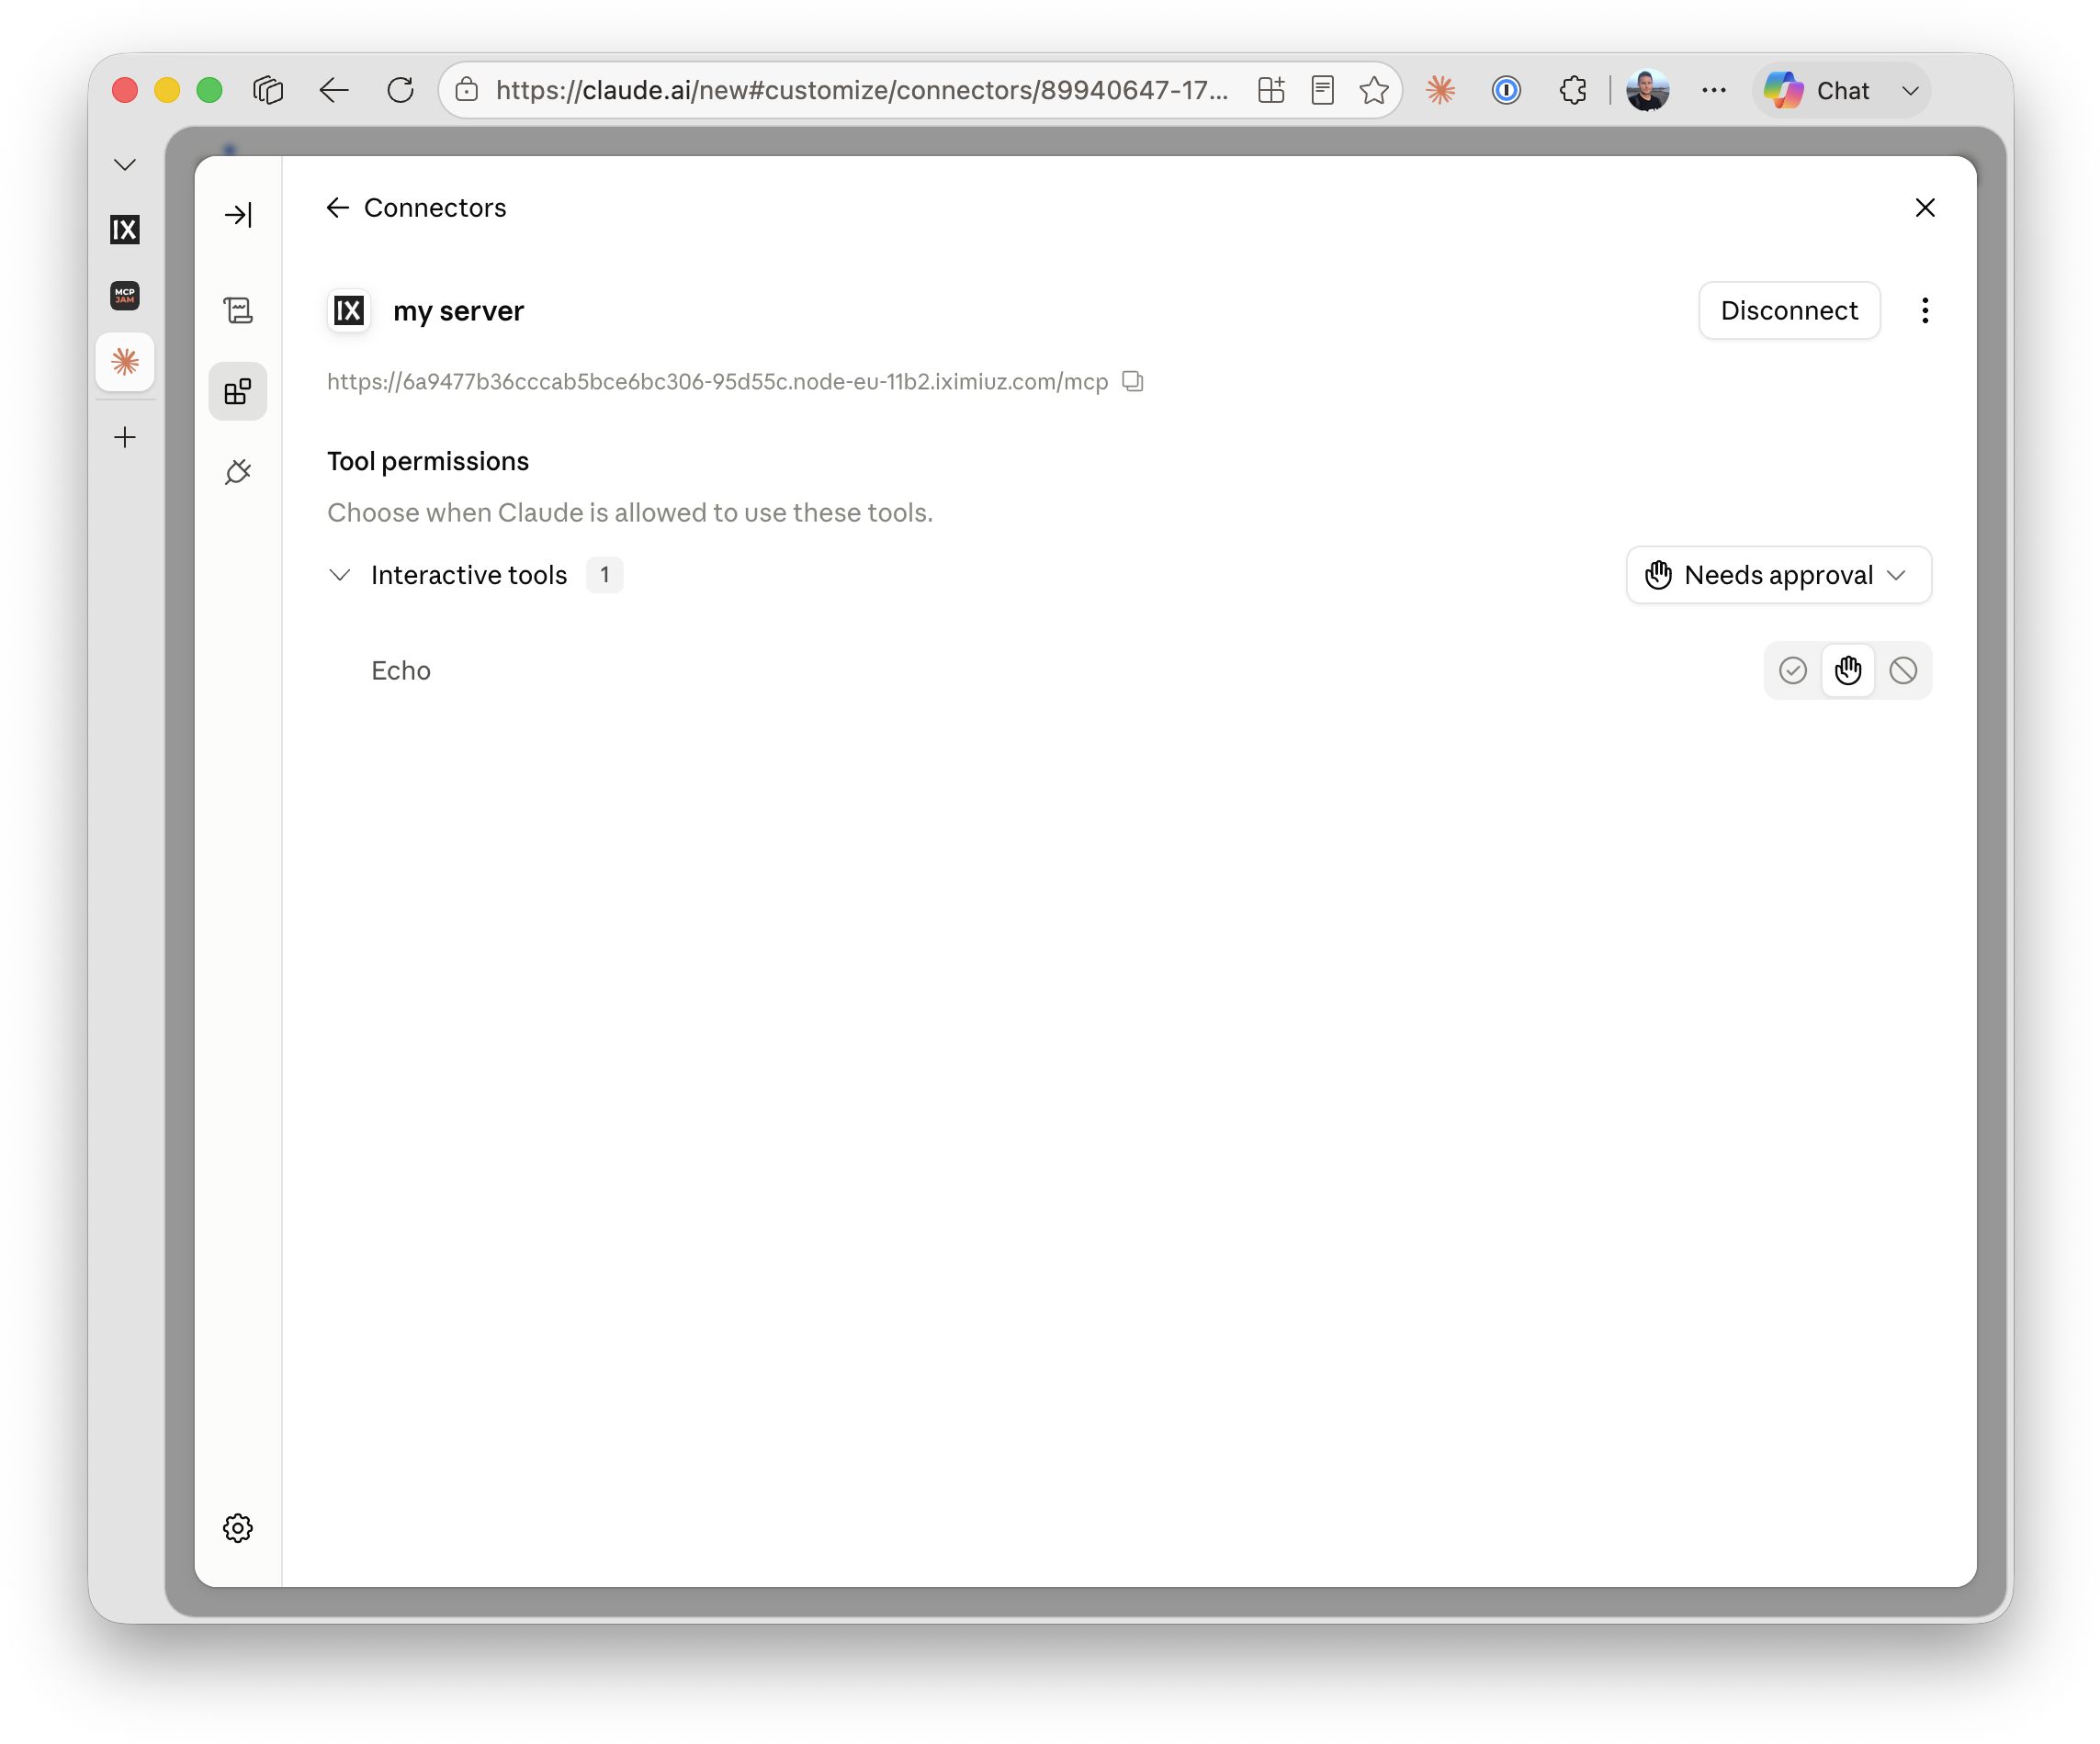
Add the app route as a connector in Claude.ai's settings (same OAuth flow as everywhere else in this lesson):
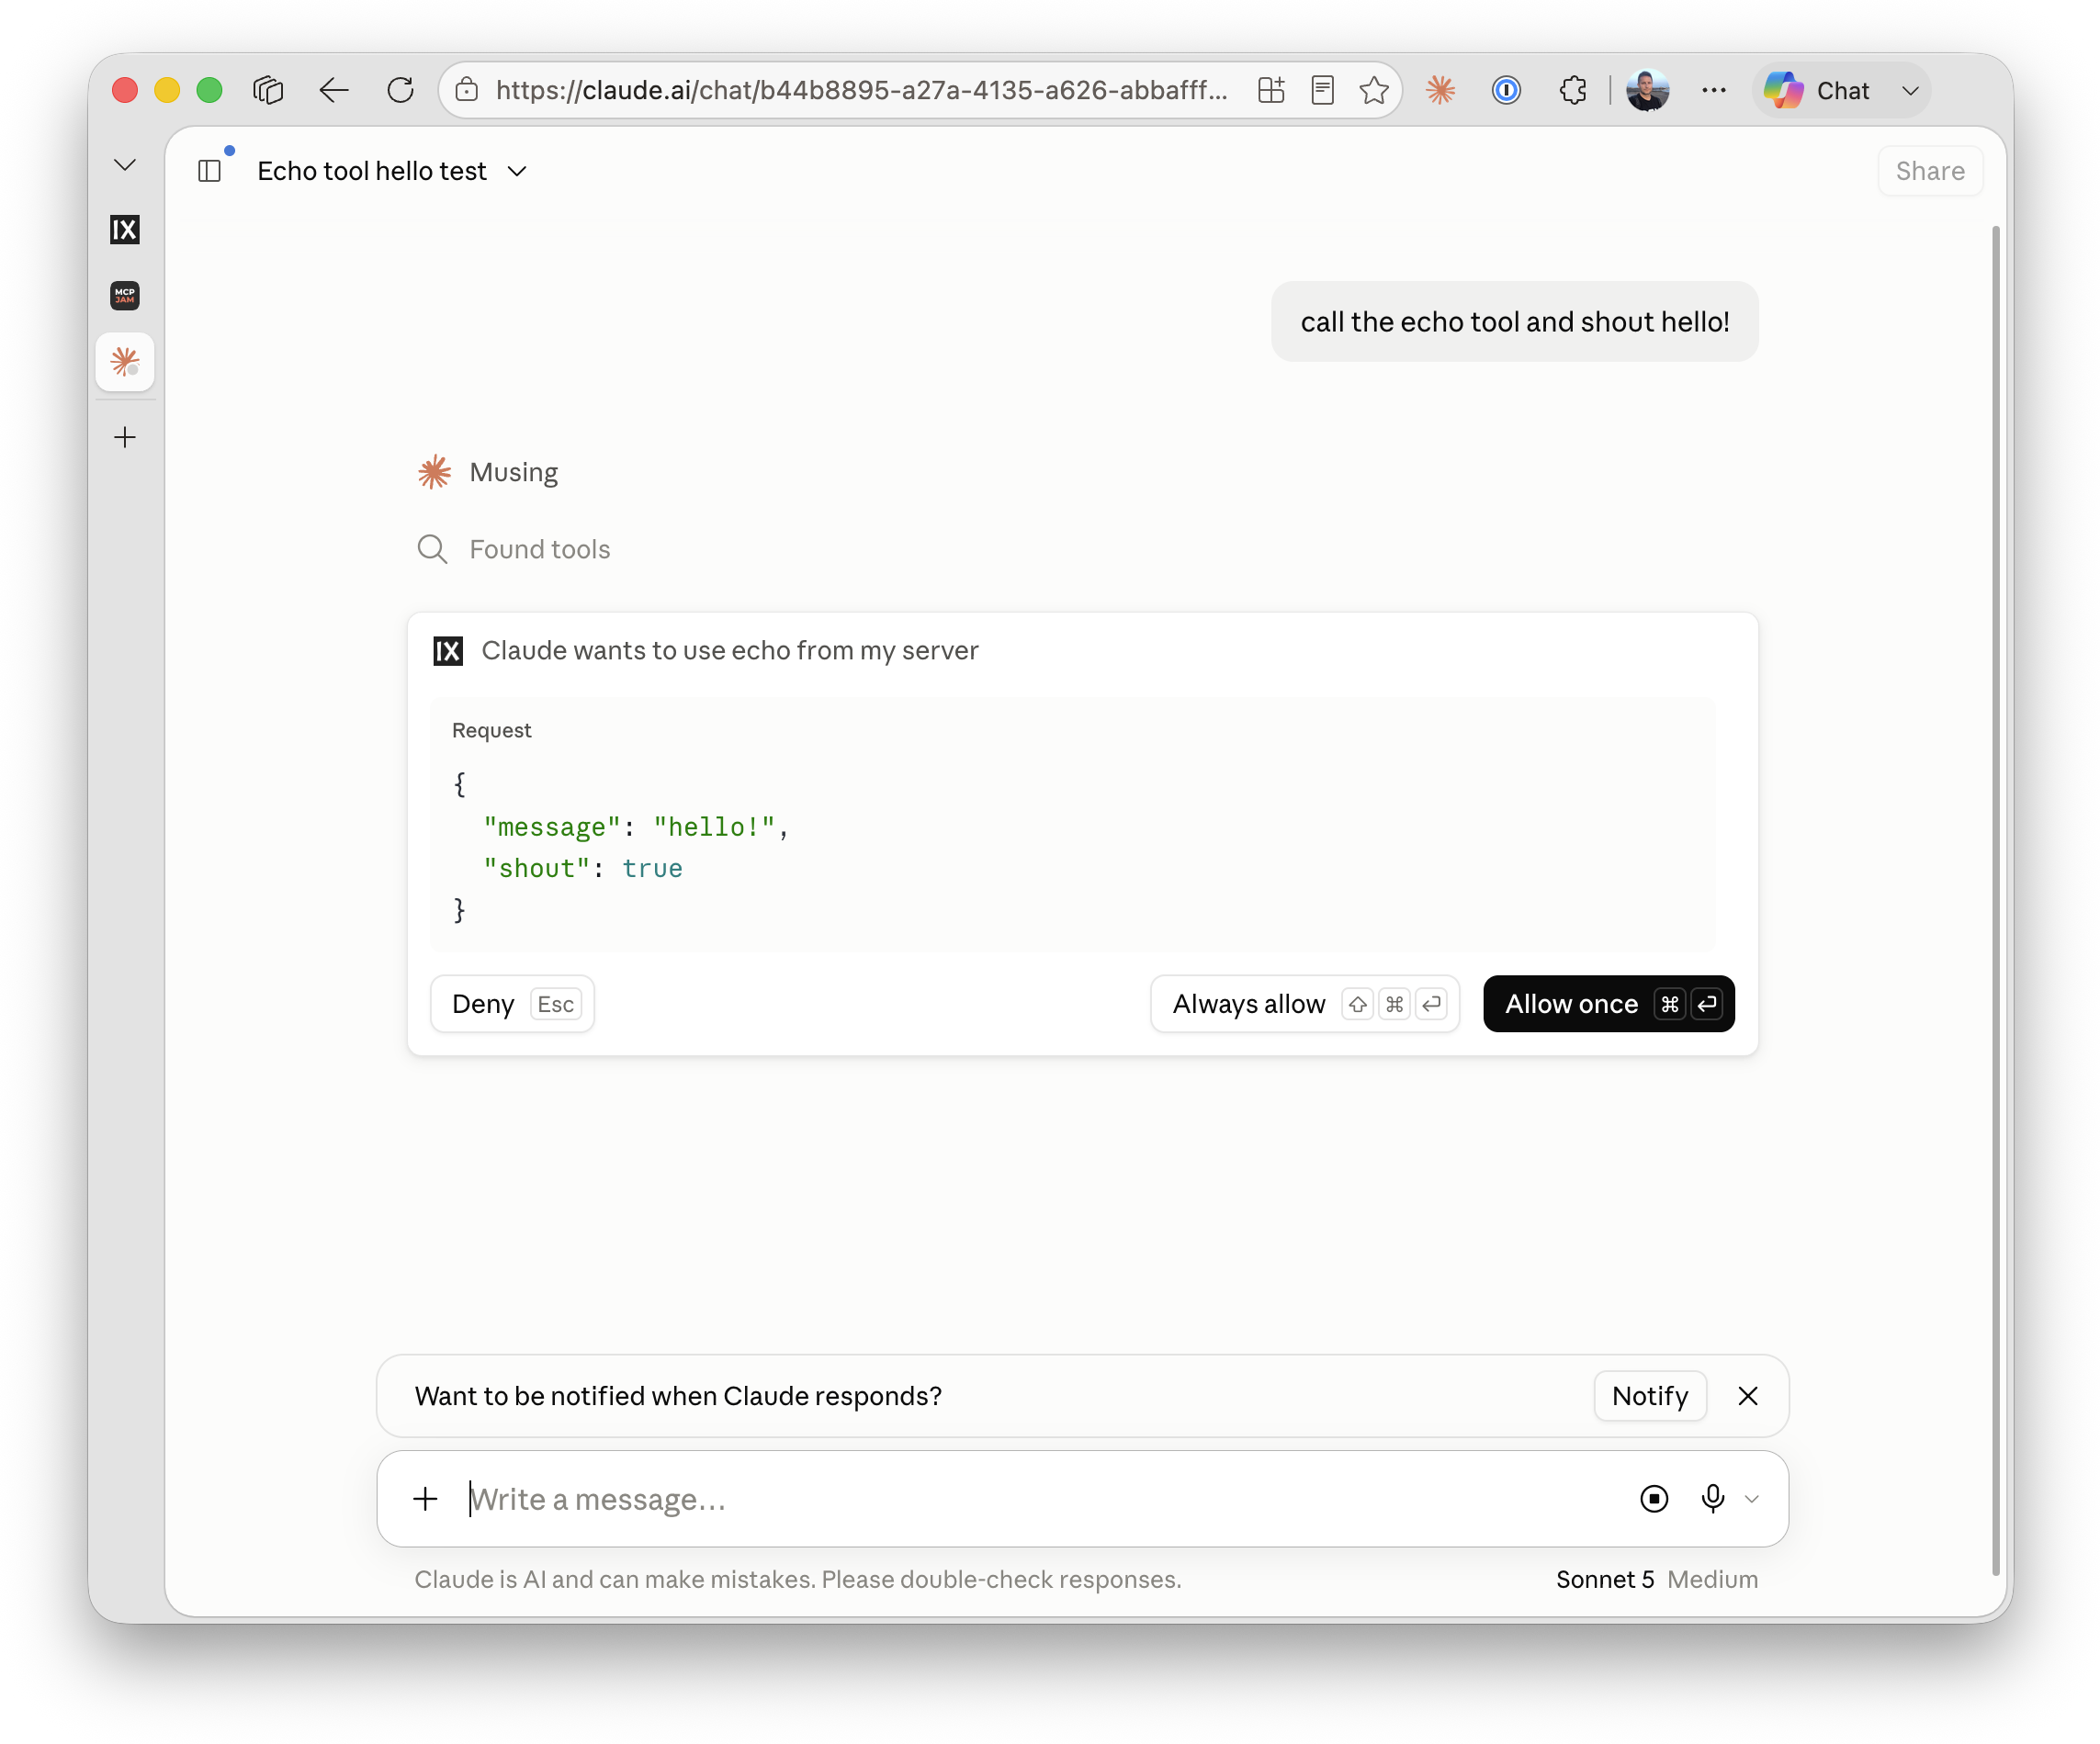
Ask Claude to call it with shout on, and Claude surfaces the same tool-approval prompt it would for any MCP tool, showing the exact arguments it's about to send:
Approve it, and the widget renders inline in the chat, same as any other host:
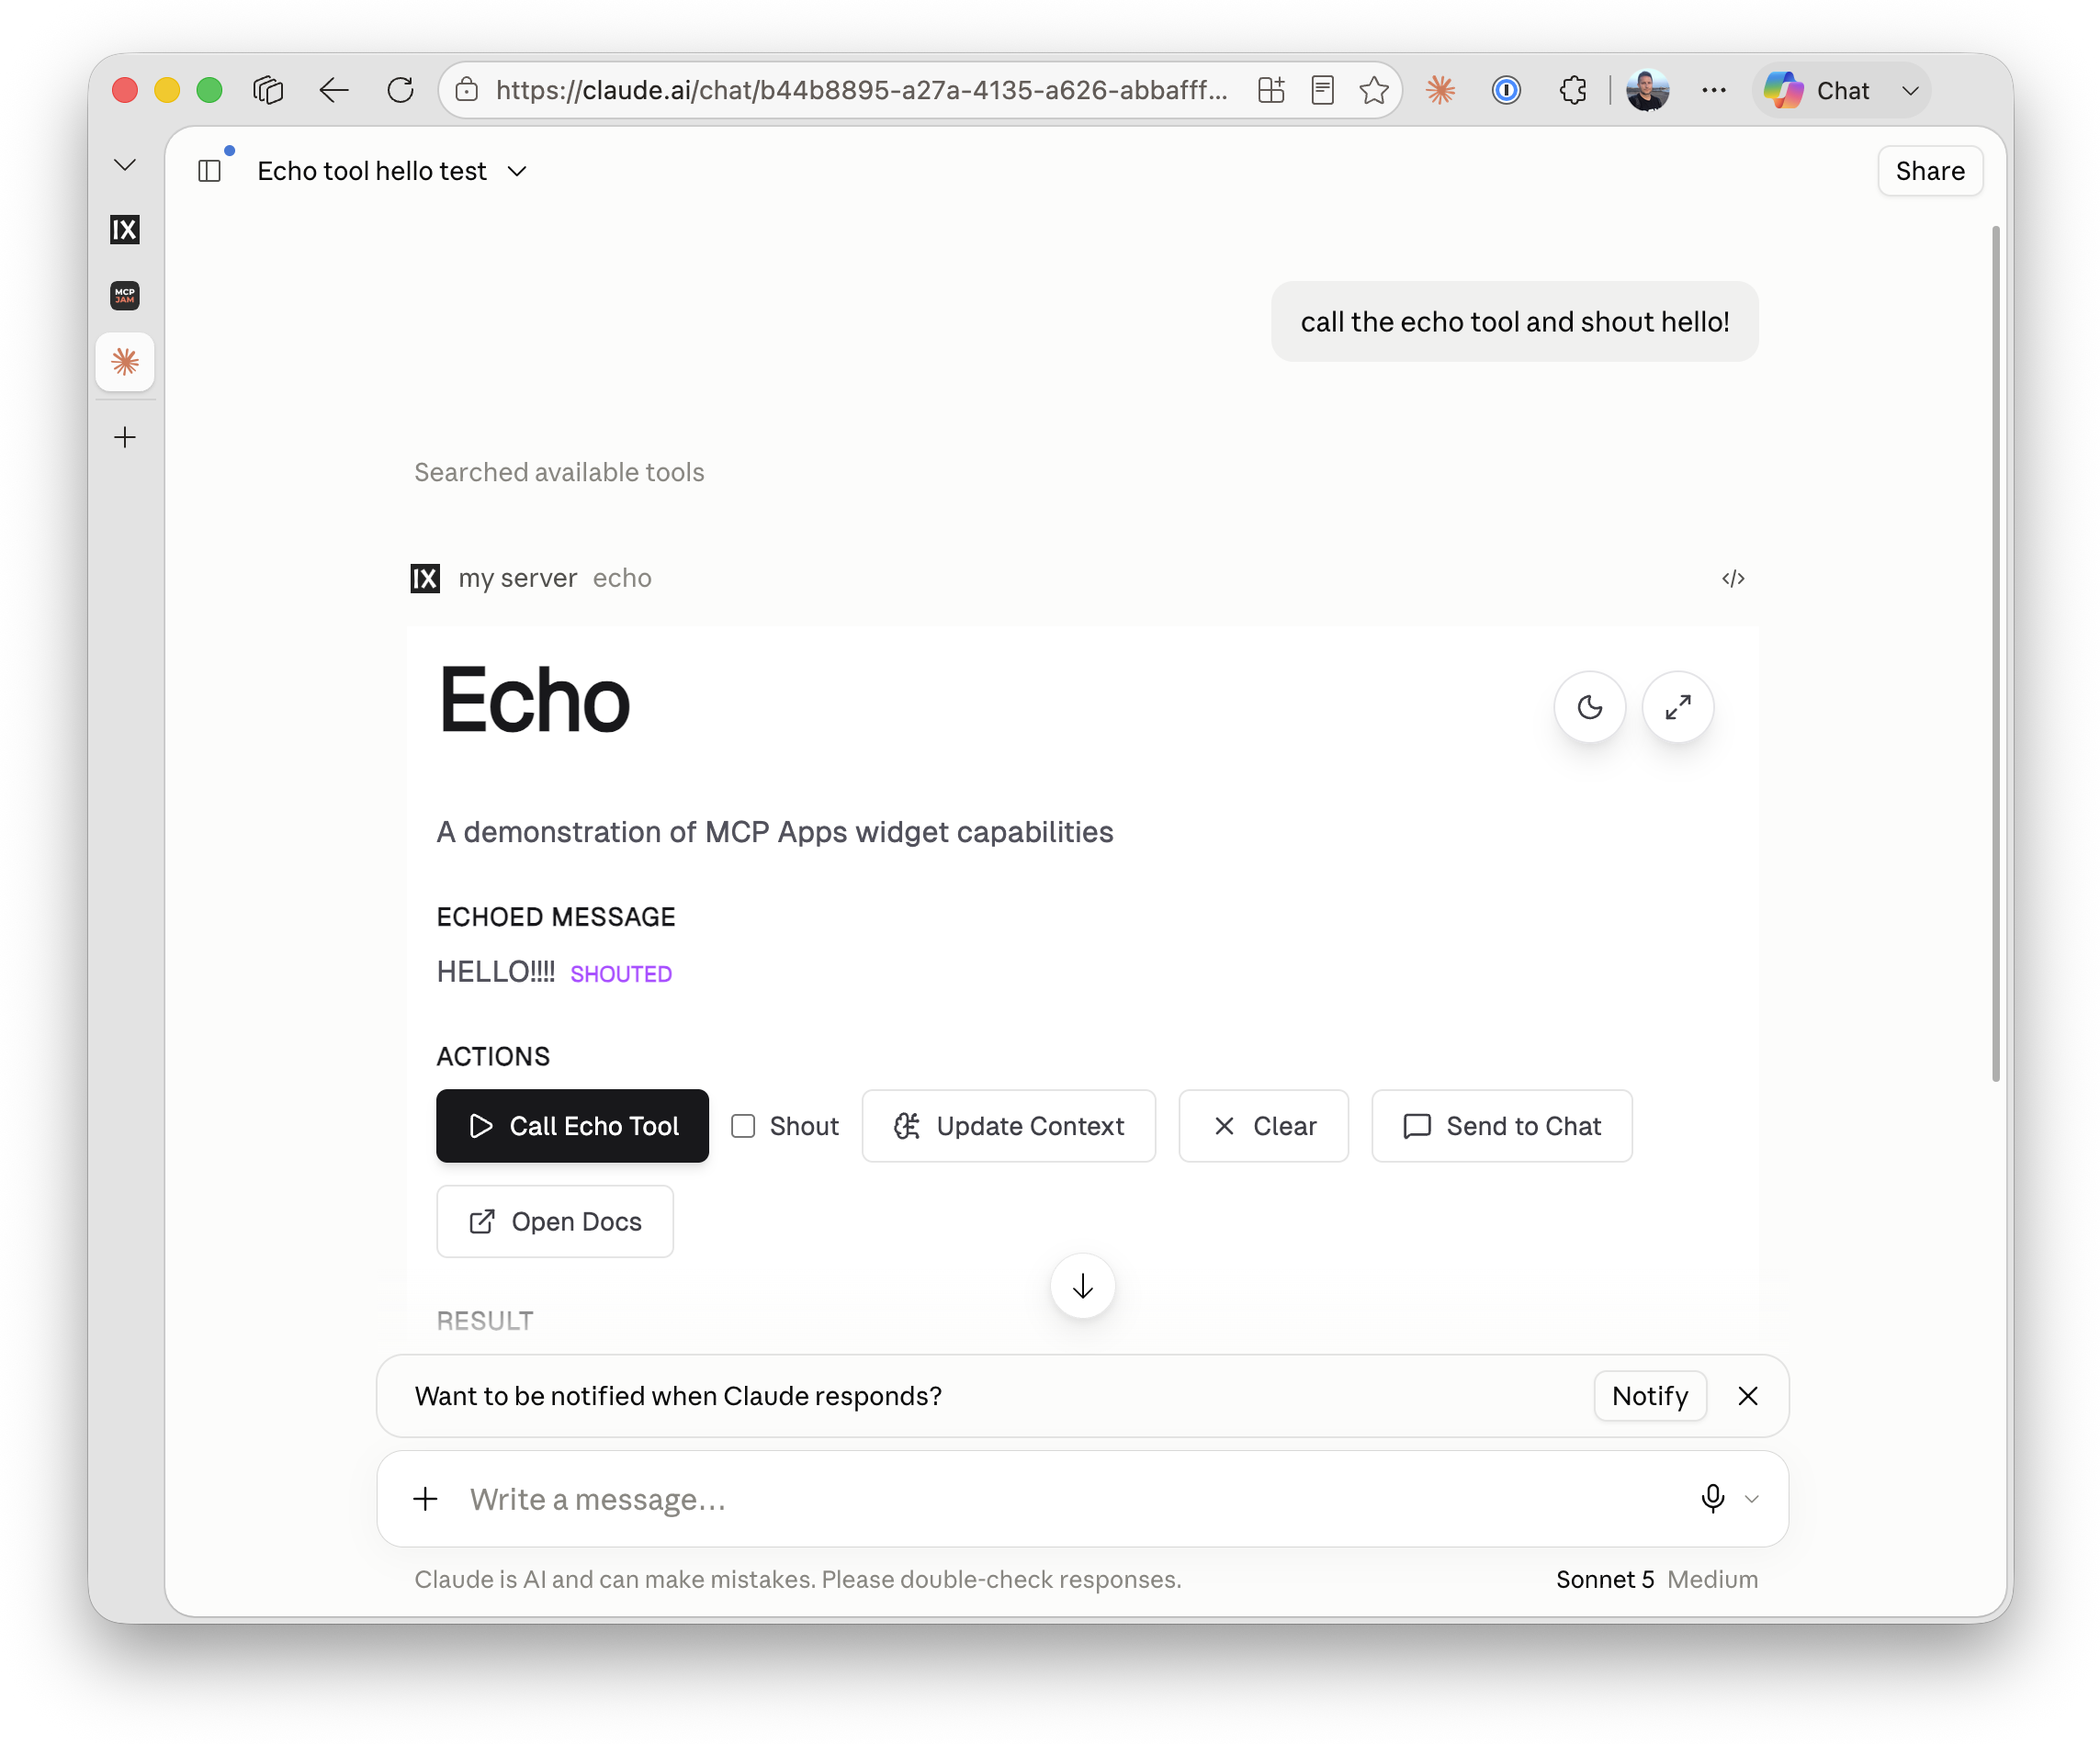
That per-client switch is WIDGET_INLINE_CLIENTS (default: claude, matched case-insensitively as a substring of the client's declared name), documented in ~/mcp-app/.env.example. A client that declares no name at all is inlined too, since that's the one mode guaranteed to work everywhere. One trade-off comes with it: Claude's rendered widget is a frozen snapshot, not an HMR connection, so after an edit you re-invoke the tool to fetch fresh HTML rather than watching the iframe update live the way MCPJam's does.
This is optional and out of scope for the rest of the course; nothing later depends on it.
Before you take this to production
- Two routes means two things to keep in sync. The assets route's policy and the app route's policy are separate blocks in this lesson's config, on purpose, but a real deployment usually wants the same set of people allowed through both; a policy change to one without the other is an easy way to end up with a widget that half-works.
- The assets route staying policy-gated only worked because it was you testing it. MCP hosts render a widget's iframe with no way to forward your Pomerium session into it, so Pomerium's own MCP app guide is explicit that widget assets need to be public in production. This lesson's assets route never had to be, for two different reasons that both stop applying once someone other than you opens the app: MCPJam and ChatGPT's live dev-server render worked because your own browser already held a session on the assets route (from the direct-visit step), not because the host forwarded anything; Claude's inlined render worked because it never touched the assets route at all, base64-embedded JS and CSS travel over the already-authenticated app route instead. A stranger's browser has neither: no pre-existing session to reuse, and (outside this lesson's dev-inline trick) no way to fetch policy-gated assets it was never signed into.
BASE_URLis a permanent production setting, not just a tunnel trick. The same environment variable that pointed the widget build at this lesson's assets tunnel is what you'd set to a CDN or a static host in production. Lesson 7 carries this forward onto stable, permanent routes instead of ephemeral tunnel URLs.- The identity provider and the policies carry the same caveats as every other lesson: Pomerium's hosted authenticate service is for quick setup and testing, and both routes' policies name exactly one email. Real deployments use your production identity provider and Pomerium Policy Language criteria that describe a team, not an individual.
What you built
- An MCP app, tools and widgets, split across two services, published through two independent reverse SSH tunnels in one SSH session
- Two Pomerium routes, each with its own OAuth 2.1 and policy, one MCP-aware and one a plain static-asset route
- A widget rendered end to end through both tunnels, and the specific failure mode (a policy-gated assets origin) that breaks that render if you forget it
- A tool and its widget changed together, live, and called through the secured routes without touching the gateway
Read more about building MCP apps against Pomerium in the MCP app development guide. In the next lesson, this same app graduates from dev tunnels to permanent HTTP routes: the shape most real deployments use, with the CSP and BASE_URL wiring you just built carried forward unchanged.
- Previous lesson
- Control an MCP Server You Don't Host
- Next lesson
- Deploy an MCP App to Production with Pomerium