Docker Security with Hadolint
This tutorial walks you through Dockerfile security and best practices using Hadolint. Follow each section in order and run the commands in the playground terminal.
Introduction to Hadolint
What is Hadolint?
Hadolint is a powerful Dockerfile linter written in Haskell that helps you write better, more secure, and more efficient Docker images. It analyzes your Dockerfile and provides recommendations based on best practices.
Key Features
- Static Analysis: Analyzes Dockerfile syntax and structure without building the image
- Bash Validation: Validates inline bash scripts using ShellCheck integration
- Best Practices: Enforces Docker best practices and security guidelines
- Rule-Based: Provides specific error codes (DLxxxx) for each issue found
- CI/CD Integration: Easy to integrate into CI/CD pipelines
- Multiple Output Formats: Supports JSON, TAP, and other output formats
Why Use Hadolint?
- Security: Identifies security vulnerabilities before deployment
- Performance: Suggests optimizations to reduce image size and build time
- Maintainability: Ensures consistent Dockerfile patterns across projects
- Quality: Catches common mistakes and anti-patterns early
- Documentation: Provides clear explanations for each issue found
Installation
Option 1: Using Docker (Recommended)
This is the easiest method and works on any system with Docker installed.
docker pull hadolint/hadolint
To use hadolint with Docker:
docker run --rm -i hadolint/hadolint < Dockerfile
Or create an alias for convenience:
echo 'alias hadolint="docker run --rm -i hadolint/hadolint"' >> ~/.bashrc
source ~/.bashrc
Option 2: Download Binary
Download the latest binary from GitHub Releases
Linux/Ubuntu:
sudo wget -O /usr/local/bin/hadolint https://github.com/hadolint/hadolint/releases/latest/download/hadolint-Linux-x86_64
sudo chmod +x /usr/local/bin/hadolint
macOS:
wget -O /usr/local/bin/hadolint https://github.com/hadolint/hadolint/releases/latest/download/hadolint-Darwin-x86_64
chmod +x /usr/local/bin/hadolint
Verify Installation
hadolint --version
Note: If using Docker, verify with:
docker run --rm hadolint/hadolint --version
Basic Usage
Command Line Syntax
hadolint [OPTIONS] Dockerfile
Common Options
--ignore RULE: Ignore specific rules (e.g.,--ignore DL3008)--format FORMAT: Output format (tty, json, checkstyle, codeclimate, gitlab_codeclimate, sarif)--failure-threshold LEVEL: Exit with failure code if issues >= LEVEL (error, warning, info, style, ignore)--no-color: Disable colored output--verbose: Enable verbose output--config FILE: Path to configuration file
Basic Example
Step 1: Create a simple Dockerfile to test:
vi Dockerfile
Step 2: Add some basic Dockerfile content, save and exit (:wq).
Step 3: Test with various options:
# Lint a Dockerfile
hadolint Dockerfile

# Lint with JSON output
hadolint --format json Dockerfile

# Ignore specific rules
hadolint --ignore DL3008 --ignore DL3009 Dockerfile
Basic Dockerfile Analysis
Exercise 1: Dockerfile Without Issues
Let's start with a well-written Dockerfile that follows best practices.
Example: Dockerfile.good
Step 1: Create the Dockerfile:
vi Dockerfile
Step 2: Paste the following Dockerfile content:
# Use specific version instead of latest
FROM node:18-alpine AS builder

# Set working directory
WORKDIR /app

# Install dependencies first (better layer caching)
COPY package*.json ./
RUN npm ci --only=production

# Copy application code
COPY . .

# Build the application
RUN npm run build

# Production stage
FROM node:18-alpine

# Create non-root user
RUN addgroup -g 1001 -S nodejs && \
    adduser -S nodejs -u 1001

# Set working directory
WORKDIR /app

# Copy only necessary files from builder
COPY --from=builder --chown=nodejs:nodejs /app/dist ./dist
COPY --from=builder --chown=nodejs:nodejs /app/node_modules ./node_modules
COPY --from=builder --chown=nodejs:nodejs /app/package*.json ./

# Switch to non-root user
USER nodejs

# Expose port
EXPOSE 3000

# Add health check
HEALTHCHECK --interval=30s --timeout=3s --start-period=5s --retries=3 \
  CMD node healthcheck.js

# Use exec form for CMD
CMD ["node", "dist/index.js"]
Step 3: Save and exit (:wq), then run Hadolint:
hadolint Dockerfile
Expected Output: No issues found! ✅
If using the good Dockerfile example, Hadolint should return no errors or warnings.
Why This Dockerfile is Good
- Specific Base Image: Uses
node:18-alpineinstead oflatest(DL3006) - Multi-stage Build: Reduces final image size
- Layer Caching: Dependencies installed before copying code
- Non-root User: Runs as
nodejsuser instead of root (DL3002) - Health Check: Includes health check for container monitoring (DL3018)
- Exec Form CMD: Uses exec form
["node", "dist/index.js"]instead of shell form (DL3025) - Proper Ownership: Sets file ownership with
--chown(DL3027)
Exercise 2: Dockerfile With Common Issues
Now let's examine a Dockerfile with common issues.
Example: Dockerfile.bad
Step 1: Create the Dockerfile:
vi Dockerfile.bad
Step 2: Paste the following Dockerfile content:
FROM ubuntu:latest

RUN apt-get update
RUN apt-get install -y python3 python3-pip
RUN pip3 install flask requests

WORKDIR /app
COPY . .

RUN chmod +x start.sh
RUN ./start.sh

EXPOSE 8080

CMD python3 app.py
Step 3: Save and exit (:wq), then run Hadolint:
hadolint Dockerfile.bad
Actual Output: Multiple issues will be reported! ❌
Dockerfile.bad:1 DL3007 warning: Using latest is prone to errors if the image will ever update. Pin the version explicitly to a release tag
Dockerfile.bad:3 DL3009 info: Delete the apt lists (/var/lib/apt/lists) after installing something
Dockerfile.bad:4 DL3059 info: Multiple consecutive `RUN` instructions. Consider consolidation.
Dockerfile.bad:4 DL3008 warning: Pin versions in apt get install. Instead of `apt-get install <package>` use `apt-get install <package>=<version>`
Dockerfile.bad:4 DL3015 info: Avoid additional packages by specifying `--no-install-recommends`
Dockerfile.bad:5 DL3013 warning: Pin versions in pip. Instead of `pip install <package>` use `pip install <package>==<version>` or `pip install --requirement <requirements file>`
Dockerfile.bad:5 DL3042 warning: Avoid use of cache directory with pip. Use `pip install --no-cache-dir <package>`
Dockerfile.bad:5 DL3059 info: Multiple consecutive `RUN` instructions. Consider consolidation.
Dockerfile.bad:11 DL3059 info: Multiple consecutive `RUN` instructions. Consider consolidation.
Dockerfile.bad:15 DL3025 warning: Use arguments JSON notation for CMD and ENTRYPOINT arguments
Common Issues You'll See
- DL3007: Using
latesttag is prone to errors - pin the version explicitly - DL3008: Pin versions in apt-get install
- DL3009: Delete the apt-get lists after installing
- DL3013: Pin versions in pip install
- DL3015: Avoid additional packages with
--no-install-recommends - DL3025: Use arguments JSON notation for CMD
- DL3042: Avoid use of cache directory with pip
- DL3059: Multiple consecutive
RUNinstructions - consider consolidation
Understanding Hadolint Output
Hadolint provides clear, actionable feedback with severity levels:
- warning: Issues that should be addressed
- info: Suggestions for improvement
Each line shows:
- File: The Dockerfile being analyzed
- Line Number: Where the issue occurs
- Rule Code: The specific rule (DLxxxx)
- Severity: warning or info
- Description: What the issue is and how to fix it
Hands-On Lab
Use the interactive playground to analyze the Dockerfiles yourself. The playground provides an Ubuntu environment with Docker and Hadolint pre-installed.
Fixing Common Issues
Issue-by-Issue Fixes
Let's go through each common issue and learn how to fix it.
Issue 1: DL3006 - Avoid using latest tag
Problem:
FROM ubuntu:latest
Solution:
FROM ubuntu:22.04
Explanation: Using latest tag makes builds unpredictable. Different builds might use different versions, leading to inconsistent behavior. Always pin to a specific version.
Issue 2: DL3008 - Pin versions in apt-get install
Problem:
RUN apt-get install -y python3 python3-pip
Better Solution:
# Use specific versions when possible, or at least use --no-install-recommends
RUN apt-get update && \
    apt-get install -y --no-install-recommends \
    python3 \
    python3-pip && \
    rm -rf /var/lib/apt/lists/*
Explanation: Pinning versions ensures reproducible builds. However, in practice, you might want to use --no-install-recommends to reduce image size and combine commands to reduce layers.
Issue 3: DL3009 - Delete the apt-get lists after installing
Problem:
RUN apt-get update
RUN apt-get install -y python3 python3-pip
Solution:
RUN apt-get update && \
    apt-get install -y --no-install-recommends \
    python3 \
    python3-pip && \
    rm -rf /var/lib/apt/lists/*
Explanation: The apt cache takes up unnecessary space. Removing it reduces image size significantly.
Issue 4: DL3013 - Pin versions in pip install
Problem:
RUN pip3 install flask requests
Better Solution:
# Use requirements.txt for better maintainability
COPY requirements.txt .
RUN pip3 install --no-cache-dir -r requirements.txt
Explanation: Pinning versions ensures reproducible builds. Using a requirements.txt file is more maintainable for multiple packages.
Issue 5: DL3002 - Last USER should not be root
Problem: The Dockerfile runs as root by default.
Solution:
# Create non-root user
RUN groupadd -r appuser && useradd -r -g appuser appuser

# ... other instructions ...

# Switch to non-root user before CMD
USER appuser
Explanation: Running containers as root is a security risk. If the container is compromised, an attacker would have root access.
Issue 6: DL3025 - Use arguments JSON notation for CMD
Problem:
CMD python3 app.py
Solution:
CMD ["python3", "app.py"]
Explanation: The exec form (JSON notation) is preferred because:
- It doesn't spawn a shell process (more efficient)
- Signals are properly handled (important for graceful shutdowns)
- More predictable behavior
Issue 7: DL3045 - COPY to a relative destination without WORKDIR
Problem: Copying to a relative path without setting WORKDIR can be ambiguous.
Solution:
# Bad: relative destination without WORKDIR
COPY app/ ./app/

# Good: set WORKDIR first
WORKDIR /app
COPY app/ ./
Explanation: Setting WORKDIR ensures all relative paths are deterministic and easier to reason about.
Fixed Dockerfile
Step 1: Create the fixed Dockerfile:
vi Dockerfile.fixed
Step 2: Paste the following fixed Dockerfile content:
# Use specific version
FROM ubuntu:22.04

# Install dependencies in a single layer and clean up
RUN apt-get update && \
    apt-get install -y --no-install-recommends \
    python3 \
    python3-pip && \
    rm -rf /var/lib/apt/lists/*

# Install Python packages with pinned versions
COPY requirements.txt .
RUN pip3 install --no-cache-dir -r requirements.txt

# Create non-root user
RUN groupadd -r appuser && useradd -r -g appuser appuser

# Set working directory
WORKDIR /app

# Copy application code
COPY --chown=appuser:appuser . .

# Switch to non-root user
USER appuser

# Expose port
EXPOSE 8080

# Use exec form for CMD
CMD ["python3", "app.py"]
Step 3: Save and exit (:wq), then run Hadolint:
hadolint Dockerfile.fixed
Actual Output: Significantly fewer issues! Most critical problems are fixed, but some warnings may remain:
Dockerfile.fixed:5 DL3008 warning: Pin versions in apt get install. Instead of `apt-get install <package>` use `apt-get install <package>=<version>`
Dockerfile.fixed:12 DL3045 warning: `COPY` to a relative destination without `WORKDIR` set.
Note: The fixed version resolves most critical security issues (like running as root, using latest tag, etc.). The remaining warnings are about version pinning (which can be strict in practice) and WORKDIR usage. These are less critical but still good to address for production use.
Hands-On Lab
Use the interactive playground to practice fixing Dockerfile issues. The playground provides an Ubuntu environment with Docker and Hadolint pre-installed, so you can test your fixes in real-time.
Practice Exercise
- Review the
Dockerfile.badexample above - Run Hadolint on it to see all issues
- Compare with the
Dockerfile.fixedexample - Try fixing the issues yourself before looking at the solution
Advanced Patterns
Multi-stage Builds
Multi-stage builds are a powerful technique to reduce final image size by excluding build tools and dependencies from the production image.
Example: Multi-stage Build with Issues
Step 1: Create the Dockerfile:
vi Dockerfile-multi-issues
Step 2: Paste the following Dockerfile content:
FROM node:latest AS builder
WORKDIR /app
COPY . .
RUN npm install
RUN npm run build

FROM node:latest
WORKDIR /app
COPY --from=builder /app/dist ./dist
COPY --from=builder /app/node_modules ./node_modules
CMD node dist/index.js
Step 3: Save and exit (:wq), then run Hadolint:
hadolint Dockerfile-multi-issues
Actual Output: Multiple issues will be reported! ❌
Dockerfile-multi-issues:1 DL3007 warning: Using latest is prone to errors if the image will ever update. Pin the version explicitly to a release tag
Dockerfile-multi-issues:5 DL3059 info: Multiple consecutive `RUN` instructions. Consider consolidation.
Dockerfile-multi-issues:7 DL3007 warning: Using latest is prone to errors if the image will ever update. Pin the version explicitly to a release tag
Dockerfile-multi-issues:11 DL3025 warning: Use arguments JSON notation for CMD and ENTRYPOINT arguments
Issues in This Dockerfile
- Using
latesttag (DL3007) - appears twice (builder and production stages) - Multiple consecutive
RUNinstructions (DL3059) - should be consolidated - Copying everything before installing dependencies (poor layer caching)
- Copying
node_modulesinstead of installing production dependencies - Running as root (DL3002) - not explicitly shown but default behavior
- Using shell form for CMD (DL3025)
Fixed Multi-stage Build
Step 1: Create the fixed Dockerfile:
vi Dockerfile-multi-fixed
Step 2: Paste the following fixed Dockerfile content:
FROM node:18-alpine AS builder
WORKDIR /app

# Copy package files first for better caching
COPY package*.json ./
RUN npm ci

# Copy source and build
COPY . .
RUN npm run build

# Production stage
FROM node:18-alpine
WORKDIR /app

# Create non-root user
RUN addgroup -g 1001 -S nodejs && \
    adduser -S nodejs -u 1001

# Install only production dependencies
COPY package*.json ./
RUN npm ci --only=production && npm cache clean --force

# Copy built application
COPY --from=builder --chown=nodejs:nodejs /app/dist ./dist

# Switch to non-root user
USER nodejs

EXPOSE 3000

# Use exec form
CMD ["node", "dist/index.js"]
Step 3: Save and exit (:wq), then run Hadolint:
hadolint Dockerfile-multi-fixed
Actual Output: No issues found! ✅
root@ubuntu-01:laborant# hadolint Dockerfile-multi-fixed
root@ubuntu-01:laborant#
Perfect! The fixed version passes all Hadolint checks.
Key Improvements
- Specific Versions: Uses
node:18-alpineinstead oflatest(fixes DL3007) - Better Caching: Copies
package*.jsonbefore source code - Production Dependencies: Only installs production dependencies in final stage
- Non-root User: Runs as
nodejsuser (fixes DL3002) - Exec Form: Uses proper JSON notation for CMD (fixes DL3025)
- Consolidated RUN: Combined related commands to reduce layers (fixes DL3059)
Layer Caching Optimization
Bad: Poor Layer Ordering
Step 1: Create the Dockerfile:
vi Dockerfile-bad-cache
Step 2: Paste the following content:
COPY . .
RUN npm install
Step 3: Save and exit (:wq).
Problem: Every code change invalidates the npm install cache.
Good: Optimized Layer Ordering
Step 1: Create the Dockerfile:
vi Dockerfile-good-cache
Step 2: Paste the following content:
COPY package*.json ./
RUN npm install
COPY . .
Step 3: Save and exit (:wq).
Why: Dependencies change less frequently than source code. This order allows Docker to cache the dependency layer.
Test both to see the difference:
hadolint Dockerfile-bad-cache
hadolint Dockerfile-good-cache
Combining RUN Commands
Bad: Multiple Layers
Step 1: Create the Dockerfile:
vi Dockerfile-multiple-run
Step 2: Paste the following content:
RUN apt-get update
RUN apt-get install -y python3
RUN rm -rf /var/lib/apt/lists/*
Step 3: Save and exit (:wq), then test:
hadolint Dockerfile-multiple-run
Problem: Creates 3 separate layers, increasing image size. You'll see warnings about multiple consecutive RUN instructions (DL3059).
Good: Single Layer
Step 1: Create the Dockerfile:
vi Dockerfile-consolidated-run
Step 2: Paste the following content:
RUN apt-get update && \
    apt-get install -y --no-install-recommends python3 && \
    rm -rf /var/lib/apt/lists/*
Step 3: Save and exit (:wq), then test:
hadolint Dockerfile-consolidated-run
Why: Each RUN creates a new layer. Combining reduces layers and image size.
This should have fewer or no warnings about multiple RUN instructions.
Using .dockerignore
Important: Create a .dockerignore file before creating your Dockerfile. This file tells Docker which files and directories to exclude from the build context.
Step 1: Create the .dockerignore file first:
vi .dockerignore
Add the following content:
node_modules
npm-debug.log
.git
.gitignore
README.md
.env
.nyc_output
coverage
.vscode
Save and exit (:wq).
Step 2: Then create your Dockerfile:
vi Dockerfile
Add your Dockerfile content, save and exit (:wq).
What happens after adding .dockerignore:
- Faster Builds: Docker won't send excluded files to the Docker daemon, reducing build context size
- Smaller Images: Excluded files won't be copied into the image layers
- Better Security: Sensitive files (like
.env) won't accidentally be included - Reduced Build Time: Less data to transfer means faster builds
Example: Without .dockerignore, a build might send 500MB of node_modules to Docker. With .dockerignore, only your source code (maybe 5MB) is sent, making builds much faster.
Test it: After creating both files, build your image and notice the difference:
docker build -t myapp .
docker images myapp
Health Checks
Step 1: Create the Dockerfile:
vi Dockerfile-with-healthcheck
Step 2: Paste the following content with health check:
HEALTHCHECK --interval=30s --timeout=3s --start-period=5s --retries=3 \
  CMD curl -f http://localhost:3000/health || exit 1
Step 3: Save and exit (:wq), then test:
hadolint Dockerfile-with-healthcheck
Why: Allows Docker and orchestrators to monitor container health.
Hands-On Lab
Use the interactive playground to practice creating optimized multi-stage Dockerfiles. The playground provides an Ubuntu environment with Docker and Hadolint pre-installed for hands-on experimentation.
Testing Your Dockerfiles
Create a test script to verify your Dockerfiles:
vi test-dockerfiles.sh
Add the following content:
#!/bin/bash
echo "Testing Dockerfile.good..."
hadolint Dockerfile.good

echo "Testing Dockerfile.bad..."
hadolint Dockerfile.bad

echo "Testing Dockerfile.fixed..."
hadolint Dockerfile.fixed
Save and exit (:wq), then make it executable and run:
chmod +x test-dockerfiles.sh
./test-dockerfiles.sh
This script will:
- Test
Dockerfile.good(should pass) - Test
Dockerfile.bad(should have issues) - Test
Dockerfile.fixed(should pass)
Integration & Configuration
Configuration File
Create a .hadolint.yaml file to customize which rules to ignore or override.
Step 1: Create the configuration file:
vi .hadolint.yaml
Step 2: Add the configuration content:
# Ignore specific rules (these won't be reported)
ignored:
  - DL3008  # Pin versions in apt-get install (can be too strict for some use cases)
  - DL3013  # Pin versions in pip install (can be too strict for some use cases)

# Override rule severity
# You can change the severity level of specific rules
override:
  error: DL3002  # Treat DL3002 (Last USER should not be root) as error instead of warning
  warning: DL3006  # Treat DL3006 (Always tag version) as warning instead of error

# Trusted registries (for DL3017 rule)
trustedRegistries:
  - docker.io
  - gcr.io
  - quay.io
Save and exit (:wq).
Using the Configuration
After creating the configuration file, use it with Hadolint:
hadolint --config .hadolint.yaml Dockerfile
The configuration will apply the ignored rules and severity overrides you specified.
CI/CD Integration
GitHub Actions
Create the GitHub Actions workflow file:
mkdir -p .github/workflows
vi .github/workflows/hadolint.yml
Add the workflow content:
name: Lint Dockerfile

on:
  pull_request:
    paths:
      - 'Dockerfile*'
      - '.dockerfilelintrc'

jobs:
  hadolint:
    runs-on: ubuntu-latest
    steps:
      - uses: actions/checkout@v3
      - name: Run Hadolint
        uses: hadolint/hadolint-action@v3.1.0
        with:
          dockerfile: Dockerfile
          failure-threshold: warning
          ignore: DL3008,DL3013
Save and exit (:wq).
Pre-commit Hook
Create the pre-commit configuration file:
vi .pre-commit-config.yaml
Add the pre-commit configuration:
repos:
  - repo: https://github.com/hadolint/hadolint
    rev: v2.12.0
    hooks:
      - id: hadolint-docker
        args: ['--ignore', 'DL3008']
Save and exit (:wq).
Install pre-commit:
pip install pre-commit
pre-commit install
GitLab CI
Create or edit the GitLab CI configuration:
vi .gitlab-ci.yml
Add the hadolint job:
hadolint:
  image: hadolint/hadolint:latest
  script:
    - hadolint --ignore DL3008 --ignore DL3013 Dockerfile
  only:
    - merge_requests
Save and exit (:wq).
Makefile
Create or edit the Makefile:
vi Makefile
Add the lint targets:
.PHONY: lint
lint:
    docker run --rm -i hadolint/hadolint < Dockerfile

.PHONY: lint-json
lint-json:
    docker run --rm -i hadolint/hadolint --format json < Dockerfile
Save and exit (:wq).
Output Formats
Hadolint supports multiple output formats. First, create a Dockerfile to test:
vi Dockerfile
Add content, save and exit (:wq), then test different output formats:
# Default (TTY)
hadolint Dockerfile

# JSON
hadolint --format json Dockerfile

# Checkstyle
hadolint --format checkstyle Dockerfile

# Code Climate
hadolint --format codeclimate Dockerfile

# GitLab Code Climate
hadolint --format gitlab_codeclimate Dockerfile

# SARIF
hadolint --format sarif Dockerfile
Failure Thresholds
Control when Hadolint exits with a failure code. Test with your Dockerfile:
# Fail on errors only (default)
hadolint --failure-threshold error Dockerfile

# Fail on warnings and errors
hadolint --failure-threshold warning Dockerfile

# Fail on info, warnings, and errors
hadolint --failure-threshold info Dockerfile
This is useful in CI/CD pipelines where you want to control build failures based on issue severity.
Common Rules Reference
Security Rules
| Rule | Description | Solution |
|---|---|---|
| DL3002 | Last USER should not be root | Create and switch to a non-root user |
| DL3006 | Always tag the version of an image explicitly | Use specific tags like ubuntu:22.04 instead of latest |
| DL3008 | Pin versions in apt-get install | Use apt-get install package=version |
| DL3013 | Pin versions in pip install | Use pip install package==version |
| DL3015 | Avoid additional packages | Use --no-install-recommends flag |
Best Practice Rules
| Rule | Description | Solution |
|---|---|---|
| DL3003 | Use WORKDIR instead of RUN cd | Use WORKDIR /path instead of RUN cd /path |
| DL3009 | Delete apt-get lists after installing | Add rm -rf /var/lib/apt/lists/* after apt-get install |
| DL3025 | Use arguments JSON notation for CMD | Use CMD ["executable", "arg1", "arg2"] |
| DL3027 | Do not use COPY as root | Use COPY --chown=user:group |
Additional Resources
Summary
Hadolint is an essential tool for maintaining high-quality Dockerfiles. By following its recommendations:
- ✅ Security: Reduce attack surface by avoiding root users and pinning versions
- ✅ Performance: Optimize layer caching and reduce image size
- ✅ Reliability: Ensure reproducible builds with version pinning
- ✅ Maintainability: Follow consistent patterns across projects
Remember: Hadolint provides recommendations, but you should understand the reasoning behind each rule and apply them appropriately to your use case.
Happy Linting! 🐳
About the Author

Ajay Kumar
The DevSecOps Ledger is a technical resource dedicated to the integration of security into the modern software development lifecycle. Our goal is to empower engineers with the documentation and practical skills needed to automate security.
More tutorials you might like
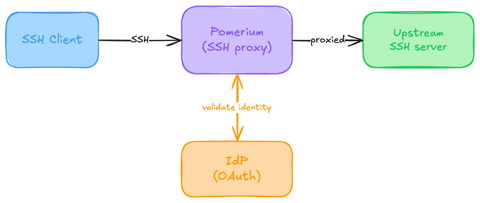
Native SSH Access with Pomerium
Pomerium can be used as a native SSH reverse proxy, adding OAuth authentication and flexible Pomerium policy enforcement to standard SSH connections, without the need for tunnels, or custom clients or servers.

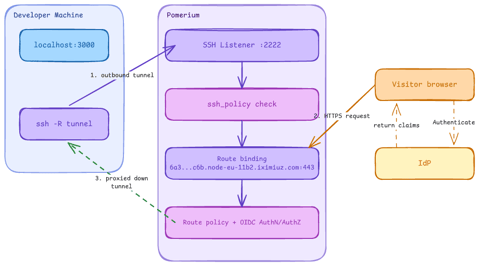
Native SSH Reverse Tunneling with Pomerium
Use Pomerium's native SSH support to publish a local service through a standard reverse SSH tunnel, with OpenID Connect (OIDC) authentication and continuous authorization on every request. Reach services behind Network Address Translation (NAT) without firewall holes or custom agents, and control both who can use the service and who can open the tunnel. Application traffic stays on infrastructure you control.
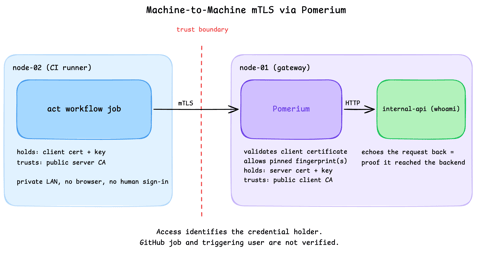
Secure Machine-to-Machine Access with mTLS and Pomerium
Run a GitHub Actions-compatible continuous integration (CI) job on a private runner and protect its internal API call with mutual TLS (mTLS) and Pomerium. Build separate server and client trust chains, authorize one machine certificate by fingerprint, then revoke, restore, and rotate its credentials through live policy changes.
Harden Access to OpenClaw with Pomerium
Put OpenClaw, a self-hosted AI assistant with shell and file access, behind a web route and an SSH route, both gated by the same identity and Pomerium's context-aware policy. OpenClaw runs in trusted-proxy mode, trusting signed identity headers instead of its own login, while Pomerium's native SSH proxy signs short-lived certificates for shell access.
Learn by doing, not just by reading or watching
Sign up for a free account to start a VM playground right on this page, track your progress, and get notified about new learning materials.