Build a Custom Rootfs Image That Boots as a microVM, Not a Container
Scope. This tutorial builds a rootfs image for an iximiuz Labs playground VM, and the manifest and labctl steps in Part 7 are specific to this platform.
Those playgrounds happen to be Firecracker microVMs, so everything up to Part 7, the five boot requirements, the Dockerfile, and the validation script, applies just as well if you are preparing a rootfs for your own Firecracker or Cloud Hypervisor microVMs. Where a step depends on the platform doing something for you, it is called out.
Prerequisites
This tutorial assumes you are comfortable writing a Dockerfile and running docker build, and that you have seen a systemd unit before. You do not need to know systemd well: the one distinction that matters, between enabling a unit and starting it, is explained where it comes up.
Nothing else is required. No Kubernetes, no labctl, no registry account, and no playground of your own: everything through Part 6b runs in this Docker playground, and Part 7 is read-along. If either area is new, the Dockerfile reference and systemd's unit basics cover more than enough background.
What You Will Learn
By the end of this tutorial, you will know:
- Which five requirements separate a bootable rootfs image from an ordinary container image, and which of them a plain
ubuntu:24.04fails - Why SSH host keys and
machine-idmust never be baked into the image, and who regenerates them - How to validate an image that you cannot boot, using assertions against a stopped image
- Why
docker runanswers almost nothing about a rootfs image, and what it can still be trusted for - How to tell a broken image from a broken check, which turns out to be the harder skill
The Two Artifacts Problem
docker run -it ubuntu:24.04 bash works. Hand that same image to iximiuz Labs as a playground's root filesystem and it does not boot.
Both are "an OCI image". Only one is a machine.
Playgrounds here run as Firecracker microVMs, and the drive you point a manifest at becomes the VM's root filesystem. So "custom playground" really means "custom rootfs image".
A container borrows the host's kernel and gets one process started for it. A microVM is handed a kernel and has to bring itself up from there, which is work a container image has never been asked to do.
You will build a deliberately broken rootfs, watch it fail the requirements, fix it, then write a validation script that proves an image would boot without booting it, because you cannot boot it here.
Two senses of "playground" are about to sit next to each other, so to be explicit: you are working inside a Docker playground, building a rootfs image that would become a different playground's root drive.
Part 1: The Five Requirements
An image used as a playground's root drive has to satisfy exactly these:
| Requirement | Why |
|---|---|
linux/amd64 | The platform runs amd64 microVMs |
| No kernel | The platform supplies it; your image provides everything from /sbin/init up |
| An init system | systemd for most distributions, OpenRC for Alpine |
sshd on 0.0.0.0:22 at boot | Terminal tabs and labctl ssh are SSH |
| Users already exist in the image | The platform does not create them |
Two delivery rules on top of those five: the image must be publicly pullable, and it cannot live on Docker Hub (rate limiting). GHCR is the recommended registry. A manifest pointing at a private image, or at Docker Hub, fails at start time rather than build time.
Notice what is not on that list: no CMD, no ENTRYPOINT. The platform boots /lib/systemd/systemd itself and never reads the OCI config's entrypoint fields.
Part 2: Build the Naive Version
First, start two downloads
Parts 6 and 6b compare your image against two published rootfs images. They are large, and nothing before Part 6 touches them, so start them now and let them arrive while you work:
docker pull ghcr.io/iximiuz/labs/rootfs:ubuntu-24-04      > /tmp/pull-1.log 2>&1 &
docker pull ghcr.io/ibtisam-iq/ubuntu-24-04-rootfs:latest > /tmp/pull-2.log 2>&1 &
The trailing & hands your prompt straight back. By the time you reach Part 6 they will already be local.
Now the image
Create the working directory:
cd ~/rootfs-lab
Write the obvious Dockerfile:
cat > Dockerfile.naive <<'EOF'
FROM ubuntu:24.04

RUN apt-get update && \
    apt-get install -y --no-install-recommends curl vim && \
    rm -rf /var/lib/apt/lists/*

CMD ["/bin/bash"]
EOF
Build it:
docker build -f Dockerfile.naive -t naive-rootfs:v1 .
It builds cleanly. It runs cleanly. Confirm what it is missing:
docker run --rm --entrypoint sh naive-rootfs:v1 -c '
  test -x /lib/systemd/systemd && echo "systemd:  yes" || echo "systemd:  MISSING"
  command -v sshd >/dev/null   && echo "sshd:     yes" || echo "sshd:     MISSING"
  id laborant >/dev/null 2>&1  && echo "user:     yes" || echo "user:     MISSING"
'
systemd:  MISSING
sshd:     MISSING
user:     MISSING
Three failures. Handed to the platform, this image would be given a kernel, the kernel would look for an init system, find nothing usable, and panic.
Why every line prints an explicit yes or MISSING
Because the tools do not report consistently. ls writes an error to stderr, id writes a different one, and which sshd prints nothing at all, communicating only through its exit code.
A check whose failure mode is silence is a bad check: you cannot tell "passed" from "never ran". The validation script later labels every line for the same reason.
Part 3: Make It Bootable
Four things have to be added, and one class of thing has to be deliberately removed.
cat > Dockerfile.bootable <<'EOF'
FROM ubuntu:24.04

ENV DEBIAN_FRONTEND=noninteractive

# 1. Init system, SSH, and a usable userland
RUN apt-get update && \
    apt-get install -y --no-install-recommends \
        systemd systemd-sysv \
        openssh-server \
        sudo ca-certificates curl vim iproute2 && \
    rm -rf /var/lib/apt/lists/*

# 2. The interactive user the manifest will name
RUN useradd -m -s /bin/bash laborant && \
    echo 'laborant ALL=(ALL) NOPASSWD:ALL' > /etc/sudoers.d/laborant && \
    chmod 0440 /etc/sudoers.d/laborant

# 3. Enable sshd at boot (enable, not start: there is no init running in a build)
RUN systemctl enable ssh

# 4. Strip the per-machine identity that must NOT be shared
RUN rm -f /etc/ssh/ssh_host_* && \
    : > /etc/machine-id && \
    rm -f /var/lib/dbus/machine-id && \
    rm -f /.dockerenv
EOF
Build it:
docker build -f Dockerfile.bootable -t bootable-rootfs:v1 .
Three of those steps are ordinary. Two deserve explanation.
systemctl enable, not systemctl start
There is no init system running during docker build. systemctl start would fail. systemctl enable does not start anything; it writes a symlink into /etc/systemd/system/multi-user.target.wants/, which systemd reads on the next real boot.
That is the whole bake-versus-boot distinction in one command. Verify the symlink is what you actually produced:
docker run --rm --entrypoint sh bootable-rootfs:v1 -c \
  'ls -l /etc/systemd/system/multi-user.target.wants/ssh.service'
Deleting the host keys is the point
This is the step that looks like a mistake. openssh-server generates SSH host keys at install time, and those keys are the machine's cryptographic identity.
Leave them in the image and every VM anyone ever boots from it shares one identity. Anyone who pulls your public image holds the private host keys of every machine running it.
On iximiuz Labs you are covered either way: the platform strips and regenerates host keys at first boot, so this line is defence in depth rather than a hard requirement. The official base images delete them too, for the same reason it is worth doing here, to keep the step visible.
Keep it. The moment you boot this rootfs on your own Firecracker or Cloud Hypervisor VM, nothing is doing it for you.
/etc/machine-id is the same problem in a smaller form: systemd uses it to identify the machine, and a shared one produces duplicate journald IDs and DHCP collisions.
Part 4: Validate What You Cannot Boot
You cannot boot this image here. So how do you know it is correct before publishing it?
You assert the observable consequences of each requirement. Every check below runs against a stopped image:
cat > validate.sh <<'EOF'
#!/usr/bin/env bash
set -uo pipefail
IMAGE="${1:?usage: validate.sh <image>}"
fail=0

check() {
  local label="$1"; shift
  if docker run --rm --entrypoint sh "$IMAGE" -c "$1" >/dev/null 2>&1; then
    printf '  ok    %s\n' "$label"
  else
    printf '  FAIL  %s\n' "$label"; fail=1
  fi
}

echo "Validating $IMAGE"
check "init system present"     'test -x /lib/systemd/systemd'
check "sshd present"            'test -x /usr/sbin/sshd'
check "ssh enabled at boot"     'test -L /etc/systemd/system/multi-user.target.wants/ssh.service'
check "interactive user exists" 'id laborant'
check "no SSH host keys"        '! ls /etc/ssh/ssh_host_* >/dev/null 2>&1'
check "machine-id empty"        'test ! -s /etc/machine-id'

# /.dockerenv is deliberately NOT checked with the helper above, and not with
# `docker export` either. Both report it on every image in existence. Only the
# image layers tell the truth. See the note below.
tmpd=$(mktemp -d)
docker save "$IMAGE" | tar -x -C "$tmpd"
dockerenv=0
for f in $(find "$tmpd" -type f \( -name 'layer.tar' -o -path '*blobs/sha256/*' \)); do
  if tar -tf "$f" 2>/dev/null | grep -q '^\.dockerenv$'; then dockerenv=1; break; fi
done
rm -rf "$tmpd"
if [ "$dockerenv" -eq 0 ]; then
  printf '  ok    .dockerenv absent from image layers\n'
else
  printf '  FAIL  .dockerenv baked into an image layer\n'; fail=1
fi

arch=$(docker image inspect --format '{{.Architecture}}' "$IMAGE")
if [ "$arch" = "amd64" ]; then printf '  ok    architecture is amd64\n'
else printf '  FAIL  architecture is %s\n' "$arch"; fail=1; fi

exit $fail
EOF

chmod +x validate.sh
That is the longest paste in this tutorial, and long heredocs sometimes garble in a browser terminal. If the echoed text looks scrambled, check the file with cat validate.sh before running it, or use the IDE tab to create it instead.
The check where two obvious methods are both wrong
Every check above uses docker run except /.dockerenv. That exception took me three attempts to get right, and the two wrong turns are more instructive than the answer.
Attempt 1: test it inside the container.
docker run --rm --entrypoint sh bootable-rootfs:v1 -c 'ls -l /.dockerenv'
It is there, despite rm -f /.dockerenv in the Dockerfile. /.dockerenv is created by the Docker runtime, not stored in the image, so the act of running the test creates the file being tested for. This check can never pass.
Attempt 2: create a container without starting it, and export its filesystem.
cid=$(docker create bootable-rootfs:v1)
docker export "$cid" | tar -t | grep -c '^\.dockerenv$'
docker rm "$cid"
Reports it present. Which looks like a real finding, until you run the control:
docker create --name ctrl-check ubuntu:24.04 >/dev/null
docker export ctrl-check | tar -t | grep -c '^\.dockerenv$'
docker rm ctrl-check >/dev/null
Stock ubuntu:24.04 reports it too, and stock Ubuntu certainly does not ship /.dockerenv. The runtime injects it at create time, not start time, so docker export is contaminated for every image. Attempt 2 is as useless as attempt 1, and worse, because it produces a confident false positive.
Attempt 3: read the image layers and never make a container.
tmpd=$(mktemp -d)
docker save bootable-rootfs:v1 | tar -x -C "$tmpd"
for f in $(find "$tmpd" -type f \( -name 'layer.tar' -o -path '*blobs/sha256/*' \)); do
  tar -tf "$f" 2>/dev/null | grep -q '^\.dockerenv$' && echo "FOUND in $f"
done
rm -rf "$tmpd"
Silence. It is genuinely not in any layer. docker save streams the image itself rather than a container built from it, which is the only view without a runtime in the way.
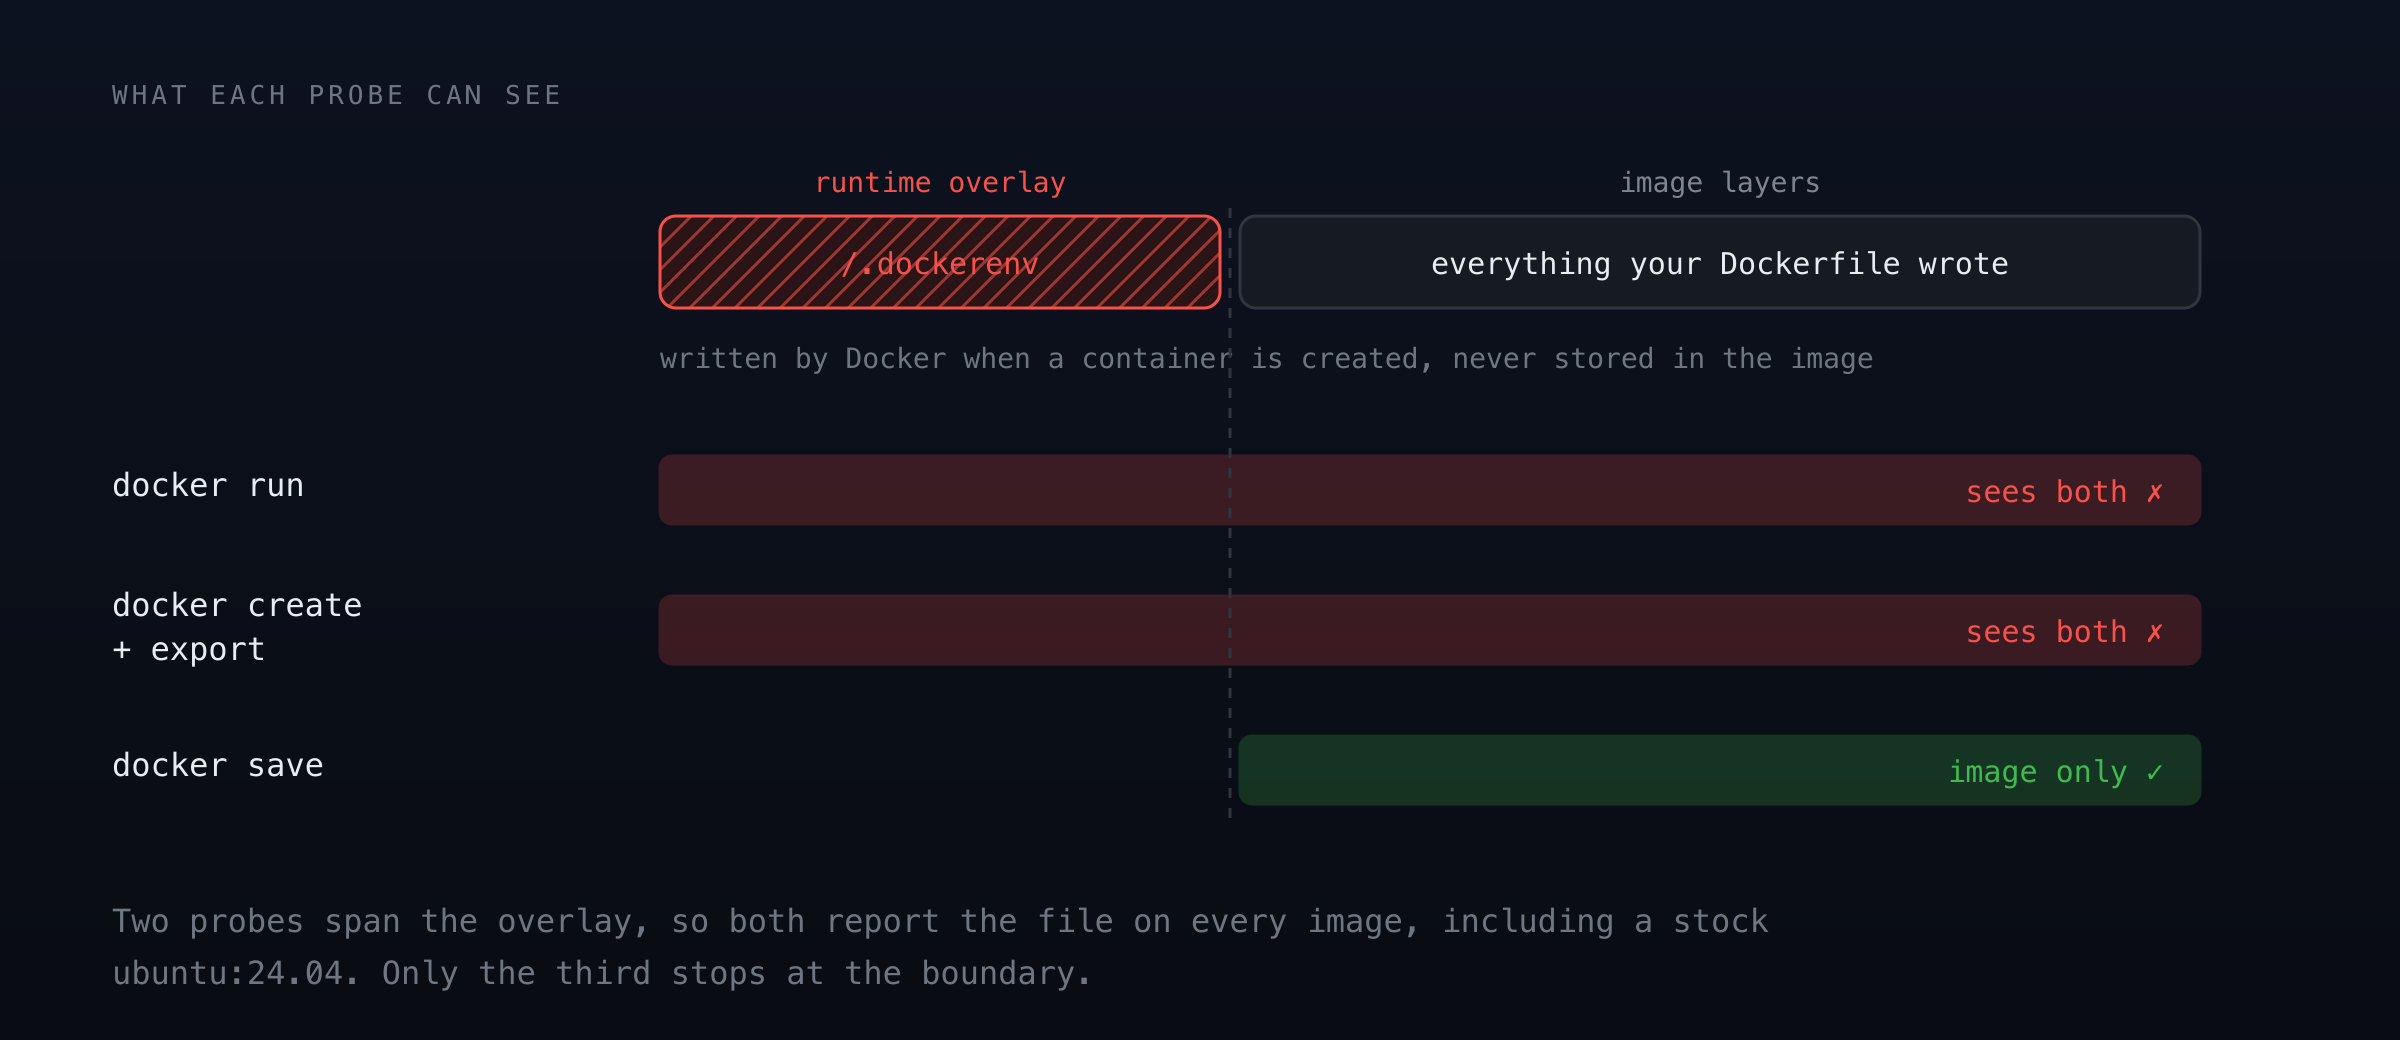
The control experiment is the technique worth stealing. Attempt 2 gave a plausible answer, and nothing about it looked broken. What exposed it was running the same test against an image whose answer was known in advance. When a check reports a problem, point it at something you are certain is clean before you believe it.
An honest caveat about this particular check
Docker never bakes /.dockerenv into layers under normal builds, so this check passes for essentially any image, and the rm -f /.dockerenv in the Dockerfile is defensive rather than load-bearing.
Its value here is not the assertion. It is that a requirement can look trivially testable and have two plausible tests that are both wrong.
docker save is also the slowest check in the script, since it streams the whole image, which is why it runs last.
Run it
bash validate.sh naive-rootfs:v1 ; echo "exit=$?"
bash validate.sh bootable-rootfs:v1 ; echo "exit=$?"
The naive image fails several checks and exits non-zero. The bootable one passes and exits 0.
Put this in the image's CI pipeline as a RUN step before the final CMD, and a broken image can never reach your registry. That is worth more than it looks: the alternative is discovering the problem when a learner clicks Start and gets a machine that never finishes booting.
Part 5: What docker run Cannot Tell You
Try to start the image the way you would any container:
docker run --rm bootable-rootfs:v1 systemctl is-system-running
offline
That one word is the correct result. offline is what systemctl reports when it cannot reach a running system manager. It is not saying the image is broken or that systemd is missing: the binary is right there, installed and enabled. It is saying nothing has booted it, and inside docker run nothing ever will, because PID 1 is your systemctl process rather than systemd.
Note what did not happen: no error, no crash, no stack trace. Just a tidy, plausible-looking one-word answer.
Skim for something obviously broken and you move on satisfied, having learned almost nothing about whether this image actually boots. Quiet output is not the same as a passing result.
So docker run against a rootfs image answers a narrow band of questions:
| Question | Answerable with docker run? |
|---|---|
| Is the binary present? | Yes |
| Is it readable by the right user? | Yes |
Is the unit symlinked into multi-user.target.wants/? | Yes |
| Does the service actually start? | No |
Does sshd bind to 0.0.0.0:22? | No |
| Is the boot ordering correct? | No |
| Does networking come up? | No |
Everything in the No column only exists once a kernel boots the filesystem, which is the platform's job, not Docker's.
This is exactly why the validation script checks symlinks rather than running services. A symlink is a fact you can observe in a stopped image. "The service started" is not.
Part 6: The Same Thing, The Easy Way
First, confirm the two background pulls from Part 2 have landed:
docker images | grep -E 'labs/rootfs|ubuntu-24-04-rootfs'
Both should be listed. If not, check /tmp/pull-1.log and /tmp/pull-2.log, or just run the pulls again in the foreground.
Everything in Part 3 exists so that the platform's base images do not have to be re-derived by every author. Compare:
cat > Dockerfile.official <<'EOF'
FROM ghcr.io/iximiuz/labs/rootfs:ubuntu-24-04

# The official rootfs images end as a non-root user. Switch back before installing.
USER root

RUN apt-get update && \
    apt-get install -y --no-install-recommends postgresql-16 && \
    rm -rf /var/lib/apt/lists/*
EOF

docker build -f Dockerfile.official -t official-rootfs:v1 . && \
  bash validate.sh official-rootfs:v1
That USER root line is not optional
Leave it out and the build fails:
E: Could not open lock file /var/lib/apt/lists/lock - open (13: Permission denied)
E: Unable to lock directory /var/lib/apt/lists/
Inheriting an image inherits its final USER, and these bases end as an unprivileged account so that docker run lands you somewhere sensible. apt-get then cannot write to /var/lib/apt/lists. It is a one-line fix that reads like a permissions bug in your own Dockerfile, which is why it is worth seeing once.
You do not need to switch back to the non-root user at the end. The USER field is an OCI image-config setting that tells docker run who to start as; the platform boots this filesystem with its own kernel, and systemd takes PID 1 regardless. Which user your terminal logs in as comes from the manifest, not from here.
Two lines of real content. Then the validation says this:
Validating official-rootfs:v1
  ok    init system present
  ok    sshd present
  FAIL  ssh enabled at boot
  ok    interactive user exists
  ok    no SSH host keys
  FAIL  machine-id empty
  ok    .dockerenv absent from image layers
  ok    architecture is amd64
Two failures, against the platform's own reference image. The one every custom playground is supposed to inherit from.
When your check fails the reference implementation, the check is what is broken.
That is worth sitting with for a second before reading on, because the instinct is to go looking for what is wrong with the image.
Failure 1: ssh enabled at boot
Ask the image how it enables sshd:
docker run --rm --entrypoint sh ghcr.io/iximiuz/labs/rootfs:ubuntu-24-04 -c '
  find /etc/systemd -name "*ssh*" 2>/dev/null
'
/etc/systemd/system/sockets.target.wants/ssh.socket
/etc/systemd/system/ssh.service.requires/ssh.socket
...
No multi-user.target.wants/ssh.service anywhere. This image uses socket activation, which is the Ubuntu 24.04 default: systemd listens on port 22 itself and starts sshd on the first connection. The image you built in Part 3 uses ssh.service instead, because systemctl enable ssh on a fresh install picks the service unit.
Both satisfy the Part 1 requirement. sshd answers on 0.0.0.0:22 at boot either way. My check asserted one of the two mechanisms and called it the rule.
Widen it to accept either:
sed -i "s#check \"ssh enabled at boot\" 'test -L /etc/systemd/system/multi-user.target.wants/ssh.service'#check \"sshd starts at boot\" 'ls /etc/systemd/system/multi-user.target.wants/ssh.service /etc/systemd/system/sockets.target.wants/ssh.socket 2>/dev/null | grep -q .'#" validate.sh
Failure 2: machine-id empty
docker run --rm --entrypoint sh ghcr.io/iximiuz/labs/rootfs:ubuntu-24-04 \
  -c 'stat -c%s /etc/machine-id'
One byte, not zero. test ! -s demands exactly zero bytes, and a file holding a single newline is not that. systemd treats empty and whitespace-only identically: both mean uninitialised, both get a fresh ID at first boot. The check was testing one way of writing the file rather than the property that matters.
sed -i "s#check \"machine-id empty\" 'test ! -s /etc/machine-id'#check \"machine-id uninitialised\" '[ ! -s /etc/machine-id ] || [ -z \"\$(tr -d \"[:space:]\" < /etc/machine-id)\" ]'#" validate.sh
Re-run and the reference image passes:
bash validate.sh official-rootfs:v1 ; echo "exit=$?"
Nothing about the image changed. Two assertions stopped mistaking an implementation for a requirement.
Use this unless understanding the base is your actual goal. Part 3 is worth doing once, so that when a machine fails to boot you know which of the five requirements to suspect. After that, inherit.
Part 6b: Point It at an Image You Did Not Build
Part 6 already broke this script against the platform's own base. Now point it at one built by a third party, with different conventions again.
This one is mine. I built it the hard way, exactly as in Part 3, and it currently backs five public playgrounds:
bash validate.sh ghcr.io/ibtisam-iq/ubuntu-24-04-rootfs:latest ; echo "exit=$?"
One check fails:
FAIL interactive user exists
The other two you already fixed in Part 6, and they stay fixed here. That is the point of widening a check rather than special-casing an image: my machine-id also holds a single newline, and the repaired assertion accepts it without being told about it.
This last one is different, and it is the most instructive of the three.
The one that cannot be widened
id laborant is hardcoded. That image creates ibtisam instead.
Neither name is more correct. The rule from Part 1 is that the users your manifest names must exist in the image, and which names those are is the image author's decision. There is no clever assertion that covers every case, because the correct answer genuinely differs per image.
So it stops being a constant and becomes an input:
sed -i 's|^IMAGE=.*|IMAGE="${1:?usage: validate.sh <image> [login-user]}"\nLOGIN_USER="${2:-laborant}"|' validate.sh
sed -i "s|check \"interactive user exists\" 'id laborant'|check \"login user exists\"       \"id \$LOGIN_USER\"|" validate.sh
Now the caller supplies what only the caller can know:
bash validate.sh ghcr.io/ibtisam-iq/ubuntu-24-04-rootfs:latest ibtisam ; echo "exit=$?"
bash validate.sh bootable-rootfs:v1 ; echo "exit=$?"
Both exit 0. The script now expresses the requirement rather than one way of satisfying it, and takes the genuinely variable part as an argument.
Three failures, three different repairs, and the difference between them is the useful bit.
ssh had two valid mechanisms, so the check widened to accept both. machine-id had two valid encodings of the same state, so the check tested the state instead. The user has no universal answer at all, so it became a parameter.
Reaching for a parameter first is the common mistake. It works, and it pushes the thinking onto whoever runs the script.
None of the three was a flaw in an image. Every one was the script mistaking one author's habits for the requirement, and it stayed invisible for exactly as long as that author only pointed it at his own work. The platform's own reference image was the first thing to expose it.
Part 7: Publishing It
These steps push to your own registry and create a playground under your own account, so they cannot be verified from inside this sandbox. Read along, then run them in your terminal afterwards.
Push the image somewhere public that is not Docker Hub:
echo "$GITHUB_TOKEN" | docker login ghcr.io -u <your-username> --password-stdin
docker tag bootable-rootfs:v1 ghcr.io/<your-username>/my-rootfs:v1
docker push ghcr.io/<your-username>/my-rootfs:v1
Point a manifest at it:
kind: playground
title: My Custom Playground
description: A one-line summary shown on the card.
categories:
  - linux
playground:
  networks:
    - name: local
      subnet: 172.16.0.0/24
  machines:
    - name: dev-01
      users:
        - name: root
        - name: laborant
          default: true
      drives:
        - source: oci://ghcr.io/<your-username>/my-rootfs:v1
          mount: /
          size: 30GiB
      network:
        interfaces:
          - network: local
      resources:
        cpuCount: 2
        ramSize: 2GiB
  accessControl:
    canList: [owner]
    canRead: [owner]
    canStart: [owner]
Create it:
labctl playground create my-custom-playground --base flexbox -f manifest.yaml
--base flexbox is not incidental. It is the only base that accepts an arbitrary set of machines; every other base keeps its own and rejects new or renamed ones.
That is the whole handoff, and deliberately so. Everything past this point (the dump-edit-update loop, init tasks, the Playground Constructor UI, access control beyond owner) is covered properly in Your First Custom Playground and the manifest reference. Go there next rather than taking my abbreviated version as the full story.
What this tutorial gave you that those pages assume you already have is the image on the other end of that oci:// line.
Unknown manifest keys are silently discarded. Write format: ext4 when the field is actually filesystem and nothing errors, warns, or fails. The key is dropped and you believe you configured something you did not. This one is not in the docs, and I found it by diffing my own submitted manifest against labctl playground manifest <full-name>. Do that diff.
Free-tier accounts can hold one custom playground at a time. If create refuses and you already have one, that is why, not a problem with your manifest.
What You Built
A container image becomes a bootable rootfs when it stops assuming a kernel will hand it a single process, and starts assuming it has to bring a machine up on its own. Concretely:
| What changed | Why |
|---|---|
| An init system | Something has to take PID 1 |
sshd enabled, not started | There is no init running during a build |
| A user that pre-exists | The platform never creates one |
| Host keys and machine-id absent | Otherwise every VM shares one identity |
The validation script is the part worth keeping. It encodes those requirements as assertions against a stopped image, which is the only kind of check available before a kernel exists, and it turns "I think this will boot" into something CI can answer.
It also taught you two things about itself along the way: that a plausible test can be contaminated by the runtime, and that a script only ever pointed at its author's own images encodes their habits as requirements.
The finished validate.sh, after all three repairs
Five sed commands across Parts 6 and 6b mutated the Part 4 version into this. Here it is whole, so you can lift it without replaying them:
#!/usr/bin/env bash
set -uo pipefail
IMAGE="${1:?usage: validate.sh <image> [login-user]}"
LOGIN_USER="${2:-laborant}"
fail=0

check() {
  local label="$1"; shift
  if docker run --rm --entrypoint sh "$IMAGE" -c "$1" >/dev/null 2>&1; then
    printf '  ok    %s\n' "$label"
  else
    printf '  FAIL  %s\n' "$label"; fail=1
  fi
}

echo "Validating $IMAGE"
check "init system present"      'test -x /lib/systemd/systemd'
check "sshd present"             'test -x /usr/sbin/sshd'
check "sshd starts at boot"      'ls /etc/systemd/system/multi-user.target.wants/ssh.service /etc/systemd/system/sockets.target.wants/ssh.socket 2>/dev/null | grep -q .'
check "login user exists"        "id $LOGIN_USER"
check "no SSH host keys"         '! ls /etc/ssh/ssh_host_* >/dev/null 2>&1'
check "machine-id uninitialised" '[ ! -s /etc/machine-id ] || [ -z "$(tr -d "[:space:]" < /etc/machine-id)" ]'

# /.dockerenv cannot be checked from a container: the runtime injects it at create
# time, so docker run AND docker export report it on every image. Read the layers.
tmpd=$(mktemp -d)
docker save "$IMAGE" | tar -x -C "$tmpd"
dockerenv=0
for f in $(find "$tmpd" -type f \( -name 'layer.tar' -o -path '*blobs/sha256/*' \)); do
  if tar -tf "$f" 2>/dev/null | grep -q '^\.dockerenv$'; then dockerenv=1; break; fi
done
rm -rf "$tmpd"
if [ "$dockerenv" -eq 0 ]; then
  printf '  ok    .dockerenv absent from image layers\n'
else
  printf '  FAIL  .dockerenv baked into an image layer\n'; fail=1
fi

arch=$(docker image inspect --format '{{.Architecture}}' "$IMAGE")
if [ "$arch" = "amd64" ]; then printf '  ok    architecture is amd64\n'
else printf '  FAIL  architecture is %s\n' "$arch"; fail=1; fi

exit $fail
bash validate.sh <image> [login-user] # login-user defaults to laborant
Two quoting details worth preserving if you edit it. The login check uses double quotes so the outer shell expands $LOGIN_USER before the string reaches docker run. The machine-id check uses single quotes so $(tr ...) survives to the container's sh -c instead of running on your host. Swap either and the check silently tests the wrong machine.
Where next
- Custom Rootfs Images and the manifest reference in the official docs, which cover the full schema this tutorial only touches
- Init tasks if you would rather provision at boot than bake into the image
- Official rootfs image definitions for a base to inherit from instead of writing your own
- My six systemd rootfs images, built with exactly this pattern, including Jenkins, SonarQube and Nexus. The Ubuntu base among them is the image you validated in Part 6b.
- Building an OCI Image That Boots as a microVM, Not a Container, the long-form version of Parts 1 to 5, covering the six rootfs images this pattern produced and the failures behind each build step
- Also on my blog: publishing a custom playground end to end and where provisioning should live
About the Author

Muhammad Ibtisam
DevOps and cloud engineer. CKA and CKAD. Author of DebugBox, a Kubernetes debugging container in three size-scoped variants. This platform has been my working environment since August 2025: I build here, I learn here, I test here. Kubernetes clusters for whatever I am trying out, and my own Linux machine for everything else, a rootfs image with my tools already baked in, so there is nothing to set up and no reason to SSH out from my Mac. The work that holds up gets published here as playgrounds and tutorials.
Writes about
Frequently covers
More tutorials you might like
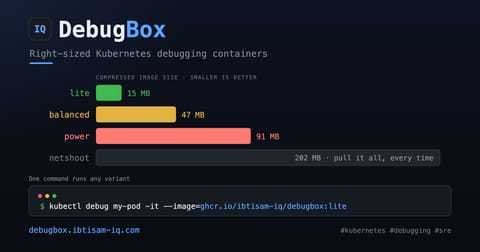
Kubernetes Debugging with DebugBox: Right-Sized Containers for Every Scenario
Most Kubernetes debugging images ship as a single 200+ MB package. DebugBox takes a different approach: three variants (15 MB, 47 MB, 91 MB) each scoped to a specific debugging task. This tutorial covers when to use lite, balanced, and power, how to run each as an ephemeral container or debug pod, and what tools are available in each variant.
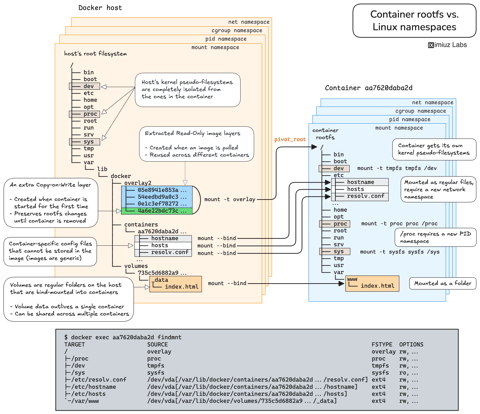
How Container Filesystem Works: Building a Docker-like Container From Scratch
Learn how Linux containers are built from the ground up. Starting with the mount namespace and a root filesystem, see why PID, cgroup, UTS, and network namespaces naturally follow - and how this foundation makes concepts like bind mounts, volumes, and persistence in Docker or Kubernetes much easier to grasp.

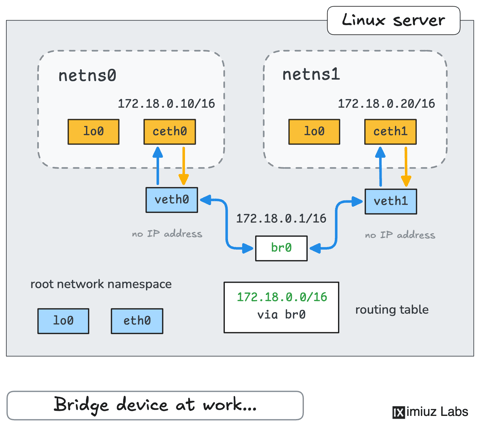
How Container Networking Works: Building a Bridge Network From Scratch
Begin with the basics to understand Docker and Kubernetes networking: learn how to create and interconnect Linux network namespaces using only command-line tools.
How Kubernetes Reinvented Virtual Machines - In a Good Sense
How Virtual Machines were used to deploy services. What old problems containers solve and what new problems create. How Kubernetes used containers to recreate Virtual Machines in a better way?
Learn by doing, not just by reading or watching
Sign up for a free account to start a VM playground right on this page, track your progress, and get notified about new learning materials.