Linux Basics - Essential Commands for Beginners

Welcome to Linux Basics: Essential Commands for Beginners! This hands-on tutorial will teach you fundamental Linux administration skills by guiding you through a realistic scenario at a fictional company called TechCorp.
You'll learn by doing - creating users, managing files, setting permissions, and organizing a project directory structure. By the end, you'll be comfortable with the Linux command line and ready to tackle more advanced topics.
💡 New to Linux? Don't worry! This tutorial assumes no prior experience. We'll explain every command as we go.
What You'll Learn
By completing this tutorial, you'll master:
- User Management: Creating users, setting passwords, and managing sudo access
- File System Navigation: Understanding absolute vs relative paths
- File Operations: Creating, copying, moving, and editing files
- Directory Management: Organizing projects with mkdir
- Text Editing: Using vi editor basics
- Permissions: Understanding and setting file/directory permissions
- Ownership: Managing user and group ownership
- Security: Using umask for default permissions
The Scenario
You're a Linux administrator at TechCorp. Your task is to set up a secure project environment called ProjectX for team collaboration. You'll create user accounts for team members, organize the project structure, and configure proper access controls.
Let's get started!
Part 1: User Management Basics
Understanding Your Environment
First, let's see who you are:
whoami
You should see laborant - that's your current user. Now check your current directory:
pwd
This shows your absolute path (the full path from the root / directory).
📍 Paths in Linux:
- Absolute path: Starts from root
/- e.g.,/home/laborant - Relative path: Relative to current location - e.g.,
./ProjectX - Shortcuts:
~= home directory,.= current directory,..= parent directory
Creating the Manager User
We'll create a user named donald who will be the project manager:
sudo useradd -m -s /bin/bash donald
What does each flag do?
sudo: Run with administrative privilegesuseradd: Command to create a new user-m: Create a home directory (/home/donald)-s /bin/bash: Set bash as the default shelldonald: The username
Set a password for donald:
sudo passwd donald
When prompted, enter: ProjectX2024! (type it twice to confirm)
Granting Sudo Privileges
Now let's give donald administrative powers:
sudo usermod -aG wheel donald
Breaking it down:
usermod: Modify a user account-aG: Add to group (without removing from other groups)sudo: The group name (members can use sudo)donald: The user to modify
Verify donald has sudo access:
sudo -l -U donald
Switching Users
Switch to the donald account:
su - donald
Enter the password: ProjectX2024!
The - flag ensures you get donald's full environment (including his home directory).
Verify you're now donald:
whoami
pwd
You should see donald and /home/donald.
⚠️ For the rest of this tutorial, make sure you're logged in as donald!
If you need to switch back to laborant, type exit or press Ctrl+D.
Part 2: Creating the Project Structure
Creating the Main Directory
Let's create the ProjectX directory:
mkdir ~/ProjectX
The ~ is a shortcut for your home directory (/home/donald).
Navigate into it:
cd ~/ProjectX
Verify your location:
pwd
You should see: /home/donald/ProjectX
Creating Subdirectories
Create four subdirectories to organize the project:
mkdir src
mkdir docs
mkdir tests
mkdir bin
List them to verify:
ls -l
Understanding ls -l output:
drwxr-xr-x 2 donald donald 4096 Oct 16 10:00 src
d: It's a directoryrwxr-xr-x: Permissions (we'll learn about these later!)2: Number of linksdonald donald: Owner and group4096: Size in bytesOct 16 10:00: Last modified datesrc: Directory name
Creating Files
Now create one file in each subdirectory:
pwd
touch src/main.c
touch docs/readme.txt
touch tests/test.sh
touch bin/deploy.sh
What is touch?
The touch command creates an empty file or updates the timestamp of an existing file.
View the complete structure:
ls -lR
The -R flag means "recursive" - it shows all subdirectories and their contents.
Part 3: Editing Files with vi
vi Editor Basics
vi is a powerful text editor available on virtually every Linux system. It has two modes:
- Normal mode: For navigation and commands (default)
- Insert mode: For typing text
Essential vi commands:
i- Enter INSERT mode (start typing)Esc- Exit INSERT mode (back to normal mode):w- Save (write) the file:q- Quit vi:wq- Save and quit:q!- Quit without saving
Adding Content to main.c
Let's edit the C source file:
# Navigate to the ProjectX directory.
cd ~/ProjectX

# Make sure you are in the right place
pwd

# List the contents of your directory
ls -l

# Modify the main.c file in src directory in ProjectX directory
vi src/main.c
Now follow these steps:
- Press
ito enter INSERT mode - Type the following code:
#include <stdio.h>

int main() {
    printf("Welcome to ProjectX!\n");
    return 0;
}
- Press
Escto exit INSERT mode - Type
:wqand pressEnterto save and quit
Adding Content to readme.txt
vi docs/readme.txt
Add this content:
ProjectX Documentation
======================

This project is part of TechCorp's Linux administration training.
Team members should follow the guidelines in this directory.

Project Manager: Donald
Last updated: October 2025
Remember: i to insert, Esc then :wq to save and quit.
Adding Content to test.sh
vi tests/test.sh
Add this bash script:
#!/bin/bash
# Test script for ProjectX

echo "Running tests..."
echo "Test 1: Passed"
echo "Test 2: Passed"
echo "All tests passed!"
Adding Content to deploy.sh
vi bin/deploy.sh
Add this deployment script:
#!/bin/bash
# Deployment script for ProjectX

echo "Starting deployment..."
echo "Checking dependencies..."
echo "Building project..."
echo "Deployment complete!"
Verifying File Contents
Check that each file has content using cat:
cat src/main.c
cat docs/readme.txt
cat tests/test.sh
cat bin/deploy.sh
The cat command displays file contents to the screen.
💡 vi too difficult? You can also use nano editor which is more beginner-friendly:
nano src/main.c
Use Ctrl+O to save and Ctrl+X to exit.
Part 4: Understanding Paths
Absolute Paths
An absolute path always starts from the root directory / and specifies the complete path to a file or directory.
Examples:
# Using absolute paths
cat /home/donald/ProjectX/src/main.c
ls /home/donald/ProjectX/docs/
cd /home/donald/ProjectX/bin
Absolute paths work from anywhere in the system - you don't need to be in a specific directory.
Relative Paths
A relative path is relative to your current directory. It doesn't start with /.
Examples:
# Make sure you're in /home/donald/ProjectX first
cd ~/ProjectX

# Now use relative paths
cat src/main.c           # Same as: /home/donald/ProjectX/src/main.c
ls docs/                 # Same as: /home/donald/ProjectX/docs/
cd bin                   # Same as: /home/donald/ProjectX/bin
Path Navigation Shortcuts
# Go to ProjectX
cd ~/ProjectX

# Check current location
pwd                      # Shows: /home/donald/ProjectX

# Go into src using relative path
cd src
pwd                      # Shows: /home/donald/ProjectX/src

# Go up one level (to parent directory)
cd ..
pwd                      # Shows: /home/donald/ProjectX

# Go into docs using ./
cd ./docs                # ./ means "current directory"
pwd                      # Shows: /home/donald/ProjectX/docs

# Go up two levels
cd ../..
pwd                      # Shows: /home/donald

# Jump directly using absolute path
cd /home/donald/ProjectX/bin
pwd                      # Shows: /home/donald/ProjectX/bin
Path Shortcuts Summary:
/- Root directory~- Your home directory (/home/donald).- Current directory..- Parent directory (one level up)../..- Two levels up
Part 5: Copying and Moving Files
Copying Files
The cp command copies files:
# Copy a file
cp docs/readme.txt docs/readme_backup.txt

# Verify
ls -l docs/
Copy a file to another directory:
# Copy main.c to the bin directory
cp src/main.c bin/

# Verify
ls -l bin/
Copying Directories
To copy a directory and all its contents, use -r (recursive):
# Copy entire docs directory
cp -r docs docs_backup

# Verify
ls -lR
Moving and Renaming
The mv command moves OR renames files:
# Rename a file (move it to a new name in same directory)
mv docs/readme_backup.txt docs/readme_old.txt

# Move a file to another directory
mv bin/main.c src/

# Verify
ls -l docs/
ls -l bin/
ls -l src/
⚠️ Be careful with mv! Unlike cp, mv doesn't keep the original file. If you move file.txt, the original location no longer has it.
Part 6: Creating Groups and Users
Creating Team Groups
As donald (with sudo), create groups for different teams:
sudo groupadd sysadmins
sudo groupadd devops
sudo groupadd developers
sudo groupadd testers
sudo groupadd qa
sudo groupadd managers
Verify groups were created:
getent group | grep -E 'sysadmins|devops|developers|testers|qa|managers'
Creating Team Member Accounts
Create user accounts for the team:
sudo useradd -m -s /bin/bash alice
sudo useradd -m -s /bin/bash bob
sudo useradd -m -s /bin/bash charlie
sudo useradd -m -s /bin/bash diana
sudo useradd -m -s /bin/bash eve
Set simple passwords for lab purposes:
echo "alice:password123" | sudo chpasswd
echo "bob:password123" | sudo chpasswd
echo "charlie:password123" | sudo chpasswd
echo "diana:password123" | sudo chpasswd
echo "eve:password123" | sudo chpasswd
Verify users exist:
getent passwd | grep -E 'alice|bob|charlie|diana|eve'
Assigning Users to Groups
Add users to their respective teams:
sudo usermod -aG managers alice
sudo usermod -aG developers bob
sudo usermod -aG developers eve
sudo usermod -aG testers charlie
sudo usermod -aG sysadmins diana
Verify group memberships:
groups alice
groups bob
groups charlie
groups diana
groups eve
Part 7: File Permissions and Ownership
Understanding File Permissions
When you run ls -l, you see permissions like this:
-rwxr-xr-x 1 donald donald 1234 Oct 16 10:00 file.txt
Permission breakdown:
-  rwx  r-x  r-x
│   │    │    │
│   │    │    └── Others permissions
│   │    └──────── Group permissions
│   └───────────── Owner permissions
└───────────────── File type (- = file, d = directory)
Permission meanings:
r= read (4)w= write (2)x= execute (1)-= no permission (0)
Numeric notation:
rwx= 4+2+1 = 7 (full access)r-x= 4+0+1 = 5 (read and execute)r--= 4+0+0 = 4 (read only)---= 0+0+0 = 0 (no access)
Example: rwxr-xr-- = 754
- Owner: 7 (rwx)
- Group: 5 (r-x)
- Others: 4 (r--)
Configuring docs Directory for SysAdmins
Change the group ownership of the docs directory:
sudo chgrp sysadmins ~/ProjectX/docs
Set permissions using numeric notation (750):
chmod 750 ~/ProjectX/docs
This gives:
- Owner (donald):
rwx(7) - full access - Group (sysadmins):
r-x(5) - read and execute - Others:
---(0) - no access
Verify:
ls -ld ~/ProjectX/docs
You should see: drwxr-x--- and group sysadmins
Practice with symbolic notation:
chmod u=rwx,g=rx,o= ~/ProjectX/docs
This is the symbolic way:
u=rwx: user (owner) gets read, write, executeg=rx: group gets read, executeo=: others get nothing
Configuring src Directory for Developers
Change the group ownership:
sudo chgrp developers ~/ProjectX/src
Set permissions using numeric notation (775):
chmod 775 ~/ProjectX/src
This gives:
- Owner:
rwx(7) - Group:
rwx(7) - Others:
r-x(5)
Verify:
ls -ld ~/ProjectX/src
Practice with symbolic notation:
chmod u=rwx,g=rwx,o=rx ~/ProjectX/src
Changing Group Ownership Only
Change the group of the tests directory to qa:
sudo chgrp qa ~/ProjectX/tests
Verify (donald is still the owner, but group is now qa):
ls -ld ~/ProjectX/tests
Changing Owner Only
Change the owner of deploy.sh to diana:
sudo chown diana ~/ProjectX/bin/deploy.sh
Verify (diana is now the owner, but group remains unchanged):
ls -l ~/ProjectX/bin/deploy.sh
Ownership Commands Summary:
chown user file- Change owner onlychgrp group file- Change group onlychown user:group file- Change both owner and groupchown -R user:group dir/- Change recursively for directories
Part 8: Advanced Permission Management
Understanding umask
The umask command sets default permissions for newly created files.
Check your current umask:
umask
You'll probably see 0022 or 0002.
How umask works:
- Default file permissions: 666 (rw-rw-rw-)
- Default directory permissions: 777 (rwxrwxrwx)
- umask is subtracted from these defaults
Example with umask 0022:
- Files: 666 - 022 = 644 (rw-r--r--)
- Directories: 777 - 022 = 755 (rwxr-xr-x)
Setting a More Secure umask
For better security, let's create files with 640 permissions (rw-r-----):
Calculate the umask:
- Desired permission: 640
- Default: 666
- umask needed: 666 - 640 = 026
Set the umask:
umask 026
Verify:
umask
Create a test file:
touch ~/ProjectX/test_secure.txt
ls -l ~/ProjectX/test_secure.txt
You should see: -rw-r----- (640 permissions)
⚠️ Note: This umask change is temporary (only for this session). To make it permanent, you would add it to ~/.bashrc.
Part 9: Complete Directory Review
Viewing Everything
Let's review the entire ProjectX structure:
ls -lR ~/ProjectX
This shows all directories, files, permissions, and ownership.
Check specific directories:
ls -ld ~/ProjectX/docs
ls -ld ~/ProjectX/src
ls -ld ~/ProjectX/tests
ls -ld ~/ProjectX/bin
Viewing the Directory Tree
If the tree command is available:
tree ~/ProjectX
If not, install it:
sudo apt-get update && sudo apt-get install -y tree
Summary: What You've Learned
Congratulations! 🎉 You've completed a comprehensive Linux basics tutorial. Here's what you mastered:
User and Group Management ✅
- Created users with
useradd - Set passwords with
passwd - Created groups with
groupadd - Added users to groups with
usermod -aG - Switched users with
su
File System Navigation ✅
- Used absolute paths (starting with
/) - Used relative paths (relative to current directory)
- Navigated with
cd,pwd,ls - Used path shortcuts (
~,.,..)
File and Directory Operations ✅
- Created directories with
mkdir - Created files with
touch - Copied files with
cpand directories withcp -r - Moved/renamed with
mv - Edited files with
vi - Viewed files with
cat
Permissions and Ownership ✅
- Read permissions with
ls -l - Changed permissions with
chmod(numeric and symbolic) - Changed ownership with
chown - Changed group with
chgrp - Set default permissions with
umask
Security Concepts ✅
- Principle of least privilege
- Team-specific access control
- Collaborative permissions
- Protected sensitive files
Quick Reference Guide
File Operations
touch file.txt          # Create empty file
mkdir directory         # Create directory
cp file1 file2          # Copy file
cp -r dir1 dir2         # Copy directory recursively
mv old new              # Move/rename
rm file                 # Delete file
rm -r directory         # Delete directory recursively
cat file                # Display file contents
Navigation
pwd                     # Print working directory
cd /path                # Change directory (absolute)
cd path                 # Change directory (relative)
cd ~                    # Go to home directory
cd ..                   # Go up one level
cd -                    # Go to previous directory
ls                      # List files
ls -l                   # List with details
ls -la                  # List all (including hidden)
ls -lR                  # List recursively
Permissions
chmod 755 file          # rwxr-xr-x
chmod 644 file          # rw-r--r--
chmod 600 file          # rw-------
chmod u+x file          # Add execute for owner
chmod g-w file          # Remove write for group
chmod o= file           # Remove all for others
Ownership
chown user file         # Change owner
chgrp group file        # Change group
chown user:group file   # Change both
chown -R user:group dir # Change recursively
Users and Groups
useradd -m username     # Create user with home dir
passwd username         # Set password
usermod -aG group user  # Add user to group
groupadd groupname      # Create group
id username             # Show user info
groups username         # Show user's groups
vi Editor
vi file                 # Open file
i                       # Enter insert mode
Esc                     # Exit insert mode
:w                      # Save
:q                      # Quit
:wq                     # Save and quit
:q!                     # Quit without saving
Practice Exercises
Test your knowledge with these exercises:
- Create a new project directory called
ProjectYwith subdirectories:frontend,backend,database - Create a file with restricted permissions (600) that only you can read and write
- Practice path navigation - Navigate to your home directory using 3 different methods
- Create a backup - Copy your entire ProjectX directory to ProjectX_backup
- Advanced permissions - Create a directory where the group can read and execute, but not write
💡 Keep Practicing! The more you use these commands, the more natural they'll become. Try to use the terminal for daily tasks instead of a GUI file manager.
Next Steps
Now that you've mastered Linux basics, you're ready to explore:
- Shell Scripting - Automate tasks with bash scripts
- Process Management - Control running programs with ps, top, kill
- Networking - Learn about ping, netstat, ssh, scp
- System Monitoring - Monitor resources with df, du, free
- Package Management - Install software with apt/yum
- Text Processing - Master grep, sed, awk
- Advanced Permissions - Learn about SUID, SGID, sticky bit
Troubleshooting Tips
Permission denied errors?
- Use
sudofor administrative tasks - Check file ownership with
ls -l - Verify you're in the correct group
Can't find a file?
- Use absolute paths to be sure
- Check your current directory with
pwd - Use
findcommand:find ~ -name filename
vi editor confusing?
- Use
nanoinstead:nano filename - Or learn vi basics:
:helpin vi shows help
Command not found?
- Check if installed:
which command - Install if needed:
sudo apt-get install package
Congratulations on completing the Linux Basics tutorial! 🎉
You now have a solid foundation in Linux system administration. Keep practicing, and soon these commands will become second nature!
About the Author

More tutorials you might like
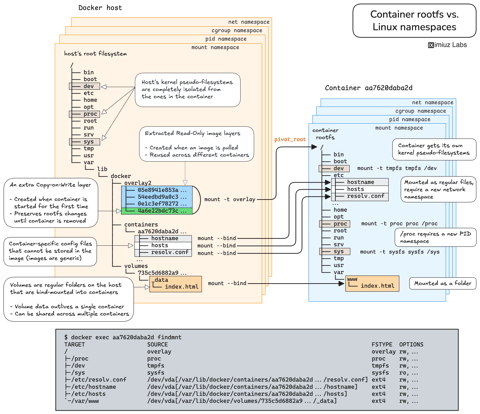
How Container Filesystem Works: Building a Docker-like Container From Scratch
Learn how Linux containers are built from the ground up. Starting with the mount namespace and a root filesystem, see why PID, cgroup, UTS, and network namespaces naturally follow - and how this foundation makes concepts like bind mounts, volumes, and persistence in Docker or Kubernetes much easier to grasp.

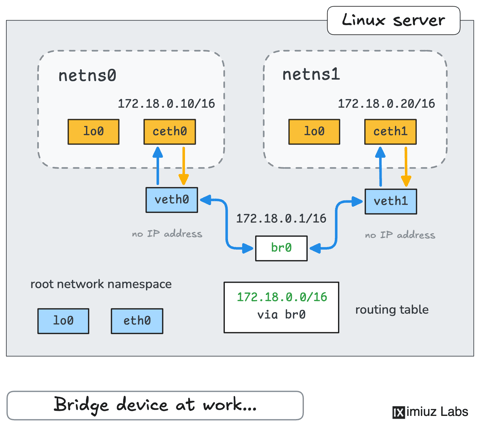
How Container Networking Works: Building a Bridge Network From Scratch
Begin with the basics to understand Docker and Kubernetes networking: learn how to create and interconnect Linux network namespaces using only command-line tools.
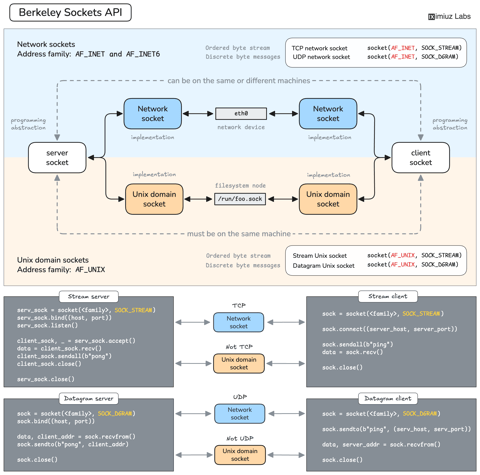
How Servers Work: A Hands-On Introduction to TCP Sockets
Learn how servers actually work by building a tiny TCP server and client from scratch. A hands-on introduction to sockets, TCP, and the network programming model every backend, DevOps, and platform engineer should go through at least once.
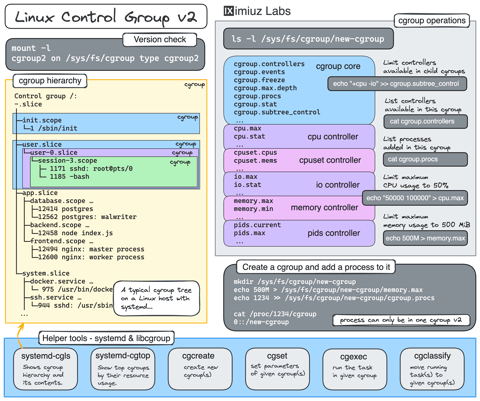
Controlling Process Resources with Linux Control Groups
Learn how to limit process resources using Linux cgroups - from the most basic and labour-intensive cgroupfs manipulation to the handiest systemd-run command.
Learn by doing, not just by reading or watching
Sign up for a free account to start a VM playground right on this page, track your progress, and get notified about new learning materials.