Kubernetes Security - The Basics

Setup the environment
- Click on the
START PLAYGROUNDbutton - Wait for the playground to start
- Clone the repository
git clone https://github.com/Alevsk/dvka.git ~/dvka
cd ~/dvka/workshop
- Run
install-tools.shscript and follow the instruction
sudo ./install-tools.sh --install
After that you can start the beginner labs by going into each lab directory and follow the instructions there, e.g. cd labs/create-cluster.
1 Creating a Kubernetes Cluster with Kind
Prerequisites
Quick Start
- Look at the cluster configuration in the
workshop-cluster.yamlfile - Create the cluster using the
kindcommandkind create cluster --config workshop-cluster.yaml --name workshop-cluster
Recommended
If using kind, once your kubernetes workshop-cluster is up and running you can push all the images in your local registry to the cluster
# push all images to you kind cluster
for image in $(cat ../../images.txt); do kind load docker-image $image --name workshop-cluster; done;
Resources
2 Exploring the kubeconfig File and kubectl
Prerequisites
Quick Start
cat ~/.kube/config
Output
apiVersion: v1
clusters:
  ...
contexts:
  ...
current-context: kind-workshop-cluster
kind: Config
preferences: {}
users:
  ...
Explore Kubectl Command
kubectl controls the Kubernetes cluster manager.

 Find more information at: https://kubernetes.io/docs/reference/kubectl/

Basic Commands (Beginner):
  create          Create a resource from a file or from stdin
  expose          Take a replication controller, service, deployment or pod and expose it as a new Kubernetes service
  run             Run a particular image on the cluster
  set             Set specific features on objects

Basic Commands (Intermediate):
  explain         Get documentation for a resource
  get             Display one or many resources
  edit            Edit a resource on the server
  delete          Delete resources by file names, stdin, resources and names, or by resources and label selector

Deploy Commands:
  rollout         Manage the rollout of a resource
  scale           Set a new size for a deployment, replica set, or replication controller
  autoscale       Auto-scale a deployment, replica set, stateful set, or replication controller

Cluster Management Commands:
  certificate     Modify certificate resources.
  cluster-info    Display cluster information
  top             Display resource (CPU/memory) usage
  cordon          Mark node as unschedulable
  uncordon        Mark node as schedulable
  drain           Drain node in preparation for maintenance
  taint           Update the taints on one or more nodes

Troubleshooting and Debugging Commands:
  describe        Show details of a specific resource or group of resources
  logs            Print the logs for a container in a pod
  attach          Attach to a running container
  exec            Execute a command in a container
  port-forward    Forward one or more local ports to a pod
  proxy           Run a proxy to the Kubernetes API server
  cp              Copy files and directories to and from containers
  auth            Inspect authorization
  debug           Create debugging sessions for troubleshooting workloads and nodes
  events          List events

Advanced Commands:
  diff            Diff the live version against a would-be applied version
  apply           Apply a configuration to a resource by file name or stdin
  patch           Update fields of a resource
  replace         Replace a resource by file name or stdin
  wait            Experimental: Wait for a specific condition on one or many resources
  kustomize       Build a kustomization target from a directory or URL

Settings Commands:
  label           Update the labels on a resource
  annotate        Update the annotations on a resource
  completion      Output shell completion code for the specified shell (bash, zsh, fish, or powershell)

Other Commands:
  api-resources   Print the supported API resources on the server
  api-versions    Print the supported API versions on the server, in the form of "group/version"
  config          Modify kubeconfig files
  plugin          Provides utilities for interacting with plugins
  version         Print the client and server version information

Usage:
  kubectl [flags] [options]

Use "kubectl <command> --help" for more information about a given command.
Use "kubectl options" for a list of global command-line options (applies to all commands).
Resources
3 Exploring Your Cluster with k9s
Prerequisites
Running k9s from the cli
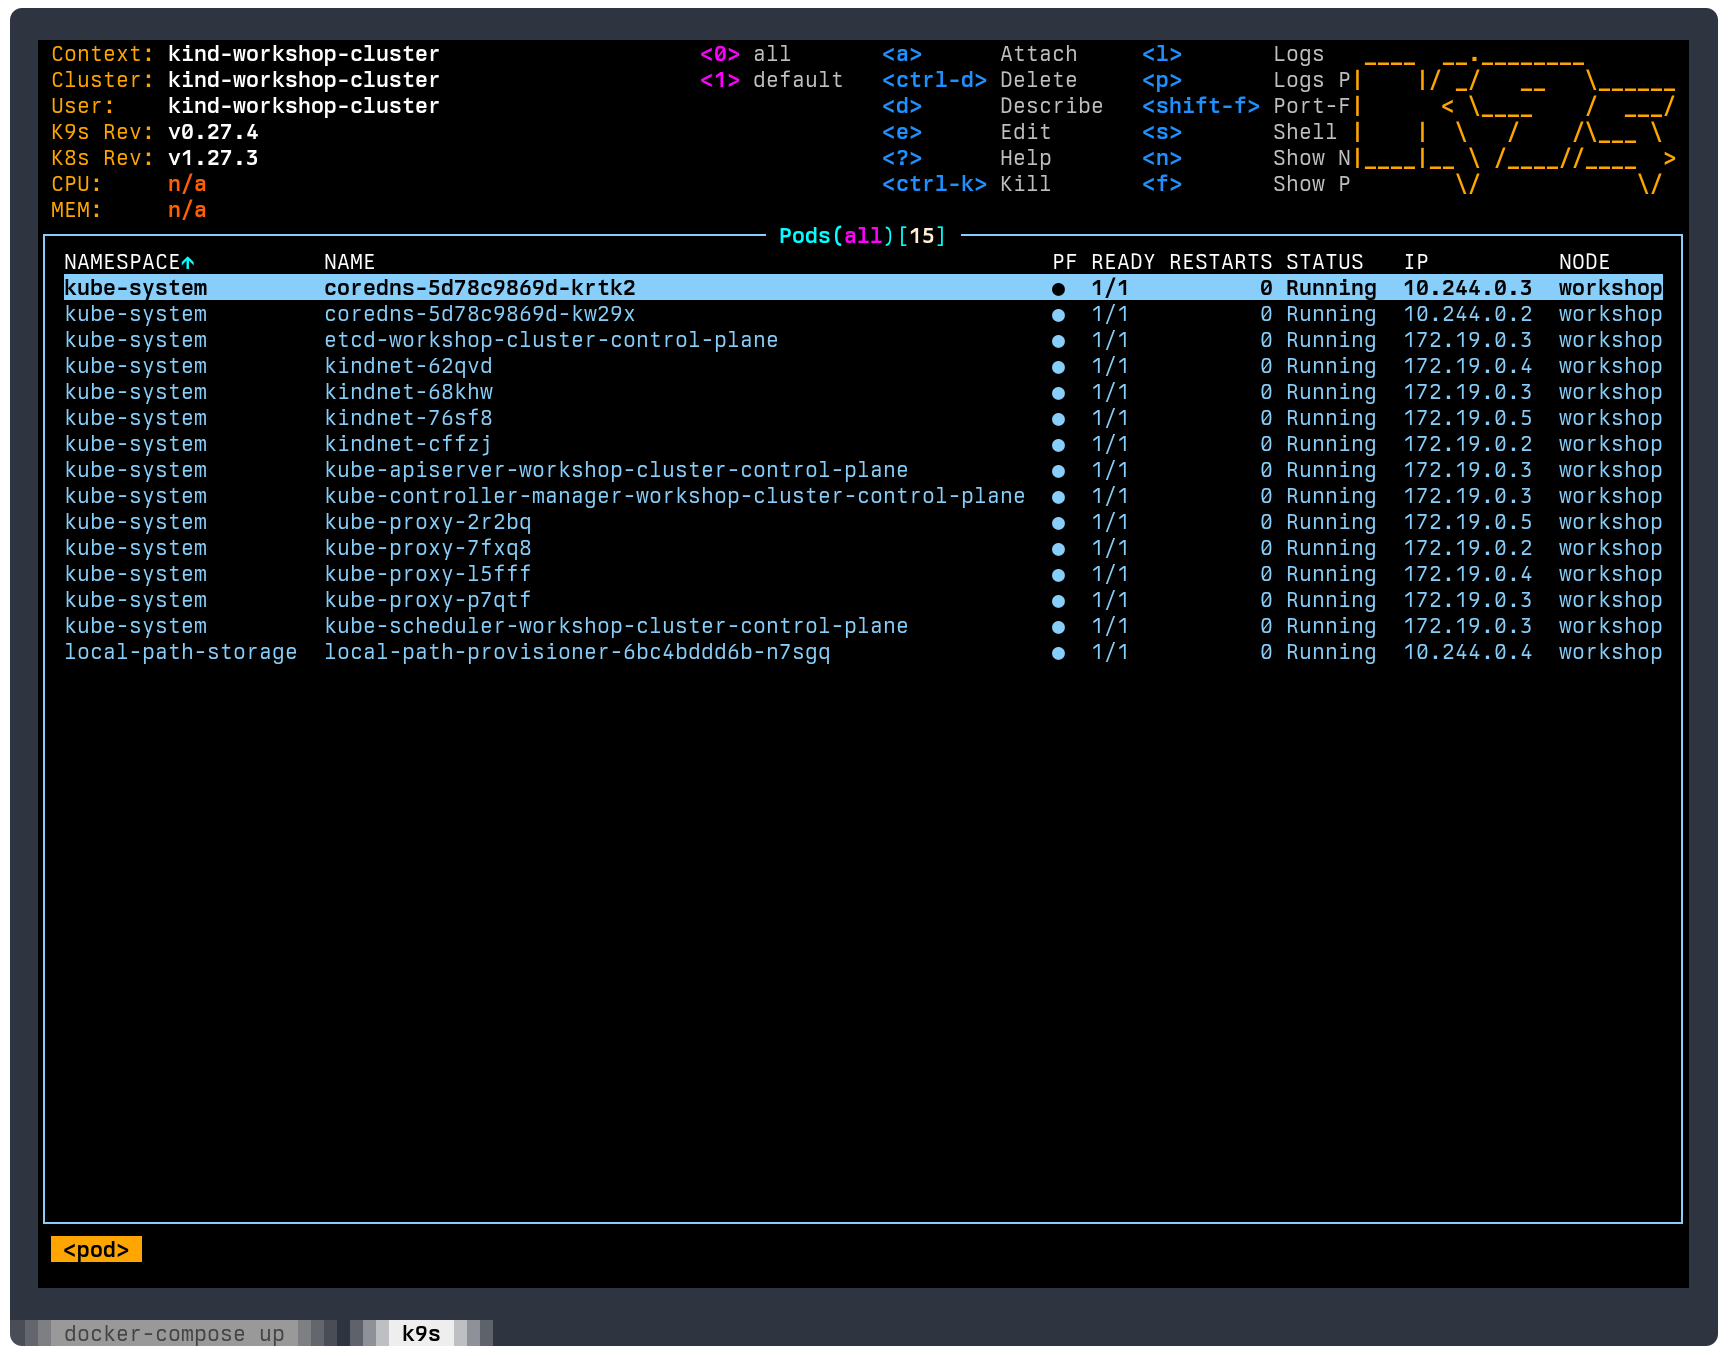
Resources
4 Deploying a Kubernetes Workload
Prerequisites
- A running Kubernetes cluster.
kubectlinstalled and configured to connect to your cluster.
Using Multiple Kubectl Commands
- Run the following commands
# create nginx deployment kubectl create deployment nginx --image=nginx:stable-alpine3.17-slim --replicas=2 --port=80 # create service (nginx by default will run in port 80) kubectl create service clusterip nginx --tcp=8080:80 # locally expose nginx service using port 8080 kubectl port-forward svc/nginx 8080:8080 - Open browser and go to http://localhost:8080/
- Explore deployed application using
kubectlork9s - Terminate nginx application
kubectl delete svc nginx
kubectl delete deployment nginx
Using Yaml Files
- Run the following commands
# create nginx deployment and service (nginx by default will run in port 80) kubectl apply -f nginx.yaml # locally expose nginx service using port 8080 kubectl port-forward svc/nginx 8080:8080 - Open browser and go to http://localhost:8080/
- Explore deployed application using
kubectlork9s- Pods
- Deployments
- Services
- Terminate nginx application
kubectl delete -f nginx.yaml
Resources
5 Getting a Shell to a Running Container
Prerequisites
- A running Kubernetes cluster.
kubectlinstalled and configured to connect to your cluster.
Quick Start
- Deploy busybox as a pod (notice we are not creating a
deploymentthis time)# create busybox pod kubectl apply -f busybox.yaml - Exec into the running container
kubectl:kubectl exec -it pod/busybox -- sh
k9s:
Pods>busybox>press<s> - Explore the container file system
topcommandls(/proc, /sys, /dev, /etc) commandprintenv
- Terminate busybox pod
kubectl delete -f busybox.yaml
Resources
6 Managing Configuration with ConfigMaps and Secrets
Prerequisites
- A running Kubernetes cluster.
kubectlinstalled and configured to connect to your cluster.
Configmap
- Create a new
configmapfrom literalkubectl create configmap lab-6-configmap --from-literal=workshop="kubernetes security" --from-literal=lab="Lab 6" - Look at lab-6-configmap
configmapusingk9sorkubectl - Create new
configmapsfrom a filekubectl create configmap nginx-configuration --from-file=default.conf=default.conf kubectl create configmap nginx-index --from-file=index.html=index.html - Look at nginx-configuration
configmapusingk9sorkubectl - Deploy nginx using a custom
default.confconfiguration# create nginx deployment and service (nginx will run in port 8080) kubectl apply -f nginx.yaml # locally expose nginx service kubectl port-forward svc/nginx 8080:8080 - Open browser and go to http://localhost:8080/
- Navigate inside the nginx pod and look for the
default.confandindex.htmlfiles
Secret
- Create a new
secretfrom literalkubectl create secret generic lab-6-secret --from-literal=password=1234567 - Look at lab-6-secret
secretusingk9sorkubectl - Create new
secretfrom a TLS certificate keypair# Generate self-signed certificates using https://github.com/FiloSottile/mkcert, openssl or any other tool you want. ie: `mkcert localhost` kubectl create secret tls nginx-tls-certificates --cert=localhost.pem --key=localhost-key.pem - Create new
configmapsfromnginxconfiguration that include tls certificateskubectl create configmap nginx-configuration-tls --from-file=default.conf=default-tls.conf - Deploy nginx with tls certificates
# create nginx deployment and service (nginx will run in port 8443) kubectl apply -f nginx-tls.yaml # locally expose nginx service kubectl port-forward svc/nginx 8443:8443 - Open browser and go to https://localhost:8443/ or use
curl https://localhost:8443 -v - Navigate inside the nginx pod and look for the
default.confand the tls certificate files
End the Lab
Stop port-forward (<ctrl+c>) and remove application files
kubectl delete -f nginx.yaml
kubectl delete -f nginx-tls.yaml
kubectl delete configmap lab-6-configmap
kubectl delete configmap nginx-configuration
kubectl delete configmap nginx-configuration-tls
kubectl delete configmap nginx-index
kubectl delete secret lab-6-secret
kubectl delete secret nginx-tls-certificates
Resources
7 Working with Namespaces
Prerequisites
- A running Kubernetes cluster.
kubectlinstalled and configured to connect to your cluster.
Quick Start
- Look at
tenant-1.yamlfile and deploy all the resources for application 1kubectl apply -f tenant-1.yaml - Look at
tenant-2.yamlfile and deploy all the resources for application 2kubectl apply -f tenant-2.yaml - Inspect the resources created for the
tenant-1andtenant-2namespaces usingk9sorkubectl# tenant-1 kubectl get all --namespace tenant-1 # tenant-2 kubectl get all --namespace tenant-2 - Start
port-forwardfor both applications# forwarding tenant-1 in first terminal kubectl port-forward svc/nginx 8081:8080 -n tenant-1 # forwarding tenant-2 in second terminal kubectl port-forward svc/nginx 8082:8080 -n tenant-2
Open browser and go to http://localhost:8081 and http://localhost:8082 to verify applications are running correctly - Exec into the running container
kubectl:# exec into nginx tenant-1 kubectl -n tenant-1 exec -it <pod name> -- sh # exec into nginx tenant-2 kubectl -n tenant-2 exec -it <pod name> -- sh
k9s:- Namespace >
tenant-1> Pods>nginx>press<s> - Namespace >
tenant-2> Pods>nginx>press<s>
- Namespace >
- Install
curlon both nginx containersapk add curl
- Test connectivity between services in two different namespaces
Fromtenant-1totenant-2curl http://nginx.tenant-2.svc.cluster.local:8080
Fromtenant-2totenant-1curl http://nginx.tenant-1.svc.cluster.local:8080
Notice how the serviceURLshave the following structure:http://<service name>.<namespace>.svc.cluster.local:<port> - Stop
port-forward(<ctrl+c>) and remove applications:kubectl delete -f tenant-1.yaml kubectl delete -f tenant-2.yaml
Resources
8 Pod Security Context
Prerequisites
- A running Kubernetes cluster.
kubectlinstalled and configured to connect to your cluster.
Quick Start
- Deploy ubuntu pod
# create ubuntu pod kubectl apply -f ubuntu.yaml - Exec into the running container
kubectl:kubectl exec -it ubuntu -- sh
k9s:
Pods>ubuntu>press<s> - Run the
whoamicommand and try to install some applicationsapt-get update && apt-get install curl -y
- Terminate pod
kubectl delete -f ubuntu.yaml - Deploy pod with
security contextand exec into itkubectl apply -f ubuntu-with-security-context.yaml - Run the
whoamicommand and try to update system packages - Terminate pod
kubectl delete -f ubuntu-with-security-context.yaml
Resources
About the Author

More tutorials you might like
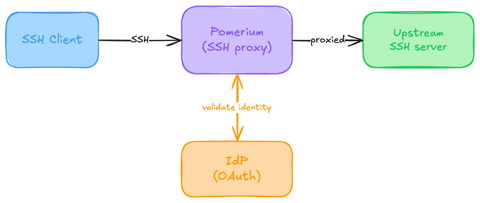
Native SSH Access with Pomerium
Pomerium can be used as a native SSH reverse proxy, adding OAuth authentication and flexible Pomerium policy enforcement to standard SSH connections, without the need for tunnels, or custom clients or servers.

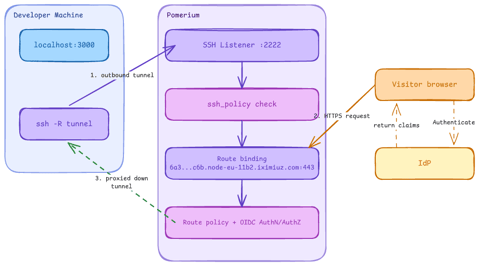
Native SSH Reverse Tunneling with Pomerium
Use Pomerium's native SSH support to publish a local service through a standard reverse SSH tunnel, with OpenID Connect (OIDC) authentication and continuous authorization on every request. Reach services behind Network Address Translation (NAT) without firewall holes or custom agents, and control both who can use the service and who can open the tunnel. Application traffic stays on infrastructure you control.
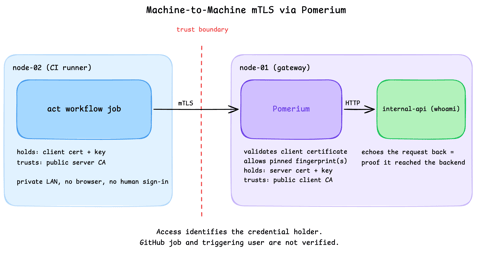
Secure Machine-to-Machine Access with mTLS and Pomerium
Run a GitHub Actions-compatible continuous integration (CI) job on a private runner and protect its internal API call with mutual TLS (mTLS) and Pomerium. Build separate server and client trust chains, authorize one machine certificate by fingerprint, then revoke, restore, and rotate its credentials through live policy changes.
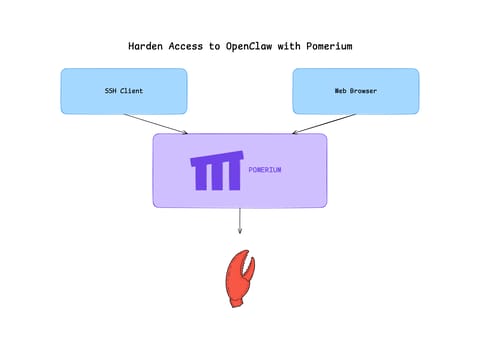
Harden Access to OpenClaw with Pomerium
Put OpenClaw, a self-hosted AI assistant with shell and file access, behind a web route and an SSH route, both gated by the same identity and Pomerium's context-aware policy. OpenClaw runs in trusted-proxy mode, trusting signed identity headers instead of its own login, while Pomerium's native SSH proxy signs short-lived certificates for shell access.
Learn by doing, not just by reading or watching
Sign up for a free account to start a VM playground right on this page, track your progress, and get notified about new learning materials.