Kubernetes Security - Intermediate

Setup the environment
- Click on the
START PLAYGROUNDbutton - Wait for the playground to start
- Clone the repository
git clone https://github.com/Alevsk/dvka.git ~/dvka
cd ~/dvka/workshop
- Run
install-tools.shscript and follow the instruction
sudo ./install-tools.sh --install
After that you can start the intermediate labs by going into each lab directory and follow the instructions there, e.g. cd labs/service-account-token.
1 Kubernetes Certificate Authority
Prerequisites
- A running Kubernetes cluster.
kubectlinstalled and configured to connect to your cluster.
Quick Start
- Generate a Private Key
"Elliptic Curve Digital Signature Algorithm" (ECDSA) with the P-256 curve. ECDSA is a widely-used and secure algorithm for generating key pairs.
openssl ecparam -name prime256v1 -genkey -noout -out private.key
Optionally you could use a different algorithm, ie: RSA.openssl genrsa -out private.key 2048 - Generate a Certificate Signing Request (CSR)
openssl req -new -config cert.cnf -key private.key -out kubernetes-security.csrNote: Use https://www.sslshopper.com/csr-decoder.html to verify the generated
csr - Encode the CSR in Base64 and copy it to your clipboard
cat kubernetes-security.csr | base64 | tr -d "\n" - Open the
csr.yamlfile and paste the encoded certificate on thespec.requestfield if is not there already - Create the
CSRresource in Kuberneteskubectl apply -f csr.yaml - Using
k9sorkubectllist and inspect the createdCSRresourcekubectl get csr -A - Manually approve the CSR
kubectl certificate approve kubernetes-security-csr - Retrieve the Signed Certificate
kubectl get csr kubernetes-security-csr -o jsonpath='{.status.certificate}'| base64 -d > public.crt
When theCSRis approved, the new certificate will be issued by the Kubernetes CA and would be found under thestatus.certificatefield of thekubernetes-security-csrcsr - Verify the
public.crtcertificate was issued bykubernetesusing https://www.sslchecker.com/certdecoder or theopensslcommandcat public.crt | openssl x509 -noout -text - Use this keypair to configure TLS for your workloads, similar to what you did for the Configmaps & Secrets lab
Resources
2 cert-manager: X.509 Certificate Management for Kubernetes
Prerequisites
- A running Kubernetes cluster.
kubectlinstalled and configured to connect to your cluster.
Quick Start
- Install
cert-managerusing the default yaml configurationkubectl apply -f cert-manager.yaml - Provide or generate your own
rootCertificate Authority (CA), ie:# generate private key openssl genrsa -out rootCAKey.pem 2048 # generate public key openssl req -x509 -sha256 -new -nodes -key rootCAKey.pem -days 3650 -out rootCACert.pem base64encode the public and private keys for your root CAcat rootCACert.pem | base64 -w 0 # copy to clipboard cat rootCAKey.pem | base64 -w 0 # copy to clipboard- Open the
custom-ca-secret.yamlfile and place thebase64 encodedvalues for the public and private key in thetls.crtandtls.keyfields, then create create the custom ca on kubernetes# create secret kubectl apply -f custom-ca-secret.yaml # create cert-manager ClusterIssuer kubectl apply -f custom-ca.yaml - Verify the ca was added to the cluster issuers list
kubectl get clusterissuers - Generate a new
tlscertificate usingcert-managerand your root CA viacert-managerkubectl apply -f default-tls-certificate.yaml - Verify the certificate was generated correctly
# check status of the certificate request
kubectl get certificaterequests
# check status of the certificate itself
kubectl get certificates
# check the tls certificate stored directly on the k8s secret
kubectl describe secrets default-tls-certificate-secret describe
# inspect the public and private keys of the generated certificate
kubectl get secrets default-tls-certificate-secret -o yaml
You can use https://www.sslshopper.com/certificate-decoder.html or https://www.sslchecker.com/certdecoder to verify the content of the certificate - Use this keypair to configure TLS for your workloads, similar to what you did for the Configmaps & Secrets lab
- End the lab
kubectl delete secret default-tls-certificate-secret
kubectl delete -f default-tls-certificate.yaml
kubectl delete -f custom-ca-secret.yaml
kubectl delete -f custom-ca.yaml
kubectl delete -f cert-manager.yaml
Resources
3 Pod Resource Limits
Prerequisites
- A running Kubernetes cluster.
kubectlinstalled and configured to connect to your cluster.
Quick Start
- Install metrics server in your cluster
kubectl apply -f metrics-server.yaml
After the service is running restartk9sand look for the newCPUandMemorymetrics available for your cluster. Look at metrics usingkubectl:kubectl top pod -A - Memory testing
# deploy container without limits
kubectl apply -f mem-testing.yaml
# look at memory consumtion by the pod
watch kubectl top pod -l app=mem-testing
Update memory stress container to limit the amount of memory to only 100mb# deploy container with limits kubectl apply -f mem-testing-limits.yaml
Observe how the container is stopped with statusOOMKilled - CPU testing
# deploy container without limits kubectl apply -f cpu-testing.yaml # look at cpu consumtion by the pod watch kubectl top pod -l app=cpu-testingThe
-cpus "2"argument tells the Container to attempt to use 2 CPUs.
Update cpu stress container to limit the amount of cpu to only 1 core# deploy container with limits kubectl apply -f cpu-testing-limits.yaml
Observe how the container is limited to consume maximum 1 cpu - Finalize the lab
kubectl delete -f metrics-server.yaml
kubectl delete -f mem-testing.yaml
kubectl delete -f cpu-testing.yaml
Resources
4 Scratch Containers
Prerequisites
- A running Kubernetes cluster.
kubectlinstalled and configured to connect to your cluster.- Docker installed locally.
- Go installed locally.
Quick Start
- Take a look at the example application source code under
./encoding-service- main.go
- base64
- Dockerfile
- Build the
encoding servicedocker imagedocker build -t alevsk/dvka:lab10 -f encoding-service/Dockerfile ./encoding-service - Push the image to your Kubernetes cluster
kind load docker-image alevsk/dvka:lab10 --name workshop-cluster - Deploy the application into Kubernetes
# create deployment kubectl apply -f encoding-service.yaml # locally expose the application service kubectl port-forward svc/encoding-service 1337:1337 - Open the browser and go to http://localhost:1337/run?command=encode&message=hello%20world
- Found any vulnerabilities?
- Get a shell on the container using
kubectlork9s
- Stop
port-forward(<ctrl+c>) and remove applicationkubectl delete -f encoding-service.yaml - Build the scratch container and deploy to kubernetes again
# build scratch image docker build -t alevsk/dvka:lab10-scratch -f encoding-service/Dockerfile.scratch ./encoding-service # push image to kubernetes kind load docker-image alevsk/dvka:lab10-scratch --name workshop-cluster # create deployment kubectl apply -f encoding-service-scratch.yaml # locally expose the application service kubectl port-forward svc/encoding-service 1337:1337 - Open the browser and go to http://localhost:1337/run?command=encode&message=hello%20world
- Test for vulnerabilities again
- Get a shell on the container using
kubectlork9s
- Stop
port-forward(<ctrl+c>) and remove applicationkubectl delete -f encoding-service.yaml - Follow up
- Differences between regular images and scratch images
Resources
5 Service Account Tokens
Prerequisites
- A running Kubernetes cluster.
kubectlinstalled and configured to connect to your cluster.
Quick Start
- Deploy ubuntu pod
# create ubuntu pod kubectl apply -f ubuntu.yaml - Exec into the running container
kubectl:kubectl exec -it pod/ubuntu -- /bin/bash
k9s:
Pods>ubuntu>press<s> - Install
curlapt-get update && apt-get install curl jq -y
- Move to the
serviceaccountfoldercd /var/run/secrets/kubernetes.io/serviceaccount
- Analyze the 3 files under the
serviceaccountfolder- ca.crt
- namespace
- token
- Visualize
tokenusing https://jwt.io/ or a similar tool - Query the the Kubernetes api server
curl https://kubernetes.default.svc.cluster.local # ignore tls verification curl https://kubernetes.default.svc.cluster.local -k # pass ca.crt to verify tls connection curl https://kubernetes.default.svc.cluster.local --cacert ca.crt - Authenticate using the service account
tokenexport TOKEN=$(cat token) curl --cacert ca.crt https://kubernetes.default.svc.cluster.local/api/v1/namespaces?limit=500 -H "Authorization: Bearer $TOKEN" # Use jq to parse the list of existing namespaces in the cluster curl --cacert ca.crt https://kubernetes.default.svc.cluster.local/api/v1/namespaces?limit=500 -H "Authorization: Bearer $TOKEN" | jq ".items[].metadata.name" - Deploy ubuntu pod
# delete ubuntu pod kubectl delete -f ubuntu.yaml # create ubuntu pod without mounting service account by default kubectl apply -f ubuntu-no-sa.yaml - Try to navigate again to the
serviceaccountfolder (You should get an error)kubectl exec -it pod/ubuntu -- /bin/bashcd /var/run/secrets/kubernetes.io/serviceaccount
- Finalize the lab
# end the lab
kubectl delete -f ubuntu-no-sa.yaml
kubectl delete -f ubuntu.yaml
Resources
6 Network Policies with Calico
Prerequisites
- A running Kubernetes cluster.
kubectlinstalled and configured to connect to your cluster.
Quick Start
- Look at
tenant-1.yamlfile and deploy all the resources for application 1kubectl apply -f tenant-1.yaml - Look at
tenant-2.yamlfile and deploy all the resources for application 2kubectl apply -f tenant-2.yaml - Inspect the resources created for the
tenant-1andtenant-2namespaces usingk9sorkubectl# tenant-1 kubectl get all --namespace tenant-1 # tenant-2 kubectl get all --namespace tenant-2 - Exec into the running container
kubectl:# exec into nginx tenant-1 kubectl -n tenant-1 exec -it <pod name> -- sh # exec into nginx tenant-2 kubectl -n tenant-2 exec -it <pod name> -- sh
k9s:- Namespace >
tenant-1> Pods>nginx>press<s> - Namespace >
tenant-2> Pods>nginx>press<s>
- Namespace >
- Install
curlon both nginx containersapk add curl
- Test connectivity between services in two different namespaces
Fromtenant-1totenant-2curl http://nginx.tenant-2.svc.cluster.local:8080
Fromtenant-2totenant-1curl http://nginx.tenant-1.svc.cluster.local:8080
Notice how the serviceURLshave the following structure:http://<service name>.<namespace>.svc.cluster.local:<port> - Install the Tigera Calico operator and custom resource definitions.
kubectl create -f https://raw.githubusercontent.com/projectcalico/calico/v3.26.1/manifests/tigera-operator.yaml - Install Calico by creating the necessary custom resource.
Before creating this manifest, read its contents and make sure its settings are correct for your environment. For example, you may need to change the default IP pool CIDR to match your pod network CIDR. See https://docs.tigera.io/calico/latest/getting-started/kubernetes/quickstart.
kubectl create -f custom-resources.yaml - Confirm that all of the pods are running with the following command.
watch kubectl get pods -n calico-system - Block all incomming request to
tenant-2namespace workloads using Calico Networking Policies. Look atnp-default-deny.yamland then run:Note: In some cluster setups nginx pods need to be restarted first.
kubectl apply -f np-default-deny.yaml - Exec into the
tenant-1running container again and test connectivity to the running container intenant-2. You should see a timeout error.curl -m 5 http://nginx.tenant-2.svc.cluster.local:8080 - Exec into the
tenant-2running container again and test connectivity to the running container intenant-1.# request to tenant-1 curl -m 5 http://nginx.tenant-1.svc.cluster.local:8080 # request to itself using service name should timeout curl -m 5 http://nginx.tenant-2.svc.cluster.local:8080 # request to itself using localhost curl -m 5 http://localhost:8080 - Deploy networking rule to allow internal connectivity for
tenant-2namespace.kubectl apply -f np-allow-namespace-connectivity.yaml
Exec into thetenant-2running container again and test connectivity# request to itself using service name should work this time curl -m 5 http://nginx.tenant-2.svc.cluster.local:8080 - Deploy a new tenant namespace. Update existing networking rule to allow connectivity from workloads running on
tenant-3namespace totenant-2namespace.# deploy tenant-3 kubectl apply -f tenant-3.yaml # update tenant-2 networking rule to accept tenant-3 connections kubectl apply -f np-allow-namespace-connectivity-update.yaml
Exec into thetenant-3running container
kubectl:# exec into nginx tenant-3 kubectl -n tenant-3 exec -it <pod name> -- sh
k9s:- Namespace >
tenant-3> Pods>nginx>press<s>
Installcurlontenant-3container and test connectivity totenant-2.# install curl apk add curl # request to tenant-2 should work this time curl -m 5 http://nginx.tenant-2.svc.cluster.local:8080 - Namespace >
- Finalize the lab
# end the lab
kubectl delete -f tenant-1.yaml
kubectl delete -f tenant-2.yaml
kubectl delete -f tenant-3.yaml
kubectl delete -f np-default-deny.yaml
kubectl delete -f np-allow-namespace-connectivity.yaml
kubectl delete -f np-allow-namespace-connectivity-update.yaml
kubectl delete -f custom-resources.yaml
kubectl delete -f https://raw.githubusercontent.com/projectcalico/calico/v3.26.1/manifests/tigera-operator.yaml
Resources
About the Author

More tutorials you might like
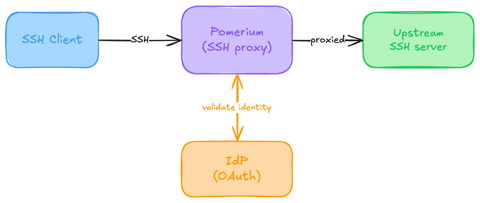
Native SSH Access with Pomerium
Pomerium can be used as a native SSH reverse proxy, adding OAuth authentication and flexible Pomerium policy enforcement to standard SSH connections, without the need for tunnels, or custom clients or servers.

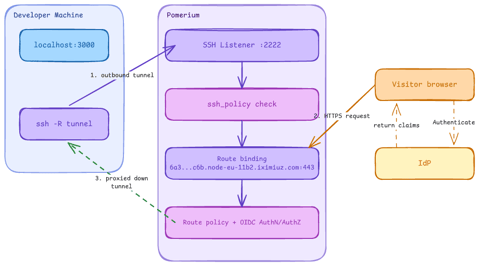
Native SSH Reverse Tunneling with Pomerium
Use Pomerium's native SSH support to publish a local service through a standard reverse SSH tunnel, with OpenID Connect (OIDC) authentication and continuous authorization on every request. Reach services behind Network Address Translation (NAT) without firewall holes or custom agents, and control both who can use the service and who can open the tunnel. Application traffic stays on infrastructure you control.
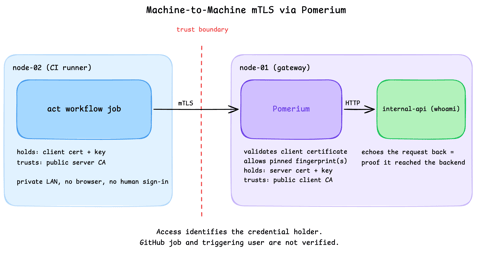
Secure Machine-to-Machine Access with mTLS and Pomerium
Run a GitHub Actions-compatible continuous integration (CI) job on a private runner and protect its internal API call with mutual TLS (mTLS) and Pomerium. Build separate server and client trust chains, authorize one machine certificate by fingerprint, then revoke, restore, and rotate its credentials through live policy changes.
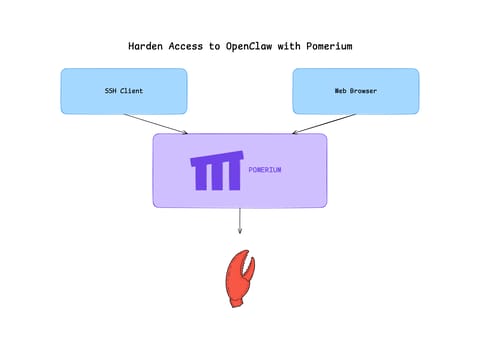
Harden Access to OpenClaw with Pomerium
Put OpenClaw, a self-hosted AI assistant with shell and file access, behind a web route and an SSH route, both gated by the same identity and Pomerium's context-aware policy. OpenClaw runs in trusted-proxy mode, trusting signed identity headers instead of its own login, while Pomerium's native SSH proxy signs short-lived certificates for shell access.
Learn by doing, not just by reading or watching
Sign up for a free account to start a VM playground right on this page, track your progress, and get notified about new learning materials.