Build Containers with Buildpacks
Introduction
What is Buildpacks?
Buildpacks or
Cloud Native Buildpacks is a tool that solves the
painpoints that some may face when working with containerized workloads on
the question of how to build them in a similar fashion all across the board.
Buildpacks automate the process of building a container by using pre-defined
and centrally managed building processes to build containers rather than relying
on each developer or service team to manage their own Dockerfiles.
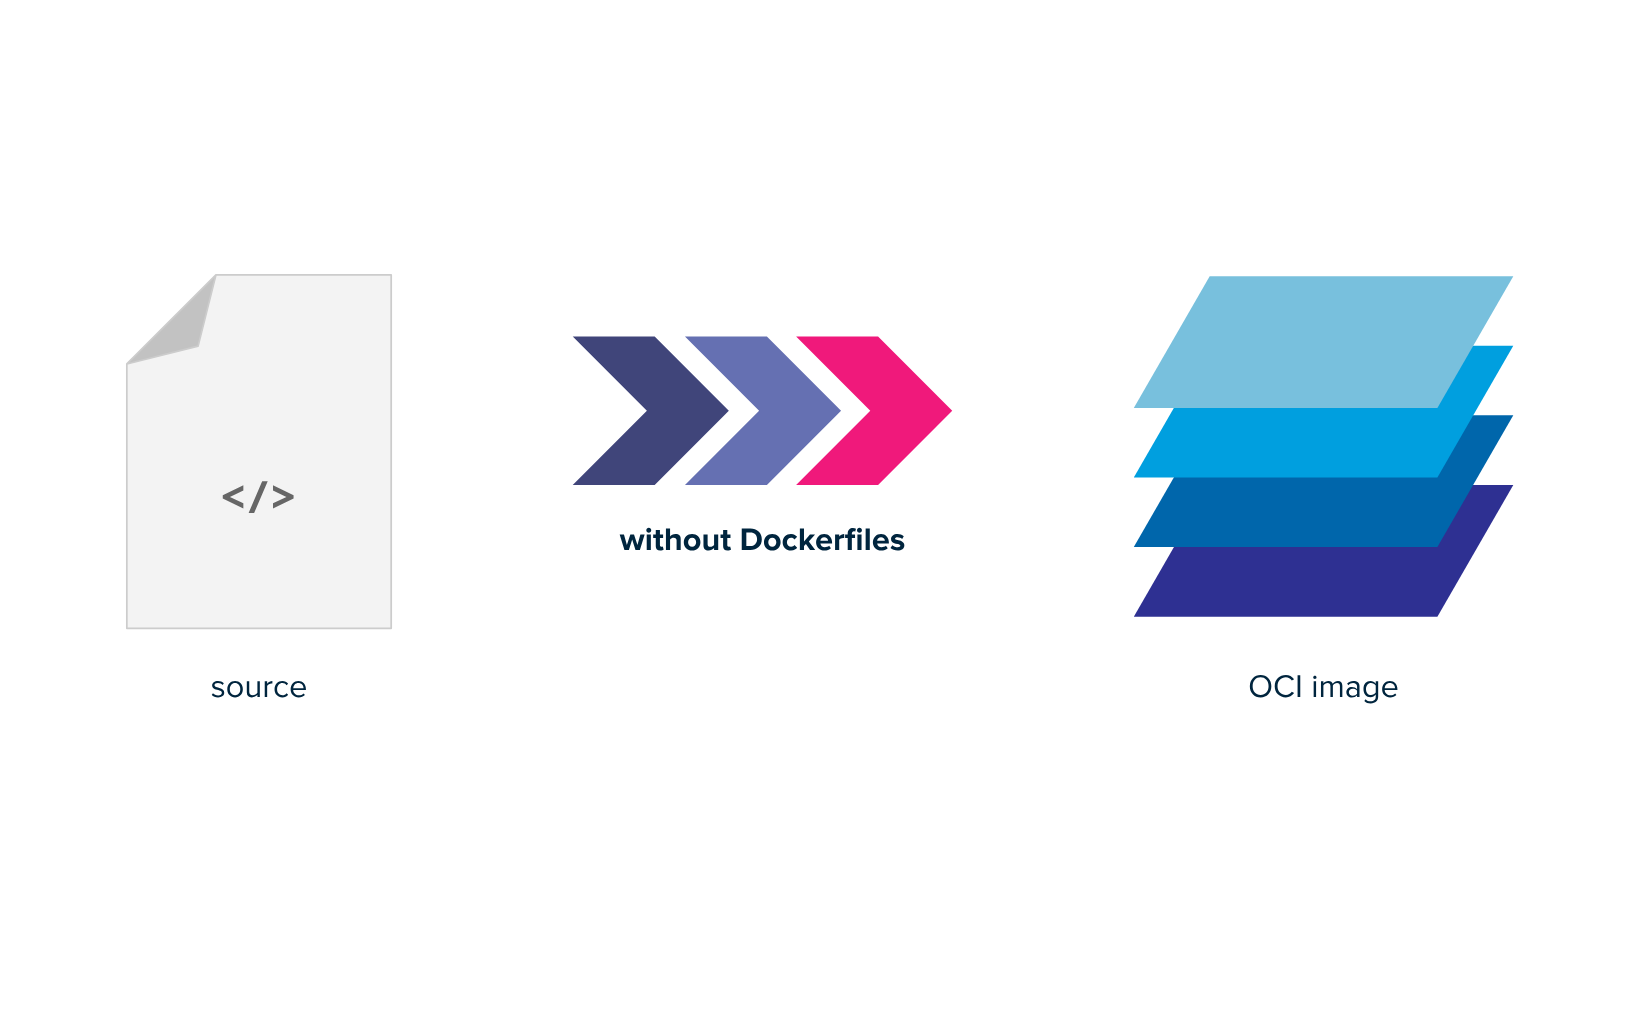
If you have Buildpacks in your toolbox the build process of your applications will look like this
pack build --tag my-favorite-app --builder gcr.io/buildpacks/python
What are Containers?
Containers are a technology which revolutionized the process of building and
deploying applications. It allowed and encouraged the entire Software
Engineering industry to be more agile and confident in shipping software.
Containers do that by creating a build artifact which can be deployed and
with the help of container runtime get executed on the run environment without
needing anything else. You can read about what comprises in a container image
here.
How containers are built
The way of building containers generally involves doing the following steps
- Building an application in your favorite language with your preferred tools.
For e.g.
Nodejs - Writing a
dockerfileorcontainerfilewhich specify how your application is built, packed and delivered as a image that can be ran by the Container Runtime.
Writing a good Dockerfile means that engineers need to know how docker works as well as know the Dockerfile reference schema present here
A sample Dockerfile looks like this# Use an official base image FROM node:20-alpine # Set the working directory inside the container WORKDIR /app # Copy dependency files first (for better layer caching) COPY package*.json ./ # Install dependencies RUN npm install # Copy the rest of the application code COPY . . # Expose the port the app runs on EXPOSE 3000 # Define the command to run the app CMD ["node", "server.js"] - Building the container using a tool like
docker,podmanorbuildah, which would take the contents of Dockerfile, execute them one by one and create a deployment artifact i.e. aContainerimage at the end of it
Lets see how Buildpacks can help us solve this
Hands on time
- Lets start the playground
- Examine the folders that are present in them, you should see an example directory with several subdirectories in them each containing a web-application defined in a different programming language.
- Try to build the
python-helloapplication.pack build python-app --path examples/python-hello --builder paketobuildpacks/builder-jammy-base
Lets try to run and test itdocker run -p 8080:8080 python-app - Try to build the
golang-helloapplication.pack build golang-app --path examples/golang-hello --builder paketobuildpacks/builder-jammy-base
Lets try to run and test itdocker run -p 8080:8080 golang-app - Try to build the
nodejs-helloapplication.pack build nodejs-app --path examples/nodejs-hello --builder paketobuildpacks/builder-jammy-base
Lets try to run and test itdocker run -p 8080:8080 nodejs-app
That's it. With buildpacks, building a software into a containerized deployment require no involvement from the dev team, they can just build their software the way they want and using pack cli's build command, it can get built in the way platforms teams want.
How does buildpacks work?
While we described buildpacks as a whole previously, it was a broad definition and now we should dig a bit deep down to understand how the creation of this build artifact happens and what different moving parts are involved in this process.
Buildpack
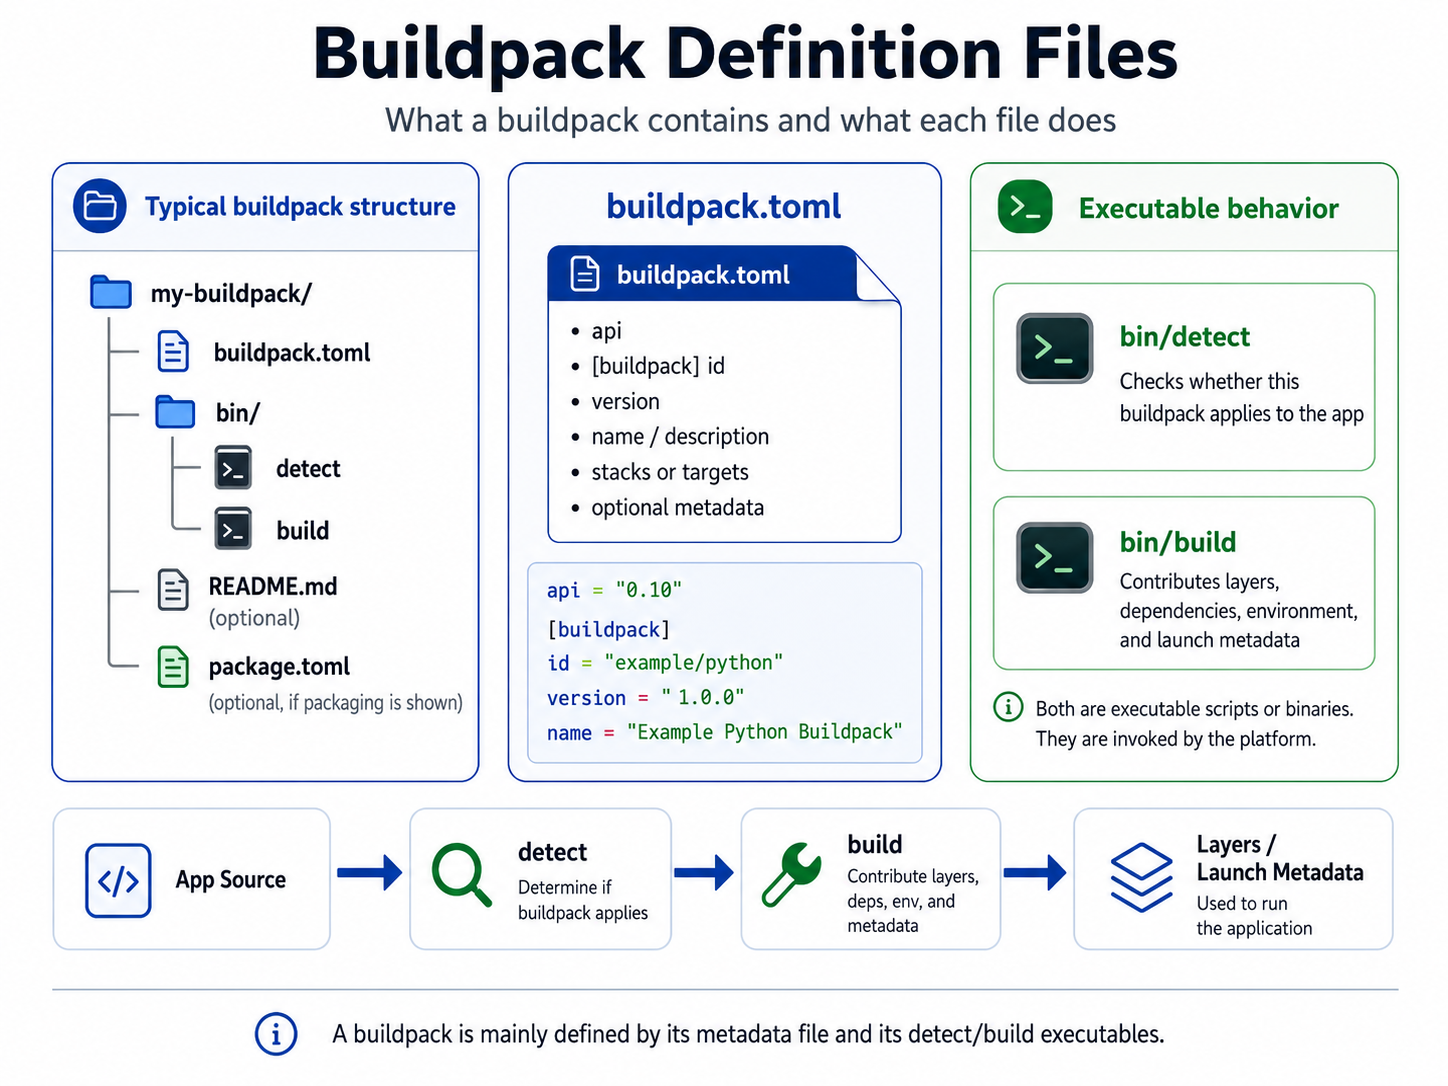
A Buildpack is a software, that transforms application source code into runnable artifacts by analysing code, detecting different files and determining the best way to build it. it is usually written as scripts that dictate what happens during a build lifecyle and decide how the container image should be build. The scripts come together to create a build lifecycle which includes steps like
- analyse
- detect
- restore
- build
- export
But inorder to define a buildpack, you do not need to define all of the phases
yourself, simplest buildpacks can be built with just the use of build and
detect phases defined. We are gonna build a buildpack below. 😉
Builders
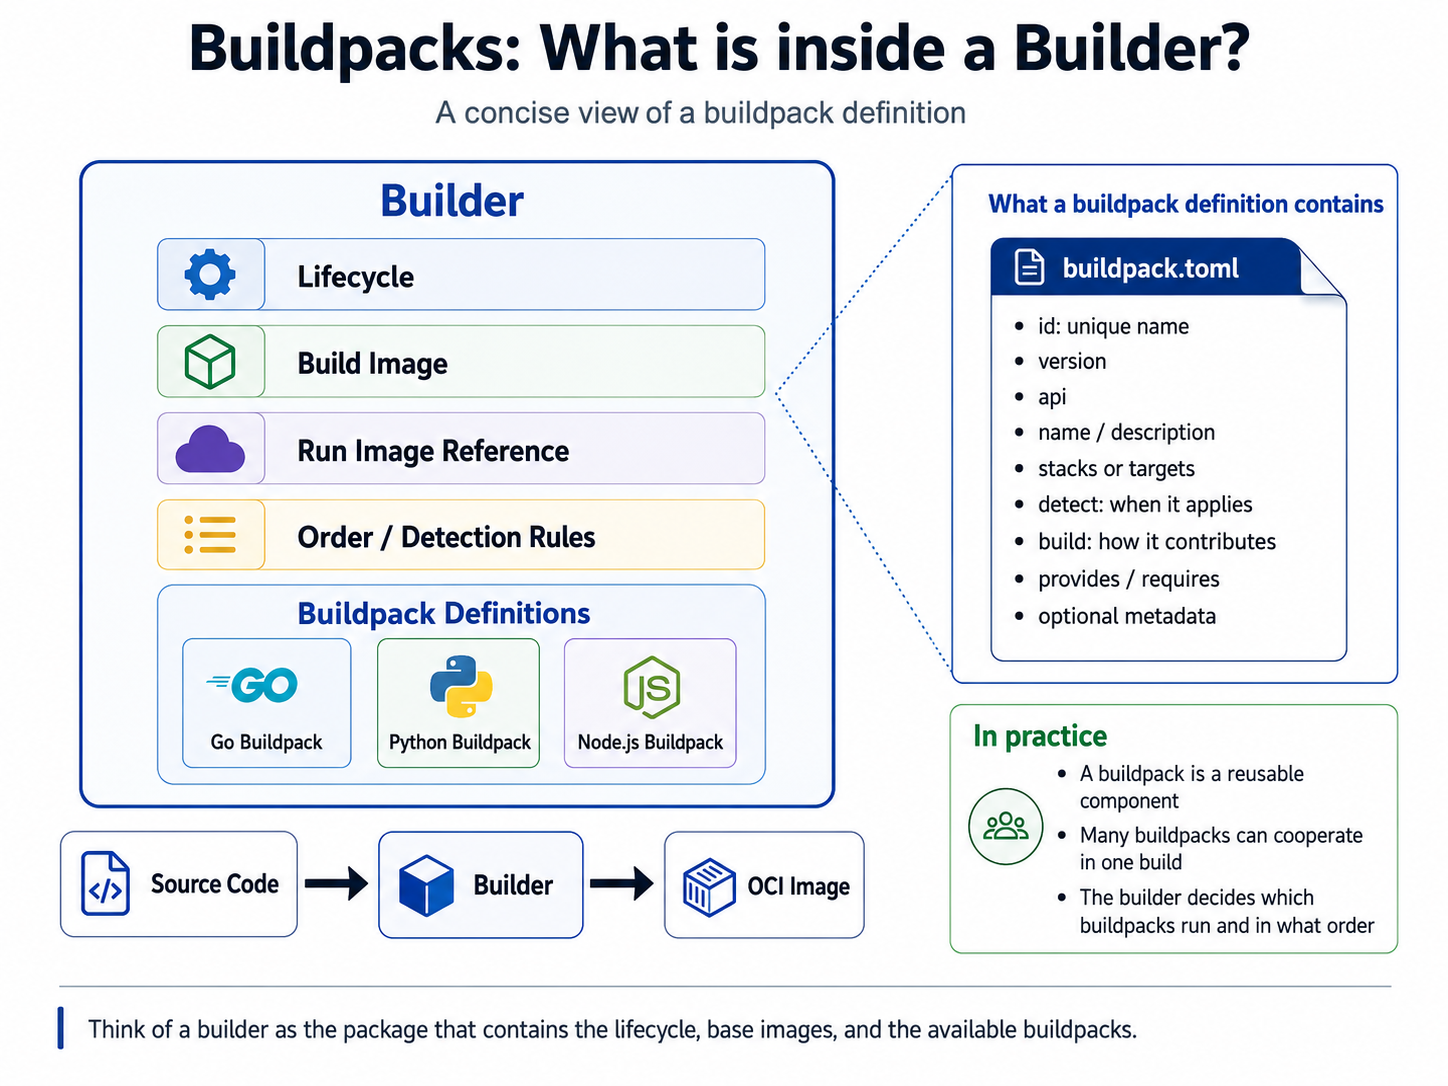
A Builder is an OCI image (i.e. not always a container), that runs the lifecycle stages of the buildpacks that are registered with it. It uses its own filesystem along with the build context i.e. your application code to complete a build process. Builder OCI Image consists of
- Build Image
- Lifecycle binary
- Buildpack definitions
Pack CLI using these definitions along with Lifecycle binary and the build-time image to contruct layers for the run-time image which are then added on top of a run-time base image. We already discussed a little about how lifecycle works and we will see it in more details when we create our own buildpack definition.
Setting up Buildpacks ourselves
We learnt how the pack cli can be used to create docker containers then we learnt what different concepts make buildpacks able to do what it does, now its time to build our own builder and a buildpack and then test a build with it.
Writing a custom buildpack
A buildpack is a set of lifecycle scripts that when executed, if they get completed produce a build artifact that can be turned into a docker container. We in the previous step used Paketo buildpacks that were included in the paketo builder that we used when we ran the command
pack build python-app --path examples/python-hello \
    --builder paketobuildpacks/builder-jammy-base
We used the same builder to build application for all the languages, what it
means is that the builder that we referenced consisted of multiple buildpack
definitions within and when we ran the commands they all ran and the ones which
passed the initial detect phase, were used to complete the rest of the build
process.
That was an example of a well build and managed builder that an entire community relies upon. What we are going to build will only be for building a golang web-service, it is a great starter and will help you understand the basics so that you can go on and build complex ones if you chose to do so.
Lets begin with the process, we can use Pack CLI to completely build a builder as well as new buildpacks and we would not require any other tooling apart from that.
- Creating a sample buildpack using Pack CLI
pack buildpack new registry.iximiuz.com/examples/buildpacks/golang-buildpack \
  --api 0.10 \
  --path golang-buildpack \
  --version 0.0.1 \
  --targets "linux/amd64"
- Examine the generated directory
There exists a directory called bin/ and a single file called
buildpack.toml. Buildpack.toml defines necessary metadata about the
currently defined buildpack and the bin/ directory defines detect and
build scripts, which are nothing but empty scripts that just end with a
0 signal. That is, they always succeed without producing anything.
api = "0.10"
WithWindowsBuild = false
WithLinuxBuild = false

[buildpack]
  id = "registry.iximiuz.com/examples/buildpacks/golang-buildpack"
  version = "0.0.1"

[[targets]]
  os = "linux"
  arch = "amd64"
- Constructing the detect script
Detect script which is present in bin/detect is something which detects
presence of certain files in the build context, to try to figure out whether
it makes sense to run the rest of buildpack or not. For example in this
buildpack since we are building it for golang, we can check whether go.mod
file is present in the build context or not, if it is present we exit with
0 that means success and if it is not present we exit with 1.
#!/usr/bin/env bash
set -euo pipefail

DEFAULT_GO_VERSION="1.22.5"

# Skip this buildpack if the app is not a Go module.
if [[ ! -f go.mod ]]; then
  exit 100
fi

# Read the version from the "go 1.22.5" line in go.mod.
go_version=$(awk '/^go / { print $2 }' go.mod)

# if go.mod says just "1.22" — update it as Go downloads need "1.22.0".
[[ "$go_version" =~ ^[0-9]+\.[0-9]+$ ]] && go_version="$go_version.0"

# Fall back to the default if go.mod didn't pin one.
go_version="${go_version:-$DEFAULT_GO_VERSION}"

echo "detected Go module, using Go $go_version"

# Save it in the build plan so bin/build can read it.
cat > "$CNB_BUILD_PLAN_PATH" << PLAN
[[provides]]
name = "go"

[[requires]]
name = "go"

[requires.metadata]
version = "$go_version"
PLAN
Copy the above content and paste it in bin/detect file within buildpack
directory.
- Constructing the build script
When detect script exits with a status 0 i.e. it finishes execution
without any errors, buildpack lifecycle proceeds with other steps defined,
if the detect script does not pass then the rest of the steps are skipped
and build fails unless the builder has some other buildpack defined which
succeeds in detect operation.
The task of a build script is to take context and the metadata provided from detect phase and try to build layers that should be attached to run time image. In our case, since we have detected that the context includes a gopackage, we need to
- Install applicable go version.
- Build a binary of the source code.
- Push the build binary into a layer that can be attached to run image.
Below code does exactly that
#!/usr/bin/env bash
set -euo pipefail

echo "---> Golang Web Service Buildpack"

# 1. Read the Go version that bin/detect saved in the build plan.
#    yj converts the TOML plan to JSON, jq picks the value out.
go_version=$(yj -t < "$CNB_BP_PLAN_PATH" | jq -r '.entries[0].metadata.version')
echo "---> Using Go $go_version"

# 2. Download Go into a temp directory and add it to PATH.
#    (linux-amd64; change to linux-arm64 if your machine is ARM)
tmp=$(mktemp -d)
curl -fsSL "https://go.dev/dl/go${go_version}.linux-amd64.tar.gz" | tar -xz -C "$tmp"
export PATH="$tmp/go/bin:$PATH"

# Go needs writable cache dirs, and must not auto-switch toolchains.
export GOCACHE=$(mktemp -d) GOPATH=$(mktemp -d) GOTOOLCHAIN=local
echo "Go installation succeeded. Installed version: ";

go version;


echo "Generating build binary -"
# 3. Build the binary into a new layer that ships in the run image.
layer="$CNB_LAYERS_DIR/app"
mkdir -p "$layer/bin"
CGO_ENABLED=0 go build -o "$layer/bin/web-server" .

echo '[types]
launch = true' > "$layer.toml"

# 4. Set the web launch process to run our binary.
cat > "$CNB_LAYERS_DIR/launch.toml" << TOML
[[processes]]
type = "web"
command = ["$layer/bin/web-server"]
default = true
TOML

echo "---> Done"
Notice that we are using utilities like wget, yj, jq inorder to
complete our build task, these are packages that we will need in the
build image.
- Creating a package.toml file to package buildpack
While the buildpack that we have created can directly be used by providing
direct file path to it, but inorder to create a OCI artifact of it and then
save it to a repository, we need to create a package.toml file as well.
package.toml file should be created in the root of buildpack directory.
[buildpack]
uri = "."
- Creating OCI artifact of the package and uploading it to a registry
Running the below command creates a buildpack artifact and saves it on docker images list. A simple docker push with the image name then saves it to the registry.
BUILDPACK_IMAGE="registry.iximiuz.com/examples/buildpacks/golang-buildpack"
pack buildpack package ${BUILDPACK_IMAGE} --config ./package.toml
docker push ${BUILDPACK_IMAGE}
Notice that we are using registry.iximiuz.com, this is a registry that comes
with each Iximiuz labs playground, it is private to a playground and images
stored on it will be lost once the playground is destroyed.
We will be using the same registry for all of the artifacts that we will be creating.
Creating a custom builder
We created a buildpack in the previous step, here we learn how to package that buildpack within a builder and use it.
- Create a directory to store builder config
cd
mkdir -p golang-builder
- Creating builder image
Within the just created golang-builder directory, create a new file called
builder.Dockerfile, with the following content.
# Define the base image
FROM ubuntu:resolute

# Install packages that we want to make available at build time
RUN apt-get update && \
  apt-get install -y xz-utils ca-certificates wget curl && \
  rm -rf /var/lib/apt/lists/*

# Set required CNB user information
ARG cnb_uid=2000
ARG cnb_gid=2000
ENV CNB_USER_ID=${cnb_uid}
ENV CNB_GROUP_ID=${cnb_gid}

# Create user and group
RUN groupadd cnb --gid ${CNB_GROUP_ID} && \
  useradd --uid ${CNB_USER_ID} --gid ${CNB_GROUP_ID} -m -s /bin/bash cnb

ADD --chown=${CNB_USER_ID}:${CNB_GROUP_ID} --chmod=755 https://github.com/sclevine/yj/releases/download/v5.1.0/yj-linux-amd64 /usr/local/bin/yj
ADD --chown=${CNB_USER_ID}:${CNB_GROUP_ID} --chmod=755 https://github.com/jqlang/jq/releases/download/jq-1.8.2/jq-linux-amd64 /usr/local/bin/jq

# Set user and group
USER ${CNB_USER_ID}:${CNB_GROUP_ID}

# Set required CNB target information
LABEL io.buildpacks.base.distro.name="ubuntu"
LABEL io.buildpacks.base.distro.version="26.04"
Build and push it to registry.
docker build . -t registry.iximiuz.com/examples/images/golang-runner -f runner.Dockerfile --push
- Creating runner image
Create a runner.Dockerfile alongside and paste the following contents.
# Define the base image
FROM ubuntu:resolute

# Install packages that we want to make available at run time
RUN apt-get update && \
  apt-get install -y xz-utils ca-certificates && \
  rm -rf /var/lib/apt/lists/*

# Create user and group
ARG cnb_uid=2000
ARG cnb_gid=2000
RUN groupadd cnb --gid ${cnb_gid} && \
  useradd --uid ${cnb_uid} --gid ${cnb_gid} -m -s /bin/bash cnb

# Set user and group
USER ${cnb_uid}:${cnb_gid}

# Set required CNB target information
LABEL io.buildpacks.base.distro.name="ubuntu"
LABEL io.buildpacks.base.distro.version="26.04"
Build and push it to registry.
docker build . -t registry.iximiuz.com/examples/images/golang-runner -f runner.Dockerfile --push
- Packaging builder
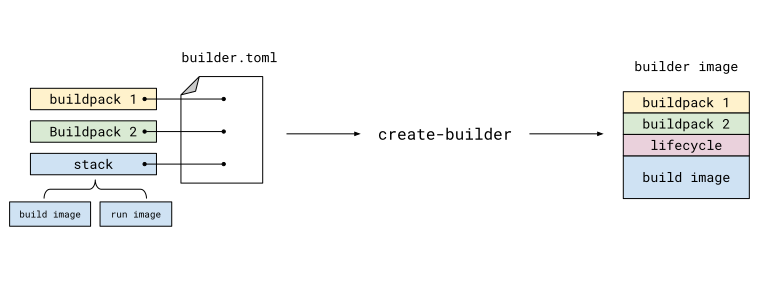
Create a builder.toml file that references our buildpack scripts and uses
builder and runner images.
[[buildpacks]]
# Packaged buildpacks to include in builder;
# the "hello-universe" package contains the "hello-world" and "hello-moon" buildpacks
uri = "docker://registry.iximiuz.com/examples/buildpacks/golang-buildpack"
version = "0.0.1"

[[order]]
[[order.group]]
id = "registry.iximiuz.com/examples/buildpacks/golang-buildpack"

# Base images used to create the builder
[build]
image = "registry.iximiuz.com/examples/images/golang-builder"
[run]
[[run.images]]
image = "registry.iximiuz.com/examples/images/golang-runner"
Create a builder OCI Image and push it to registry.
BUILDER=registry.iximiuz.com/examples/builders/golang-builder
pack builder create ${BUILDER} --config ./builder.toml
docker push ${BUILDER}
Using our Custom Builder and Buildpack
Since we have our builder ready, lets take it for a ride.
Lets try building our golang-hello example app with our custom builder.
cd
pack build golang-hello --path examples/golang-hello \
  --builder registry.iximiuz.com/examples/builders/golang-builder
and start our container
docker start -p 8080:8080 golang-hello
About the Author

Ganesh Tiwari
I am a Software Engineer, I specialize in creating software with which procuring infrastructure repeatably and in a customizable manner becomes easier. I design platforms with which engineering teams can build upon and obsess about having secure and reliable software.
More tutorials you might like
Gitless GitOps with Flux: Plugins, Mirrors, and Schema Validation
In this tutorial, we will learn how to use the new plugin system in Flux 2.9 to: validate manifests, mirror charts into local registries and deploy using Gitless GitOps principles.

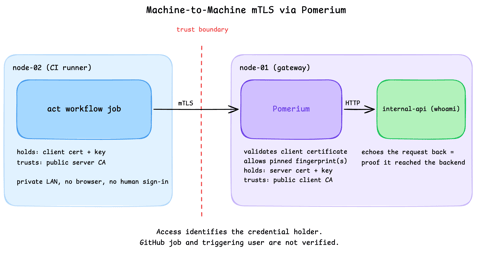
Secure Machine-to-Machine Access with mTLS and Pomerium
Run a GitHub Actions-compatible continuous integration (CI) job on a private runner and protect its internal API call with mutual TLS (mTLS) and Pomerium. Build separate server and client trust chains, authorize one machine certificate by fingerprint, then revoke, restore, and rotate its credentials through live policy changes.

Running Dagger Pipelines on GitHub Actions
Learn how to integrate Dagger into your existing CI pipelines on GitHub Actions.

Testing and Releasing Helm Charts with Dagger
Learn how to test, package and release Helm charts using Dagger.
Learn by doing, not just by reading or watching
Sign up for a free account to start a VM playground right on this page, track your progress, and get notified about new learning materials.