If you have used Docker before, many kubectl commands will feel familiar.
Docker manages containers on a single host, while Kubernetes schedules
containers (wrapped in Pods) across a cluster. The core verb set is similar:
| Docker command | kubectl equivalent |
|---|---|
docker ps | kubectl get pods |
docker run nginx | kubectl run my-nginx --image=nginx |
docker logs <id> | kubectl logs <name> |
docker exec -it <id> sh | kubectl exec -it <name> -- sh |
docker stop <id> | kubectl delete pod <name> |
docker inspect <id> | kubectl describe pod <name> |
In Docker, the fundamental unit is the container. In Kubernetes, the fundamental unit is the Pod, which holds one or more containers that share a network namespace and an IP address. A Pod runs on a Node (a worker machine), and multiple Pods can be managed together by higher-level controllers like Deployments or DaemonSets.
Every kubectl command ultimately translates to an HTTP request sent to the
API server, the single entry point for the cluster. The API server
validates the request, persists the desired state to etcd, and then the
control plane components (scheduler, controller manager) work to converge
the actual state toward that desired state.
The Kubernetes Control Plane
Core components
| Component | Role | Runs as |
|---|---|---|
API server (kube-apiserver) | Validates and processes all requests. The only component that reads from and writes to etcd. | Static Pod in kube-system |
| etcd | Distributed key-value store that holds every cluster object. The single source of truth. | Static Pod in kube-system |
Scheduler (kube-scheduler) | Assigns unscheduled Pods to Nodes based on resource availability, affinity rules, and taints. | Static Pod in kube-system |
Controller Manager (kube-controller-manager) | Runs dozens of controllers in one process. Each controller watches for changes to its resource type and acts to reconcile state. | Static Pod in kube-system |
| Kubelet | Agent on each Node. Pulls images, starts containers, and reports Pod status to the API server. | systemd service |
| kube-proxy | Programs iptables or IPVS rules on each Node so that Service ClusterIPs route to the correct Pod IPs. | DaemonSet in kube-system |

This walkthrough assumes a self-managed cluster (kubeadm, kops, k3s, etc.)
where the control plane runs as static Pods you can see and exec into.
On managed clusters (EKS, GKE, AKS, etc.), the cloud provider hides the
control plane: you will not see kube-apiserver, kube-scheduler,
kube-controller-manager, or etcd Pods, and /etc/kubernetes/manifests
is not accessible. Use the provider's console or API to inspect or tune
those components.
All control-plane Pods live in the kube-system namespace. List them:
kubectl get pods -n kube-system
Find the API server Pod specifically:
kubectl get pods -n kube-system -o name | grep apiserver
Store its name and inspect it in detail:
APISERVER_POD=$(kubectl get pods -n kube-system -o=custom-columns='DATA:metadata.name' | grep apiserver)
kubectl describe pod $APISERVER_POD -n kube-system
The flags listed under Command: tell you how the API server is configured.
You will see the etcd endpoint (--etcd-servers), the service account key
file, admission plugin names, and the authorization mode (RBAC, Node).
The API server manifest is a static Pod manifest located on the control-plane
node at /etc/kubernetes/manifests/kube-apiserver.yaml. Changes to this file
are detected by the kubelet. The API server restarts automatically when the
file changes. The same applies to the scheduler manifest
(kube-scheduler.yaml) and the controller-manager manifest
(kube-controller-manager.yaml).
Always back up these files before editing:
cp /etc/kubernetes/manifests/kube-apiserver.yaml /kube-apiserver.yaml.bak
If you introduce a syntax error and the API server stops responding, restore the backup. The kubelet replaces the broken static Pod within seconds.
etcd
etcd is a distributed key-value store. Kubernetes stores every object (Pods,
Deployments, Services, Secrets, ConfigMaps, everything) under the /registry/
prefix. When you run kubectl get pods, the API server queries etcd and
returns the result. Every kubectl describe and kubectl get reads from
etcd through the API server.
In kubeadm-based clusters you can browse etcd from inside the etcd Pod:
ETCD_POD=$(kubectl get pod -n kube-system -l component=etcd -o name | head -1)
kubectl exec -n kube-system $ETCD_POD -- \
  etcdctl --cacert /etc/kubernetes/pki/etcd/ca.crt \
  --key /etc/kubernetes/pki/etcd/server.key \
  --cert /etc/kubernetes/pki/etcd/server.crt \
  --endpoints https://127.0.0.1:2379 \
  get / --prefix --keys-only
The etcd container image is distroless. It has no shell (sh, bash),
no package manager, and no debugging utilities. You can only run etcdctl
directly via kubectl exec. Do not wrap the command in sh -c.
The output shows keys like /registry/pods/kube-system/...,
/registry/deployments/default/..., and /registry/services/....
This is how every kubectl get and kubectl describe reads cluster state.
etcd is the single source of truth for the cluster. If you lose the etcd data and have no snapshot backup, the cluster state is gone. Pods, Deployments, Services, and all other objects must be recreated from scratch. Always configure regular etcd snapshots for production clusters.
Scheduler
The scheduler picks a Node for each unscheduled Pod in two phases. First it
filters out Nodes that lack the required resources, have taints the Pod does
not tolerate, or report unhealthy conditions. Then it scores the remaining
Nodes based on how much free resource would remain, affinity rules, and
whether the image is already cached. The highest-scoring Node wins, and the
scheduler writes the Node name to pod.spec.nodeName through the API server.
Check which scheduler handled a running Pod:
kubectl get pod -n kube-system -l k8s-app=kube-dns -o jsonpath='{.items[0].spec.schedulerName}'
The default scheduler runs on port 10259. On the cplane-01 terminal, verify with:
netstat -tlpn | grep 10259
Its manifest is at /etc/kubernetes/manifests/kube-scheduler.yaml.
Controller Manager
The controller-manager runs dozens of built-in controllers inside a single
binary. The exact count depends on the Kubernetes version. The --controllers
flag in its manifest shows which controllers are active. A value of * means
all built-in controllers are enabled:
kubectl get pod -n kube-system -l component=kube-controller-manager -o yaml | grep -A1 '\-\-controllers'
When --use-service-account-credentials=true is set, each controller gets
its own ServiceAccount. Count them to see how many controllers are running:
kubectl get serviceaccount -n kube-system | grep controller | wc -l
Each controller watches for changes to a specific object type and takes action to reconcile the actual state with the desired state. Some of the most important:
| Controller | What it does |
|---|---|
| Deployment controller | Creates a ReplicaSet when a Deployment is created, and orchestrates rolling updates |
| ReplicaSet controller | Creates or deletes Pods to match the desired replica count |
| Node controller | Monitors Node health. If a Node becomes unreachable for too long, it evicts Pods from that Node |
| Token controller | Creates and manages ServiceAccount tokens |
| ServiceAccount controller | Ensures the default ServiceAccount exists in every namespace |
| EndpointSlice controller | Watches Services and Pods and populates EndpointSlice objects with active Pod IPs |
| Job controller | Creates Pods to fulfill Job workloads and tracks completions |
To see the dedicated ServiceAccounts created per controller when
--use-service-account-credentials=true is set:
kubectl get serviceaccount -n kube-system | grep controller
The controller-manager manifest is at
/etc/kubernetes/manifests/kube-controller-manager.yaml. Key flags include:
--service-account-private-key-file: the private key used to sign ServiceAccount tokens.--controllers: a comma-separated list of which controllers to run. The default is*(all).
Kubelet
The kubelet is the bridge between the control plane and the Node's container runtime. It is a systemd service, not a Pod. After the scheduler assigns a Pod to the Node, the kubelet:
- Calls the container runtime (containerd or CRI-O) to pull the container image from the registry.
- Creates the container with the specified configuration (command, args, environment variables, volume mounts).
- Starts the container and begins monitoring its health.
- Periodically sends the Pod's status (phase, conditions, container restart counts) back to the API server.
Run the following commands on the node-01 terminal to inspect it:
systemctl status kubelet
cat /var/lib/kubelet/config.yaml
Important configuration fields:
| Field | Meaning |
|---|---|
staticPodPath | Directory for static Pod manifests. Default: /etc/kubernetes/manifests. The kubelet watches this directory and creates Pods from any YAML files placed there. |
authentication.anonymous.enabled | When true, the kubelet accepts unauthenticated requests. Should always be false in production. |
authorization.mode | Set to Webhook. Never use AlwaysAllow in production. |
clusterDNS | The DNS server IP address that is written into each Pod's /etc/resolv.conf. |
clusterDomain | The cluster's DNS domain suffix (typically cluster.local). |
When the kubelet talks to the API server, it logs in as
system:node:<nodename> (the username) in the system:nodes group. The API
server recognizes this identity and gives the kubelet just enough permission
to do its job. It can read its own Node, read the Secrets and ConfigMaps
used by Pods on its Node, and update Pod status.
Check it yourself:
sudo openssl x509 -in /var/lib/kubelet/pki/kubelet-client-current.pem -noout -subject
You'll see CN=system:node:<nodename> (username) and O=system:nodes (group).
See Node Authorization for the full list of permissions.
Never change the kubelet's identity or group. The cluster relies on this exact name to grant the kubelet its permissions.
Pods
A Pod is the smallest deployable unit in Kubernetes. It represents a single instance of a running process in the cluster. A Pod wraps one or more containers that share:
- The same Linux network namespace (one IP address, shared localhost).
- The same IPC namespace.
- Optionally, shared storage volumes mounted at the Pod level.
A Pod is ephemeral by nature. When a Pod dies (whether from a crash, a Node
failure, or an explicit deletion), it is not automatically resurrected.
A higher-level controller (Deployment, ReplicaSet, StatefulSet, DaemonSet)
must recreate it. A standalone Pod created directly with kubectl run
or from a Pod manifest has no such controller watching over it.
Creating a Pod
Imperative approach. A single command creates the Pod. The definition is not saved anywhere unless you capture it separately. Useful for quick tests and debugging:
kubectl run my-nginx --image=mirror.gcr.io/library/nginx --restart=Never
The --restart=Never flag tells kubectl to create a standalone Pod. If you
omit it, recent kubectl versions default to --restart=Always, which creates
a Deployment instead of a bare Pod.
Verify the Pod was created:
kubectl get pod my-nginx
You should see the status transition from ContainerCreating to Running.
Declarative approach. Write the desired state into a YAML manifest file and apply it. This is the recommended method for any workload you intend to keep or version-control. The manifest is reviewable, repeatable, and can be stored in a git repository:
cat > my-pod.yaml <<EOF
apiVersion: v1
kind: Pod
metadata:
  name: my-nginx-declarative
spec:
  containers:
  - name: nginx
    image: mirror.gcr.io/library/nginx
EOF
Apply the manifest:
kubectl apply -f my-pod.yaml
Verify the Pod was created from the manifest:
kubectl get pod my-nginx-declarative
The primary difference between imperative and declarative is that declarative keeps the manifest. You can reapply it to any cluster, share it with your team, and track changes over time with version control.
Inspecting Pods
List Pods in the current namespace with their name, status, age, and restart count:
kubectl get pods
Add -o wide to also show the Pod IP and the Node it runs on:
kubectl get pods -o wide
Show everything Kubernetes knows about a single Pod: container spec, events, volumes, conditions, and recent state changes. This is the first command to run when a Pod is not behaving as expected:
kubectl describe pod <name>
Stream the container's stdout and stderr. Add -f to follow new output, or
--previous to read logs from the last terminated container:
kubectl logs <name>
Open an interactive shell inside the running container. Useful for poking at the filesystem, running curl, or checking environment variables:
kubectl exec -it <name> -- sh
JSONPath, extracting structured data from kubectl output
kubectl get pods -o jsonpath='{.items[*].metadata.name}'
kubectl get pod my-nginx -o jsonpath='{.spec.nodeName}'
Full documentation: Kubernetes JSONPath reference
Labeling Pods
Labels are key-value pairs attached to objects. They are used by selectors (like Service selectors and Deployment selectors) to identify sets of objects. You can add, change, or remove labels on existing Pods.
Add a tier=frontend label to the my-nginx Pod created earlier:
kubectl label pod my-nginx tier=frontend
List Pods that match the new label and show all labels on each one:
kubectl get pods -l tier=frontend --show-labels
Overwrite an existing label by adding --overwrite:
kubectl label pod my-nginx tier=backend --overwrite
Remove a label by appending a minus sign to the key:
kubectl label pod my-nginx tier-
Confirm the label is gone. The tier key should no longer appear in the
output:
kubectl get pod my-nginx --show-labels
Label changes take effect immediately and do not restart the Pod. Services and Deployments that select on modified labels will adjust their endpoint sets or replica counts accordingly.
Deleting Pods
Delete the declarative Pod using its manifest. This pairs naturally with
kubectl apply -f for repeatable teardown. The kubelet sends SIGTERM to
the container, waits for the grace period (30 seconds by default), then
SIGKILL if the container has not exited. See Pod termination
for what happens at each step:
kubectl delete -f my-pod.yaml
Delete every Pod matching a label selector in one call. kubectl run
automatically adds a run=<name> label, so the my-nginx Pod from the
imperative step can be deleted by selector:
kubectl delete pods -l run=my-nginx
You can also delete a Pod directly by name:
kubectl delete pod <pod-name>
Force delete skips the graceful termination period and removes the Pod
record from etcd immediately. The container may still be running on the
Node. Use only as a last resort when a Pod is stuck in Terminating:
kubectl delete pod <stuck-pod-name> --force --grace-period=0
Deployments
A Deployment is a higher-level controller that manages a ReplicaSet, which in turn manages a set of identical Pods. The relationships between these objects are encoded in their YAML and visible at runtime:
Deployment (nginx-app)
  │  ownerReference
  ▼
ReplicaSet (nginx-app-<pod-template-hash>)
  │  ownerReference
  ▼
Pod-1 (nginx-app-<pod-template-hash>-<random>)
Pod-2 (nginx-app-<pod-template-hash>-<random>)
...
Each object has a specific responsibility:
- The Deployment orchestrates the rollout of new versions. It maintains a revision history that allows you to roll back to any previous version.
- The ReplicaSet guarantees that the exact number of Pod replicas
(defined by
replicas) is running at all times. If a Pod dies, the ReplicaSet creates a new one. - The Pod is the actual workload, containing the containers.
The selector.matchLabels in the Deployment spec tells the Deployment how
to identify the Pods it owns. The template.metadata.labels must include
these labels. This label matching is what chains all three objects together.
Creating a Deployment
The manifest below declares a Deployment named nginx-app that should keep
two identical nginx Pods running at all times. The app: nginx label is the
glue: the Deployment uses selector.matchLabels to find the Pods it owns,
and template.metadata.labels stamps that same label onto every Pod it
creates. Write it to a file:
cat > nginx-deployment.yaml <<EOF
apiVersion: apps/v1
kind: Deployment
metadata:
  name: nginx-app
  labels:
    app: nginx
spec:
  replicas: 2
  selector:
    matchLabels:
      app: nginx
  template:
    metadata:
      labels:
        app: nginx
    spec:
      containers:
      - name: nginx
        image: mirror.gcr.io/library/nginx
        ports:
        - containerPort: 80
EOF
Apply the manifest. The API server creates the Deployment object, the Deployment controller then creates a ReplicaSet, and the ReplicaSet controller creates two Pods. All three objects appear within a few seconds:
kubectl apply -f nginx-deployment.yaml
Manifest field explanation
| Field | Meaning | Required |
|---|---|---|
apiVersion: apps/v1 | The Deployment resource lives in the apps API group, version v1 | Yes |
kind: Deployment | Declares the object type | Yes |
metadata.name | Unique name for this Deployment within the namespace | Yes |
replicas | How many identical Pods the Deployment should maintain | Yes |
selector.matchLabels | Label query that identifies which Pods belong to this Deployment. Must match template.metadata.labels | Yes (immutable after creation) |
template.metadata.labels | Labels that are stamped onto every Pod this Deployment creates | Yes |
template.spec.containers | The container definition: image name, ports, environment variables, resource limits | Yes |
The .spec.selector field is immutable. You cannot change how a Deployment
matches its Pods after the Deployment exists. If you need a different selector,
you must delete and recreate the Deployment.
Verify that all three layers were created.
Check the Deployment itself. The READY column shows current vs desired
replicas (should be 2/2). UP-TO-DATE is the number of Pods running the
latest template. AVAILABLE is the number of Pods that have passed their
readiness check:
kubectl get deployments
Inspect the ReplicaSet the Deployment created. DESIRED is the target
replica count from the Deployment, CURRENT is how many Pods the
ReplicaSet has created, and READY is how many are passing readiness
checks. Expect 2 2 2:
kubectl get replicaset
Finally, look at the Pods themselves. Both should be in the Running
state with 1/1 containers ready. Pod names follow the pattern
<deployment-name>-<replicaset-hash>-<random-suffix>, and both Pods share
the same ReplicaSet hash because they came from the same template:
kubectl get pods -l app=nginx
Take a closer look at the Pod names. Every Deployment Pod follows the same
three-part shape <deployment>-<replicaset-hash>-<random-suffix>:
<deployment>— the Deployment's name (here,nginx-app).<replicaset-hash>— a fingerprint of the Pod template. Every Pod from the same ReplicaSet shares this value. When you trigger a rolling update, a new ReplicaSet is created with a different hash.<random-suffix>— a random string that keeps each Pod name unique within the ReplicaSet.
The naming pattern is only a hint, though. The authoritative signal that a
Pod belongs to a controller lives in its metadata, in a field called
ownerReferences.
A Pod created by a Deployment has an ownerReferences field that points
to its ReplicaSet. A Pod created directly with kubectl run --restart=Never
or from a Pod manifest has no owner and is called an orphan Pod (or
bare Pod). If an orphan Pod dies, nothing brings it back.
Pick one of the Deployment's Pods and look at its ownerReferences. You
will see a single entry with kind: ReplicaSet and the ReplicaSet's name:
DEPLOY_POD=$(kubectl get pods -l app=nginx -o jsonpath='{.items[0].metadata.name}')
kubectl get pod $DEPLOY_POD -o jsonpath='{.metadata.ownerReferences}' | jq
Now create a standalone Pod and check the same field. The output is empty, which means no controller will replace it if it dies:
kubectl run orphan-demo --image=mirror.gcr.io/library/nginx --restart=Never
kubectl get pod orphan-demo -o jsonpath='{.metadata.ownerReferences}'
Clean up the standalone Pod:
kubectl delete pod orphan-demo
Orphan Pods matter from a security angle too. An attacker who can create
Pods may run a standalone Pod whose name mimics a Deployment's pattern so
it blends into kubectl get pods output. The fake Pod has no
ownerReferences, so checking that field is how you spot it. See Orphan Pod
Masquerading
for the full attack pattern and detection ideas.
Rolling updates
A rolling update happens when you change anything in the Pod template. The Deployment creates a new ReplicaSet with the updated template, then gradually scales up the new one while scaling down the old one. No request is dropped during this process (assuming readiness probes are configured).
Update the container image:
kubectl set image deployment/nginx-app nginx=mirror.gcr.io/library/nginx:1.25
Watch the rollout progress in real time:
kubectl rollout status deployment/nginx-app
View the full rollout history, including all past revisions:
kubectl rollout history deployment/nginx-app
Roll back to the previous revision:
kubectl rollout undo deployment/nginx-app
Roll back to a specific revision:
kubectl rollout undo deployment/nginx-app --to-revision=2
The default rolling update strategy uses maxSurge: 25% and maxUnavailable: 25%. This means during an update, the Deployment can create up to 25% more
Pods than the target replica count and allow up to 25% of Pods to be
unavailable. These values can be tuned under spec.strategy.rollingUpdate.
Scaling replicas
Scaling changes only the replica count. The Pod template is not modified, so no rollout is triggered:
kubectl scale deployment/nginx-app --replicas=4
kubectl get deployments -o wide
To edit a Deployment in place, open it in your default editor with
kubectl edit. Saving the file applies the change and, if the Pod template
was touched, triggers a new rollout:
kubectl edit deployment/nginx-app
Services
A Service is an abstraction that provides a stable network endpoint for a dynamic set of Pods. Pods are ephemeral: when they restart, they get a new IP. The Service gives clients a fixed ClusterIP and DNS name that always route to healthy Pods, regardless of which Pods are currently alive.
Selectors and endpoints
A Service uses label selectors defined in spec.selector. Any Pod whose
labels match the selector becomes a backend endpoint and receives traffic:
Service (nginx-svc)
  selector: app=nginx
      │
      ├── Pod (app=nginx)  ✓ receives traffic
      └── Pod (app=web)    ✗ skipped
If no Pods match the selector, the Service exists but has no endpoints. It will not accept traffic until at least one matching Pod is running and Ready.
Exposing a Deployment
Imperative one-liner:
kubectl expose deployment nginx-app --name=nginx-svc --port=80 --target-port=80
Declarative manifest (recommended for anything you intend to keep):
cat > nginx-svc.yaml <<EOF
apiVersion: v1
kind: Service
metadata:
  name: nginx-svc
spec:
  selector:
    app: nginx
  ports:
  - port: 80
    targetPort: 80
EOF
kubectl apply -f nginx-svc.yaml
Service port fields explained
| Field | Meaning |
|---|---|
port | The port the Service listens on. Clients connect to <ClusterIP>:<port>. |
targetPort | The port on the Pod's container where traffic is forwarded. Can be a number or a named port from the container spec. |
nodePort | Only used with type: NodePort. The port opened on every Node in the range 30000 to 32767. |
When targetPort is not specified, it defaults to the value of port.
Verify the Service was created and that it has healthy endpoints:
kubectl get svc nginx-svc
kubectl describe svc nginx-svc
kubectl get endpoints nginx-svc
The output of kubectl get endpoints shows IP address and port pairs for
every Pod that matches the Service's selector. If this list is empty, either
no Pods match the selector or the matching Pods are not yet Ready.
Service types
| Type | How it is accessed | Use case |
|---|---|---|
ClusterIP | Internal cluster IP only. Reachable only from within the cluster. | Default. Used for internal service-to-service communication. |
NodePort | Opens a static port (30000 to 32767) on every Node. Accessible from outside via <AnyNodeIP>:<NodePort>. | Quick external access during development or for simple setups. |
LoadBalancer | Provisions an external cloud load balancer that forwards to the NodePort. | Production external access with integrated cloud load balancing. |
ExternalName | Returns a CNAME DNS record pointing to an external DNS name. No proxying is done. | Redirecting internal traffic to an external service by DNS name. |
Headless Services
When you set clusterIP: None in the Service spec, the Service gets no
ClusterIP and kube-proxy does not perform load balancing. Instead, DNS
returns the individual Pod IPs directly. This is useful when the client
needs to discover every backend instance:
spec:
  clusterIP: None
  selector:
    app: nginx
DNS queries for a headless Service return multiple A records, one per Pod. This pattern is essential for StatefulSets and custom service discovery where the client wants to interact with specific Pods rather than a single load-balanced endpoint.
DNS
Kubernetes runs CoreDNS (or kube-dns in older clusters) as a built-in DNS server. CoreDNS automatically creates DNS A and AAAA records for every Service and, in some configurations, for Pods. This is how applications inside the cluster find each other by name instead of by IP address.
Service records
Every Service receives a DNS record in the following pattern:
<service-name>.<namespace>.svc.<cluster-domain>
The default cluster domain is cluster.local, so the full form is:
<service-name>.<namespace>.svc.cluster.local
Cluster DNS only answers queries from inside the cluster, so these lookups
must run from within a Pod. Start a one-shot Pod with nslookup available
and resolve the fully qualified name for nginx-svc in the default
namespace:
kubectl run dns-test --image=mirror.gcr.io/library/busybox --rm -it --restart=Never -- nslookup nginx-svc.default.svc.cluster.local
The fully qualified form works from any Pod in any namespace in the cluster. Shorter forms work only when the DNS search path includes the right suffixes.
The short name works only from Pods within the same namespace. Run it from
a Pod in default:
kubectl run dns-test --image=mirror.gcr.io/library/busybox --rm -it --restart=Never -- nslookup nginx-svc
If you see NXDOMAIN, the Service does not exist in the queried namespace
yet. Make sure the earlier Services step created nginx-svc with
kubectl get svc nginx-svc. busybox's nslookup prints only the last
suffix it tried from the resolv.conf search path, which can make a missing
Service look like a search-path problem.
Short names
Every Pod gets an /etc/resolv.conf file written by the kubelet. It includes
a search line that lists domain suffixes to append when resolving short
names. Pick any Pod from the nginx-app Deployment and read its resolv.conf:
NGINX_POD=$(kubectl get pods -l app=nginx -o jsonpath='{.items[0].metadata.name}')
kubectl exec $NGINX_POD -- cat /etc/resolv.conf
Typical output from a Pod in the default namespace (the nameserver IP
varies per cluster):
search default.svc.cluster.local svc.cluster.local cluster.local
nameserver X.X.X.X
options ndots:5
When a process resolves nginx-svc, the resolver tries each search suffix in
order. It first tries nginx-svc.default.svc.cluster.local. If that fails,
it tries nginx-svc.svc.cluster.local. If that fails, it tries
nginx-svc.cluster.local. This is why short names work only within the
same namespace and the svc-level short name works across namespaces.
The nameserver points to the CoreDNS Service ClusterIP. The exact address
depends on your cluster's Service CIDR; check it with
kubectl get svc -n kube-system kube-dns.
Headless records
For a headless Service (clusterIP: None), a DNS A query returns all Pod IPs
behind the Service directly. No single ClusterIP is returned. Clients receive
multiple A records, one per ready Pod.
For StatefulSets, each Pod gets a predictable DNS name:
<statefulset-name>-<ordinal>.<headless-svc>.<namespace>.svc.cluster.local
This stable identity per Pod is a core feature of StatefulSets.
Pod records
Pods can also have DNS records, but only when the cluster enables this feature. The record is derived from the Pod's IP:
<pod-ip-with-dashes>.<namespace>.pod.cluster.local
For example, a Pod at a.b.c.d would have the record:
a-b-c-d.default.pod.cluster.local
Try it on one of the nginx-app Pods. First grab the Pod's IP and convert
the dots to dashes:
POD_IP=$(kubectl get pods -l app=nginx -o jsonpath='{.items[0].status.podIP}')
POD_DNS=$(echo $POD_IP | tr '.' '-').default.pod.cluster.local
echo $POD_DNS
Resolve it from inside a Pod. If your cluster has Pod DNS records enabled,
nslookup returns the original IP. If it returns NXDOMAIN, the feature
is not enabled in your CoreDNS configuration:
kubectl run dns-test --image=mirror.gcr.io/library/busybox --rm -it --restart=Never -- nslookup $POD_DNS
Inspecting DNS config
View the CoreDNS configuration:
kubectl get configmap coredns -n kube-system -o yaml
Check that the kubelet's clusterDomain matches the CoreDNS domain. The
kubelet config lives on the Node, not the dev-machine, so switch to the
node-01 terminal and run:
cat /var/lib/kubelet/config.yaml | grep clusterDomain
The cluster domain is a cluster-wide setting set at bootstrap time. It is
passed to the kubelet as --cluster-domain and configured in the CoreDNS
ConfigMap. Changing it after the cluster is running requires coordinated
updates to kubelet, CoreDNS, and the API server. Always verify the actual
value from your cluster rather than hardcoding cluster.local.
Service internals
Service-to-Pod traffic routing is programmed by kube-proxy, a component that runs on every Node as a DaemonSet. kube-proxy watches the API server for changes to Services and EndpointSlices, then updates the Node's local iptables or IPVS rules so that traffic arriving for the Service's ClusterIP is forwarded to one of the healthy backend Pods.
  Client Pod (P.P.P.P)
      │
      │ DNS lookup: "nginx-svc" resolves to S.S.S.S
      ▼
  Service ClusterIP (S.S.S.S:80)             ← virtual IP, never changes
      │
      ▼  kube-proxy intercepts via iptables/IPVS
      │
      ├─▶ Pod A (A.A.A.A:80)                 ← real Pod, real IP
      └─▶ Pod B (B.B.B.B:80)                 ← real Pod, real IP
Follow a single request from the client Pod all the way to a backend Pod and back:
- A Pod's process sends an HTTP request to
http://nginx-svc:80. - The container's DNS resolver (configured by
/etc/resolv.conf) queries CoreDNS for the A record ofnginx-svc. - CoreDNS resolves it to the Service's ClusterIP, e.g.,
X.X.X.X. This IP was allocated when the Service was created and will never change. - The kernel sends the TCP packet toward
X.X.X.X:80. This is a virtual IP address, not bound to any network interface. - The iptables rules (or IPVS rules) inserted by kube-proxy on the Node intercept the packet. These rules match traffic destined for the Service's ClusterIP.
- The rules randomly select one healthy backend Pod IP from the EndpointSlice and rewrite the packet's destination (DNAT). The source is also rewritten (SNAT) so return traffic routes back through the Node.
- The packet arrives at the chosen Pod's container. The container processes the request and sends a response.
- The response packet travels back through the Node's kube-proxy rules, where the NAT is reversed, and the response reaches the client Pod.
iptables vs IPVS
| Mode | How it works | Best for |
|---|---|---|
| iptables (default) | Each Service adds a chain of iptables rules. The statistic module selects backend Pods randomly. | Small to medium clusters (up to hundreds of Services). Rule count is proportional to the number of Services and endpoints. |
| IPVS | Uses the Linux kernel's IP Virtual Server. Acts as a kernel-level Layer 4 load balancer. Supports multiple scheduling algorithms. | Large clusters with many Services. Offers better throughput, lower latency, and more scheduling options. |
IPVS supports scheduling algorithms including:
rr(round robin)lc(least connections)sh(source hashing)dh(destination hashing)
Check which mode your cluster uses:
kubectl logs -n kube-system -l k8s-app=kube-proxy | head -20
Routing properties
Stable IP. The ClusterIP is allocated when the Service is created and persists for the Service's entire lifetime. Even if every backend Pod is replaced during a rolling update, the ClusterIP stays the same. Clients never need to reconnect to a different address.
Load balancing. kube-proxy distributes connections across all ready backend Pods. In iptables mode, the selection is random. In IPVS mode, you can configure the scheduling algorithm.
Session affinity. If you set sessionAffinity: ClientIP on the Service,
requests from the same client IP are routed to the same backend Pod for the
duration of the session stickiness timeout (default 10800 seconds, or 3 hours).
This is useful for stateful applications that need client affinity:
spec:
  sessionAffinity: ClientIP
  sessionAffinityConfig:
    clientIP:
      timeoutSeconds: 3600
EndpointSlices. This is a newer, more scalable API for tracking backend Pod IPs. Instead of one large Endpoints object per Service (which can become very large), the API is sharded into EndpointSlice objects, each holding up to 100 endpoints. kube-proxy subscribes to these slices and updates rules only for the slices that changed.
Testing connectivity
Create a temporary Pod that sends an HTTP request to the Service and then deletes itself:
kubectl run test-pod --image=mirror.gcr.io/library/alpine --rm -it --restart=Never -- \
  wget -qO- nginx-svc.default.svc.cluster.local
To test from a different namespace (where the short name does not resolve):
kubectl create namespace test-ns
kubectl run test-pod --image=mirror.gcr.io/library/alpine --rm -it -n test-ns --restart=Never -- \
  wget -qO- nginx-svc.default.svc.cluster.local
If the request fails with a connection error, check:
- Does the Service selector match any Pods?
- Are the matched Pods in the Ready state?
- Is the port number correct?
Kubernetes automatically injects environment variables for every Service
into Pods at creation time. For nginx-svc, a Pod would see
NGINX_SVC_SERVICE_HOST=<service-ClusterIP> and NGINX_SVC_SERVICE_PORT=80.
Verify this by launching a one-shot Pod and grepping its environment for the Service variables. Because env vars are injected only at Pod start, the Service must already exist when the Pod is created:
kubectl run env-test --image=mirror.gcr.io/library/busybox --rm -it --restart=Never -- \
  sh -c 'env | grep NGINX_SVC'
You should see both NGINX_SVC_SERVICE_HOST and NGINX_SVC_SERVICE_PORT
printed. Note that Service environment variables are only injected for
Services in the same namespace as the Pod. A Pod in test-ns will not
see NGINX_SVC_SERVICE_* variables for a Service in default. Reuse the
test-ns namespace from the earlier connectivity test and run the same
check there:
kubectl run env-test --image=mirror.gcr.io/library/busybox -n test-ns --rm -it --restart=Never -- \
  sh -c 'env | grep NGINX_SVC || echo "no NGINX_SVC vars"'
Environment variables are set only once, when the Pod starts, so if the Service is deleted and recreated, existing Pods will have stale values. DNS is the preferred method for service discovery because it resolves the name on every connection, works across namespaces with the FQDN, and always returns the current ClusterIP.
You can disable the injection of Service environment variables by setting
enableServiceLinks: false on the Pod spec. This prevents Kubernetes from
populating *_SERVICE_HOST and *_SERVICE_PORT variables. It also reduces
the Pod's environment variable count, which is relevant because the kernel
limits the total size of environment variables plus arguments for a process:
apiVersion: v1
kind: Pod
metadata:
  name: no-service-env
spec:
  enableServiceLinks: false
  containers:
  - name: app
    image: mirror.gcr.io/library/nginx
Service Accounts
A ServiceAccount is a Kubernetes identity for Pods. Just as a human user authenticates to the API server with a kubeconfig certificate or token, a Pod authenticates using a JSON Web Token (JWT) bound to its ServiceAccount. This identity is what Pods use to call the Kubernetes API from inside the cluster.
On its own, a ServiceAccount is just an identity with no permissions. You
attach permissions to it later by binding a Role or ClusterRole to it
with a RoleBinding or ClusterRoleBinding. This is covered in the
Granting permissions (RBAC) section below.
The default ServiceAccount
A ServiceAccount is a namespaced Kubernetes object. A Pod is assigned one
through its .spec.serviceAccountName field. If the field is omitted, the
Pod falls back to the default ServiceAccount in its namespace. Every
namespace has one — the ServiceAccount controller (part of the
controller-manager) creates it automatically, and the Token controller
manages the tokens attached to it.
List the ServiceAccounts in the current namespace:
kubectl get serviceaccounts
Take a closer look at the default SA:
kubectl describe sa default
Creating a ServiceAccount
Production workloads should use a dedicated ServiceAccount with only the permissions that specific workload needs. This follows the principle of least privilege:
kubectl create serviceaccount nginx-sa
kubectl get sa nginx-sa
A freshly created ServiceAccount has zero permissions — it is just an
identity. Any API call made with its token is rejected until you bind a
Role or ClusterRole to it. Confirm by impersonating the new SA and
listing every permission it currently has:
kubectl auth can-i --list --as=system:serviceaccount:default:nginx-sa
The output shows only the built-in self-review verbs that every
authenticated subject has (selfsubjectaccessreviews, selfsubjectrulesreviews).
No application resources are listed. Permissions get attached later in the
Granting permissions (RBAC) section.
Assign it to a Pod. Write the manifest and apply it in a single step using a heredoc:
cat <<EOF | kubectl apply -f -
apiVersion: v1
kind: Pod
metadata:
  name: nginx-with-sa
spec:
  serviceAccountName: nginx-sa
  containers:
  - name: nginx
    image: mirror.gcr.io/library/nginx
EOF
Verify the Pod is using the new ServiceAccount:
kubectl get pod nginx-with-sa -o jsonpath='{.spec.serviceAccountName}'
The serviceAccountName field is immutable after a Pod is created. You
cannot change the ServiceAccount of a running Pod. You must delete the Pod
and recreate it with the new ServiceAccount.
Token mounting
Since Kubernetes 1.22, ServiceAccount tokens are mounted into Pods as a projected volume rather than being sourced from a Secret. The kubelet projects three files into each Pod's filesystem:
/var/run/secrets/kubernetes.io/serviceaccount/
├── token
├── ca.crt
└── namespace
token is a time-limited JSON Web Token that the Pod can use as a Bearer
token when calling the API server. ca.crt is the cluster's CA certificate,
used to verify the API server's TLS certificate. namespace is a plain
text file containing the namespace the Pod runs in.
Any process running inside the container can read these files. They are
world-readable by default. Pick any Pod from the nginx-app Deployment and
verify:
NGINX_POD=$(kubectl get pods -l app=nginx -o jsonpath='{.items[0].metadata.name}')
kubectl exec $NGINX_POD -- ls /var/run/secrets/kubernetes.io/serviceaccount/
kubectl exec $NGINX_POD -- cat /var/run/secrets/kubernetes.io/serviceaccount/token
kubectl exec $NGINX_POD -- cat /var/run/secrets/kubernetes.io/serviceaccount/namespace
How the projected volume is managed under the hood
- The ServiceAccount admission controller (enabled by default in the API
server) inspects every Pod creation request. If the Pod does not explicitly
set
automountServiceAccountToken: false, the admission controller adds a projected volume to the Pod spec. - The kubelet on the Pod's Node sees the projected volume in the spec
and calls the
TokenRequestAPI to obtain a time-bound token from the API server for the Pod's ServiceAccount. - The API server signs the token using the ServiceAccount signing key
(
--service-account-signing-key-file). The token is bound to that specific Pod and has a limited lifetime (typically one hour). - The kubelet writes the token, CA certificate, and namespace into a tmpfs mount inside the Pod's filesystem.
- Before the token expires, the kubelet automatically re-requests a new token from the API server and atomically replaces the file. The container always reads a valid token without any restart or reload.
This design has significant security advantages over the older Secret-based tokens: tokens are time-limited, audience-bound, Pod-specific, and rotated automatically with no change required in the application.
The signing keys involved:
| Component | Relevant flag | Role |
|---|---|---|
| controller-manager | --service-account-private-key-file | Signs legacy Secret-based tokens (if used) |
| API server | --service-account-key-file | Public key used to verify any token (required) |
| API server | --service-account-signing-key-file | Private key used to sign tokens requested via the TokenRequest API |
In modern clusters, the kubelet requests time-limited tokens through the
TokenRequest API and the API server signs them. The controller-manager's
private key is used only for legacy Secret-based tokens and for backward
compatibility.
JWT token
The token mounted at /var/run/secrets/kubernetes.io/serviceaccount/token
is a standard JWT (JSON Web Token). A JWT consists of three Base64-encoded
parts separated by dots: <header>.<payload>.<signature>.
Capture the token into a variable directly from the Pod:
JWT=$(kubectl exec $NGINX_POD -- cat /var/run/secrets/kubernetes.io/serviceaccount/token)
Decode the payload (the middle Base64 segment) into readable JSON:
echo "$JWT" | cut -d. -f2 | base64 -d 2>/dev/null | python3 -m json.tool
The decoded payload reveals the claims embedded in the token. Typical fields:
{
    "aud": [
        "https://kubernetes.default.svc.cluster.local"
    ],
    "exp": 1810374972,
    "iat": 1778838972,
    "iss": "https://kubernetes.default.svc.cluster.local",
    "jti": "bd48f0fd-2d0b-471f-a087-13cae964f444",
    "kubernetes.io": {
        "namespace": "default",
        "node": {
            "name": "cplane-01",
            "uid": "4fb70675-cae2-4973-9ad1-15336a820295"
        },
        "pod": {
            "name": "nginx-app-7f755d54cc-mf9dk",
            "uid": "b84e9ce2-2e83-47f1-b728-72d030d6cf02"
        },
        "serviceaccount": {
            "name": "default",
            "uid": "63abfddf-da1b-4832-b51a-79a2eb3e0c14"
        },
        "warnafter": 1778842579
    },
    "nbf": 1778838972,
    "sub": "system:serviceaccount:default:default"
}
Key JWT claims:
| Claim | Meaning |
|---|---|
sub (subject) | The full identity: system:serviceaccount:<namespace>:<sa-name> |
iss (issuer) | The token issuer, which is the API server's URL |
aud (audience) | The intended recipient. The API server checks this matches itself |
iat (issued at) | Unix timestamp of when the token was created |
exp (expiration) | Unix timestamp of when the token expires. After this, the token is rejected |
nbf (not before) | Unix timestamp before which the token must not be used |
kubernetes.io | Custom Kubernetes claims: namespace name, Pod name and UID, ServiceAccount name and UID |
The kubernetes.io claims are what make this a bound token. The API
server can verify that the token is being used by the specific Pod it was
issued for. If the token is exfiltrated and used from outside the Pod (or
from a different Pod), the API server can detect the mismatch and reject it.
Whether the token is mounted at all is controlled by the
automountServiceAccountToken field. The default is true, which is
why every Pod above already has the token file. Set it to false when a
workload does not need to call the Kubernetes API. The field can be set on
either the Pod spec (per workload) or the ServiceAccount (affects every Pod
that uses it); if both are set, the Pod value wins.
apiVersion: v1
kind: Pod
metadata:
  name: secure-pod
spec:
  automountServiceAccountToken: false
  containers:
  - name: app
    image: mirror.gcr.io/library/nginx
To disable for all Pods using a given ServiceAccount:
kubectl patch serviceaccount default -p '{"automountServiceAccountToken": false}'
Creating tokens manually
You can create a short-lived token for any ServiceAccount without creating a Pod. This is useful for CI/CD pipelines, external monitoring tools, or debugging:
kubectl create token nginx-sa
With a custom expiration duration:
kubectl create token nginx-sa --duration=2h
The output is a valid Bearer token that can be used with curl -H "Authorization: Bearer <token>" to call the API server.
Security risk of the automounted default token
The default ServiceAccount starts with no RBAC permissions, but the
automounted token is still a foothold. A compromised container can read the
world-readable token file at
/var/run/secrets/kubernetes.io/serviceaccount/token and use it to probe
the API server. Anything the API server lets unauthenticated or low-privilege
identities see (server version, list of API groups, public endpoints) becomes
visible to the attacker.
The real danger is later: the day someone grants permissions to the
default SA — even temporarily for a quick fix — every Pod in the namespace
inherits them at once. Protect against this by setting
automountServiceAccountToken: false on any Pod that does not need to call
the Kubernetes API:
spec:
  automountServiceAccountToken: false
Granting permissions (RBAC)
Permissions are granted by creating a Role (or ClusterRole) and binding it to the ServiceAccount through a RoleBinding (or ClusterRoleBinding):
kubectl create role pod-reader --verb=get,list,watch --resource=pods
kubectl create rolebinding nginx-sa-pod-reader \
  --role=pod-reader \
  --serviceaccount=default:nginx-sa
Now any Pod using the nginx-sa ServiceAccount can list and watch Pods in
the default namespace. To grant cluster-wide access or access to
non-namespaced resources (such as Nodes), use ClusterRole and
ClusterRoleBinding instead.
Verify the effective permissions:
kubectl auth can-i list pods --as=system:serviceaccount:default:nginx-sa
kubectl auth can-i create deployments --as=system:serviceaccount:default:nginx-sa
Role vs ClusterRole. A Role is namespaced. It can only grant access to resources within a single namespace (Pods, Services, Deployments, etc.). A ClusterRole is cluster-wide. It can grant access to non-namespaced resources (Nodes, Namespaces, PersistentVolumes) or to namespaced resources across all namespaces.
For example, a Role that allows listing Pods only works in the namespace where it is created. A ClusterRole that allows listing Pods works in every namespace when bound with a ClusterRoleBinding.
RoleBinding vs ClusterRoleBinding. A RoleBinding binds a Role (or ClusterRole) to subjects within a single namespace. A ClusterRoleBinding binds a ClusterRole to subjects across the entire cluster. You can bind a ClusterRole with a RoleBinding to limit its scope to one namespace.
Create a ClusterRole and ClusterRoleBinding that lets nginx-sa list Pods
in every namespace. This is what the next section will use to call the API
from inside a Pod:
kubectl create clusterrole pod-lister --verb=get,list --resource=pods
kubectl create clusterrolebinding nginx-sa-pod-lister \
  --clusterrole=pod-lister \
  --serviceaccount=default:nginx-sa
Now nginx-sa can list Pods cluster-wide. Confirm with an impersonated
check:
kubectl auth can-i list pods --as=system:serviceaccount:default:nginx-sa --all-namespaces
Using the token in a Pod
A Pod that has API access can use its mounted token directly. The
nginx-with-sa Pod created earlier runs under the nginx-sa ServiceAccount,
which now holds the pod-lister ClusterRole. Exec into it:
kubectl exec -it nginx-with-sa -- sh
Then from inside the Pod:
TOKEN=$(cat /var/run/secrets/kubernetes.io/serviceaccount/token)
CA_CERT=/var/run/secrets/kubernetes.io/serviceaccount/ca.crt
NAMESPACE=$(cat /var/run/secrets/kubernetes.io/serviceaccount/namespace)
APISERVER=https://kubernetes.default.svc
curl --cacert $CA_CERT -H "Authorization: Bearer $TOKEN" \
  $APISERVER/api/v1/namespaces/$NAMESPACE/pods
The internal DNS name kubernetes.default.svc resolves to the API server's
ClusterIP and is reachable from every Pod in the cluster.
Image pull secrets
A ServiceAccount can carry image pull secrets. Every Pod that uses that ServiceAccount automatically gets the pull secret injected into its spec. This avoids configuring each Pod individually:
kubectl create secret docker-registry my-registry \
  --docker-server=docker.io \
  --docker-username=<user> \
  --docker-password=<pass>
kubectl patch serviceaccount default \
  -p '{"imagePullSecrets": [{"name": "my-registry"}]}'
After this patch, any new Pod using the default ServiceAccount will have
the my-registry pull secret in its spec automatically. Existing Pods are
not affected because the pull secret is injected at Pod creation time.
The Kubernetes API
Every kubectl command is an HTTP request to the API server. The same API
is available to any HTTP client that can authenticate. This section shows
how to access the API directly.
API server address
Your kubeconfig file (default: ~/.kube/config) stores the API server URL,
your client certificate, and the CA certificate. View it:
kubectl config view
Extract just the server address:
kubectl config view -o jsonpath='{.clusters[0].cluster.server}'
The output is something like https://172.x.x.x:6443. Port 6443 is the
default secure port for the API server.
kubectl proxy
The API server requires mutual TLS. It presents a certificate for you to verify, and you must present a client certificate for it to verify. Managing these certificates manually with curl is tedious and easy to get wrong.
kubectl proxy simplifies this by running a local reverse proxy that forwards
requests from localhost to the API server. It reads your kubeconfig to
locate the API server address, extracts your client certificate and key, and
handles TLS on your behalf. It also verifies the API server's certificate
against the CA in your kubeconfig, which prevents man-in-the-middle attacks.
The proxy does not expose the API server directly to the network. Only
connections from the loopback interface (127.0.0.1) are accepted.
Start the proxy on port 8080 in the background:
kubectl proxy --port=8080 &
The output confirms: Starting to serve on 127.0.0.1:8080.
Now the entire Kubernetes API is available at http://localhost:8080:
curl http://localhost:8080/api/
The response is a JSON listing of all available API paths. This is the safest way to access the API: kubectl proxy verifies the server's certificate against the CA in your kubeconfig, preventing man-in-the-middle attacks.
API path structure
Kubernetes groups its API by purpose and maturity. There are two main path prefixes:
The Core API group contains the original, foundational resources such
as Pod, Service, Node, Namespace, ConfigMap, Secret, ServiceAccount,
PersistentVolume, and others. The group name is empty, so paths start with
/api/.
Namespaced resource:
/api/v1/namespaces/<namespace>/<resource>/<resource-name>
Non-namespaced resource:
/api/v1/<resource>/<resource-name>
Example: list all Pods in the default namespace:
curl http://localhost:8080/api/v1/namespaces/default/pods
Named API groups contain resources introduced after Kubernetes 1.0.
Each group has its own name and version. Examples are Deployments (apps),
Ingresses (networking.k8s.io), NetworkPolicies (networking.k8s.io),
Roles (rbac.authorization.k8s.io).
Namespaced resource:
/apis/<group>/<version>/namespaces/<namespace>/<resource>/<resource-name>
Non-namespaced resource:
/apis/<group>/<version>/<resource>/<resource-name>
Example: get Deployments via the apps group:
curl http://localhost:8080/apis/apps/v1/namespaces/default/deployments
How apiVersion maps to the URL path
The apiVersion field in every YAML manifest maps directly to the API URL:
YAML apiVersion | API path prefix | Group |
|---|---|---|
v1 | /api/v1/ | core (no group name) |
apps/v1 | /apis/apps/v1/ | apps |
batch/v1 | /apis/batch/v1/ | batch |
networking.k8s.io/v1 | /apis/networking.k8s.io/v1/ | networking.k8s.io |
rbac.authorization.k8s.io/v1 | /apis/rbac.authorization.k8s.io/v1/ | rbac.authorization.k8s.io |
When you write apiVersion: apps/v1, the part before the / is the group
name, and the part after is the version.
Fetching a single resource
Pick one of the nginx-app Deployment Pods and fetch it through the proxy:
NGINX_POD=$(kubectl get pods -l app=nginx -o jsonpath='{.items[0].metadata.name}')
curl http://localhost:8080/api/v1/namespaces/default/pods/$NGINX_POD
The response is a JSON object containing the full Pod spec and status. This
is equivalent to running kubectl get pod $NGINX_POD -o json.
Listing API resources
kubectl api-resources -o wide
The output columns:
| Column | Meaning |
|---|---|
| NAME | The resource name as used in the URL path (plural form, e.g., pods) |
| SHORTNAMES | Abbreviations accepted by kubectl (e.g., po for pods, svc for services) |
| APIVERSION | The group and version string. v1 means the core group. Any value with a / is a named group |
| NAMESPACED | true if the resource belongs to a namespace, false if it is cluster-wide |
| KIND | The Kind string used in the kind field of a YAML manifest |
From inside a Pod
Every Pod has the information needed to call the API server using its
mounted ServiceAccount token. Use the nginx-with-sa Pod from the
ServiceAccount section — it runs under nginx-sa, which now has the
pod-lister ClusterRole, so the kubectl get pods call below actually
returns data instead of 403:
kubectl exec -it nginx-with-sa -- sh
Then from inside the Pod, set up the required variables:
TOKEN=$(cat /var/run/secrets/kubernetes.io/serviceaccount/token)
CA_CERT=/var/run/secrets/kubernetes.io/serviceaccount/ca.crt
NAMESPACE=$(cat /var/run/secrets/kubernetes.io/serviceaccount/namespace)
APISERVER=https://kubernetes.default.svc
Now call the API server from inside the Pod:
curl --cacert $CA_CERT -H "Authorization: Bearer $TOKEN" $APISERVER/api/v1/namespaces/$NAMESPACE/pods
The DNS name kubernetes.default.svc is available inside every Pod. It
resolves to the API server's ClusterIP, so the request never leaves the
cluster's internal network.
When you are done, leave the Pod shell and return to the host:
exit
From outside the cluster
When kubectl proxy is not available, you can extract client credentials
from your kubeconfig and pass them to curl directly:
kubectl config view --raw -o jsonpath='{.users[0].user.client-certificate-data}' | base64 -d > client.crt
kubectl config view --raw -o jsonpath='{.users[0].user.client-key-data}' | base64 -d > client.key
kubectl config view --raw -o jsonpath='{.clusters[0].cluster.certificate-authority-data}' | base64 -d > ca.crt
curl --cert client.crt --key client.key --cacert ca.crt $APISERVER/api/
Never use curl's -k or --insecure flag with the Kubernetes API server.
This disables TLS certificate verification and makes the connection vulnerable to
man-in-the-middle attacks. Always use kubectl proxy when possible, as
it handles certificate verification for you.
About the Author
Writes about
Frequently covers
More tutorials you might like

Kubernetes Kill Chain
Hands-on Kubernetes security workshop using the ShopWave demo app. Explore attack paths against a realistic e-commerce stack: Next.js storefront, FastAPI order service, and a notification webhook.

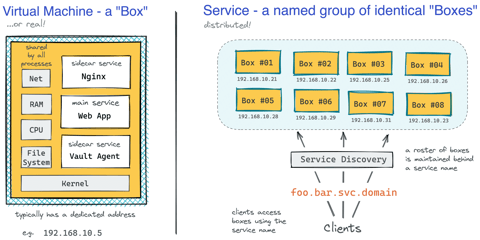
How Kubernetes Reinvented Virtual Machines - In a Good Sense
How Virtual Machines were used to deploy services. What old problems containers solve and what new problems create. How Kubernetes used containers to recreate Virtual Machines in a better way?

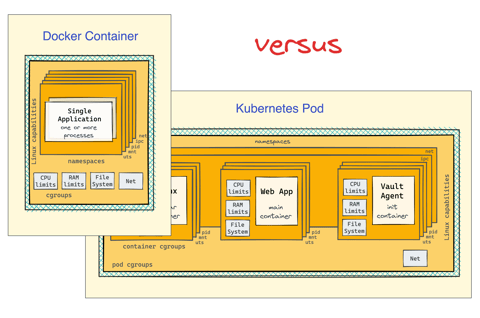
Docker Containers vs. Kubernetes Pods - Taking a Deeper Look
Can a Kubernetes Pod be created with plain Docker commands? Learn the difference between Containers and Pods by exploring how they are implemented under the hood.
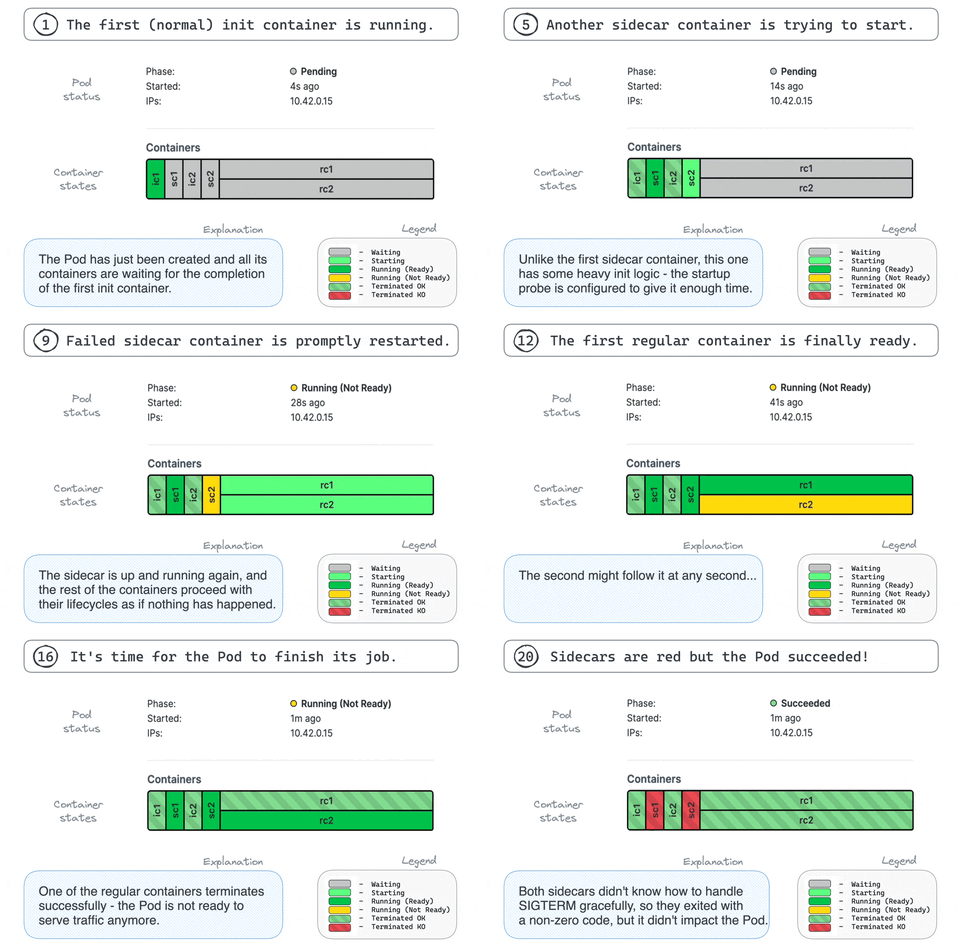
Making Sense Out of Native Sidecar Containers in Kubernetes
Understand the "native" sidecar containers, learn their difference from regular and init containers and discover their advantages in this focused and highly practical tutorial.
Learn by doing, not just by reading or watching
Sign up for a free account to start a VM playground right on this page, track your progress, and get notified about new learning materials.