DEV: Getting Started with Architect

Idle workloads are expensive. Keeping replicas around just in case is great for latency, but not for your cloud bill.
The obvious answer is scale-to-zero. The catch is that scale-to-zero deletes Pods entirely, so the next request pays the cold-start penalty.
Architect takes a different approach. Instead of deleting idle Pods, it hibernates them in place and wakes them when traffic arrives. The Pods stay registered with Services, keep their PVCs mounted, and idle replicas can drop to zero CPU and memory without turning every wake-up into a full restart.
In this tutorial, you will:
- Install Architect on a Kubernetes cluster
- Test Architect's hibernation and migration capabilities
🐛 Reporting issues
If you encounter any issues throughout the tutorial, please report them here.
Preparations
Start the playground if it is not running yet, then open the dev-machine terminal.
This machine is already configured with kubectl access to the cluster, so it is the easiest place to do the installation work.
Check that all nodes are ready:
kubectl get nodes
You should see something like this:
NAME            STATUS   ROLES           AGE   VERSION
control-plane   Ready    control-plane   ...   ...
worker-01       Ready    <none>          ...   ...
worker-02       Ready    <none>          ...   ...
worker-03       Ready    <none>          ...   ...
Sign Up and Add the Cluster
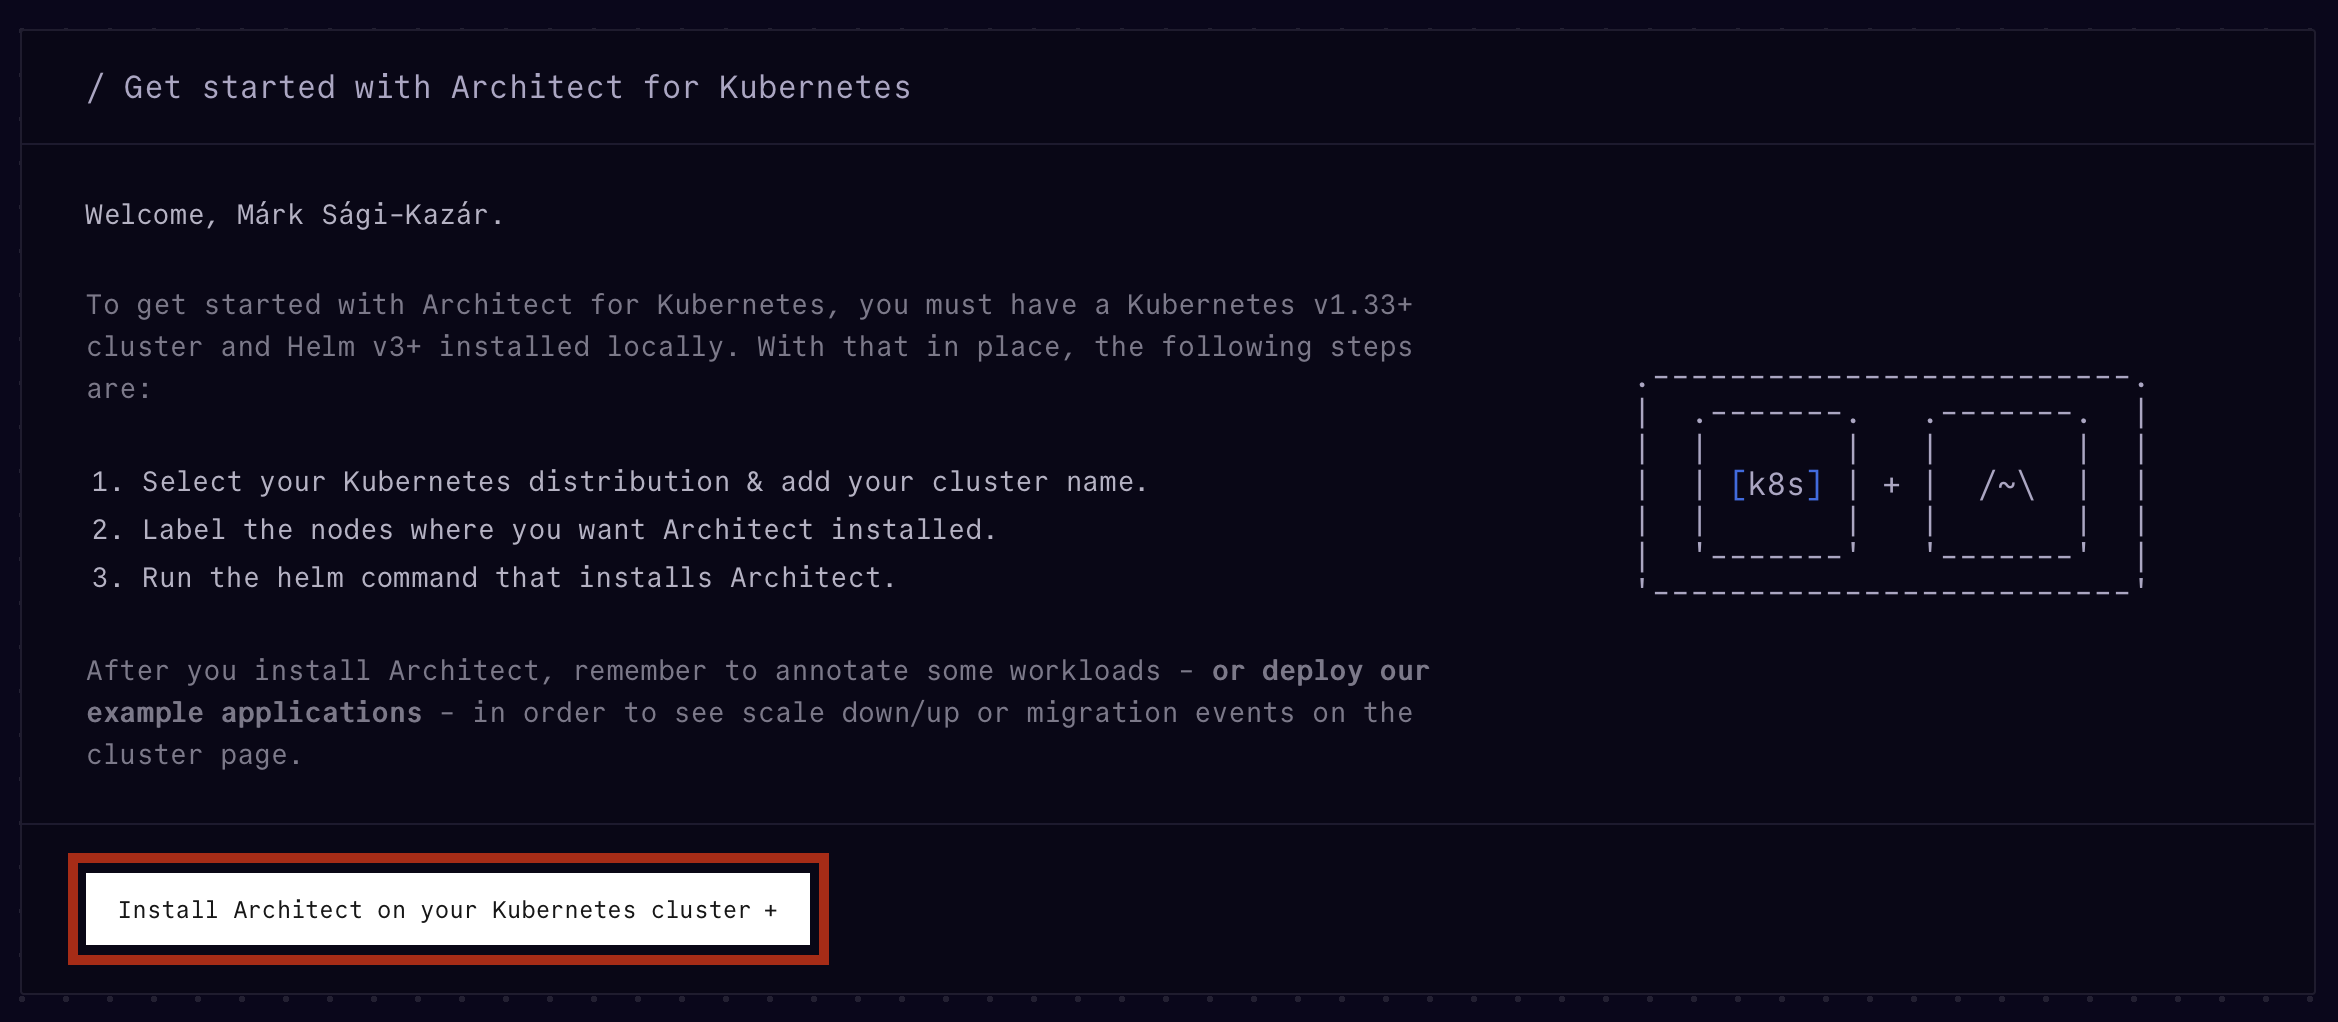
Open console.architect.io and create an account if you do not have one yet.
Then:
- Click Install Architect on your Kubernetes cluster
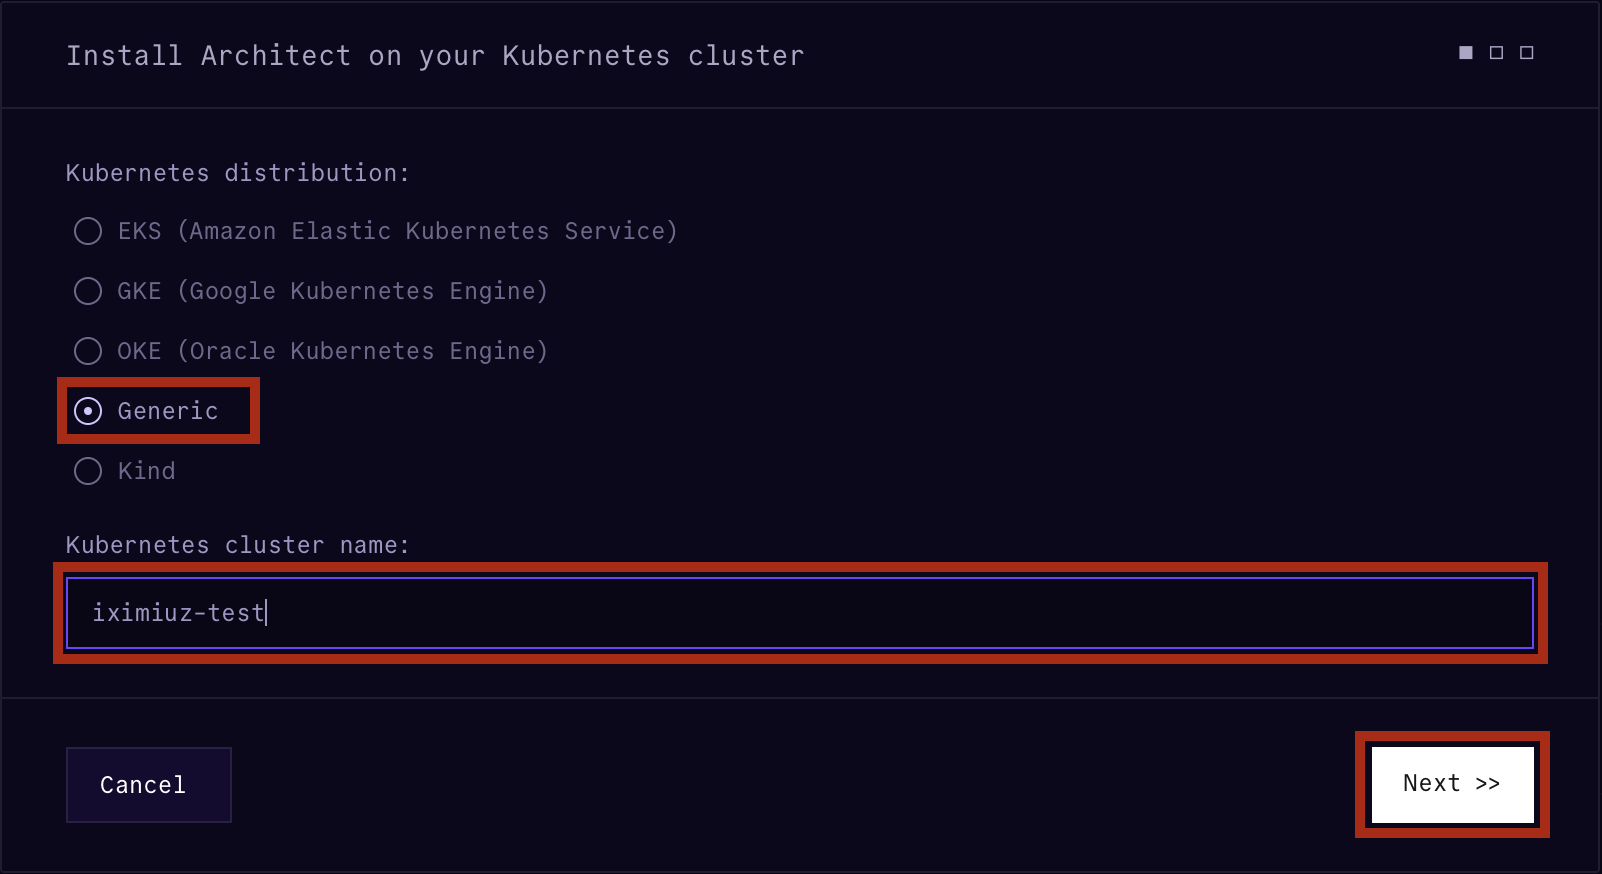
- Choose Generic
- Pick a cluster name
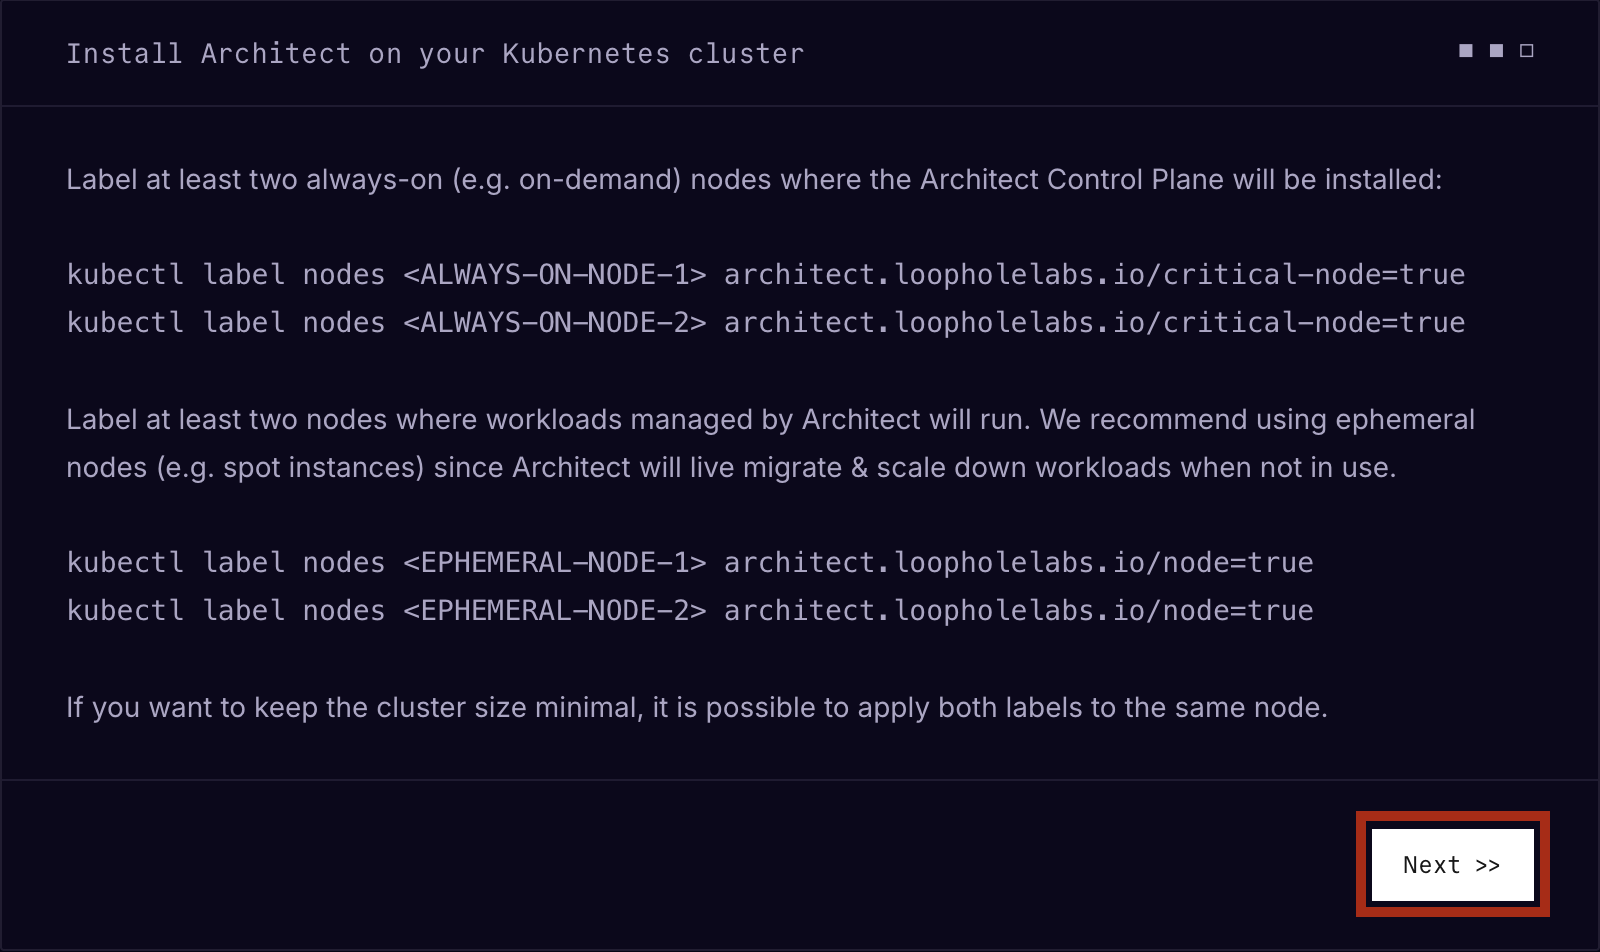
- Click Next on the next page (you will take car of labeling the nodes later)
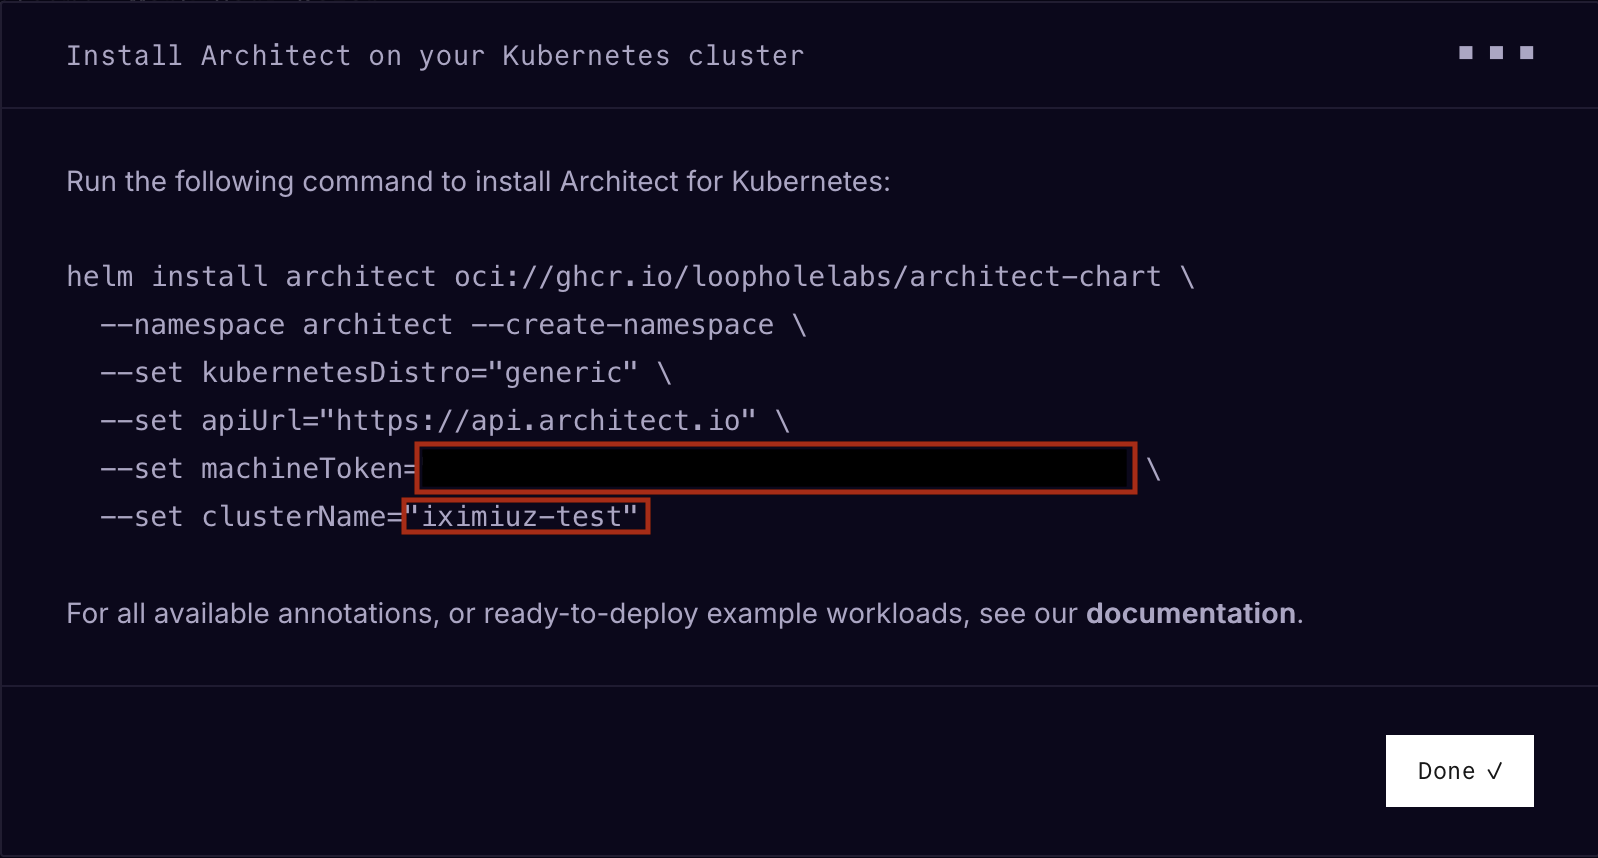
- On the last page, take note of the following details:
- The cluster name you picked
- The machine token
You will use these details later to install Architect on the cluster.
💡 Don't worry about copying the Helm command. The instructions below cover that.

Label the Nodes
Label the control plane node:
kubectl label nodes control-plane architect.loopholelabs.io/critical-node=true
Then label the worker nodes where architectd should run:
kubectl label nodes worker-01 worker-02 worker-03 architect.loopholelabs.io/node=true
Verify the labels:
kubectl get nodes \
  -L architect.loopholelabs.io/critical-node \
  -L architect.loopholelabs.io/node
The result should look similar to this:
NAME            STATUS   ROLES           AGE   VERSION   CRITICAL-NODE   NODE
control-plane   Ready    control-plane   ...   ...       true            <none>
worker-01       Ready    <none>          ...   ...       <none>          true
worker-02       Ready    <none>          ...   ...       <none>          true
worker-03       Ready    <none>          ...   ...       <none>          true
Install Architect
Configure the machine token and cluster name as environment variables in the dev-machine terminal:
ARCHITECT_MACHINE_TOKEN="mk_your_machine_token"
ARCHITECT_CLUSTER_NAME="your-cluster-name"
Create a Namespace for Architect components:
kubectl create namespace architect
Create a Secret with the machine token:
kubectl create secret generic architect \
    --namespace=architect \
    --from-literal=machineToken=${ARCHITECT_MACHINE_TOKEN}
Create a values file:
cat > values.yaml <<EOF
kubernetesDistro: "generic"
apiUrl: "https://api.architect.io"
clusterName: ${ARCHITECT_CLUSTER_NAME}
secretRef: architect

architectAdmissionControllerTolerations:
  - key: node-role.kubernetes.io/control-plane
    operator: Exists
    effect: NoSchedule

architectControlPlaneTolerations:
  - key: node-role.kubernetes.io/control-plane
    operator: Exists
    effect: NoSchedule
EOF
Install Architect:
helm install architect oci://ghcr.io/loopholelabs/architect-chart \
  --namespace architect \
  --values values.yaml
Wait for Architect to come up:
kubectl --namespace architect rollout status deployment architect-control-plane
kubectl --namespace architect rollout status deployment architect-admission-controller
kubectl --namespace architect rollout status daemonset architectd
At this point, the cluster is registered and Architect is installed. Now you need a workload that actually keeps some state in memory.
Testing with Valkey
Valkey is a good demo application for Architect. If a key survives hibernation and migration, you know Architect restored the process instead of starting a fresh container.
Deploy a single-replica Valkey instance with the runc-architect runtime class and a 10-second idle timeout:
kubectl apply -f - <<EOF
apiVersion: apps/v1
kind: Deployment
metadata:
  name: valkey
spec:
  selector:
    matchLabels:
      app: valkey
  template:
    metadata:
      labels:
        app: valkey
      annotations:
        architect.loopholelabs.io/managed-containers: '["valkey"]'
        architect.loopholelabs.io/scaledown-durations: '{"valkey":"10s"}'
    spec:
      runtimeClassName: runc-architect
      containers:
        - name: valkey
          image: valkey/valkey:9
          ports:
            - containerPort: 6379
          resources:
            limits:
              memory: "256Mi"
              cpu: "500m"
            requests:
              memory: "128Mi"
              cpu: "250m"
EOF
Wait for the Deployment to become ready:
kubectl rollout status deployment valkey
Store a value in Valkey:
kubectl exec "$(kubectl get pod -l app=valkey -o jsonpath='{.items[0].metadata.name}')" -- valkey-cli SET foo bar
Read it back:
kubectl exec "$(kubectl get pod -l app=valkey -o jsonpath='{.items[0].metadata.name}')" -- valkey-cli GET foo
The command should print bar.
Give Architect enough idle time to hibernate the container:
sleep 15
Now check the Pod status label that Architect updates:
kubectl get pod "$(kubectl get pod -l app=valkey -o jsonpath='{.items[0].metadata.name}')" \
  -o jsonpath='{.metadata.labels.status\.architect\.loopholelabs\.io/valkey}{"\n"}'
You should see SCALED_DOWN.
Wake the container with kubectl exec and read the key again:
kubectl exec "$(kubectl get pod -l app=valkey -o jsonpath='{.items[0].metadata.name}')" -- valkey-cli GET foo
The command should still print bar.
Wake on Network Traffic
kubectl exec is handy for testing, but most applications wake because traffic hits them.
Expose Valkey with a NodePort Service:
kubectl apply -f - <<EOF
apiVersion: v1
kind: Service
metadata:
  name: valkey
spec:
  type: NodePort
  ports:
    - nodePort: 32079
      port: 6379
      protocol: TCP
      targetPort: 6379
  selector:
    app: valkey
EOF
Enable packet-based network wake on the Valkey container:
kubectl patch deployment valkey --type merge -p '{"spec":{"template":{"metadata":{"annotations":{"architect.loopholelabs.io/network-monitor":"{\"valkey\":\"packets\"}"}}}}}'
Wait for the new Pod revision to become ready:
kubectl rollout status deployment valkey
Read it back through the same NodePort:
valkey-cli -h control-plane -p 32079 GET foo
This time the value should be baz.
Let the container go idle again:
sleep 15
Check the status label one more time:
kubectl get pod "$(kubectl get pod -l app=valkey -o jsonpath='{.items[0].metadata.name}')" \
  -o jsonpath='{.metadata.labels.status\.architect\.loopholelabs\.io/valkey}{"\n"}'
You should see SCALED_DOWN again.
Now wake it with network traffic instead of kubectl exec:
valkey-cli -h control-plane -p 32079 GET foo
The request itself wakes the container, and the value should still be baz.
Migrate the Pod
Hibernation is only half the story. Architect can also restore a workload on a different node when Kubernetes replaces the Pod.
Cordon that node so the replacement Pod has to land somewhere else:
kubectl drain --ignore-daemonsets "$(kubectl get pod -l app=valkey -o jsonpath='{.items[0].spec.nodeName}')"
Wait for the replacement Pod to become ready:
kubectl rollout status deployment valkey
Check where the new Pod landed:
kubectl get pod -l app=valkey -o wide
Finally, read the key through the NodePort Service again:
valkey-cli -h control-plane -p "$(kubectl get service valkey -o jsonpath='{.spec.ports[0].nodePort}')" GET foo
If everything worked, the key is still there even though the Pod moved to another node.
Congratulations!
You installed Architect, watched a stateful process hibernate,
woke it with both kubectl exec and network traffic,
and migrated it on another node without losing in-memory state.
Learn by doing, not just by reading or watching
Sign up for a free account to start a VM playground right on this page, track your progress, and get notified about new learning materials.
Writes about
Frequently covers
Getting Started with VictoriaMetrics on Kubernetes
Deploy VictoriaMetrics on Kubernetes using the VM Operator, configure metrics scraping with CRDs, and query cluster metrics.

Getting started with Valkey on Architect
Learn how to run Valkey on spot instances without losing state

Kubernetes: Runtime Class
Learn how to configure and use Kubernetes Runtime Classes to specify different container runtimes for your workloads. Explore different OCI runtimes and their scheduling constraints.

Kubernetes: Admission Control
Dive deep into Kubernetes admission control with hands-on examples. Learn how admission controllers influence cluster behavior, apply default configurations, and enforce policies for consistency and compliance.