Getting started with Valkey on Architect

Running Valkey on Kubernetes inevitably raises the question of how to manage state. In the container world, workloads are ephemeral, which makes stateful services like Valkey harder to run reliably.
In this lab, you'll use a playground Kubernetes cluster running Architect to see how Valkey can retain its in-memory state while the workload hibernates or is recreated on another node, without enabling Valkey persistence.
Architect and Valkey are already installed on the playground cluster. All you need to do is get a machine token and cluster name from the Architect Console.
More about Architect: https://architect.io
Get a Token
This playground installs Architect during startup, but you need to get a machine token and cluster name from the Architect Console first.
- Open console.architect.io and create an account if needed.
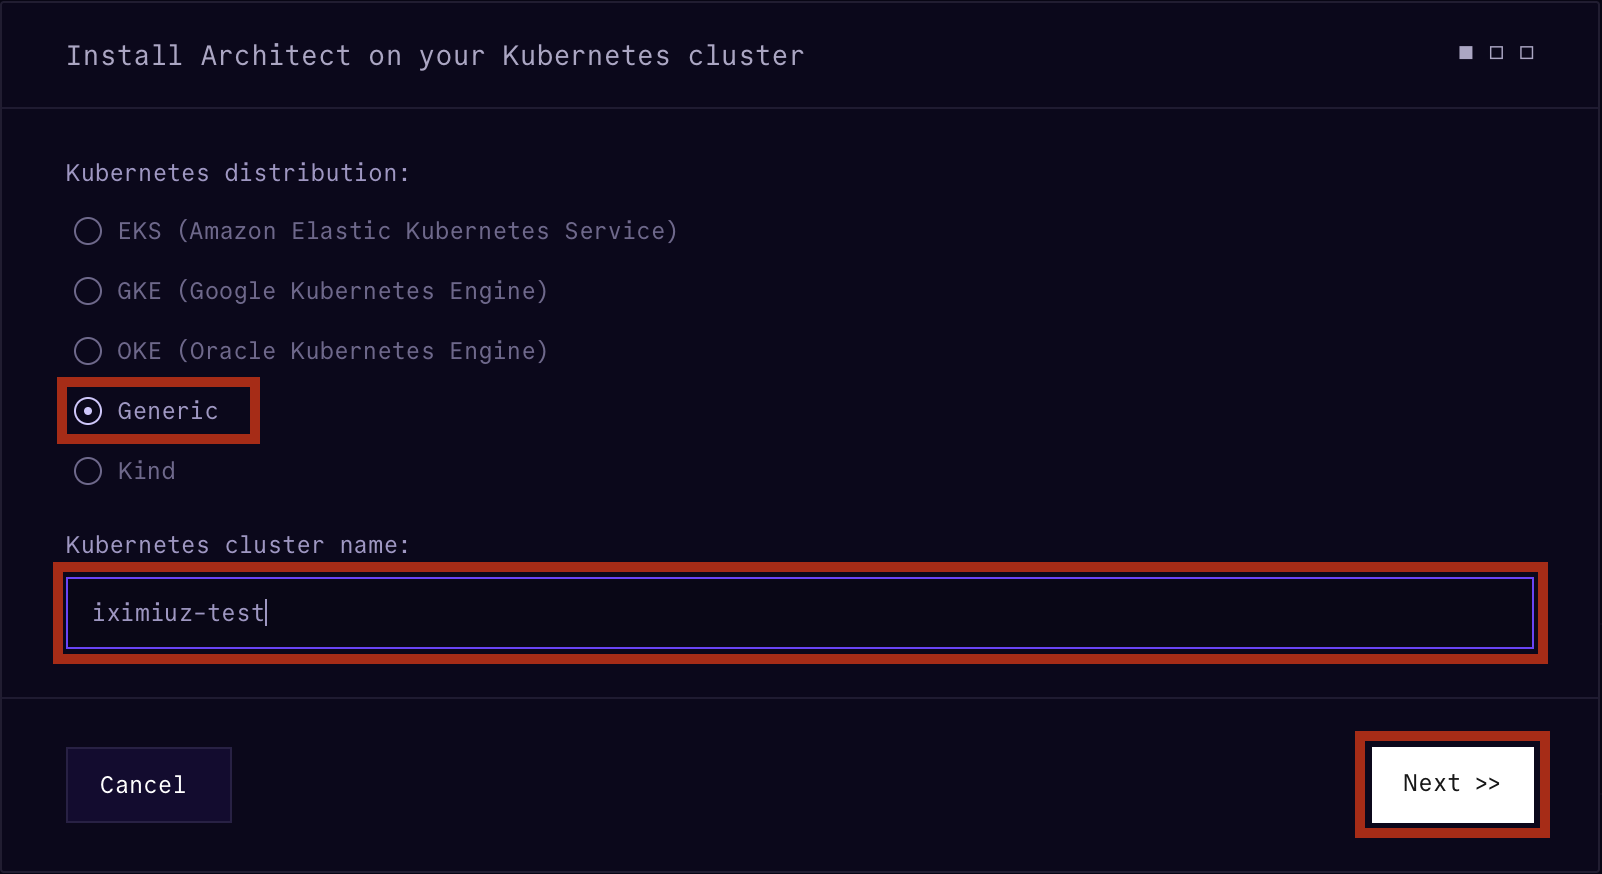
- Click Install Architect on your Kubernetes cluster.
- Choose Generic.
- Pick a cluster name.
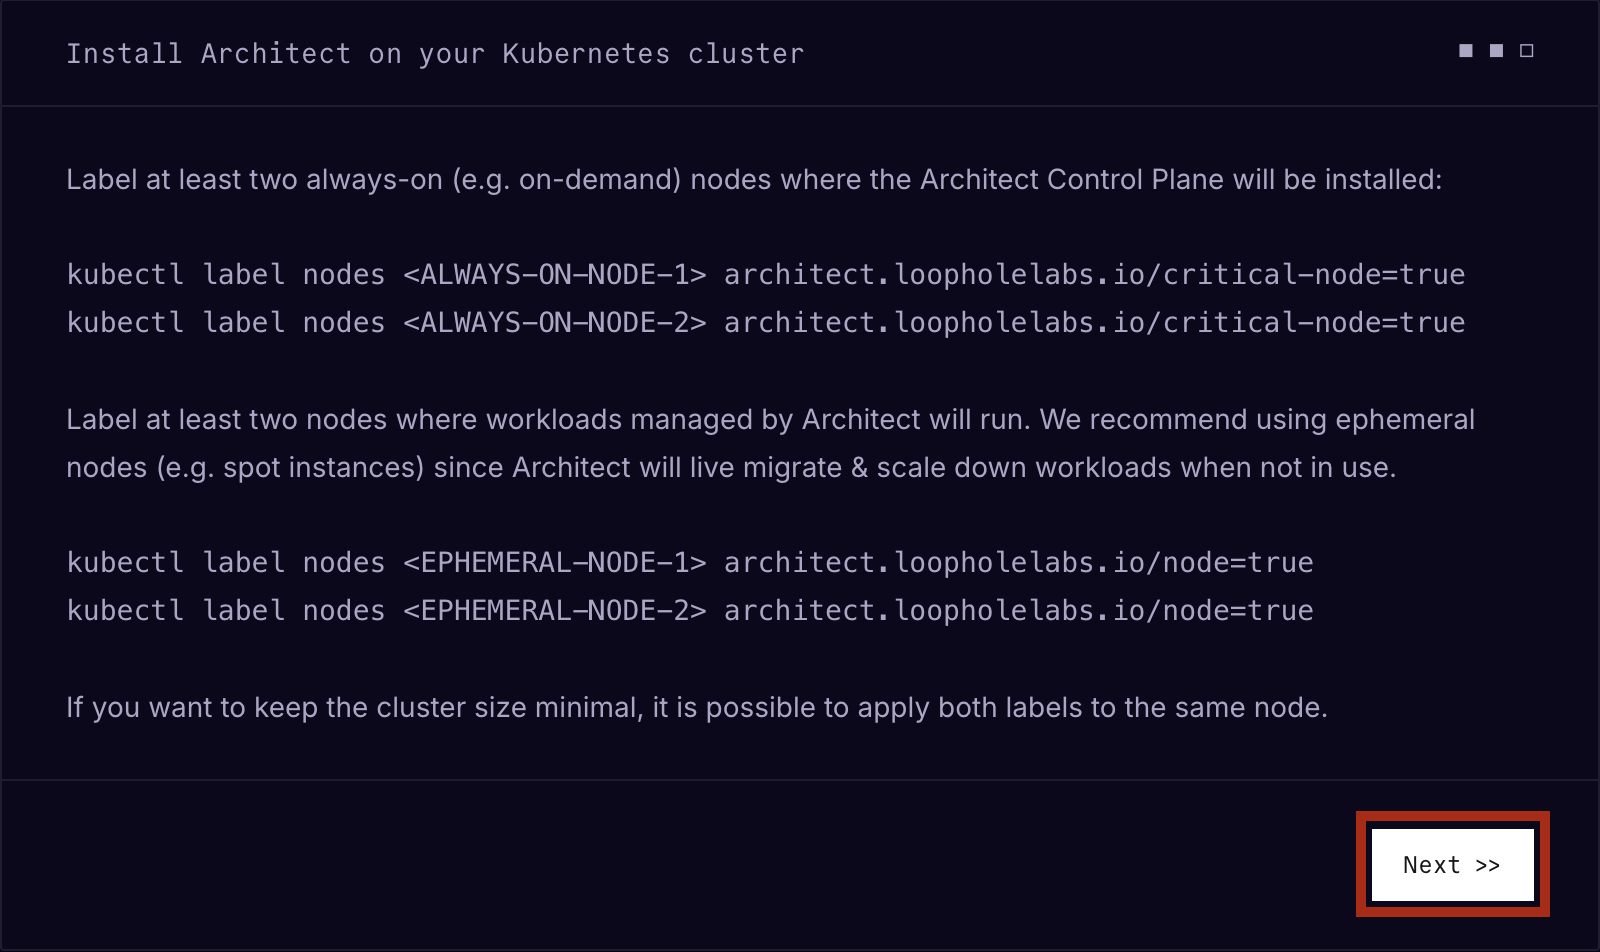
- Click Next on the labels page. This playground labels the nodes for you.
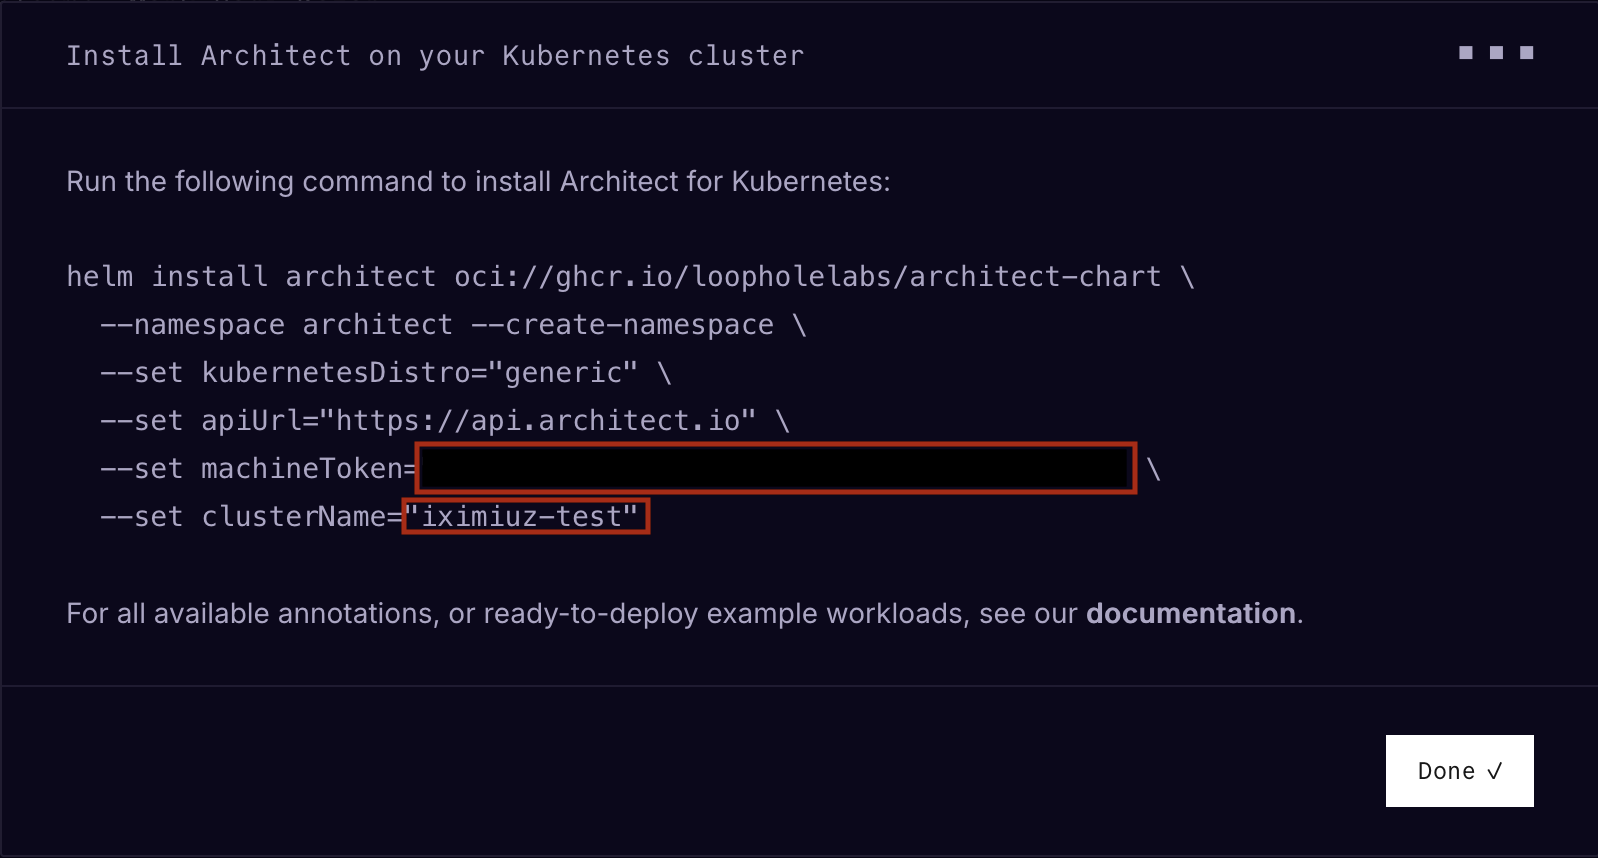
- On the last page, copy the machine token and the cluster name into the playground start form.
- Start the playground.
⏰ It takes 3-5 minutes for the playground to boot.


Workload Hibernation
First, let's observe how Architect hibernates Valkey (essentially turning it's resource usage to zero) when the workload is idle.
Write some data to Valkey using the valkey-cli:
# Store a user session
valkey-cli HSET session:u9f3a \
  user_id 4821 \
  role admin \
  last_seen "2026-05-28T14:03:00Z"

# Queue some jobs
valkey-cli LPUSH jobs:email \
  "send-welcome:4821" \
  "send-invoice:4819"

# Store AI agent context
valkey-cli SET agent:ctx:4821 \
  "user prefers weekly summaries, timezone UTC+1"
valkey-cli is an alias to valkey-cli -h control-plane -p 32079 to spare a few keystrokes when running Valkey commands.
Check that Valkey contains the seeded keys:
valkey-cli keys *
Give Architect enough idle time to hibernate the container and watch the Pod status:
watch "kubectl get pod -l app=valkey -o custom-columns=\"\
NAME:.metadata.name,\
ARCHITECT:.metadata.labels['status\.architect\.loopholelabs\.io/valkey'],\
CPU:.spec.containers[0].resources.requests.cpu,\
MEM:.spec.containers[0].resources.requests.memory,\
NODE:.spec.nodeName\""
You should see the Pod status change from RUNNING to SCALED_DOWN.
💡 Notice that CPU and memory requests drop to zero as well.
Read from Valkey should "wake up" the container and return the stored data:
valkey-cli HGETALL session:u9f3a
valkey-cli LRANGE jobs:email 0 -1
valkey-cli GET agent:ctx:4821
💡 Pro tip: Open a second dev-machine terminal to run commands in and leave the watch running in the first terminal.
Observing status and resource changes with kubectl is useful,
but the Architect Console provides way more detailed insights into the cluster and workload state:
- Open the Architect Console
- Select your cluster from the list
- Select the Valkey workload
- Click on the event you want to inspect
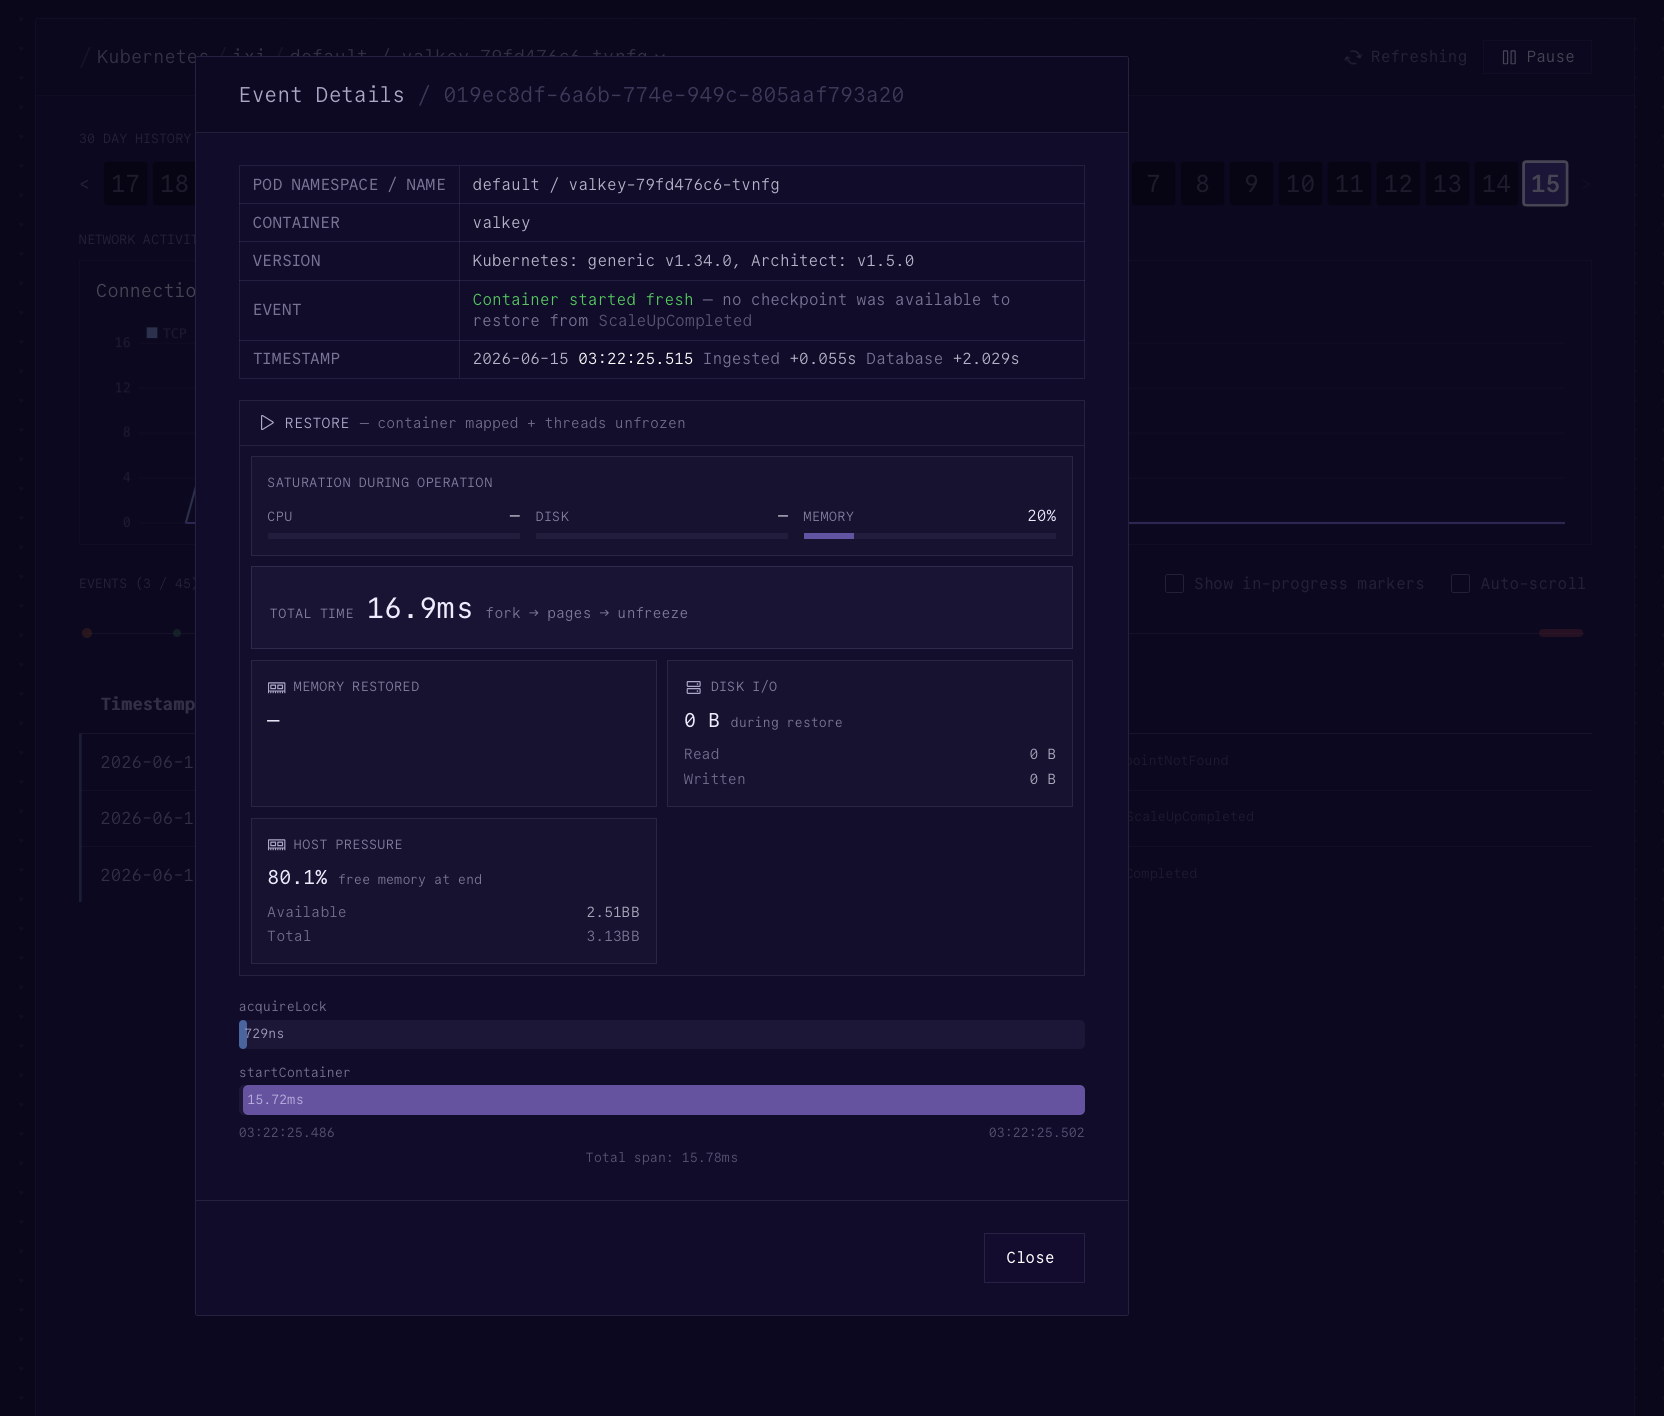
Workload event details
Simulated Node Termination
Hibernation is only half the story. Architect can also restore a workload on a different node when Kubernetes replaces the Pod.
Cordon the node Valkey is running on (simulating what would happen in case of a node failure or termination) so the replacement Pod has to land somewhere else:
kubectl drain --ignore-daemonsets "$(kubectl get pod -l app=valkey -o jsonpath='{.items[0].spec.nodeName}')"
Wait for the replacement Pod to become ready:
kubectl rollout status deployment valkey
Check that the new Pod landed on a different node in the watch terminal.
Finally, read the data from Valkey again:
valkey-cli keys *

valkey-cli HGETALL session:u9f3a
valkey-cli LRANGE jobs:email 0 -1
valkey-cli GET agent:ctx:4821
If everything worked, the key is still there even though the Pod moved to another node.
About the Author
Writes about
Frequently covers